Many people call an insulated container the home of the future. The idea of using all-welded metal structures was accepted due to the ease of their transportation over long distances and the possibility of quick installation. Due to their convenient size, they are well suited for garages, basements, cottages and even for the construction of a residential building.
You can stack modules together, stack them on top of each other, connect them. To build a DIY shipping container home on a budget, you need to know how to do it and where you can save money to get the best results. The main work is to insulate the containers inside and out.
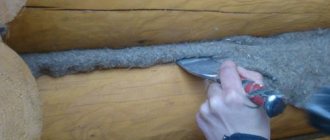
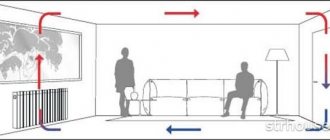
View of an uninsulated container inside
Fire protection of metal structures of two different types
Structural fire protection system for metal structures ET Profile
A system of structural fire protection for metal structures with different fire resistance limits.
Provides for the use of basalt fire-retardant foil material (MBOR) in combination with the fire-retardant adhesive composition "Plazas".
It is used for protection against exposure to open flames and high temperatures in the event of a fire in buildings and structures of any type and purpose.
To learn more
Structural fire protection system for metal structures ET-Metal
A system of structural fire protection for metal structures with different fire resistance limits.
Provides for the use of basalt mineral fire-resistant board EURO-LIT in combination with fire-retardant adhesive composition "Plazas".
It is used for protection against exposure to open flames and high temperatures in the event of a fire in buildings and structures of any type and purpose.
To learn more
Environmental cleanliness, radiation safety
Basalt insulation Tizol, which is used as the main material for fire protection of metal structures, is made from natural, environmentally friendly raw materials - basalt.
It is absolutely safe for use in residential and industrial premises, does not contain adhesive or binding elements, and therefore does not emit harmful substances even when exposed to high temperatures or during prolonged use.
EFFICIENT FIRE PROTECTION
Due to the fact that basalt fiber can withstand temperatures up to 1000˚C, material made from it can significantly enhance the fire-resistant properties of metal structures protected by it.
Vibration resistance, moisture resistance
Even in conditions of increased vibration, all the unique properties of Tizol basalt insulation remain unchanged. Pressure, bending and compaction of the material do not lead to a deterioration in its physical and mechanical properties, since basalt fiber can withstand high static and vibration loads.
Low load on the structure
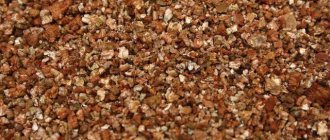
The material used for fire protection is basalt mineral wool.
In the material for fire protection of metal structures, this wool is formed in the form of a canvas or plate and has different thicknesses and densities, which makes it possible to optimally calculate the fire resistance threshold and the consumption of the required amount of material with a minimum load on the structure.
Aesthetic appearance
The surface of metal structures, coated with fire-retardant material MBOR, looks aesthetically pleasing and finished. In this regard, there is no need to use additional decorative means.
The surface of metal elements, covered with a fire-resistant basalt slab, can be plastered or covered with various non-combustible building materials, which will give it a completely aesthetic appearance while maintaining all fire-resistant characteristics.
In addition, when insulating with polyurethane foam:
- there is no gap left between the surface of the container and the insulation layer, so rust and mold do not form on the iron;
- a layer is formed that simultaneously has steam-, hydro- and wind-insulating properties. This significantly reduces the cost of work and reduces the time it takes to complete it;
- even a small team can insulate any carriage or several containers in one day;
- an environmentally friendly coating is formed that does not emit an unpleasant odor. No harmful substances or fumes are released from the surface of the polymer layer. This allows the use of insulated wagons and containers for transporting food products;
- a sealed non-flammable layer is formed that protects products and goods in the event of an external fire. If there is a fire source in a neighboring car or container, the PPU will not let the fire inside;
- shipping containers become stronger, deform less and last longer. A container or wagon with a layer of insulation applied inside will last 30 years or more;
- smoothing out temperature fluctuations with a layer of insulation prevents condensation from forming on the inner surface of the metal;
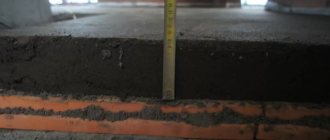
- the low thermal conductivity of the material allows it to be applied in a layer of only 10-15 cm, which makes it possible to preserve the volume of the container or wagon as much as possible;
- With the help of polyurethane foam, you can insulate a surface of any shape, so there will be no problems with attaching the insulation to the semicircular car roof and to the ribs of the container.
Enhancing the thermal effect and the final stage
Fiberglass-based mineral wool is a highly efficient material that meets modern requirements for thermophysical parameters, has high thermal insulation, and is excellent for wall insulation.
To insulate walls with your own hands, you can also use mineralized wool or polystyrene foam; cotton wool is convenient because you can hide wiring in it. Another great material for container walls is cotton insulation, which is considered the most environmentally friendly material and is made from recycled blue denim. It is worth considering that installing cotton insulation will take longer because it is difficult to cut. Since this material is highly flammable, it would not be superfluous to add a fire retardant to it. You should not use ecowool as insulation; in humid weather it begins to actively mold and rot. If you should not forget about ways to remove condensate, vents in the lower and upper parts of the walls successfully fulfill this role.
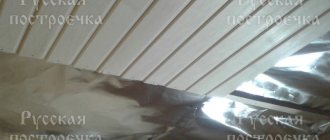
To enhance the thermal effect, penofol can be glued on top of the insulation as an additional heat insulator. Thanks to its properties, this perforated material is able to reflect heat into the room and prevent it from escaping outside, thus creating a kind of “thermos effect” and making it possible to further insulate the container. Penofol should be glued in whole pieces; the fewer joints there are, the better the thermal insulation will be; the resulting seams are best sealed with foil tape. The ceiling in a container can be insulated with your own hands in the same way as the walls. After insulating the walls and ceiling, to give an aesthetic appearance and subsequent wallpapering, plasterboard sheets are fixed on top of all insulating materials. Using dowels and self-tapping screws, sheets of plasterboard are easily attached to a wooden frame. In a similar way, fiberboard sheets can be used to finish walls and ceilings.
Features of external insulation
If it is important to maintain the volume of space, insulation is carried out from the outside
Insulating a house from containers from the outside is in demand in situations where it is important to preserve their internal volume without any changes. For external work, foamed polystyrene is usually used, which protects metal well from corrosion, or thick sheets of foam.
In the second case, special hardware (“umbrellas”) will be required to fasten the material, the use of which poses the threat of the formation of cold bridges. This lack of material must be taken into account when insulating, for which risk areas are additionally treated with liquid heat insulators or sealed with foam.
Foam plastic and polyurethane: insulation of a sea container for housing
To sheathe walls with foam plastic, you need to take liquid nails. The walls and floor are finished with thick foam sheets. All cracks are sealed with polyurethane foam as standard. A polyethylene film is stretched over the foam. The covering is made in two layers; if necessary, a third layer can be used.
How to cover walls with polyurethane:
- The polyurethane finish will be vapor and moisture resistant;
- It is advisable that this insulation option be carried out by specialists - the material must be applied strictly hermetically.
But many professionals are sure that such a house needs to be insulated from the outside. It is only recommended to do vertical sheathing, vertically stuffing wooden blocks 5-7 cm thick. This way you will get beacons. And then polystyrene foam or polyurethane foam is sprayed onto these walls. Then it is through the beacons that the excess is removed.
Insulation of wooden and refrigerator cars
To insulate wooden cars, a beam is hammered onto their inner surface, between which foam is foamed. Spraying is carried out in such a way that there is a small space between the edge of the polymer and the sheathing for air ventilation. The hardened foam is covered with any finishing material - boards, plywood. After insulation and refurbishment, such trailers can be used as residential and technical premises.
When insulating isothermal (refrigerated) cars and tanks, a layer of polyurethane foam is placed in the enclosing structures located between the inner and outer casing by pouring, which forms a kind of thick shell that does not let heat and cold in.
The use of polyurethane foam makes it possible to do without protective films, as well as laying asbestos and other fiberglass fire-retardant materials, which creates good savings.
Container house project
Shipping containers are popular with architects. People with a creative streak are converting trailers into incredibly beautiful residential structures. Some use such houses as change houses, while others build full-fledged two-story cottages with balconies from containers with their own hands. For construction, blocks 6 meters long and weighing 2200 kg are most often used.
The layout of container housing can be different; it is developed for each individual
For such buildings, it is important to accurately calculate the possible load. First, future residents must decide on the number of rooms, the floor plan and whether there will be a shower and toilet in the house
To avoid errors in calculations, you can contact specialized companies that develop container house projects. They will take into account the nuances and calculate the amount of materials. The internal part of the block can be divided into compartments of different sizes with the installation of additional doors, windows, hatches.
Housing built according to the project will be reliable, durable and beautiful. Sometimes combined plans are made, in which other materials are additionally used during construction. After completing the project drawing, it is sent to production, where blanks are made - windows, doors, floors and others. They are then brought to the construction site, the house is assembled, ventilation is installed and a roof is erected, since containers with a tarpaulin top are often found.
What affects the value of a home
The most affordable option is to purchase a house made from one container. Such buildings are suitable for country houses for temporary residence. To build a permanent home, you will need several containers, due to which the cost of materials will increase several times depending on the size of the future home.
Affects the final price and number of floors of the house. If you want to make a 2nd floor by adding 2-3 containers on top, construction costs will at least double. A noticeable increase in the cost of future housing is ensured by turning to contractor firms that build houses from sea containers. Additionally, costs are greatly influenced by the territory and conditions under which construction will take place, as well as the type and quality of finishing, soil characteristics, and others.
Reviews
People with experience in insulating shipping containers and converting them into domestic premises for personal use sometimes write reviews online about their results. It will be useful to familiarize yourself with them.
Ivan, Penza.” Last summer I installed a container house on my summer cottage. The plans, of course, include building a large brick house, but given the low price and limited budget, a container garden house is a good option. “
Nikolay, Samara. The neighbors at the dacha first installed one block and gradually added others of different sizes. The result was an interesting house, unlike the others in the area. The neighbor does not complain about the quality of housing. Now my wife and I are also thinking about building something similar ourselves.
Anna, Kaliningrad. In Germany I saw interesting projects of houses made from containers. I returned home and installed the same one on my site. I spent a little on installation, but building a regular house would have been more expensive. I am especially pleased with the mobility of housing. If I change my dacha, I’ll take the house with me.
With proper work on the internal and external thermal insulation of a container house, you can get an excellent result. Such a building will serve for many years and will delight you with its interesting design, and will also significantly save the family budget.
Which side to do the insulation on?
Metal container walls have high thermal conductivity. This means that it is hot in summer and cold in winter.
It is important to properly insulate your future home
From the inside
In order for a building made of container blocks to be suitable for living, it is necessary to insulate it from the inside. To do this, you can use the services of companies that insulate rooms with expanded polystyrene.
A 5 cm layer of foam competes in terms of thermal insulation with a 1.5 meter thick brick wall. With such insulation, the effect of a thermos is created - the heat does not leave the room, and with one heater you can heat the rooms in 30 - 40 minutes. You can also insulate the container with a 12 cm thick layer of mineral wool.
Possible problems
When insulating a room from the inside, problems may arise. They can be avoided using the following recommendations:
When insulating internally, it is very important to lay the materials in a continuous layer, avoiding any gaps. It is easier to achieve this effect when using polyurethane foam. It is important to prevent contact of materials with high thermal conductivity with the interior of the room
If isolated rooms are planned in the house, and a metal partition is needed, it is prohibited to weld it to the walls of the container.
If you take these two points into account and do everything correctly, heat will not escape from the room through the walls. Containers with a constant temperature are called isothermal.
Outside
External insulation involves completely finishing the walls of the trailer with penoplex, also known as expanded polystyrene, or mineral wool. First, the sheathing frame is installed, and the facing material is fixed to it.
Thermal insulation is protected with waterproofing or a special membrane that protects from wind, under which a vapor barrier is placed.
Potential problems arising during insulation
Experts emphasize that insulating the container from the inside has a greater effect: both living and transportation are affected by the metallic nature of the walls. Therefore, when organizing work, attention should be paid to 2 factors:
- It is necessary to provide a continuous layer of insulator. It is important to exclude any possibility of contact between the iron walls of the container and the air filling the volume of the room. This task will be easier to implement if you use sprayed polyurethane foam as a thermal insulation material.
- It is necessary to exclude any possible cold bridges - substances with high thermal conductivity, due to which the metal walls could be combined with internal surfaces through a layer of insulation.
In particular, if you plan to make an internal metal partition, you cannot weld it directly to the walls; for fastening you should use materials characterized by increased resistance to heat transfer. Wooden blocks placed between the outer walls and a metal partition are suitable here.
Where else can you use insulated containers?
The scope of application of marine packaging is very wide - from a seasonal summer cottage shed for storing garden tools to permanent housing. In Europe, budget hotels, fast food establishments and even public transport stops are built from it. And as cabins on construction sites, staff and residential trailers on shifts, etc. they are simply irreplaceable. This is due to the fact that corrugated steel is a very durable, weatherproof material. The container, even without additional external finishing, can last for decades.
One of the most popular is block container bcode 01. It is a container made of galvanized metal, insulated and lined with chipboard. It can be used as living quarters for shift workers or as a change house for security at a checkpoint.
The container is well insulated, the inside is lined with particle boards that are pleasant to the touch, and is cozy and comfortable.
How does the use of polyurethane foam differ from the use of other insulation materials?
Polyurethane foam (PPU), used for insulation, is a polymer material formed by spraying two components - polyol and isocyanate, mixed together in a special installation. When these two substances interact, a multi-stage reaction occurs, as a result of which a large amount of carbon dioxide is released, forming large or small bubbles. It is to them that the material owes its high level of thermal insulation.
Because polyurethane foam comes in containers rather than in mats or rolls, it is very convenient for this type of insulation. Using the installation and a couple of containers with polyurethane foam components, you can insulate the required number of cars and containers or a container house of a decent area.
Foam plastic and polyurethane: insulation of a sea container for housing
To sheathe walls with foam plastic, you need to take liquid nails. The walls and floor are finished with thick foam sheets. All cracks are sealed with polyurethane foam as standard. A polyethylene film is stretched over the foam. The covering is made in two layers; if necessary, a third layer can be used.
How to cover walls with polyurethane:
- The polyurethane finish will be vapor and moisture resistant;
- It is advisable that this insulation option be carried out by specialists - the material must be applied strictly hermetically.
But many professionals are sure that such a house needs to be insulated from the outside. It is only recommended to do vertical sheathing, vertically stuffing wooden blocks 5-7 cm thick. This way you will get beacons. And then polystyrene foam or polyurethane foam is sprayed onto these walls. Then it is through the beacons that the excess is removed.
Required materials and tools
To insulate a sea container for living, you need to prepare the following materials:
- insulation,
- polyurethane foam,
- paint,
- penofol,
- sheets of chipboard or fibreboard,
- sealant,
- wooden beam with a cross section of 5 cm,
- foil tape,
- primer,
- plasterboard sheets,
- thick polyethylene film.
Tools that may be useful:
- grinder with petal circles,
- electric drill,
- screwdrivers,
- dowels,
- yardstick,
- screwdriver,
- gun for applying sealant and polyurethane foam,
- brush,
- hammer,
- self-tapping screws 6.5 cm long,
- sharp knife,
- building level,
- pencil or felt-tip pen for marking.
To insulate the container you will need an angle grinder with petal circles. You need to acquire personal protective equipment - gloves, goggles, a respirator.
Work order
Purple coral for removing rust before insulation
The procedure for turning an ordinary steel box into a warm container includes several stages. Before insulating a container for permanent residence, you will need to carry out preparatory measures. You should decide in advance on the method of insulation (outside or inside).
Preparatory stage
The essence of preparation is to carefully examine the container for traces of dirt and rust on its surfaces. The former are simply washed off with water, and traces of corrosion, if possible, are cleaned in any convenient way. Typically, a grinder with a metal brush attachment is used for this. Traces of rust are removed from the outside and inside, after which they proceed to coating the metal with a layer of protective primer.
After the primer has dried (after about 2 hours), you can proceed to painting the surfaces, which will reliably protect the metal from moisture and damage. A second layer is applied over the dried paint. Upon completion of these procedures, they proceed to the main insulation operations.
Stages of interior work
To reflect heat, you can use penofol before laying mineral wool.
Insulating a container from the inside is possible when the loss of part of the volume of the internal space does not matter. The work carried out in this case is divided into two stages: finishing of the side surfaces and thermal insulation of the ceiling. When carrying out them, the walls should be insulated first. To do this, a wooden sheathing consisting of bars of a suitable size is attached to them. Then, plates of the selected heat insulator (expanded polystyrene, for example) are placed in the spaces between them. To enhance the insulation effect from cold air masses, it is additionally covered with a layer of penofol.
The ceilings are insulated in the same way as the walls, after which everything is sheathed with plasterboard sheets.
Instructions for installing sheathing
The lathing technology for all types of walls is standard and consists of the following operations:
- the passage of vertical and horizontal slats is marked. The dimensions of the cells in height and width should be 2-5 cm smaller so that the mats stand upright and stay inside the structure only due to the elasticity of the insulation;
- a vertical frame is attached to the wall. A beam measuring 50x100 mm must be equal to the height of the room;
- horizontal strapping slats are installed. The size of the block is 50x50 mm, the length is equal to the distance between the vertical strapping slats. Attached to a vertical stand using a metal angle. Can be attached directly to the wall;
- Vertical internal racks are installed. The pitch is equal to the width of the insulation minus 2-5 cm. The fastening is carried out either with corners to the horizontal trim, which is easier, or to the wall;
- Horizontal bars are attached between the posts. Do not forget that the distance between them should be slightly less than the size of the insulation boards.
A schematic diagram of the sheathing device is shown below.
Sheathing diagram.
- 1 - sheathing strapping bars;
- 2 - vertical bars;
- 3 - horizontal bars;
- 4 - metal corners on screws or nails;
- 5 - fasteners fixing the harness to the wall.
The process of installing the sheathing is completed by tying the windows and doors.
Preparing the walls from the inside in the apartment
The use of basalt wool for wall insulation minimizes the amount of preparatory work, since there is no need to install lathing for decorative plaster, painting and wallpapering. It is enough to attach a fiberglass reinforcing mesh to the surface of the insulation, and then apply a layer of putty over the dried glue, with the help of which a flat surface will be obtained.
Lathing is only needed for ceramic tiles and PVC panels. You can see how to arrange it correctly using the example of wooden walls. We should not forget that the walls themselves still need to be prepared. In this case, technological operations are performed in the following sequence:
- switches, sockets, lamps, various fasteners, etc. are removed from the walls;
- the old finish is removed, and, if necessary (it’s leaking in many places), the plaster is removed;
- the wall is cleaned of dust and dirt, including smoked areas and oil stains;
- small and large cracks are sealed.
There is no need to carefully level the surface - the cotton wool will hide everything.
Facade preparation
Insulating the outside of a house with basalt wool begins with preparing the facade for thermal insulation work. They are performed according to the following scheme:
- Rainwater drainage systems, doorway and window frames, lanterns, etc. are removed from the walls. As a result, the wall should be completely bare;
- the surface of the walls is cleaned of dirt and dust, deposits of masonry mortar;
- The verticality of the wall is checked. If the slope is more than 1.5 cm for every 3 m, work is carried out to level it (a layer of leveling plaster is applied);
- existing gaps, cracks and holes are sealed with repair mortar. How to properly repair cracks formed due to shrinkage of the building can be found in the work “How to prepare walls for wallpapering”;
- wooden walls are impregnated with fire retardants and antiseptics;
- facade made of brick, concrete, aerated concrete, foam blocks, etc. treated with deep penetration primer in 2 layers;
- Under the sheathing, a vapor barrier membrane (type A) is attached to the walls with the smooth side facing the insulation. For fixation, you can use the staples of a construction stapler. In order for the vapor barrier to be of high quality, the membranes must overlap each other by 15-20 cm (overlapping), the seams are taped with regular tape. Many specialists ignore this operation. But this is the case when “you can’t spoil the porridge with butter”;
Cornice under basalt wool.
Cornice connection at outer corner.
With a wide foundation, you can do without a cornice. Basalt mats are installed directly on the foundation base, previously covered with roofing felt, to prevent moisture from entering the insulation from below.
The sheathing is placed on the fixed membrane.
Enhancing the thermal effect and the final stage
Fiberglass-based mineral wool is a highly efficient material that meets modern requirements for thermophysical parameters, has high thermal insulation, and is excellent for wall insulation.
To insulate walls with your own hands, you can also use mineralized wool or polystyrene foam; cotton wool is convenient because you can hide wiring in it. Another great material for container walls is cotton insulation, which is considered the most environmentally friendly material and is made from recycled blue denim. It is worth considering that installing cotton insulation will take longer because it is difficult to cut. Since this material is highly flammable, it would not be superfluous to add a fire retardant to it. You should not use ecowool as insulation; in humid weather it begins to actively mold and rot. When installing insulation, do not forget about ways to remove condensate; vents in the lower and upper parts of the walls successfully fulfill this role.
To enhance the thermal effect, penofol can be glued on top of the insulation as an additional heat insulator. Thanks to its properties, this perforated material is able to reflect heat into the room and prevent it from escaping outside, thus creating a kind of “thermos effect” and making it possible to further insulate the container. Penofol should be glued in whole pieces; the fewer joints there are, the better the thermal insulation will be; the resulting seams are best sealed with foil tape. The ceiling in a container can be insulated with your own hands in the same way as the walls. After insulating the walls and ceiling, to give an aesthetic appearance and subsequent wallpapering, plasterboard sheets are fixed on top of all insulating materials. Using dowels and self-tapping screws, sheets of plasterboard are easily attached to a wooden frame. In a similar way, fiberboard sheets can be used to finish walls and ceilings.
Preparation
The sea container is an all-metal structure. Therefore, the thermal circuit should be made on all surfaces at once. The insulation of the container inside begins from the walls, then the heat-insulating material is laid on the floor, under the ceiling lining. For external insulation, the thermal insulation technology may vary depending on the roof design of the modular building:
- exploitable roof - insulation is carried out before laying the membrane, heat-insulating material is attached to the walls after the roof is installed;
- flat roof - insulated from the inside, under the ceiling lining;
- pitched roof - insulation is laid from the inside of the attic on top of the ceiling, attached to the facades.
Rice. 4 Container house with flat roof
Depending on the design of the foundation, the following insulation method is used:
- MZLF tape, slab - the insulation layer passes from the wall to the base vertically, then continues horizontally under the blind area;
- columnar, pile grillage - it is necessary to make a fence, which does not make sense to insulate.
The fence imitates a plinth and protects against the penetration of dirt, rodents, and animals under the building. Inside it there are communication input nodes, which also need to be covered with thermal insulation materials in the air and to a depth of 1.5 m to protect against freezing.
Rice. 5 Comprehensive insulation of walls, blind area and basement
Preparation for insulation of the walls and ceiling of a sea container involves the manufacture of a frame structure, taking into account the following nuances:
- racks and lintels are mounted on brackets;
- the length of the brackets is equal to the thickness of the soya thermal insulation plus a ventilated gap of 3 cm minimum.
Rice. 6 The sheathing on the brackets should not be adjacent to the walls
Metal surfaces are additionally degreased to increase adhesion to adhesives on which thermal insulation materials will be attached.
Instructions for installing lathing on the facade
Installation of lathing on the facade during its insulation is carried out only when using various panels, porcelain tiles or natural stone as finishing. For decorative plaster and painting, thermal insulation is installed without lathing.
To install a frame for siding, block house, imitation timber or tiles you will need:
- dry, straight, smooth-surfaced wooden slats 40x40 or 50x50 mm.
- metal hangers or bars for attaching the sheathing to the wall.
Metal hangers.
The technological process can be divided into several independent stages.
- Step 1. Determine the thickness of the pads under the sheathing posts or the distance from the wall at which the posts will be plumb. To do this, the width of the racks is subtracted from the thickness of the insulating layer.
- Step 2. On the surface of the wall, mark the places where the strapping is attached, and then the lines of passage of the internal horizontal and vertical slats. The horizontal distance is 590 mm, the vertical distance is 390 mm (for laying sideways). It is impossible to maintain the same step along the entire wall. Therefore, compensation, i.e. a smaller distance between the posts must be done either on the window or on the doorway. To do this, the marking must first be carried out from one side of the strapping to the opening in the wall, and then from the other.
- Step 3. The linings are cut to the obtained dimensions.
- Step 4. Along the line of the rack, the places for attaching the linings are marked: at the ends of the racks, and inside in increments of 40-60 cm.
- Step 5. Use a hammer drill (electric drill) to drill holes in the wall for self-tapping screws.
Step 6. Dowels are driven into the drilled holes.
Step 7. The lining is attached.
Step 8. The racks and horizontal slats are filled. Door and window openings are also upholstered.
This technology allows you to quickly and easily install the sheathing. Difficulties arise when laying insulation: bars protruding beyond the dimensions of the racks interfere. You have to cut out the wool in the insulation boards to fit them, but this is difficult. Therefore, professional builders use metal hangers.
Horizontal slats are often not used under siding. The racks perfectly hold the finishing material, and horizontal packing is not needed for basalt slabs.
Methods of fastening plates
There are two methods of attaching slabs for thermal insulation, which are suitable for internal and external insulation. In the first option, a sheathing with cells is made into which the slabs are laid. The process goes like this:
- Markings are made on the surface of the wall so that the size of the resulting cells is equal to the size of the slabs.
- The wooden frame is securely fastened to the metal walls of the cabin.
- The slabs are packed tightly into cells.
The second method is to attach the insulating sheathing directly to the metal surface. To do this, the metal is thoroughly cleaned of dust and dirt, and then moistened with water so that the polyurethane foam adheres better. Then foam is applied along the contour of the slabs, applied to the wall and held for several minutes.
The material needs a day to dry completely. At the end the walls are finished with plaster. You can determine the water resistance of an insulated container by watering the walls and roof with water.
How to insulate the ceiling and walls
Liquid polyurethane foam does not leave cracks or air pockets, which extends the service life of steel
One of the best materials that can be used to insulate surfaces with a wavy structure is polyurethane foam, which hides even large irregularities well. The attractiveness of this insulation is explained by its following advantages:
- ease of installation of the material;
- environmental friendliness;
- tight fit to the walls (without the formation of cracks);
- reliable thermal insulation.
The use of materials of this class reduces convective flows and virtually eliminates the possibility of condensation formation. In addition, extruded polystyrene foam is used to insulate a sea container for living. This material is not inferior in its performance to polyurethane foam, differing from it only in price.
Table of contents:
- How does the use of polyurethane foam differ from the use of other insulation materials?
- Insulation of wagons and containers for transportation
- How metal cars and containers are insulated using polyurethane foam
- Insulation of wooden and refrigerator cars
- Insulation of containers for living
- Technology of spraying polyurethane foam onto a converted container
Recently, this service has become increasingly in demand, since wagons and containers are used not only for transporting goods, but also as mobile warehouses, mobile dormitories, workshops, and cabins. Shipping containers are often purchased for conversion into cheap housing. A variety of buildings are built from them - from garden houses and tire shops to student dormitories and shopping centers. Naturally, you need to keep it warm inside the container.
Floor insulation
Before insulating the floor in a container with your own hands, you should lay a thick film on it; it successfully solves the issue of vapor barrier. Thermal insulation is placed on top of the film, it can be polystyrene foam or any of the materials described above, and small pieces of plywood or boards are laid on top of the insulation, this is done so that when laying the logs the insulating bottom layer is not “crushed.” Then the logs are installed, they are made of wooden beams and laid across the container 60-70 cm apart. The outer bars should not be installed close to the wall, but at a distance of about 10 cm; a gap for expansion is required between the wall and the end (about 3-5 cm). Next, using self-tapping screws, each beam is fixed in 3-4 places.
How to insulate a living room floor
Before insulating the floor in the container, first lay a thick film for vapor barrier. After its arrangement, logs are installed in increments of at least 0.9 m. Then foam plastic or other high-quality insulating material from those described above is laid. If there are gaps, they are filled with polyurethane foam so as not to leave cold bridges. Then the floor is covered with moisture-resistant material. It can be plywood, chipboard or fiberboard.
Note! Do not choose cheap mineral wool of dubious quality and from an unverified manufacturer. Usually the reason for the reduction in price is a deviation from the manufacturing technology. Therefore, such a material can quickly lose its thermal insulation properties.
The next stage of floor insulation is laying decorative flooring. After this, the floor around the perimeter of the container is insulated with sealant or polyurethane foam. Upon completion of the work, plinths are installed.
Preparing to insulate the container inside
The container itself is made from perishable materials, so some preparation is needed. You need to carefully inspect the surfaces: is there any rust, defects, or dents on it. If rust is found, the damaged areas must be cleaned with sandpaper or a sander.
Also, before starting insulation, the walls need to be primed and painted. And if for some reason this cannot be done, then do such work at least on the damaged parts of the container. Also, before insulation, you need to find and make load-bearing supports for the future house. Usually these are three 50 mm dry wood beams. These blanks will be used to assemble a frame around the perimeter of the sea container.
Required materials and tools
Penoplex does not allow moisture to pass through, so it is recommended for insulating metal structures
To organize and implement insulation of a sea container from the inside, you will need to prepare:
- insulation material of the selected type (expanded polystyrene, for example);
- wooden beam 5x5 cm and dowels;
- tape, primer and plastic film;
- mounting foam, paint and sealant.
In addition, it is necessary to purchase plasterboard sheets, as well as chipboard or fiberboard blanks.
Large tools will require a grinder, an electric drill and a screwdriver. In addition, you need to prepare the following toolkit:
- screwdrivers;
- yardstick;
- device for applying polyurethane foam and sealant;
- dowels;
- brush, hammer, sharp knife and building level.
You will also need a pencil or colored felt-tip pen for marking.
How to equip a container for housing
If you purchased a container and decided to make a garage, cellar, or living space out of it, conduct a thorough inspection before insulating it. If any damage is found, repair it.
Sequence of insulation work:
- clean off the rust with sandpaper or a grinder;
- weld the holes;
- prime and paint the walls;
- make a sheathing from a wooden beam 5 cm thick or a metal profile;
- secure it around the perimeter of the walls and ceiling using fasteners for the drywall profile and self-tapping screws;
- Insulate the sea container from the inside by placing insulation in the grooves between the bars;
- stretch the vapor barrier film.
Before insulation, preparatory work is carried out.
Do not forget about the supports of the house. The container is placed on a timber frame.
Arrangement of the cellar
Sea containers are sometimes used to make basements or cellars that maintain a constant temperature for storing food, drinks and other things. Many people believe that metal structures are expensive and deteriorate when left in wet soil. Despite these disadvantages, homemade refrigerators are popular, especially in southern climates. Sometimes even wine cellars are made from shipping containers.
Bringing to life the idea of converting a trailer into a cellar will not take much time. First, a pit is dug, the bottom of which is covered with a layer of gravel, sand or filled with concrete. These measures are necessary to prevent humidity levels from rising. The cellar is insulated in the same way as the house. It is recommended to leave a gap at the top and remove ventilation.
If you have no experience in insulating sea containers, it will be useful to watch a video with a step-by-step guide to this process and its features on the Internet.
The full picture: container house, pros and cons
Shipping containers are food for the creative minds of architects around the world. If you look through the photo gallery, you will be amazed at the originality of the ideas. The design is impressive and even more inspiring to build just such a home. But still, for a more objective impression, you need to consider what advantages such houses have, and whether they have disadvantages.
Pros of a house made from shipping containers:
- Affordable price, it will be an inexpensive construction;
- Reliable design;
- The house is not afraid of such disasters as floods and earthquakes;
- An insulated house is built quickly;
- Possibility of using strip foundation;
- If your region experiences frequent snowfalls, the container can be used in such conditions;
- Externally, the building will stand out favorably.
But it would be fair to note the disadvantages of such a house. The original purpose of a sea container is sea transportation. Cargoes are protected from external influences by applying a toxic composition to the surface. This means that before using it for housing, you need to clean the container.
The walls of the container are definitely not intended for housing. They heat up very quickly, but also cool down just as quickly if it’s hot or cold outside. The structure requires special care, because the walls are afraid of corrosion. And the more windows there are in such a container, the less reliable it will be. Insulation from the inside is a mandatory element of the arrangement.
Container structure
The container must be insulated inside and out so that the steel does not corrode.
Before insulating the container inside, you will need to familiarize yourself with the features of its design. According to the drawings given in the design documentation for the product, the frame consists of the following main elements:
- upper and lower frame bases;
- a set of racks (corner, middle and for doors);
- a set of wall panels;
- outer cladding.
The lower frame is made in the form of a welded unit consisting of 2 longitudinal and transverse channels. The front beam in the area of the doorway is additionally reinforced with a metal strip. The welded upper frame consists of 2 longitudinal and four transverse beams, the joints of which are reinforced with gussets. The top and sides of the container frame are covered with 1.5 mm thick steel sheets, on which the insulation itself is mounted.
Marine analog device
The design of products of this class is not much different from the usual one. Its basis is the same strong steel frame, welded from longitudinal and transverse channels. The top of the container is made in the form of transverse and longitudinal beams. Along the entire perimeter, the frame is sheathed with steel sheets, characterized by good anti-corrosion properties and having a corrugated profile. In the production of sea containers of 20, 40, 45 feet, high-quality alloy sheet steel is used. Its thickness is 1.5-2.0 mm, which guarantees a strong and rigid structure.