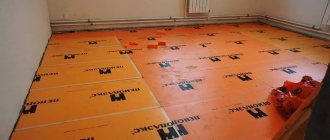
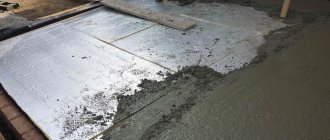
Expanded polystyrene insulation "Penoplex" is more expensive than many analogues, but the unique performance properties of this material have made it quite popular when carrying out internal work on insulating floors between floors, attics, walls and partitions. The versatility of this material allows it to be used in a screed when installing a heated floor system. To properly manufacture an insulated screed, you need to find out the sequence of actions to be performed. The big advantage of this method of floor insulation is that it is relevant not only for private houses, but also for ordinary city apartments. Today’s material is about how to properly use penoplex under floor screed.
Penoplex under floor screed
Advantages of using penoplex
In terms of its performance characteristics, penoplex ranks first among similar floor insulation materials. At a fairly reasonable price per square insulation, the manufacturer provides a long warranty on its use (up to 40 years). There are several advantages:
Characteristics of penoplex
- High stability of the coating under intense mechanical loads.
- High moisture resistance.
- Heat resistance (the stove does not ignite).
- The absence of formaldehyde in the production of insulating sheets, which ensures a high environmental class of the material.
- Increased sound insulation properties.
- Laying penoplex does not require additional costs.
Combining the properties of plastic and foam, the material is produced in the form of slabs, with a length of 120 cm, with a standard width of 60 cm. Thanks to the inclusions of air cells formed during pressing of the material, the slab is light, with high surface rigidity. Depending on the assortment, it is used to cover floors (grade 35 “Foundation”), walls, ceilings (grade 31 C “Comfort”). To insulate the floor, the material is most often laid on the following bases:
- priming;
- floor coverings;
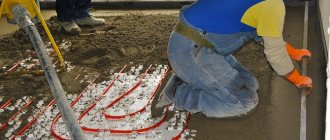
- under the system heated floor;
- concrete floor.
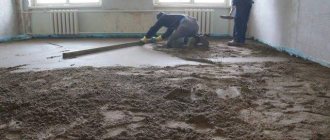
Penoplex insulated ground screed
Penoplex insulation over the ground is carried out in private houses built on a strip foundation without a basement. There are several ways to install such a floor:
Sequence of work on floor insulation on the ground:
Now you need to take a technical break so that the screed gains strength and dries. It is recommended to regularly moisten the screed to prevent premature drying. When the floor reaches brand strength, you can give it a perfectly flat surface by filling it with a leveling mixture. This is especially recommended if you plan to lay laminate or parquet boards in the room. After the finishing layer of screed has dried, the protruding edges of the damper tape are trimmed at the level of the finished floor. The floor insulated with Penoplex on the ground is completely ready for installation of decorative covering.
In conclusion, it is worth noting that the biggest mistake when insulating the floor with Penoplex slabs is the absence of a damper tape between the screed and the walls of the room. Any mortar, even the most elastic, tends to expand and shift, and the absence of a gap will inevitably lead to deformation of the screed and the appearance of cracks.
Basic rules for installing penoplex
Before laying penoplex, the required performance characteristics and features of the floor are determined. But there are general rules when laying insulation, compliance with which will allow you to avoid wasting time and money.
Penoplex insulation options
Correct calculation of the square footage of the insulated floor and selection of the appropriate slab thickness. Penoplex is produced in widths from 2 to 10 cm, with a standard width (60 cm), sheet length from 120 to 240 cm. The material is sold in blocks of four to 20 sheets.
The slab must be laid on a flat surface, regardless of the floor (rough, dirt, concrete).
Insulation technology involves the use of only polyurethane adhesive mixtures; if any other adhesive composition is used, it is important that the adhesive does not contain toluene, acetone or formaldehyde components, since they destroy the cellular structure.
Treatment
To ensure reliable insulation, an adhesive composition is used, self-tapping screws are screwed in, dowels, liquid nails and cement mortar are used. To properly glue penoplex, you need to take into account the type and thickness of the brick. Installation of penoplex is carried out in the following ways:
- Adhesive composition. Mounting adhesive is better suited for fastening polystyrene foam; it can be mounted both inside and outside the building.
- Self-tapping screws. The insulation is produced in a set with self-tapping screws that will fit different tile thicknesses. After processing, they leave holes that are covered with cement mortar to prevent moisture from appearing under the insulation sheets.
- Dowels. To work you will need assembly adhesive. The disadvantage of this method is the formation of an air cushion between the slab and the wall, which causes mold and moisture to appear, and a collapse may occur.
- Liquid Nails. It fits perfectly on the surface and provides a good bond between the material and the brick.
- Cement mortar. Treatment with the solution secures the insulation well. Since cement is heavy, it is recommended to additionally use glue to avoid detachment of the material.
- Polyurethane foam. The coating is carried out using a construction gun, which applies the solution over the entire sheet of foam plastic.
Insulation on the ground base
It is recommended to lay penoplex on a ground base, without main foundation slabs, using the following technology.
The standard insulation scheme assumes the presence of a vapor barrier layer under the foam sheet; in some cases this operation is skipped. The insulation layers are arranged as follows:
- priming;
- crushed stone (or gravel);
- sand;
- foam boards;
- waterproofing;
- reinforcing mesh;
- cement strainer;
- finished floor (laminate, parquet, linoleum, etc.).
The soil base is leveled, compacted and dried. A layer of crushed stone, about 40 cm high, is tightly laid and compacted. Sand is poured onto the crushed stone cushion in a layer of about 10 cm.
Some craftsmen use a modified technology in alternating laying layers:
- priming;
- crushed stone;
- sand.
Granite chips, crushed stone or gravel are poured onto the ground. Then everything is watered generously and compacted. After this, the soil is dried.
It is recommended to use these rules during construction only in the warm season, so that the soil has the opportunity to dry out sufficiently. Then dry sand is poured.
Penoplex is placed on the resulting base; the seams can be glued with tape (or use an adhesive solution). Layers of waterproofing are applied to sheets laid in a checkerboard pattern, onto which a reinforcing mesh is mounted.
Thermal insulation process
For subsequent cement screed, metal cellular reinforcing mesh is used. The height of the mesh should not exceed 25 cm. Fill the floor with cement mortar, checking the level.
If you do the insulation of the floor on the ground floor of a private house yourself, you should pay attention to the fact that it may be necessary to cut holes in the foam slabs for communication pipes. This stage of work should be carried out after laying the sand, during the first measurements.
Self-installation
The insulation is mounted on foundations made of reinforced concrete, soil and wood. When working, the following rules should be observed:
- strictly follow the installation instructions;
- Carefully adjust the slabs to each other so that there is no free space between them.
- Distortions and rolls are unacceptable.
If the material is laid in two layers, then you need to ensure that the joints of the upper plates do not coincide with the joints of the lower ones. Otherwise, pockets filled with air will appear in the insulating layer. Condensation will accumulate in them. Such defects impair thermal insulation and subsequently lead to delamination of the insulation.
A special compound is used to glue the boards together. It improves the thermal insulation properties of insulation. A “finish floor” is laid on top of the penoplex, for which the following materials are used:
- laminate;
- linoleum;
- parquet;
- polymer coating;
- ceramic tiles;
- boards.
Decorative coating is mounted on foam boards
Floor insulation on the base - floor slab
When laying building materials on concrete floor slabs, it is recommended to additionally insulate the surface. You should put penoplex on a layer of thermal insulation, using for this:
- cork sawdust;
- expanded polystyrene;
- foil-based insulation;
- liquid insulation.
For high-quality and fast flooring, a certain technology is used.
Concrete floor insulation scheme
- Preparatory work. The floor slabs are puttied, all irregularities are sanded, and checked with a level.
- The surface of the base is primed; two layers of primer can be used if no additional insulation has been carried out.
- In high-rise buildings, for thermal protection, sheets of material can be laid on a concrete base without additional coating primer.
- Penoplex sheets are laid.
- The sheets are laid on the floor, the seams can be treated with polyurethane foam or using tape.
- Installation of the thermal insulation layer.
- A cement screed is poured onto the reinforcing mesh. The order of work often changes; the reinforcing mesh may not be installed.
- The finished floor covering is being laid.
If penoplex is used for thermal protection of a balcony floor, it is recommended to additionally lay the concrete floor using foam plastic or mineral wool as insulation.
The technology of laying the finished floor directly onto the material, bypassing layers of reinforcing mesh and cement screed, is also widely used. This method is used if it is necessary to reduce the weight of the floor (when insulating the interfloor floors of a private house). And also if there is a risk that the load-bearing floors are not designed for the additional weight of the concrete screed or if additional insulation is not required.
How to style
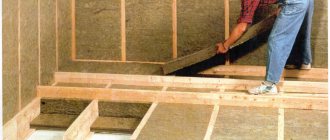
In a wooden house, the floor is mainly blown due to the fact that the boards dry out over time, and gaps form between them, sometimes quite large. But if the floor is insulated with high-quality material, then even as the floor covering dries out, the heat in the house will not become noticeably less. Our recommendations for proper installation of penoplex when insulating the floor in a wooden house.
What you will need
What tools and materials may be needed when insulating a floor with penoplex.
- Roulette, large ruler;
- Construction flat pencil;
- Level. Possibly laser.
- Stationery knife;
- Chisel;
- A construction gun for sealant and, in fact, the sealant itself. This material will be needed to thoroughly fill all the joints and voids and cracks formed during the installation process.
- A film with vapor and waterproofing properties is required.
- Well, and, in fact, extruded polystyrene foam itself.
You can read all the information about foam adhesive for outdoor use here.
It should be noted that wooden floors can be insulated using penoplex in different ways. The most common and simplest of them is insulation along logs.
The result is a truly warm floor. But in this case, high-quality waterproofing is necessary.
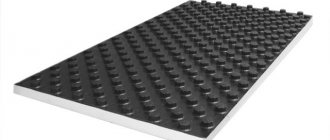
Penoplex insulation under a “warm floor” system
Warm floor design
When installing a hydraulic or electric heated floor system, the system pipes are laid out on a reinforced mesh (thermal insulation) under a cement screed.
In this case, the material can be used using standard technology, similar to when laying slabs on a concrete floor.
If electric sheet floor heating systems are used, they can be laid either in a cement screed on penoplex, or directly on penoplex slabs, using a thin layer of thermal insulation as a gasket.
For a hydraulic heated floor system, a sand-cement screed is used; the solution is prepared from equal shares of sand and cement, and it is also recommended to add a construction adhesive base to the solution.
General characteristics
Since the production technology of all types of Penoplex is similar, they have many of the same characteristics:
- water absorption is very low;
- when immersed in water for a day, no more than 0.4% of the volume;
- when immersed for 28 days, 0.5% of the volume.
- fire resistance - G4. The material is flammable and should not be used in areas where there is a risk of heating above 80°C
- thermal conductivity coefficient 0.032 W/(m×°K). This is 9 times lower than that of Rockwool mineral wool mats (0.30 (m×°K)), which is considered one of the best in its group.
- specific heat capacity 1.45 kJ/(kg.°C). Low heat capacity - it takes little time to heat up after, for example, freezing.
- sound insulation of the partition (GKL-PENOPLEX 50 mm-GKL) - 41 dB. EPPU is not a very good sound insulator. Most of this bundle is made up of gypsum boards.
- when used in a floor structure, structural noise insulation is 23 dB. When laying XPS of sufficient thickness on the floor, sounds (including percussion) will become less clear.
- vapor permeability - 0.005 mg/(m.h.Pa). Vapor permeability is very low. That is, moisture almost does not pass through it in a vapor state.
- temperature range -70°C to +70°C.
As you can see, according to temperature indicators, any type of Penoplex can be used in any part of the country - from the south to the north. Moreover, if you leave it to “winter” unprotected, nothing will happen to the material. This is not the merit of Penoplex, but a general property of extruded polystyrene foam.
Penoplex trimming
Two types of connecting edges of Penoplex insulation panels
If you need to lay insulation in non-standard rooms, or cut communication holes in sheets, use several methods of cutting the material.
Use any sharp knife. This trimming ensures relatively even edges of the sheet.
Trimming using a jigsaw. The cutting edge is very uneven; construction foam is used to tie sheets cut in this way.
Using hot wire. In this way, you can quickly cut a thick slab; for cutting, a nichrome string is heated with electric current and communication holes are easily cut out.
Being a universal insulation material, the material can also be used as thermal protection on wooden floors and on joists. The technology of laying sheets on a wooden base technically has few differences from covering a concrete base.
As an additional insulation element, mineral wool (as an additional thermal layer), construction foam (to fill possible gaps and for sealing), and mounting nails are used.
Fastening drywall
GVL (gypsum fiber sheet) is a well-known drywall that is widely used in repairs.
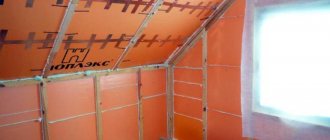
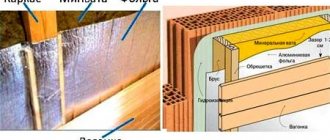
GVL is attached to penoplex in two ways. It can be glued and also strengthened by installing a frame made of metal or wood. The wooden frame should be a few centimeters behind the wall. The space between the slats is filled with foam sheets. The gaps between the plates of thermal insulation material are closed with installation foam. Then drywall is attached to the wooden blocks.
Insulation using penoplex and plasterboard is a fairly common method used on loggias, balconies, basements and garages. Penoplex sheets covered with plasterboard should not be used in high rooms (wall heights greater than 2.5 m). The frame should be stitched tightly.
Fastening drywall to penoplex using dowels is the best solution. For low wall heights, fastening with glue is a completely acceptable option.
Features of insulation
Until a certain point, the most popular material used for insulating walls and other surfaces was polystyrene foam. Although it is still used today, there are products that have been able to surpass it in some characteristics. It is made from polystyrene granules. They go through processing stages during which the base is filled with air bubbles. They provide thermal insulation properties. But the strength of the final product is low. Polystyrene foam breaks and crumbles easily, so when using it as insulation, it is imperative to take care of the protective layer. Several decades ago, a new method for processing polystyrene granules was developed. The result was a new material called extruded polystyrene foam.
Most often, this insulation is not called extruded polystyrene foam. It is better known by the names of the companies that produce it, for example, one of them is Penoplex. Manufacturers Stirex and Technoplex also produce analogues. The insulation itself has the following properties:
In terms of density and strength, extruded polystyrene foam or Penoplex insulation is several times superior to polystyrene foam. During the manufacturing process of penoplex insulation, reactions take place under high pressure, which makes it possible to reduce the size of air bubbles to a diameter of 0.1 mm. This means that per unit area of penoplex insulation there will be more of them than in polystyrene foam, which means the heat-insulating properties will increase. In its normal state, polystyrene foam does not have harmful emissions, which means that floor insulation with penoplex is absolutely safe for the inhabitants. If noisy neighbors live near the house, then penoplex insulation will also provide sound insulation, ensuring sound sleep and vigor in the morning. The material is available in several variations.
Note! Varieties of penoplex insulation are designated by the first letter of the word of the surface for which it is used, for example, “K” - roof, “S” - wall, “F” - foundation. Each type of penoplex insulation differs in density, weight and thickness of the slab
Accordingly, it has different thermal permeability. For example, the one used for roofing has a lower density and, accordingly, less rigidity. There's not a lot of pressure on him there. But its insulating properties remain high, and the price is lower.
Some types of foam do not tolerate simultaneous exposure to moisture and low temperatures. This is due to some looseness of the material, which allows water to seep into the pores. When exposed to frost, it simply bursts, so it requires additional protection. With penoplex insulation, things are more rosy. In the tests carried out, a sample of penoplex insulation was immersed in water for 30 days. At the same time, only 6 grams of additional weight were added to the weight of 100 grams. And this was due to the raw edges along which the trimming took place.
Due to the fact that under pressure, bubbles of the correct spherical shape are formed in the penoplex insulation, the resistance to compressive forces increases. But there is also a nuance that should be taken into account when handling penoplex insulation. For example, penoplex insulation does not withstand the effects of various solvents. The insulation can simply dissolve in acetone. Therefore, if painting is planned along with the installation of penoplex, then it is better to first cover the insulation with film or completely complete the installation of penoplex insulation, postponing work with paints.
Peculiarities
Theoretically, cold air currents can be isolated from the foundation and soil by laying heat-insulating material above or below the floor. Practitioners clearly recommend insulating the floor surface from below, justifying this with the following arguments:
To ensure effective insulation, you need to choose a suitable material, taking into account the specifics of the structure, and carefully follow the installation technology.
Even if in the future it is planned to equip the house with an underfloor heating system, insulation from below, in the underground, must be done to save energy. In harsh climatic zones, in addition, ceilings in wooden houses are often insulated using foam plastic for this purpose. It is laid between the beams and all cracks are carefully foamed. You can lay boards or OSB on top.
Source
Briefly about the main thing
Penoplex is characterized by two properties. The first is its low thermal conductivity, due to which it has good thermal insulation. Secondly, the slabs are not susceptible to mold and mildew; they create a good soundproofing layer, while rejecting moisture.
Another advantage is that penoplex is universal in use - it can be used regardless of the base flooring.
But here it is important to understand what thickness of penoplex to use for the floor under the screed. Further load on the surface (purpose of the room) has a huge impact.
If this is, for example, a warehouse or a garage where a car will be stored, it is better to choose denser slabs.
The type of finishing does not matter. It all depends on the preferences of the owner of the premises. You can choose laminate, tile, plywood or parquet.
Another mandatory point is waterproofing. If this layer is skipped or installed incorrectly, spilled water may accumulate under the finish coat. Penoplex does not absorb moisture, and it will be quite difficult to dry it.
