To heat a large house consisting of several rooms, you should choose the most economical option, for example, a stove with a boiler. A modern brick stove with a water circuit makes it possible to heat all rooms from one point. The coolant in it is able to distribute heat evenly and maintain the desired temperature over the entire area. Before purchasing such a unit, it is necessary to study in detail the principle of its operation, all the pros and cons, as well as the connection method and type of system.
Why do you need a heating circuit?
A brick stove perfectly heats a private village house with an area of up to 50 m2.
In a traditional village log house, it is located in the middle of one common room, divided by partitions into a kitchen and rooms. Each room has a heated oven wall, which allows them to be heated evenly. Modern private houses have a completely different layout, and the rooms can be located at a considerable distance and even on different floors. In this case, it will be necessary to install additional heating sources, for example, electric heaters. But the price of electricity is now high, so it is more practical to install water heating radiators.
They receive hot coolant through pipes - water, which enters a boiler built into a brick oven. When wood burns in such a stove, not only its walls, but also the coolant are heated, and a comfortable temperature is established in all rooms of the house. The heat capacity coefficient of water is high, and the heating system remains hot for quite a long time, even if you heat the stove only once a day, and significant savings are achieved, because the price of such heating is low.
Some useful tips
When installing a steam heating system, you should remember that all its elements must withstand high temperatures, more than 100 degrees. For example, a conventional membrane expander will not work as a reserve tank in case of an increase in coolant volume, because its maximum is 85 degrees.
The chimney of a stove with a built-in heat exchanger will become dirty faster than that of a conventional stove. Therefore, chimney cleaning needs to be planned and performed more often.
If desired, an oven with a heat exchanger can also be used for cooking, but this is not very convenient. In summer, when heating is not needed, this stove cannot be lit. We'll have to look for an alternative. It’s easier if there is a separate, convenient stove for the kitchen in the house.
Making a bed: step-by-step instructions and video
Further actions consist of manufacturing the support unit (frame), installing the working equipment, connecting it to the electric motor and direct commissioning. The sequence of actions is as follows:
- First you need to make a frame, which can be cut from steel pipes (profiles) in accordance with the dimensions in the drawings. All joints must be made only at right angles, so you can check the correctness of the connection using a regular square. The bed is made of guides. which can be used as long shafts.
The side posts of the frame should be given special attention, since they are load-bearing elements. Consequently, the immobility of the entire structure largely depends on them
It is best to make the stands on a professional lathe.
Next, you need to assemble the entire support installation: the side elements go along the edges, between them there are 2 guides. Bushings are mounted on the guides at a certain interval, as shown in the photo.
Next, the bushings are fixed, with the help of which the tailstock and tool holder will be attached. In this case, it is better to make sure that the bushings are of different sizes, since the movement of the mechanism in this case will be greater.
The surfaces for mounting the caliper are made of ordinary steel sheets
It is important that they are free from defects and even. The optimal sheet thickness is within a centimeter.
Next, the lead screw is installed. You can make a carving on a metal stick, but there are simpler options - for example, use the leg from an old swivel chair
When installing the screw, it is important to ensure that the side posts are equipped with bushings. A steering wheel is attached to the propeller itself to allow rotation, as well as a vernier.
After this, the surface is mounted on which the headstock will then be installed.
After this, the frame is completely assembled
It is important to take into account that all elements are tightly connected - the slightest slack is unacceptable, since during operation vibration swings will increase the fragility of the mechanism and can lead to damage.
Visual instructions for installing the frame are in this video.
Rules you need to know when building a chimney
Diagram of a brick chimney.
The structure for solid fuel boilers is made together with the walls of a private house. These elements are constructed according to a single principle, and it does not matter whether the channels will be used as ventilation or smoke. You will definitely need to build a foundation for the chimney. The base structure can be made of brick or concrete.
In all cases, a foundation project is prepared. During the design process, it must be taken into account that its height must be at least 30 cm, and its width must be such that the base structure extends beyond the border of the chimney device by 15 cm or more. If the chimney is made as an element of the external wall, then you need to know that the lower part of the chimney base must be placed at the lower level of the wall base.
During the construction of chimney structures, special attention should be paid to the quality of tightness. To make a durable brick chimney, you will need to follow the rules. The material should be laid so that the seams overlap the elements of the next row
In most cases, the same mixture is used as for the construction of load-bearing walls of the structure
The material should be laid so that the seams overlap the elements of the next row. In most cases, the same mixture is used as for the construction of load-bearing walls of the structure.
In the process of making a chimney for a solid fuel boiler, it must be taken into account that its internal base must be smooth.
Therefore, when performing construction work, you need to use a template. The walls between the elements must be at least half a brick thick. For ventilation elements, the thickness of the partition should be 2 times less.
At the end you will need to make a header. The extreme parts of the element must protrude beyond the structure by 10 cm or more. The outlets of the ventilation ducts must be created under the head; in most cases, 2 walls are used, which are placed opposite each other. This placement method will prevent air from being blown in.
Types of wood stoves by material of manufacture
Wood-burning stoves, while still remaining an excellent source of heat, fit well into modern heating systems for private households. Wood-burning stoves can be divided according to the material of manufacture into the following main groups:
- brick (stone);
- cast iron;
- steel.
Brick wood stoves
Brick kilns are the most durable and expensive to build. A good stove is not cheap, and it is not easy to find an experienced installation technician. To build such a stove, fireclay and refractory red bricks are used, as when laying a wood-burning fireplace, special mastics for masonry, cast iron doors, grates, and valves for the chimney pipe. A brick oven takes a long time to heat up, but also retains heat in the room for a long time.
Cast iron wood stoves
Cast iron stoves are usually used as an additional heat source. Manufacturers create not only heat sources from cast iron, but also beautiful products that fit perfectly into the interior of any home. Heated cast iron retains heat excellently, and the presence of a hob allows you to cook food or heat water for domestic needs.
Metal wood stove
A metal wood stove can quickly raise a room's temperature using minimal fuel, but the thin steel they're made of doesn't allow the heat to last long. The simplest type of metal stove is the well-known “potbelly stove,” which is often used to heat small country houses or garages.
As mentioned above, the stove itself only heats the room in which it is located. In order to transfer heat to other rooms, there are two ways - organizing air heating with an air duct system, or water heating from a stove with a heat exchanger, piping and heating radiators. Air heating is easier to install, but has a number of disadvantages, which together outweigh the use of a traditional water heating circuit.
The disadvantages of air heating include:
- installation of air ducts through which warm air is distributed must be carried out at the stage of building a house, since they are quite bulky;
- the need to install fans with a flow rate regulator, which improve air circulation but produce noise. Installing a furnace with fans in the basement of the house can solve this problem.
- The need to install additional air filters to prevent dust transfer.
The advantage of air heating, which at the same time is also a disadvantage, is low inertia. That is, the rooms begin to warm up immediately after the stove is lit, but they also cool down quickly.
Another advantage of air heating is the absence of heating radiators. Air ducts, as a rule, are hidden under the ceiling of the building, and the space under the windows remains free.
In most cases, owners of houses with stove heating opt for a water heating circuit for a private home, so we will analyze this option in detail.
How to make a stove with your own hands
Diagram of components of a brick stove with a welded water circuit
Sometimes it becomes necessary to equip a brick stove with your own hands and build it into a niche or install it on a square or rectangular foundation. First of all, markings are made for the stove and the foundation is poured. After it dries, two rows of brickwork are laid out according to the ordering scheme in order to level the uneven foundation and make a base for the unit. Next, you will need to lay out the rows on the clay mortar and finish the laying, taking into account the thickness of the seams between the rows in the process.
When the body is ready, all that remains is to install the doors, firebox, hob, heat exchanger and other parts. After completing the work, the stove must be heated completely and its performance checked.
You can develop drawings for the stove yourself or seek help from professionals. If you lack experience, it is better to entrust this work to specialists who will prepare a detailed diagram taking into account the requirements for the heating system and a specific room. In this case, the finished unit will fully comply with the safety requirements and criteria for the heating system.
Water heating device
Closed expansion tank in a stove heating system with a water circuit
The choice of stove and construction of the entire system is carried out at the stage of planning and construction of the house itself. Most models require the construction of an additional foundation. Heating based on a furnace with a water circuit consists of the following components:
- furnace design;
- heat exchanger (it is located inside or around the firebox, as well as in the form of a coil around the chimney);
- coolant circuits, radiators;
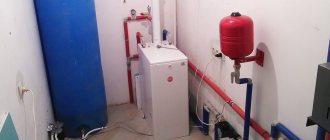
- expansion tank, which is best located in the attic.
In some cases, the heating circuit is equipped with a circulation pump. Installing a heat accumulator will increase the efficiency of the stove.
Pipe selection
It is difficult to control the water temperature in the furnace, so metal pipes are chosen
Using a furnace with a water circuit to heat a house involves the use of radiators and pipes. Not only cast iron or steel elements are suitable, but also metal-plastic and polypropylene. However, there are some peculiarities here. Since wood is used for heating and there is an open flame, the liquid in the coil may boil. In such conditions, metal-plastic pipes cannot withstand for a long time. It is better to use stainless steel products.
Another reason for choosing metal pipes is that the pipes that come out of the furnace get very hot. Under such conditions, plastic products melt. Pipes that are connected directly to the pipes must have a diameter of 3 cm. For other elements this figure is 2 cm.
Choosing a stove
Universal oven with hob and heating circuit
You can select a heating device taking into account the technical parameters and purpose of the device. According to the second characteristic, devices are:
- For heating. The generated thermal energy is used only for heating the premises. A heat exchanger tank is installed in this type of furnace.
- For cooking and heating homes. The design of the device provides an additional compartment. An oven is located above the combustion chamber. The heat exchanger can be located on the sides of the firebox. On small stoves there may only be a burner.
The technical characteristics take into account the area of the house, the fuel used and the material of manufacture. The first parameter provides that for every 10 sq.m. The area of the structure requires 1-1.2 kW of energy. At the same time, the ceiling height is 2.5-2.7 m.
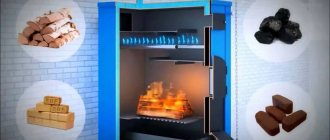
Coal, peat, pellets, and firewood are used as fuel. They all have different characteristics: when burning the same volume, different amounts of heat are released. The cost of fuel and its availability are also taken into account.
The following materials are used to make the stove:
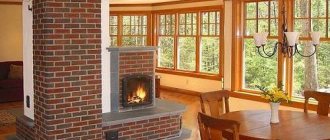
- Brick. This option has a lot of weight and dimensions, and therefore requires an additional foundation during arrangement. This design releases heat evenly and for a long time. A specialist is needed to lay a fireplace stove. However, brickwork fits perfectly into any interior, creating a special atmosphere and comfort.
- Cast iron. This material heats up quickly, but is heavy and more brittle than others. It does not require the construction of a separate foundation.
- Steel. The presented option is popular because it is lightweight and durable. The coolant in it heats up faster.
Heat exchanger for furnace
Homemade heat exchanger for a brick oven
The heat exchanger is the main element of the furnace, so the choice must be approached responsibly. It can be mounted in the firebox, but there is always a risk of coolant leakage. A safe option is to install a heat exchanger in the chimney cap. This element has a different shape and material:
- Made from sheet steel. It can be installed directly into the firebox. The thickness of the material is 3-4 mm. 2 pipes are connected to it. The top one should be connected at the highest point of the exchanger. The internal gap of this element should not be less than 3 cm. In this case, boiling of the coolant can be avoided.
- From pipes. Elements can be round or rectangular. The pipe is also allowed to be installed in the firebox. It all depends on the design of the stove. The main requirement is to install the heat exchanger so that it does not block the door, and the stacking of firewood is free.
- Flat register. This option is often installed in the chimney duct. The heat exchanger can last a long time, since it is not operated in aggressive conditions. It is large in size.
The correct choice of heat exchanger will ensure maximum stove performance.
Calculation of power and size of heat exchangers
The power of a heat exchanger depends on the materials from which it is made. If the part is cast iron, the best choice would be models of the MS-110-300 and MS-90-300 series. Due to their small size, they easily fit into the firebox; their heating area for each fin will be 0.14-0.16 m2. If you take these numbers into account, you can calculate how many sections are needed to heat each circuit. For every 10 square meters of room you will need 1 kW, equal to approximately 0.1 m2 of area from the total heating of the heat exchanger.
Brick PVC - operating features
Often, water heating is combined not only with a fireplace or a modern wood-burning stove. For many, the best option would be to install a classic brick stove as a source of thermal energy. By properly expanding the capabilities of a brick oven using a water circuit, you can efficiently heat not only the nearest living rooms, but also the entire building. To increase the efficiency of a brick kiln, various designs of heat exchangers have been developed (coils and registers act as them). The operation of such a system in suburban housing has features, which include:
- Arrangement. To build a high-quality stove and then install water heating, you will need highly qualified craftsmen.
- Size. A large traditional Russian stove takes up a lot of usable space and does not fit in every kitchen. An alternative for modest-sized rooms would be a Dutch or Swedish brick oven. Such designs are characterized by smaller sizes, but full functionality.
Heat exchanger installation diagramSource ogon.guru
- Improved efficiency. The maximum efficiency of the furnace does not reach 50%; half of the heat (and money) disappears irretrievably in the pipe. The design of a full-fledged water heating system allows you to increase this parameter to 80-85%, which is comparable to the characteristics of industrial boilers operating on solid fuels.
- Inertia. Unlike electric boilers, it will take some time to heat up a system connected to a brick oven.
- Care. Burning wood leaves behind ash and dust. The room in which the brick oven is located will have to be cleaned frequently and thoroughly.
- Security requirements. Improper operation of a brick stove for a home with water heating poses a threat not only to fire, but also to carbon monoxide poisoning.
About laying a brick oven with a water circuit in the following video:
How to cover a wood-burning stove with brickwork
Here you will learn:
- Features of potbelly stoves
- Is it possible to line a potbelly stove with bricks?
- How to properly line a stove with bricks
A potbelly stove is one of the simplest stoves. By burning solid fuel in its interior, it provides heat to residential and non-residential premises. These ovens are divided into factory-made and home-made. Thanks to their simple design, they are easy to assemble with your own hands. In the future, it is recommended to cover the potbelly stove with bricks. This step will increase its effectiveness and protect users from burns. Get information about the lining in our review.
Features of potbelly stoves
The design of the potbelly stove is extremely simple. It is a rectangular or cylindrical combustion chamber to which the chimney is connected. At the bottom there is an ash pan with a grate. There are two doors in the front part - firewood is loaded through one, ash is unloaded through the second. The second door also serves as a blower. Sometimes, instead of two doors, only one is installed - if the combustion chamber is small.
To increase the efficiency of the potbelly stove, partitions are attached inside. They prevent combustion products from directly escaping into the chimney. First they will have to go through a curved channel formed by two sheets of iron. Here they will give up the accumulated heat to the maximum, after which they will leave the confines of the stove. Brick lining gives equally good results, increasing efficiency and retaining heat.
PVC installation
If in a country cottage it is planned to install water heating from a brick stove (wood-burning), the heat exchanger is designed individually, for a specific stove. Such a device is practically beyond repair, so for installation a specialist stove specialist is hired who can professionally perform all the work:
- Make a heat exchanger and double check its quality - before and after installation.
- Install the heat exchanger at the required stage (after completing the foundation), then continue laying, observing certain rules. When installing the heat exchanger, compensation gaps are left, leaving 1-1.5 cm to the walls of the combustion chamber. Gaps that take into account thermal expansion are also needed when installing pipes.
- When installing a heat exchanger with pipes and for insulation, use only heat-resistant seals.
Steel pipes for the manufacture of a heat exchangerSource 36doors.ru
Recommendations for placing heating system elements
Elements of the heating system can hardly be called decoration of a modern interior. Only pipes that look organic in some industrial interiors can fit this definition. In general, building codes and architectural principles recommend placing parts in areas that are hidden but accessible for repair and maintenance. When placing, they are guided by the following rules:
- The heat generator is placed in an isolated room with heating and good ventilation. The circulation pump must operate under the same conditions. Small boilers (with a power of up to 30 kW) can be installed in the kitchen, hallway, basement or warm heated extension. Stoves intended for residential premises are installed taking into account fire safety rules.
- The place for an open-type expansion tank is in the attic; supply and collection pipelines tend to be located along the main wall structures.
Compliance with operating rules helps the system operate smoothly Source yandex.ru
- The main riser runs openly in the corners of the living spaces; in the attic it is covered with thermal insulation.
- Radiators are installed openly under window openings. They participate in room circulation, heating the cold air coming from the windows. Attempts to decorate radiators with decorative screens are undesirable, since they reduce the thermal efficiency of the system.
Step-by-step boiler installation instructions
The selection and arrangement of equipment is not yet a guarantee of trouble-free operation of the system, because its elements still need to be installed correctly. And you should start with arranging the boiler room, in which all this should be located
A small instruction in pictures will tell you what you need to pay special attention to
Table 2. Correct step-by-step installation.
Steps, photo Description
Step 1. Arrangement of the boiler room
The boiler is installed after repairs have been completed in the room where it will be installed.
It is important that: non-combustible materials are used in the finishing; the foundation for the boiler was prepared; there must be an air flow in the room; An exit for the chimney pipe must be provided in advance in the wall or ceiling.
Step 2. Choosing a location for the boiler
When choosing a place for installation, you need to keep in mind that there must be a minimum of 700 mm between the walls and the rear and side surfaces of the boiler body
On the front side, this distance must be at least 1250 mm (if the unit is top-loading). If loading is done from the front, you must also add the width of the door to this distance.
Step 3. Aligning the body position
It is very important that the position of the boiler does not deviate from the vertical, so during installation you need to use a level. Place it on the firebox with the lid folded back.
Step 4. Preparing components
According to the boiler passport, check its equipment, which may vary depending on the manufacturer. Purchase all other elements necessary for installation in advance in accordance with the selected scheme.
Step 5. Preparing tools
Naturally, you will need tools: adjustable, gas, socket and open-end wrenches, as well as screwdrivers of different sizes, a square and an angle grinder.
Step 6. Installing the combustion regulator
FUM tape is wound onto the regulator rod, and it is installed in its regular place. Tighten the nut, set the desired temperature and fix it in this position with a screw.
Step 7. Installation of the heating element thermostat
A little further than the combustion regulator there is a hole for installing the heating element regulator. If you don’t plan to install it, then simply screw a plug in there.
Step 8. Installation of the heating element
Next, the heating element itself is mounted - or a plug instead.
Step 9. Install the faucet
For ease of operation or routine maintenance of the system, taps are installed at the inlet and outlet of the coolant from the boiler.
Step 10. Assembling the security group
You assemble a pressure gauge, an air valve and a safety valve into one unit, which ensure the safe operation of the boiler and come with it. The group is placed in front of the shut-off valves.
Step 11. Pipeline connection to the boiler
To connect the supply and discharge pipelines to the boiler, you need to make rotary pipes. It is better if the connections are welded rather than detachable.
Step 12. Sealing the chimney landing site
To ensure that the chimney pipe fits tightly and does not allow combustion products to enter the room, its landing site and all other connections are treated with sealant.
Step 13. Water connection
Install a flexible tube onto the faucet installed at the very beginning, through which the hydraulic part of the boiler will be filled with water. Open all taps, raise the pressure to 1.3 atm, and check the tightness of the system. There shouldn't be any leaks anywhere.
Step 14. Heat the boiler
Now, in accordance with the instructions, you can load the firebox with wood and light it.
The installation process is presented only in general terms, since each boiler model has its own nuances, and the connection diagram may be different.
Some tips for proper boiler operation
In order for your boiler to be as efficient as possible, it must be operated correctly
Here are the points you need to pay attention to so that the firewood burns longer:
- When igniting the fuel, the damper on the boiler must be completely open;
- The long burning mode is set only after heating to +600 degrees;
- The coolant at the outlet must have a temperature of 65 degrees or more;
- If the boiler design does not provide for the laying of raw firewood, its humidity should not exceed 20%;
Dependence of heat production on wood type
- To avoid resin settling on the walls of the firebox and chimney, heat the boiler with hardwood firewood - acacia, birch, alder, aspen. And, by the way, the breed has a great influence on the amount of heat received;
- Do not chop the firewood - the larger the pieces, and the closer to each other they are laid in the firebox, the longer they will burn;
- To prevent logs from hanging, they should not be too long. The ideal size is the length of the combustion chamber minus 5 cm.
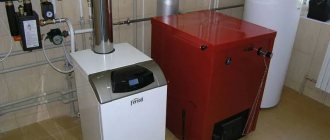
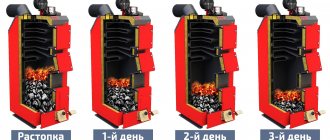
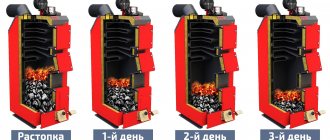
Two examples of wood heating boilers
Preparation of mortar for cladding
Experts advise using fine mountain sand to make a high-quality mixture, as it is highly durable and heat-resistant. First, the sand must be passed through a sieve with cells measuring 1.5 millimeters; the finer it is, the thinner and neater the seams between adjacent bricks will be. The fact is that thin seams help the masonry retain heat longer.
It is impossible to name the exact proportions of sand and clay in the solution, since each time the clay will have a different fat content.
To determine the desired ratio of components, proceed as follows:
- Measure out 5 liter jars of clay, previously sifted through a sieve.
- Nothing is added to the first jar, 1/10 of the sand is poured into the second, a quarter of a liter container of sand is poured into the third, 3/4 is added to the fourth, and a whole liter is poured into the fifth.
- Add water to each mixture until a solution is obtained that has a plasticine-like consistency and does not stick to your hands.
- Then they make 5 balls with a diameter of 5 to 7 centimeters and 5 small 3-mm pancakes.
- Clay crafts are left to dry in the shade for about two weeks.
- Then the balls and pancakes, so as not to be confused, are numbered and thrown to the ground from a height of 100 centimeters. An unbroken option is suitable for masonry.
After the proportion of the components is determined, they begin to prepare the masonry mixture. First, clay is poured into a large container, filled with water and left to sour for 3 days, during which time it should become elastic.
Then add the required volume of water and mix the mass until smooth so that there are no lumps in it. The mixture should come off the trowel easily. Next, a little mortar is applied to the brick and applied to the masonry. If after 5 minutes it cannot be torn off, then this solution can be used.
There is another way to check that the mixture is prepared correctly - you should lower a wooden stick into it. A good solution will cover it with a thin layer, the dry one will be barely noticeable, and after the greasy composition, a shiny film will remain.
Rules for the safe use of a water heating boiler
In order for a device with a heating water circuit to operate with the highest efficiency, it is recommended to follow a number of rules:
- The stove should never be heated with the heat exchanger drained - this will lead to irreversible damage.
- If you light the stove and supply cold water to an already heating heat exchanger, this will lead to its deformation and cracking of the metal.
- In the absence of a circulation pump, the speed of water movement through the pipes and the corresponding quality of heat transfer will decrease.
- In order to avoid water freezing in pipes located near external walls, special antifreeze is used in the circuit in winter.
- If you stop moving water through the pipes while the furnace is still running, there is a risk of an overheated heat exchanger exploding.
If all operating rules are followed, a Kuznetsov stove with a water circuit will provide the highest quality heating of the room and a long service life of all systems.
Why should you line a steam room oven with bricks?
Brick will protect walls and shelves from fire
Despite the fact that modern products look beautiful and representative, in the interior of a steam room against the background of natural wood they will look inorganic. And this is not the only reason to cover the stove in the bathhouse with bricks.
The following factors speak in favor of the event:
- The outer surface of the metal becomes very hot. This leads to overheating of the room and creating an uncomfortable environment in it.
- Fire hazard. If you overdo it with fuel, the heat from the boiler becomes so strong that it can first smolder and then burn the finish of the steam room.
- Possibility of getting burned by accidental touch. In the case of brick, such a risk is eliminated, since this material absorbs heat, distributing it evenly throughout the entire volume.
- Iron heats up quickly and cools down just as quickly. This makes it difficult to control the temperature in the room.
- Corrosion protection. Sooner or later, the protective coating comes off from the iron and the boiler begins to become covered with rust. This is not aesthetically pleasing and is fraught with thinning of the walls of the furnace body in the future.
- Organic interior. Brick against wood looks much better than metal.
