Cellar in the garage
A cellar in the garage for storing food supplies is a very reasonable solution. But it can cause high humidity, which will be a direct threat to tools and the car. There is also a downside: the garage premises belong to the category of industrial buildings, which can negatively affect the safety of products. To compensate for these two problems, high-quality thermal insulation is important. The conversation will focus on how to insulate a cellar in a garage.
Ventilation and communications
To create an optimal microclimate in the basement of the garage, a natural ventilation system must be provided. It is best to use two different ventilation ducts, which will be mounted in different corners of the cellar; this will allow you to quickly ventilate the basement due to intensive air exchange. If you need to create good draft, then install one of the ventilation pipes 1 meter higher than the garage roof, and install the second pipe at the bottom near one of the walls.
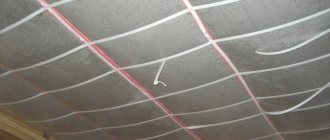
Scheme of ventilation of the cellar in the garage
Due to the difference in heights, good natural traction will be provided. Even if the cellar in the garage is heated, with natural ventilation all the hot air will simply rise up to the ceiling, and the floor and the space above it will remain cold.
Recommendation! Installing special fans allows you to increase air circulation in the cellar.
Communications (electricity, heating, water) must be securely installed before work on insulating the cellar begins. Electrical wiring must be carried out in a protective corrugation; wire switching points must be in an easily accessible place using cross-connect boxes. Also, all joints of heating or water pipes must be accessible for maintenance.
Recommendation! It is best to use a safe voltage for cellar lighting of 12 or 24 Volts.
Why is it necessary?
It makes sense to insulate the garage basement only if the depth is insufficient and the outside temperatures are extremely low. If the basement is at least three meters deep, there is no need to protect the room from the inside from freezing.
Sometimes you just need to insulate the crossbar between the garage and the basement and adjust the ventilation. When setting up a warm cellar, experts advise thinking in advance about what products you plan to store there, and whether you should take care of additional moisture insulation.
Choosing insulation
We decided to insulate the cellar, but we don’t know how to do it, and most importantly, what material to use.
Let's look at how to insulate a cellar in a garage using modern materials that experts use to insulate basements:
- polystyrene foam or extruded polystyrene foam;
- mineral wool;
- “warm” plaster;
- glass wool;
- reflective thermal insulation.
Insulating a cellar in a garage with the materials described above allows you to achieve good thermal insulation properties and prevent the appearance of fungus in the room, but each material has its own advantages and disadvantages.
Extruded polystyrene foam or polystyrene foam
Advantages:
- simple installation;
- environmental friendliness;
- you can use extruded polystyrene foam for floor insulation;
- service life up to 40 years or more;
- excellent water resistance;
- low cost;
- perfectly tolerates sudden temperature changes.
Flaws:
- is flammable;
- does not allow air to pass through.
Helpful information! Extruded polystyrene foam differs from polystyrene foam in its increased density and strength. Thus, the thermal conductivity coefficient of extruded polystyrene foam will be higher than that of polystyrene foam with the same thickness of the material. In addition, only extruded polystyrene foam is used to insulate the floor covering.
| Characteristics | Expanded polystyrene PSB-30 | Foam plastic PSB-35 |
| Density (kg/m3) | 30−32 | 27−29 |
| Thermal conductivity coefficient (W/mK) | 0,032 | 0,038 |
| Compressive Strength (MPA) | 0,25 | 0,08 |
Important! When using polystyrene foam or extruded polystyrene foam as thermal insulation, it will be necessary to treat all surfaces with a primer before starting work and, upon completion, additionally plaster the walls using reinforced plaster, and make a screed of cement and sand on the floor.
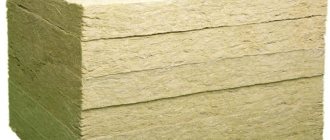
Mineral wool
Advantages:
- allows air to pass through, allowing the room to “breathe”;
- excellent sound insulation;
- excellent thermal insulation;
- affordable price;
- long service life of 30 years or more.
Flaws:
- an additional frame for installation is required;
- allows moisture to pass through;
- work is performed in special clothing and gloves.
Important! If mineral wool is chosen as insulation, then it will be necessary to additionally make a vapor barrier in the basement to prevent moisture absorption by the wool itself and deterioration of its thermal insulation properties.
"Warm" plaster
Advantages:
- excellent thermal insulation;
- affordable price;
- excellent sound insulation.
Flaws:
- it is necessary to apply a thick layer for good thermal insulation;
- difficulty in installation.
Recommendation! It is optimal to use “warm” plaster to cover surfaces together with other thermal insulation materials in order to achieve good thermal insulation.
Glass wool
Advantages:
- low cost;
- good thermal insulation properties;
- good sound insulation properties.
Flaws:
- work is performed in special clothing and gloves;
- an additional frame for installation is required;
- allows moisture to pass through;
- If exposed to moisture, it may emit an unpleasant odor.
Important! If mineral wool is chosen as insulation, then it will be necessary to additionally make a vapor barrier in the basement to prevent moisture absorption by the wool itself and deterioration of its thermal insulation properties. In addition to the vapor barrier material, it is necessary to use film or foil to insulate glass wool.
Reflective Thermal Insulation
Advantages:
- high thermal insulation properties;
- material thickness is only from 2 to 5 mm;
- simple installation;
- possibility to use facing material.
Flaws:
- price;
- possible heat loss
Important! Reflective thermal insulation is quite thin and, like a mirror, will reflect infrared heat when reflected. As a result, it is not efficient enough at convection or induction of reflected heat, which leads to heat loss.
Basement heating Library
There is a basement in almost every apartment and private building. It is used for different purposes: laying pipelines and heating equipment, storing agricultural products, and converting it into a living space. Shops and offices are often located on the ground floors: rent here is cheaper.
Basement of a private house
However, if we are talking about the basement of a country house, then fresh harvests and pickles, as well as unnecessary things, are usually stored in it. To prevent anything from spoiling or rotting, you need to take care of the heating system in the basement.
The choice of equipment largely depends on the location of the basement: for a summer house and a garage you need to select different options. It’s worth starting from how much thermal energy you need for heating. Along with the basement heating system, it is necessary to organize forced ventilation, since there are no windows in the underground for natural air exchange.
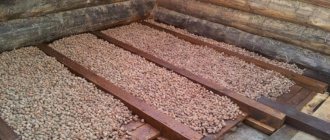
Storage of agricultural products
To organize the storage of potatoes, carrots, beets and other crops in the basements of a private house or garage, as a rule, additional heating of the basement is not required - usually the proximity to the living rooms above is sufficient. Low temperatures are not scary, but the main thing here is not to let it get below zero.
If the underground freezes, heating the basement of a private house is necessary, otherwise the products will freeze. It can be organized in several ways, the most justified is connecting heat guns (fan heaters) or infrared heaters.
Bath, sauna, swimming pool
To create an additional source of heat, you can lay a warm floor, preferably a strip floor, it is more unpretentious and lasts a long time.
An electric heated floor is expensive if you use it constantly, but for temporary heating this option will be the best, because it is easy to install.
Isolated room
If you organize additional living space in the basement of a private house, you can use a stove or boiler to heat it. It makes sense to install the boiler not in one basement, but in the whole house; simply lay an additional pipe in the underground with a coolant, for example, water, if water heating is used.
Calculation of basement heating: a 25 kW boiler is installed to heat 60-180 sq. m area, 25-35 kW – 200-300 sq. m. For rooms up to 200 sq. m. A long-burning stove is also suitable. Heated floors can be used as additional heating.
We insulate the ceiling of the cellar
Before starting insulation work, we check the entire surface of the ceiling in the basement for cracks, potholes, etc. We carefully clean all these defects and seal them with a solution or carefully blow them out with foam. After this, we treat the entire surface of the ceiling with antifungal solutions (quicklime or copper sulfate).
There are a lot of options for insulating a basement ceiling in a garage - from polystyrene foam to reflective insulation.
The ceiling can be insulated with any of the materials described above; for insulation with mineral wool or glass wool, a special frame will be required, which is then sheathed with HA sheets, plastic, plywood, etc. Installation of polystyrene foam or expanded polystyrene can be carried out on parachutes with the preliminary application of a special solution, then the mesh is applied and plastered surface and painted, you can also use facing material (decorative tiles, panels, etc.). Decorative cladding material can also be used for reflective thermal insulation.
Recommendation! Before insulating the ceiling, all electrical wiring for lighting should be done, and the wires should be laid in non-flammable corrugation.
Stages of work
To carefully insulate a garage basement with your own hands, it is recommended to follow the sequence of work:
- primary preparation;
- construction of a frame for thermal insulation;
- installation of a ventilation system;
- installation of insulation;
- cladding, fastening of racks.
Building a frame
For better fastening of the thermal insulation, it is recommended to use a special frame that will support the insulation and help with cladding. The assembly of frames must be carried out taking into account the thickness and texture of the material.
For a sheet frame, it is recommended to clearly calculate the location of the joints of the plates and the coincidence of the installation supports with the middle of each sheet. A stacked heat insulator requires significantly fewer conditions.
Important! It is recommended to leave a small space, a couple of centimeters, between the insulation and the finishing and outline the location of future shelving in advance. This will make the final part of the installation much easier.
Making ventilation
The basement requires mandatory garage ventilation. However, natural operation will be sufficient, without installing additional fans. To create such a structure, it is recommended to fix two pipes at different heights. You need to install the first pipe at a level of one meter above the garage roof, and the second pipe at the bottom of the wall. Due to the active air exchange of the garage, the basement will also be ventilated. At the same stage, heaters and air conditioners are installed.
Laying the heat insulator
Next, you need to install the heat insulator, carefully securing the insulation to the walls and frame. It is recommended to pay special attention to the typesetting material during installation. Mineral and glass wool tend to roll up and lose shape, causing heat resistance to drop sharply.
When installing sheet insulation, it is recommended to use polyurethane foam to glue the seams. The inner surface must be treated with antifungal solutions and make sure that moisture does not penetrate from the inside.
Insulating the hatch cover
The cellar lid, like the ceiling, should also be insulated, since there will be a large leakage of heat through it and the possibility of moisture getting from the main garage into the basement.
DIY cellar lid insulated with foam plastic
It is best to use polystyrene foam to insulate the hatch cover; it is better to choose the highest density of 100 or 150 kg/m³. We pre-treat the lid with antifungal solutions (quicklime or copper sulfate). We cut a piece of polystyrene foam to the size of the lid and fix it with special glue or foam. To make a decorative surface for an insulated cover, you can use plywood, which is fixed with self-tapping screws to the hatch cover itself. You can first make a wooden frame around the perimeter of the lid to cover the visible parts of the polystyrene foam. After fixing the plywood, it can be painted to protect it from moisture.
Self-made dehumidifier
Before starting work, you need to determine how exactly moisture will be extracted from the air.
Desiccant desiccant
They are cut into two parts, and holes are made in the bottom with a hot awl or knitting needle. The upper half is placed in one part of the bottle with the neck turned down, and the cork is also pierced in several places. Apply silicone gel, about 250 grams.
With the second bottle, they carry out other work - they cut off the bottom, put a cooler inside, which blows into the cut hole. A pressure unit is made at a distance of 7 or 10 centimeters from the bottom, after which the structure is placed on a bottle with gel.
All joints are sealed with tape. The cap of the second bottle is removed or replaced with gauze. This ensures free air flow.
The fan forces air masses into the desiccant, and then the air comes out through the gauze. If the gel loses its absorbent properties over time, simply dry it in the oven for about 3 hours. Thus, air dehumidification occurs without noise and is quite effective.
Condensing dryer
You will need an old refrigerator, screws and sealant, a simple heater, computer coolers, plexiglass and a rubber hose. Remove the door from the refrigerator, setting the plexiglass sheet to size, keeping the thickness to 3 mm.
Fans are mounted in such a panel, retreating from the edges by 30-40 centimeters. The fan grilles are treated with sealant and fixed with self-tapping screws. This will be the supply part of the system, pushing air inside the refrigerator.
The top of the plate is equipped with several small holes to allow cooled, dry air to escape. The area of all openings must be equal to the size of the fan.
Alternatively, the air can be removed by a second fan, which is placed on top. This will dry the air by 8%, reducing the temperature by 5 degrees.
This model can be further improved by adding a heater. It is mounted at the top of the device or on plexiglass
It is important to make an intersection of the air flows entering through the fan inside and the dried air flowing out
Although outwardly such a dehumidifier for the basement does not look attractive, it significantly saves the cost of purchasing ready-made devices and effectively removes moisture from the basement.
We insulate the floor in the cellar
Answering the question of how to insulate a basement in a garage, we go directly to the insulation process and start with insulating the floor covering.
Rigid polystyrene foam is effective for thermal insulation of floors
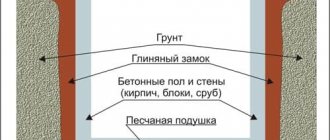
To insulate the floor, you will need to perform preparatory operations:
- we deepen the floor, digging a hole about 30 centimeters deep around the entire perimeter, and level the entire surface of the floor;
- we add fine crushed stone about 10 centimeters deep along the entire perimeter of the floor;
- Next, apply a layer of sand approximately 5 centimeters thick (this will avoid the formation of moisture on the floor);
- apply a layer of insulation - it is best to choose extruded polystyrene foam, at least 5 centimeters thick;
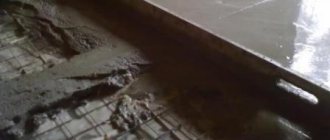
- We reinforce the floor with mesh and fill it with concrete screed.
Recommendation! You should not use sawdust or wooden platforms made from boards to insulate the floor, as wood tends to absorb moisture. Within a short time, an unpleasant odor will appear and the wood will begin to rot, which will require replacement of the floor covering, and as a result, additional costs.
Reasons for rising humidity
It is better to eliminate dampness in the basement immediately than to deal with its consequences later. The reasons may be the lack of proper air exchange, ventilation and window openings, moisture absorption by the walls of the room, poor or insufficient waterproofing protection, clogged drainage, abundant flood or groundwater.
Typically, spores of fungal infection and mold are present in all rooms, only they are inactive. But as soon as conditions for their reproduction appear (temperature above 20 degrees Celsius with a humidity of 80%), they begin to cover all accessible surfaces.
To successfully combat such infections, you need the right dehumidifier, which will change the air exchange parameters in the basement and prevent the development of pathogenic bacteria.
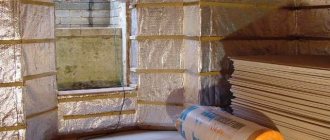
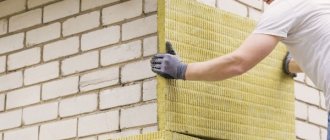
We insulate the walls
Regardless of what material the walls will be insulated with, all seams and cracks must first be carefully sealed and all walls must be treated with antifungal solutions (quicklime or copper sulfate).
To insulate walls with mineral wool or glass wool, a special frame made of wall profiles is used. This is done so that the wool does not “flow” down under its weight, but is firmly fixed along the entire perimeter of the wall. After this, the frame can be covered with HA sheets, plywood, etc. with subsequent finishing.
An economical solution - insulating basement walls with foam plastic
To fix polystyrene foam or expanded polystyrene to the wall, a special solution and “parachutes” (dowels with a wide cap) are used. All joints between sheets of foam plastic must be carefully blown out with foam. After this, a special mesh is applied to the entire surface of the wall and plastered. After plastering, the walls can be painted.
Important! Before installing foam sheets, it is advisable to level all the walls and remove all protruding parts. This is done to ensure that the foam sheets fit tightly to each other and to the wall, providing good thermal insulation.
Reflective thermal insulation is installed quite simply; it is glued to the wall surface along the entire perimeter. On the wall side the base of the material is polyurethane foam, on the outside there is polished foil. A decorative or cladding coating can be applied on top of the reflective insulation.
Recommendation! Depending on the type of insulation you choose, carefully study the installation process, as some materials may require additional wall treatment.
Ready-made dehumidifiers
Basement dehumidification is based on increasing the dryness of the air and drawing moisture out of the walls. Typically these are fans that circulate raw air to the evaporator. There it cools and dehydrates. The flow passes through the condenser, which is accompanied by heating. And the output is dry and warm air, filling the room.
Air exchange
The most significant characteristic of the device, on which the efficiency of the equipment depends. Determines the number of cubic meters of surface to be drained per hour of operation. The air exchange in the room should exceed the size of the room several times. Only under this condition will an acceptable result be achieved.
Operating temperature
A condensation type dryer is used at 15 degrees Celsius. If the temperature is lower, about 10 degrees, then the device will spend too much energy on defrosting and heating the air. In this mode, it would be optimal to use an adsorbing type of device.
Energy costs
The operation of the device requires prolonged consumption of electricity, which will increase electricity bills and cause certain loads on the electrical wiring. Specifications for each unit may vary depending on the model of the device and its manufacturer.
Condensate collection container
The container for collecting moisture is designed for comfortable use of the device; the larger it is, the less often you will need to drain it. If there is a sewer drain nearby, then you can lower the drainage pipe directly into it, removing moisture from the tank directly.
In order to save money on purchasing ready-made equipment and, if you want to gain new experience in developing devices, you can make dehumidifiers yourself.
We recommend to buy
How to insulate a concrete roof of a garage or house
Externally, you can use polystyrene foam and mineral wool slabs of increased rigidity, for example, Tekhnoruf from the well-known company TechnoNIKOL. External insulation of a concrete roof is preferable when the ceiling has been finished inside the room and additional costs will be required for dismantling and installing the finishing. In addition, high-quality waterproofing of the insulation will be required, since it will be exposed to moisture all year round.
Photo. Scheme for laying mineral wool slabs on a flat roof
If waterproofing is properly installed on the outside, then work can be done from the inside. In this case, you can use cheaper mineral wool with a lower density, as well as foam boards. Please note that carrying out work inside is accompanied by a loss of some ceiling height in the room. And mineral wool needs to be additionally protected with a vapor barrier membrane from moisture contained in the air.
Heating selection
Heating a cellar is not an easy task. When you need to heat a basement intended for seasonal living, installing an ordinary heater is suitable.
For a full-fledged living room, a more effective method is needed using a stove or boiler. To place gas equipment you will need a special room. The operation of such a system must be discussed and agreed upon with the relevant services in advance.
If a question arises about the problem of heating in winter, you need to take into account the climate in which the room is located, the depth of the pit, the waterproofing used, and thermal insulation.
When it comes to heating a small recreational space, heaters need to function quickly. In this case, a boiler, oven, or convector are suitable.
There are monolithic basements with built-in insulation. They are created for storing supplies; even in winter, at depth, vegetables remain fresh in them, do not rot or freeze.
Average score of ratings is more than 0
Share link
Comments There are no comments yet, but you could be the first...
Calculation of underground floor heating
Often homeowners do not think about heating basements and basements because they do not use their area as a living area. And in seasonal homes, heating issues are not particularly relevant. However, if you live in a private house in winter, the situation changes dramatically. To organize a heating system, you will need to make some preliminary calculations.
When choosing boiler heating, it is necessary to accurately calculate the area of the room that needs to be heated (this can be either the whole house at once, or just the basement). If the area is large enough (from 500 sq. m.), then the boiler power should be more than 40 kW. When it is necessary to heat only the basement of a private house, then simple equipment with a power of about 25 kW will be sufficient.
When installing a stove, you must first decide on its type: a “potbelly stove”, a brick stove or, possibly, a long-burning stove
When choosing a potbelly stove, you need to take into account that this device can only heat a small cellar or basement of a country house, therefore, if you need to heat a large room, you should pay attention to other types of stoves
The long-burning stove is suitable for an area of up to 200 square meters. m. The required power of such a stove is calculated in exactly the same way as in the case of boiler equipment. A good option would be to install a traditional brick stove, because in this case you don’t have to decide on power. The main thing is to correctly calculate the dimensions of the chimney and arrange the firebox.
If a traditional brick stove was installed in the basement, it is important to remember that its damper should be closed when everything has already burned out and no flame appears on the coals. This will significantly save fuel by saving heat.
If this is not done, the heat emanating from the coals will simply go out into the chimney.
Installation of sheathing
If the insulation used is sheet or roll, it becomes necessary to manufacture sheathing for installation. It is made from metal profiles or wooden sheathing (antibacterial impregnation is required for use in the basement).
The spacing of the beams is most easily determined by the width of the material, especially since this will significantly save costs. Before installing the sheathing, it is also necessary to waterproof the cellar walls. Even an ordinary thick film is suitable for this, the joints of which are well taped. If the room is very humid, it is better to purchase special waterproofing materials. For high-quality protection, at least two layers are used, in the middle of which there is the insulation itself.
Main nuances of the work:
- It is necessary to provide free space between the lining sheet and the insulation for the necessary ventilation of the room. This will ensure a long service life of the structure.
- If you plan to install shelves or racks with wall mounting in the cellar, the frame must be strengthened at the installation sites. This is done using beams of larger cross-section. Be sure to measure the distance so as not to drill into the wall “blindly”.
- For lathing, you can use special metal guide profiles. This will increase the cost of insulation, but this option is very resistant to corrosion (galvanized steel is used), and also gives proper strength to the structure with a relatively low weight.
- Wooden sheathing is much cheaper, because you can use material that was not useful in construction, as well as all available wooden pieces. However, before installation they must be impregnated with special compounds. They “preserve” the wood from damage and also make it less flammable.
Installation of the sheathing can be done using different methods; the easiest way is to do it according to a pre-marked diagram. It must be completed in any case, because before purchasing materials this will have priority. It is necessary to calculate the material with a small margin, especially if you are performing such work for the first time.
Insulation methods
The work of insulating a basement or cellar is practically no different from the process of insulating other rooms. But, despite this, it includes a number of subtleties that significantly affect the final result. So, in order to insulate an underground garage, you should not use polystyrene foam. This material ignites easily, releasing dangerous toxins, and it is quite difficult to completely eliminate sparks in the garage. There are also differences in the technologies for applying and installing various insulation materials, for example, polyurethane foam, mineral wool or polystyrene foam.
The walls and floor of the cellar located in the garage can be insulated in various ways. Conventionally, all types of thermal insulation materials that are suitable for the basement are divided into two types: modern and classic.
Modern thermal insulation
New generation materials have excellent characteristics.
- Penoizol is a liquid form of polystyrene foam. Its service life varies in length and is about 40 years. Penoizol will fit perfectly into the construction budget, because its cost is 1.5 times lower than the average price of polystyrene foam.
- Asstratek is another liquid material for thermal insulation work. Its advantage is its ease of use. Asstratek is applied to the basement walls like regular paint.
- Polyurethane foam involves certain difficulties in application. Most likely, you will need the services of professionals. But this inconvenience is offset by the excellent technical characteristics and durability of the coating. If used correctly, it will last about 70 years.
The process of spraying polyurethane foam.
Classic materials
Classical insulation of premises is carried out using materials based on polymers, mineral wool and fiberglass.
- Polymer materials are not afraid of microorganisms and moisture. But these materials are flammable, so they require strict compliance with fire safety.
- Mineral wool has excellent characteristics, but does not tolerate moisture. Its use is possible only in conjunction with reliable hydro- and vapor barrier.
- Glass wool reacts poorly to both fire and liquids. For this reason, special care is required when using it.
Installation of slab insulation in the sheathing.
Which insulation to choose: internal or external?
Thermal insulation can be internal and external. In both cases, it will retain heat and protect from wind and frost. However, each type of cladding has its own subtleties. The outer layer is better because it protects the garage walls from the cold and prevents it from freezing, and does not reduce the internal space. The disadvantage is the cost of such thermal insulation and the complexity of the process. After all, it’s not enough just to insulate, you also need to hide the material with a façade.
The material for insulation can be polystyrene foam, mineral or basalt wool, polystyrene foam, penoplex, organic insulation. It is necessary to consider some of them in more detail.
Polystyrene foam is the cheapest and most accessible insulation material. It is lightweight, moisture resistant, and easy to work with. At the same time, it has a fragile structure and is a fire hazard. Expanded polystyrene is essentially the same polystyrene foam, only more durable and less flammable. Because of this, its price is slightly different.
Mineral or basalt wool has a fibrous structure. Thanks to this, it absorbs and retains moisture, which in turn is a favorable condition for the development of fungus. In addition, cotton wool crumbles over the years. All this contributes to the loss of thermal insulation.
Organic insulation is made from natural materials (cotton, linen, etc.). It has a fibrous structure, but unlike basalt wool, this material is flammable.
The best option for insulating a garage inside and out would be polystyrene foam or a material with the same properties. It is convenient to install, the price is reasonable, and it has high moisture resistance. The last criterion is especially important for unheated rooms where there is no way to regulate the humidity level. However, if there is a heating source in the room, for example a stove, then the walls near which it is located must be insulated with mineral wool. This will prevent the insulation from overheating and subsequently catching fire. It is also worth remembering that the thickness of the insulating material will be directly responsible for its ability to retain heat.
To determine the required volume of insulation, you should calculate the working surface area. Any layer of thermal insulation needs sheathing. Inside it can be moisture-resistant plasterboard, outside - plaster. For drywall, you need to mount a frame. A metal profile is suitable for this, because it is moisture resistant and easy to install. The distance between the load-bearing parts of the frame should be no more than 55-60 cm. The footage of the guides is double the perimeter of the room plus intermediate fastenings. You always need to buy material in reserve. During installation, various unforeseen situations may arise and consumption may increase slightly. Therefore, they usually buy material 15% more than what is indicated in the plan.
Spray polyurethane foam
The most modern and high-tech insulation option. The insulating layer is applied using a special sprayer and after application it hardens, forming a porous layer of material similar in characteristics to polystyrene. In addition, this type of insulation can be used both for internal insulation and for external work. This will help create an effective heat-insulating gasket in cases where the building is free-standing and the ceiling freezes.
The only disadvantages of this solution include the high cost of implementation and the fact that the technology of applying polyurethane will not allow you to insulate the ceiling in the cellar yourself, without the use of special equipment. If the cost of the work and the ability to do everything yourself is crucial for you, then it is better to insulate the ceiling in the cellar with penoplex or polystyrene - the layers of these insulators are simply glued to the desired surface with a special glue.