- Insulation of the cellar from the inside
- Insulating the cellar from the outside
- Insulating the cellar lid
- Insulation of cellar walls
- Cellar insulation with foam plastic
- Cellar insulation with polystyrene foam
- Cellar insulation with polyurethane foam
- Conclusion
Most often, the cellar is located separately from the house, that is, it does not have heating and walls adjacent to the warm room. Typically, a cellar is used to store food, supplies, construction and sports equipment. To extend the shelf life of tools and products, you need to insulate the cellar. Depending on its type, it is worth choosing the type of thermal insulation.
- An above-ground cellar is separate from the house, does not go deep underground, and has a roof and walls. In this case, insulating the cellar from the outside is suitable.
- The deep cellar goes one to two meters underground. When insulating, it is necessary to provide a waterproofing device to protect against groundwater and soil freezing.
- The underground cellar is located at a depth of two to three meters underground. If protected from moisture and temperature changes, it is able to maintain above-zero temperatures throughout the year. An underground cellar is more difficult to build and insulate than other types. In this case, insulation of the cellar from the inside and outside is required.
How to insulate a cellar from the inside against freezing: options for insulating walls, ceilings and floors
The main purpose of the cellar is to store vegetables and other food products in fresh or canned form.
Poor quality thermal insulation, both outside and inside, creates moisture accumulation and unfavorable temperature conditions, which causes the development of mold and rot.
A low level of waterproofing can cause groundwater ingress.
Solving these issues is possible with competent and proper insulation of the cellar.
Nuances of thermal insulation of cellar doors and hatches
If the entrance to the cellar is located indoors, it is possible not to insulate it or to lay a thin insulator. You can stick penofol under the finishing coat.
The entrance from the street or the hatch must be insulated. The work is carried out as follows:
- Sheets of stone wool or expanded polystyrene, cut to size, are glued to the door. The top is finished with any material. The gaps between the frame and the wall are sealed with polyurethane foam.
- The hatch cover is covered with insulation on the outside and inside. A sheet of iron is fixed on top. If the lid is made for a new cellar, then a special frame is made to insert thermal insulation.
It is necessary to check the quality of the connection between the hatch and the door; there should be no gaps.
Walls
The main purpose of insulating cellar walls from the inside is to protect against heat loss.
Reliable insulation of wiring is also considered important to prevent short circuits, breakdowns and fires. When insulating, the following goals must be achieved:
- dry walls;
- high-quality wire insulation;
- waterproofing joints between walls and foundation;
- treating walls with special products to prevent the appearance of mold and mildew;
- insulation of wall surfaces from the inside.
Let's consider some insulation options.
A fairly inexpensive and reliable option for insulating a cellar or basement is polystyrene foam. The material has high thermal insulation rates, is easy to use, and can be coated with any solution if necessary.
In case of high humidity, it is recommended to use polystyrene foam with a density of 25 kg/m³ or higher, the properties of which allow it to not allow moisture to pass through. It is also possible to use extruded polystyrene foam, which costs an order of magnitude more, but at the same time has absolute hydrophobicity and a long service life.
The first step is to carefully seal the seams, joints and cracks with foam or sealant. If there is a possibility of underwater water entering, it is recommended to treat with a penetrating solution, which experts note as the best remedy for moisture.
How to do insulation yourself
*
When using rolled or sheet materials, the sheathing is first made from metal or wooden profiles.
Walls
When starting to install the sheathing, it is correct to first waterproof the walls with roofing felt or ordinary thick film, the joints of which are easily fastened with tape. In rooms with high humidity it is better to use special waterproofing materials.
Main nuances:
- Wooden sheathing is cheaper; any available pieces of wood or leftover building material are suitable for it. But you will definitely need to apply a special antibacterial impregnation, which will not only save the wood from damage, but also make it less flammable.
- In accordance with the size of the cells of the installed sheathing, the insulating material is cut and laid tightly.
- Between the insulation and the lining sheet, you need to leave space for ventilation of the room, this helps to increase the service life of the entire structure.
- In places where racks and shelves will be installed according to the plan, it is necessary to strengthen the frame (wooden beams must be taken with a larger cross-section).
- The easiest way to do the lathing is according to a pre-marked pattern.
Installation of sheathing
Polyurethane foam
The material is the most reliable and durable method of insulation.
The absence of seams and resistance to moisture allows you to create a high level of thermal insulation and the maximum permissible microclimate in the room. At the same time, the cost of the material is quite high when compared with previously presented analogues.
Polyurethane foam is an environmentally friendly material, so it will be the best option for insulation in rooms intended for storing vegetables and preparations.
What to consider when building a hatch
The cover should provide good insulation of living quarters from the cellar, a tight fit of the hatch to the base
The lid to the cellar in the house is a demarcation structure between the damp, cold underground space and the microclimate of living quarters. In the underground there is always high humidity and an inevitable specific smell.
The crawl space into the basement must meet the following requirements:
- strength;
- tightness;
- static;
- presentable;
- low thermal conductivity;
- ease of opening;
- resistance to moisture and temperature differences;
- durability.
For convenience and safety, the DIY basement lid is equipped with stops, clamps and gas shock absorbers. If the weight of the structure is too large, it is equipped with an electric lift.
Ceiling
Concrete ceiling slabs in the cellar are subject to the greatest freezing. You can ensure a dry and warm atmosphere by using moisture-proofing substances to treat the ceiling.
After drying, foam sheets are glued on top of the dry concrete and additionally secured with dowels. It is also possible to stuff the slats and then lay insulation in them.
After this, it is necessary to seal all the seams of the structure with polyurethane foam. Then the mounting mesh and layer of plaster are adjusted.
Floor
The floor plays an important role in ensuring optimal temperature and a favorable indoor climate. For reliability and durability, flooring requires hydro and thermal insulation, which is achieved in several ways.
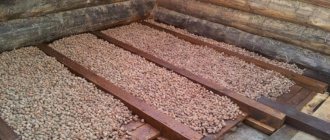
Insulation using expanded clay occurs in several stages, namely:
- the base is leveled, after which it is covered with roofing felt, onto which a waterproofing agent is glued;
- expanded clay is poured, its layer should be 10-25 cm;
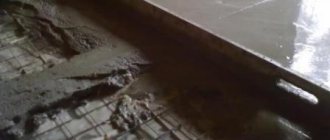
- A concrete screed with reinforcement is poured onto the expanded clay.
Stages of floor insulation using sand and crushed stone:
- the prepared surface is covered with 15-20 cm of crushed stone, then with a 5-10 cm layer of sand;
- the surface is covered with roofing felt or construction film for reliable waterproofing;
- installation of a reinforced belt and pouring concrete.
Floor insulation with foam plastic:
- preparing a gravel or sand cushion, subsequently covered with a waterproofing agent;
- laying foam on the surface;
- filling the screed.
It is worth remembering that the features of insulation largely depend on the location of the cellar, be it a garage, barn or a separate building. In any case, the general recommendations presented in the article can be safely applied in practice.
External insulation of a bulk cellar
The most labor-intensive part of the work involves performing a number of actions:
- The soil surrounding the roof and walls of the cellar is removed.
Note. Sometimes it is not possible to excavate the soil. For example, when a cellar is dug into the ground and the resulting slopes are finished with brick. Such walls can collapse. In this case, users are advised to remove the soil at a distance of 100-150 mm. from the wall, and then gradually remove the rest.Additional protection from moisture will be provided by installing a crushed stone-sand cushion at a depth of 200-300 mm. from the base of the wall.
- Rigid insulation boards are installed or polyurethane foam is applied;
- all defects from the surface of the walls are eliminated;
- For further work, the roof and walls must be completely dry. Therefore, work stops until the walls are completely dry. As you can see, it is better to carry out work in the warm, dry season;
- Roof insulation is, in essence, covering the cellar with insulation. The technology involves laying roofing felt on top of the ceiling, filling the roof with a clay-straw mixture on top. The height of the filling on the roof is 0.4-0.5 m. The mixture is carefully compacted and covered with a dense film. The edges of the film are wrapped on the wall with an overlap of 150-200 mm.
- The wall is being waterproofed. Primer treatment will not help much in this case. It is better to use a solution of bitumen with diesel fuel (1:3), mastic, roofing material or a special film;
- the joints between the sheets are blown with foam;
Some craftsmen advise tightening the insulation with a polymer mesh to ensure the integrity of the sheet. Roofing material will cope with this task more successfully. But often the distance between the wall and the soil is simply filled with expanded clay, soil with a high clay content, or a mixture of soil, sawdust/straw and clay.If there is no ventilation in the cellar, it is advisable to take care of it at this stage.
- the resulting hill is covered with a layer of fertile soil 100-150 mm high. followed by planting herbaceous plants that will protect the cellar from sunlight and strengthen the soil with their roots.
Advice from professionals on how to insulate a cellar in a garage
Not only rural residents and summer residents, but also many city dwellers dream of having their own cellar. A basement in a garage is a rational use of space and saving on expensive acres of land. However, garage buildings are often not heated, and storing vegetables and jars of pickles requires a positive temperature.
Even if there is a heating system in the main room, it is recommended to additionally insulate the cellar to prevent dampness. Every rational owner is interested in learning how to insulate a cellar in a garage. An insulated utility room in the garage provides significant advantages:
- prevents heat loss through the floor;
- makes it possible to use the utility room at any time of the year;
- saving space;
- low cost of repair work.
Types of cellars for a private home
When deciding how to insulate a cellar from the inside or outside, the type of cellar is first taken into account:
Above ground cellar
Above ground cellar
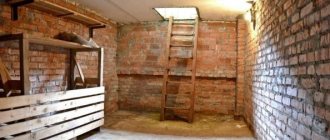
A separate room with a depth of up to 0.5 m into the soil. It can be free-standing or wall-mounted (one of the walls of the cellar is the wall of an outbuilding or garage). From the point of view of insulation, this is the simplest option, because It is possible to insulate the walls and roof from the outside and inside.
Deep cellar (semi-underground)
Deep cellar
The lowest point of the building is located at a depth of no more than 1.5 m from the ground surface. In this case, in addition to insulation, you should also think about neutralizing the effects of groundwater and frost heaving of the soil.
Underground cellar (bulk)
Underground (bulk) cellar
It is distinguished by the location of the floor at a level of 2-3 meters underground. With proper waterproofing, this is the most advantageous cellar from the point of view of operation, which perfectly maintains above-zero temperatures, approximately constant, throughout the year.
Despite the differences in construction, the design of the cellar is not diverse.
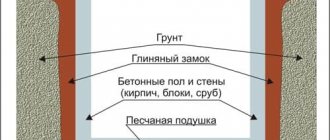
Standard cellar design:
- walls - if the soil is dense - soil, if the soil is moving - brick or stone;
- there is no floor, or rather it is dirt;
- ceiling - reinforced concrete or wood.
Accordingly, the ceiling, walls, and floor are insulated. Those. all cellar surfaces through which heat loss is possible.
What materials exist
The choice of consumables depends on the degree of soil freezing, the type of structure and the depth of groundwater flow.
Naturally, insulation materials must meet important requirements: maintain water resistance, heat and protect against fungal infection. Thermal insulators are different for walls, ceilings and floors.
Mineral wool
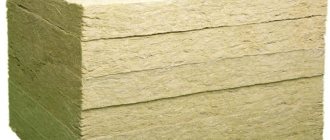
Mineral wool is an excellent thermal insulation material that, in addition to everything, allows air to pass through. To insulate walls and ceilings indoors, you can use slabs of medium and soft hardness. This material does not burn and is easily attached to the surface.
Basalt wool, which has higher thermal conductivity and noise insulation properties, has proven itself especially well. It is important to remember that additional vapor barrier protection will be required to prevent moisture accumulation.
Expanded polystyrene
This is a high quality thermal insulation material that is perfect for a basement. It has high resistance to mold and the spread of rot.
Its important characteristic is almost absolute waterproofness. In addition, the material has a long service life.
Often used for cellar insulation. It differs from expanded polystyrene in its manufacturing technology and higher vapor permeability. Has the following distinctive characteristics:
- does not allow moisture to pass through and does not change shape under its influence;
- weighs little and does not create additional load;
- affordable.
Reflective Thermal Insulator
New materials include reflective insulation.
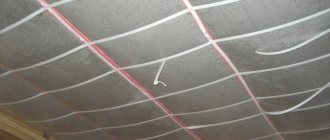
In its production, special rolls are used, which, on the one hand, are made of foamed polyurethane foam, and on the other, of polished foil.
This insulation effectively saves room space, since its thickness is 3-5 mm.
Glass wool
Glass wool is used less and less today. But it has one undeniable advantage. It's cheap.
When working with such material, it is worth stocking up on protective gloves, and you also need to protect your eyes. It is necessary to additionally insulate with film or foil.
Warm plaster
This material performs both decorative and heat-insulating functions.
Plaster can be used as an independent raw material, or can be combined with other thermal insulators. In any case, it must be applied in a very thick layer.
The floor in the basement can be insulated with expanded clay. This is an inexpensive option, very easy to use and effective. The thickness of the expanded clay layer depends on the expected load.
It is recommended to choose two types of expanded clay with fractions of 5-20 mm, this will protect the floor from subsidence. The size of the bulk layer should not be less than 10 cm.
Sand and crushed stone
The construction of sand, crushed stone and screed is also quite effective.
First we deepen and level the floor. The first layer is crushed stone, 10 cm thick, then sand, 5 cm thick. After thorough compaction, fill it with hot bitumen and make a reinforced concrete screed. This is a traditional and inexpensive option.
Construction of houses
The technology for creating a hidden floor hatch includes several stages: selection and acquisition of materials, preparation of tools, drawing up a drawing and the actual construction of the structure. The basic requirements for arranging a boat and the step-by-step progress of the work are described in the article.
Requirements for hidden hatches in the cellar
Having a basement in a country house or in a private house has a number of undeniable advantages. The utility room expands the usable area and provides a warm, dry floor covering for the first floor. The disadvantage of a cellar is the increase in construction costs. Sometimes the cost of building a basement reaches ¼ of the total estimate for the construction of the entire house. Some people try to save money by doing some of the work themselves.
Arranging a basement involves organizing a separate or built-in entrance. This can be an ordinary door or a lyada (a hatch in a field). If the basement is located in a residential building, then a hidden hatch is placed. To do the work yourself, you need to think through everything in advance, taking into account the basic requirements for hidden structures of this type.
- The dimensions of the hatch are selected in accordance with the room and the main purpose of the cellar. Minimum dimensions – 75*75 cm.
- It is better to choose the location of the lyad not next to the wall. The door should swing open without any difficulty. It is important that the open lid does not touch objects on the floor or furniture.
- The cellar must be equipped with a simple and convenient opening mechanism.
- If the door weighs more than 10 kg, it is advisable to equip the hatch with an electric drive.
- The dimensions of the hatch must fully correspond to the basement shaft, and the joints must be sealed.
- Care should be taken to ensure reliable supports around the perimeter of the hatch. The lid will be stepped on many times throughout the day and must be able to support the weight of everyone in the household.
- It is advisable to equip the floor hatch with a smooth opening/closing system (gas lift). If there are animals and children in the house, then you will need a locking device that limits access to the basement.
- The cover material is selected in accordance with the existing or proposed floor finish. For example, if a wood board or laminate is laid, then the cover is mounted from wood.
Options for finished products: features of operation and installation
It’s easier to choose a ready-made hatch design and install it yourself. There are models of different sizes and types on the market. You will be able to find an option that is optimally suited for laminate, tile or linoleum. Depending on the method of opening the door to the basement, there are three types:
- Swing. They are made by analogy with the front door. 2-4 hinges are installed on one side, and a lock or latch on the opposite side.
- Removable. These models are the cheapest and easiest to install. The door is made as a separate element and is superimposed on the equipped opening.
- Sliding. Sliding hatches are more often used in the design of street cellars. The door moves along guides and opens the entrance to the cellar.
If the floor is tiled, laminate or other finishing material, then to create a hidden hatch into the basement with your own hands, you need to choose fillable aluminum or steel structures. This specimen is a shallow rectangular container. After installation, the frame is filled with concrete mortar, and after complete drying, the surface is lined.
Important! A concrete hatch has significant weight, so it requires the use of massive hinges and durable fasteners. A well-designed steel structure can withstand weights in excess of 1 ton.
Choosing materials for making a hidden hatch with your own hands
To implement the project, you can use wood or metal. In this matter, it is important to maintain a reasonable balance between the weight of the structure and its strength. When creating a wooden hatch, boards 2.5 mm thick are often used. The top finishing of the lid is made with 1 cm plywood. Using transverse slats, the boards are connected to each other, forming a solid sheet. To extend its service life, a wooden door must be treated with drying oil.
Step-by-step instructions for insulation
Most experts recommend using polystyrene foam as a heat insulator. To insulate a cellar in a garage, you should choose a material with a thickness of 40-50 mm. Such insulation will maintain a stable temperature for a very long time.
Foamed sheets have a cellular structure, due to which they have lightness and low thermal conductivity. You can do the installation work yourself.
Selecting installation tools
When insulating, you need to stock up on numerous construction tools:
- level;
- hammer;
- trowel;
- spatulas;
- glue;
- dowels;
- plaster mortar;
- primer and putty;
- brush for applying primer.
Preparing the premises
Before installation work, we clean the basement from dirt. If the surfaces are uneven, then we perform putty and primer. Moreover, the latter procedure effectively protects against fungus. We moisten the surface and polystyrene. This can be done using a garden sprayer.
You can also create a ventilation layer between the wall and the material. To do this, we attach a special frame to the wall, and then mount the slabs on it. Ventilation can be installed after laying the sheets, but you will have to use drywall.
There are two ways to attach the material to the surface: adhesive and fungal.
Fastening with adhesive method
The first method is mounting using an adhesive solution. This is a great option as the glue has excellent adhesion. We dilute the solution in a plastic container and mix well with an electric drill. After moistening the surface, apply the glue in the form of spots with a distance of 20 cm from each other.
Using a trowel, apply another layer of glue to the resulting stains. It can also be applied to the end parts, this will make it easier to join the slabs. Press the sheet against the wall and tap it well with your palm. The slabs should be laid from top to bottom, that is, from the ceiling to the floor.
Mushroom fastening
For the second method you will need dowels. These are small screws with a head. For this material, it is better to select disc-shaped screws, which can be metal or plastic. It is better to choose plastic products: they are not subject to corrosion and will not allow cold to pass through.
Using a drill, we make through holes in the wall and material for dowels. In the corners we leave indentations of 10-15 cm. When choosing the length of the screws, you should take into account the thickness of the polystyrene foam, plus 4-5 cm.
Eliminating cracks
After 5 days, when the glue has completely hardened, we seal the cracks with polyurethane foam using a construction gun.
Finishing materials are attached to polystyrene foam using lathing. You can install drywall first, and install panels on top or simply paint. The most popular method is plastering.
Before plastering, it is recommended to perform a certain sequence of actions:
- prime the polystyrene foam coating;
- we perform reinforcement with a special mesh;
- level the surface, grind thoroughly;
- prime again;
- and do the finishing touches.
You can use mineral and acrylic plaster. A basement with an acrylic finish will last for decades. It also has excellent adhesive properties and protective functions.
Waterproofing surfaces in storage
The deeper the cellar is planned, the more serious the requirements for its waterproofing. If everything is done correctly at the construction stage, then the cost of thermal insulation will be negligible.
The fact is that it is much more difficult to bring an already damp storage facility into proper condition. Therefore, before starting construction work, you need to find out the depth of groundwater and soil freezing in the winter season in a specific place.
If the groundwater level is low, it is enough to pour a concrete floor and plaster and whitewash the surface of the walls. Roofing felt is used for waterproofing.
When groundwater is located close to the surface, then it is necessary to plaster the walls on both sides - internal and external. They also need to be covered in several layers with roofing felt based on bitumen mastic and pressed against a wall made of red brick. In order to provide additional protection, crumpled fatty clay is applied to the brickwork in a layer 20 centimeters high.
If the storage facility is built on sandy, drainable soil, its cement walls are covered in two layers of bitumen mastic and immediately sprinkled with coarse sand.
The buried cellar is additionally waterproofed before insulation is carried out. The fact is that the walls of such buildings are located half in the ground, which means there is a risk of flooding with groundwater. To prevent such a development of the situation, the underground part of the walls should be freed from soil, covered with roofing material or treated with a waterproofing compound.
Then they install polyurethane foam or rigid insulation, cover it again with roofing felt and cover it with earth. In addition to all the above measures, to minimize the impact of high humidity on the cellar, experts advise creating a drainage system.
Ventilation and communications
To create an optimal microclimate in the basement of the garage, a natural ventilation system must be provided. It is best to use two different ventilation ducts, which will be mounted in different corners of the cellar; this will allow you to quickly ventilate the basement due to intensive air exchange. If you need to create good draft, then install one of the ventilation pipes 1 meter higher than the garage roof, and install the second pipe at the bottom near one of the walls.
Scheme of ventilation of the cellar in the garage
Due to the difference in heights, good natural traction will be provided. Even if the cellar in the garage is heated, with natural ventilation all the hot air will simply rise up to the ceiling, and the floor and the space above it will remain cold.
Communications (electricity, heating, water) must be securely installed before work on insulating the cellar begins. Electrical wiring must be carried out in a protective corrugation; wire switching points must be in an easily accessible place using cross-connect boxes. Also, all joints of heating or water pipes must be accessible for maintenance.
Conclusion
The basement, even if it is in the garage, is not just an unnecessary room for storing crops and all sorts of rubbish. This is free space that can be useful.
In order for the garage cellar to function normally, it must be insulated, as well as have working ventilation so that it cleans the air of gases and toxic substances emanating from the garage. Then you can even convert a simple cellar into a gym or a beautiful workshop. Moreover, everything can be done with your own hands.
Choosing insulation
We decided to insulate the cellar, but we don’t know how to do it, and most importantly, what material to use.
Let's look at how to insulate a cellar in a garage using modern materials that experts use to insulate basements:
- polystyrene foam or extruded polystyrene foam;
- mineral wool;
- warm plaster;
- glass wool;
- reflective thermal insulation.
Insulating a cellar in a garage with the materials described above allows you to achieve good thermal insulation properties and prevent the appearance of fungus in the room, but each material has its own advantages and disadvantages.
Extruded polystyrene foam or polystyrene foam
- simple installation;
- environmental friendliness;
- you can use extruded polystyrene foam for floor insulation;
- service life up to 40 years or more;
- excellent water resistance;
- low cost;
- perfectly tolerates sudden temperature changes.
- is flammable;
- does not allow air to pass through.
Expanded polystyrene PSB-30
Foam plastic PSB-35
Density (kg/m3)
Thermal conductivity coefficient (W/mK)
Compressive Strength (MPA)
Mineral wool
- allows air to pass through, allowing the room to breathe;
- excellent sound insulation;
- excellent thermal insulation;
- affordable price;
- long service life of 30 years or more.
- an additional frame for installation is required;
- allows moisture to pass through;
- work is performed in special clothing and gloves.
Warm plaster
- excellent thermal insulation;
- affordable price;
- excellent sound insulation.
- it is necessary to apply a thick layer for good thermal insulation;
- difficulty in installation.
Glass wool
- low cost;
- good thermal insulation properties;
- good sound insulation properties.
- work is performed in special clothing and gloves;
- an additional frame for installation is required;
- allows moisture to pass through;
- If exposed to moisture, it may emit an unpleasant odor.
Reflective Thermal Insulation
- high thermal insulation properties;
- material thickness is only from 2 to 5 mm;
- simple installation;
- possibility to use facing material.
- price;
- possible heat loss
We insulate the ceiling of the cellar
Before starting insulation work, we check the entire surface of the ceiling in the basement for cracks, potholes, etc. We carefully clean all these defects and seal them with a solution or carefully blow them out with foam. After this, we treat the entire surface of the ceiling with antifungal solutions (quicklime or copper sulfate).
There are a lot of options for insulating a basement ceiling in a garage - from polystyrene foam to reflective insulation.
The ceiling can be insulated with any of the materials described above; for insulation with mineral wool or glass wool, a special frame will be required, which is then sheathed with HA sheets, plastic, plywood, etc. Installation of polystyrene foam or expanded polystyrene can be carried out on parachutes with the preliminary application of a special solution, then the mesh is applied and plastered surface and painted, you can also use facing material (decorative tiles, panels, etc.). Decorative cladding material can also be used for reflective thermal insulation.
Insulation methods
The work of insulating a basement or cellar is practically no different from the process of insulating other rooms. But, despite this, it includes a number of subtleties that significantly affect the final result. So, in order to insulate an underground garage, you should not use polystyrene foam. This material ignites easily, releasing dangerous toxins, and it is quite difficult to completely eliminate sparks in the garage. There are also differences in the technologies for applying and installing various insulation materials, for example, polyurethane foam, mineral wool or polystyrene foam.
The walls and floor of the cellar located in the garage can be insulated in various ways. Conventionally, all types of thermal insulation materials that are suitable for the basement are divided into two types: modern and classic.
Modern thermal insulation
New generation materials have excellent characteristics.
- Penoizol is a liquid form of polystyrene foam. Its service life varies in length and is about 40 years. Penoizol will fit perfectly into the construction budget, because its cost is 1.5 times lower than the average price of polystyrene foam.
- Asstratek is another liquid material for thermal insulation work. Its advantage is its ease of use. Asstratek is applied to the basement walls like regular paint.
- Polyurethane foam involves certain difficulties in application. Most likely, you will need the services of professionals. But this inconvenience is offset by the excellent technical characteristics and durability of the coating. If used correctly, it will last about 70 years.
The process of spraying polyurethane foam.
Classic materials
Classical insulation of premises is carried out using materials based on polymers, mineral wool and fiberglass.
- Polymer materials are not afraid of microorganisms and moisture. But these materials are flammable, so they require strict compliance with fire safety.
- Mineral wool has excellent characteristics, but does not tolerate moisture. Its use is possible only in conjunction with reliable hydro- and vapor barrier.
- Glass wool reacts poorly to both fire and liquids. For this reason, special care is required when using it.
Installation of slab insulation in the sheathing.
Insulating the hatch cover
The cellar lid, like the ceiling, should also be insulated, since there will be a large leakage of heat through it and the possibility of moisture getting from the main garage into the basement.
DIY cellar lid insulated with foam plastic
It is best to use polystyrene foam to insulate the hatch cover; it is better to choose the highest density of 100 or 150 kg/m³. We pre-treat the lid with antifungal solutions (quicklime or copper sulfate). We cut a piece of polystyrene foam to the size of the lid and fix it with special glue or foam. To make a decorative surface for an insulated cover, you can use plywood, which is fixed with self-tapping screws to the hatch cover itself. You can first make a wooden frame around the perimeter of the lid to cover the visible parts of the polystyrene foam. After fixing the plywood, it can be painted to protect it from moisture.
Advantages and disadvantages
The work performed to improve cellars, as a rule, has a number of positive qualities, as well as some disadvantages:
- An optimal atmosphere for storing canned goods and vegetables will be constantly maintained inside the storage facility.
- You can protect the structure from freezing, which negatively affects the structural elements of the extension.
- Subsequently, it is possible to use the premises not only as storage, but also for other purposes.
- Thermal insulation will avoid periodic heating of the cellar space.
- After the insulation work is completed, there will be no increased humidity inside the storage facility.
- Thermal insulation will protect the storage from the penetration of rodents and other pests.
However, despite the positive aspects, there are also a number of disadvantages: the cost of comprehensive insulation is quite high, and a higher temperature will be regularly maintained inside the cellar. In addition, when performing cladding, the usable area inside the storage facility will be significantly reduced.
Important. Before proceeding with thermal protection of the basement, it is necessary to understand the feasibility, since if the structural elements do not freeze at excessively negative temperatures, then performing this work will be impractical.
We insulate the floor in the cellar
Answering the question of how to insulate a basement in a garage, we go directly to the insulation process and start with insulating the floor covering.
Rigid polystyrene foam is effective for thermal insulation of floors
To insulate the floor, you will need to perform preparatory operations:
- we deepen the floor, digging a hole about 30 centimeters deep around the entire perimeter, and level the entire surface of the floor;
- we add fine crushed stone about 10 centimeters deep along the entire perimeter of the floor;
- Next, apply a layer of sand approximately 5 centimeters thick (this will avoid the formation of moisture on the floor);
- apply a layer of insulation - it is best to choose extruded polystyrene foam, at least 5 centimeters thick;
- We reinforce the floor with mesh and fill it with concrete screed.
We insulate the walls
Regardless of what material the walls will be insulated with, all seams and cracks must first be carefully sealed and all walls must be treated with antifungal solutions (quicklime or copper sulfate).
To insulate walls with mineral wool or glass wool, a special frame made of wall profiles is used. This is done so that the wool does not flow down under its weight, but is firmly fixed along the entire perimeter of the wall. After this, the frame can be covered with HA sheets, plywood, etc. with subsequent finishing.
An economical solution - insulating basement walls with foam plastic
To fix polystyrene foam or expanded polystyrene to the wall, a special solution and parachutes (dowels with a wide cap) are used. All joints between sheets of foam plastic must be carefully blown out with foam. After this, a special mesh is applied to the entire surface of the wall and plastered. After plastering, the walls can be painted.
Reflective thermal insulation is installed quite simply; it is glued to the wall surface along the entire perimeter. On the wall side the base of the material is polyurethane foam, on the outside there is polished foil. A decorative or cladding coating can be applied on top of the reflective insulation.
Final works
At the final stage, the walls are finished. In the cellar it does not have any decorative value. The main task is to provide the necessary microclimate for the preservation of food supplies.
Final lining of the cellar with clapboard
If the room is dry, you can line the walls with plywood or wood. In this case, it is imperative to treat the cladding material with an antifungal agent. For a basement with high humidity, lining is more suitable.
Wall insulation is not always required in a garage cellar. It happens that it is enough to insulate only the floor. In this case, conventional lime whitening or painting is used to finish wall surfaces.
