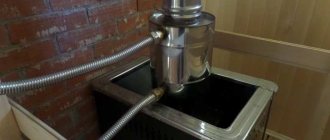
Securing the remote tank and installing the heat exchanger
Remote tank for a sauna
For a sauna stove, a tank with a volume of 80-120 liters is sufficient. This container must be hung on the wall of the bathhouse so that the level of the tank is higher than the stove.
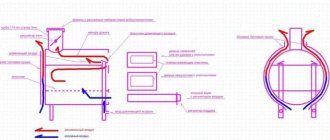
Scheme for connecting the tank and installing the furnace with heat exchanger
Connection diagram
Step 1. Choose a place to mount the tank. This can be either a steam room or a shower room behind an adjacent wall. We determine the mounting height using recommendations for the slope of inlet/outlet pipes.
Layout of the furnace and tank
Step 2. Most experienced craftsmen do not recommend hanging the remote tank directly on the wooden wall of the bathhouse. Therefore, we measure the width of the tank, saw the rail into several sections of the appropriate size, and fasten the sections to the wall of the bathhouse with nails.
Step 3. The tank must have technological holes for attaching it to the wall. We secure the tank with self-tapping screws or dowels, checking horizontal and vertical. The structure can be further strengthened with brackets, fixing them under the bottom of the tank.
Brackets under the tank bottom
Step 4. The remote water tank has three or four pipes. Two of them are intended for connection to the heat exchanger, the third is for filling the tank with water (it may not be there), through the fourth hot water is supplied to consumers. A check valve is connected to the pipe through which the tank will be filled with water. If the system is open (water is added manually through an open tank lid), then a non-return safety valve is not needed.
A faucet with or without a shower hose is connected to the pipe from which heated water will flow.
Step 5. There are two pipes left, to which you should connect corrugated steel pipes or install a copper network. Connections are made using fittings. It is permissible to use metal-plastic pipes, connecting them with adapters to the pipes of the tank and heat exchanger. All threaded connections are sealed with thread sealant.
Flexible water supply
Prices for metal-plastic pipes
metal-plastic pipes
Step 6. A tap is connected to the pipeline that leads from the tank to the heat exchanger to drain water from the system. The operation of draining the liquid will need to be performed every time after completing bath procedures, otherwise during cold weather the water may freeze in the pipes.
Furnace heat exchanger installation diagram
Step 7. A heat exchanger is hung on the wall of the furnace (or its fittings are brought out through the technological openings of the furnace, and the coil is located inside so that in the future there is no contact of the body metal with an open flame). The fasteners are tightened. Flexible corrugated hoses or pipes are supplied and connected to the heat exchanger with fittings. If necessary, holes are drilled in the wall with a diameter slightly larger than the diameter of the pipes.
Drilling holes
Pulling liners through holes in the wall
Connecting the line to the heat exchanger
Step 8. The system must be tested for leaks by supplying water under pressure.
Sauna stove with heat exchanger connected
An example of connecting a remote tank to the heat exchanger of a sauna stove
An example of connecting a remote tank to the heat exchanger of a sauna stove
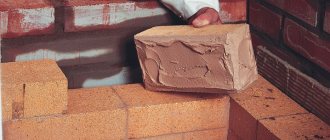
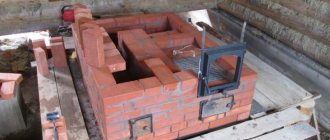
Step 9. If you have a metal stove, then you can put it into operation. The brick kiln will have to be completed, finishing, testing and other preparatory work must be done. However, metal stoves can also be lined with bricks (they are placed on edge) on two or three sides. Such a screen additionally accumulates heat, increasing the efficiency of the furnace.
Simple design: coil
Installing a heat exchanger tank on a chimney involves welding work, which not everyone can do. A simpler design is a coil wrapped in a spiral around the chimney. The coil can be made from a copper or aluminum tube - these metals are easy to bend, have high thermal conductivity and are not subject to corrosion.
The diameter of the tube is chosen so that it is convenient to connect it to the fittings of the water storage tank. For bending, pipes with a diameter of no more than 28 mm are more convenient. In any case, the length should not exceed 3 meters - this is a prerequisite for natural coolant circulation. To connect the heating coil to the tank, use a flexible hot water line.
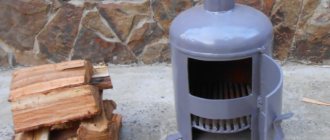
This heat exchanger design can be used to produce hot water, or less often for heating small rooms. Maximum heating efficiency is achieved if the coil is installed on the chimney of a simple stove such as a potbelly stove with a high temperature of the flue gases.
A pipe heat exchanger is usually installed on the chimney of a metal stove installed in a garage or workshop to produce warm water or heating. It is also possible to install a coil on a sauna stove.
Necessary materials:
- pipe made of copper, aluminum or steel - about 3 meters;
- flexible hose for hot water supply with a diameter of ¾ inches - 2 pieces of the required length;
- a storage tank equipped with a float valve for water supply and a drain valve for its consumption;
- ball valve for draining the system.
Sequence of work:
- The most difficult thing when making such a heat exchanger is to bend the pipe into a spiral without reducing its cross-section. Copper pipes with a diameter less than 28 mm can be bent using a pipe bender without heating. Steel and aluminum, as well as larger diameter pipes, must be heated with a blowtorch before forming.
- You can also use this method: fill the pipe with dry sand and tightly plug its ends with wooden plugs. The pipe is bent according to the template - a pipe having the diameter of the chimney, after which the plugs are removed and sand is poured out, the pipe is washed under high pressure of water.
- Threads are cut at the ends of the pipe and adapters are installed for connection to the system.
- The pipe is installed on the chimney. To improve heat transfer, you can solder the coil onto the chimney with tin, having previously degreased the soldering areas and removed oxides with phosphoric acid.
- The tank is hung on the wall or placed on a support above the level of the coil. Connect the heater to the tank using flexible hoses. A drain valve is installed at the lowest point of the system.
Heat exchanger manufacturing
Tip for making a heat exchanger
You can make a heat exchanger from sheet steel, pipes bent in the form of a coil or horseshoe, an old cast-iron radiator, and even a heated towel rail.
Sheet steel heat exchanger
In the case of using sheet steel (thickness more than 2.5 mm), cutting is carried out, preliminary “grabbing” of the joined elements by welding, checking the geometry, and then final welding. The tank can be made either rectangular or cylindrical; in the latter case, you will need a metal bending machine.
Example of a heat exchanger for a brick sauna stove
Heat exchanger for brick oven
Sheet steel prices
Sheet steel
You should not use galvanized steel, because... At temperatures above 200 degrees, zinc begins to evaporate.
Nozzles are welded to the heat exchanger at the top and bottom to connect the coolant circulation pipes. It is desirable that the pipes have threads at their free ends, this will simplify installation.
A heat exchanger in the form of a register can be used in a brick kiln. It is made from copper or steel pipes, collecting them into a single “skeleton” through which water will circulate.
Heat exchanger - register
Video - Construction of a sauna stove with a heat exchanger
Ready-made internal type heat exchangers usually consist of a housing to which elongated leads are connected. The tank is hung on the front or any other wall of the furnace, and waste streams are discharged through holes in the wall. Fixation is carried out with spacer sleeves and clamping nuts.
Heat exchanger “Ermak”
Heat exchanger “Ermak”
When making a heat exchanger, it is important to know that pipes with a diameter of more than one inch must be connected to it, otherwise the movement of water to the “consumer” and back will be difficult. The best pipes for the manufacture of a heat exchanger and circuit are copper or stainless steel
Moreover, bending a copper tube will be much easier than a steel one, and the thermal conductivity of the former is 7.5 times higher
The best pipes for making a heat exchanger and circuit are copper or stainless steel. Moreover, it will be much easier to bend a copper tube than a steel one, and the thermal conductivity of the former is 7.5 times higher.
Step by step guide
Manufacturing of a ductless heat exchanger
- Prepare a container, preferably metal, plastic will take longer to heat up.
- Place the tank at the beginning of the heating system.
- Make 2 holes in the container for exits. One is at the top, through which hot water will be discharged. The second is at the bottom, cold liquid will flow from the system pipes.
- Place the outlets correctly; the rate of heat transfer will depend on this.
- Seal the holes hermetically so that the air temperature is not wasted on the battery, and the room is evenly heated.
- Use copper for the tube; it should bend well and transfer maximum heat into the room.
- Bend the tube into a spiral shape to create a coil.
- Place the spiral in the tank, the ends of the tube need to be brought out, and secure them well.
- Connect a threaded fitting to the ends of the parts.
- Connect a power regulator to the pipe; you can buy it in a store, it’s inexpensive, so you shouldn’t get hung up on making it yourself.
- The system will work properly without a regulator, but it is needed to regulate power and save energy. The power can be set at your discretion.
- Connect the terminals to the thermostat, and then the power wires.
- To prevent the tank from wearing out due to temperature changes, install an anode.
- Close all elements hermetically.
- Fill the tank with water, the heat exchanger is ready.
Liquid heat exchanger
The standard heat exchanger used with liquid coolant is a metal coil with a high thermal conductivity coefficient directly contrasting with the internal surface of the chimney. For better heat transfer and safety, the coil is placed in a metal casing and well insulated from the inside with non-flammable insulation, usually basalt wool.
The entire structure is mounted on the chimney section. The ends of the coil are brought out through the heat exchanger body and connected to the heating system, at the top point of which an expansion tank is placed. An annealed copper tube is best suited for making a coil. In addition, such a heat exchanger, due to its high thermal conductivity coefficient, will have dimensions 7 times smaller than a steel device.
The liquid heats up and, expanding, rises along the coil, after which it flows by gravity through the pipe into the heating radiator. When the heated liquid enters the radiator, it displaces the cold coolant, which heats up again in the coil. Thus, there is a natural circulation of water throughout the system. To create coolant circulation through the system, you need to accurately calculate the length and diameter of the coil, maintain the inclination angles of the supply and return, and much more. The significance of these calculations cannot be underestimated, since a simply non-working device is not as terrible as the consequences of a water hammer that can occur when the coolant boils.
However, this type of heat exchanger also has its disadvantages, namely:
- complexity of calculations and manufacturing;
- constant monitoring of temperature and pressure in the system;
- high coolant consumption caused by evaporation of liquid from the expansion tank. And if water is used, then if the system is not used in winter, the liquid must be drained;
- a significant decrease in the temperature of the exhaust gases, which can cause a decrease in thrust and incomplete combustion of the type of fuel used.
However, despite these shortcomings, such a heat exchanger can be made independently by anyone who knows how to handle a tool and has at least school knowledge of physics.
Gas equipment
A good alternative would be gas heating. Main gas is used here. Such boilers are efficient and reliable. The efficiency is 87% for the simplest modification. For expensive condensing modifications, this figure is close to 97%.
The heating device is compact, safe and automated. It requires maintenance no more than once a year. In this case, you have to go to the boiler room solely to change the settings and monitor their normal functioning. Compared to solid fuel, this is a fairly budget unit.
Gas equipment has its own nuances
Some general tips
When using heat exchangers, some problems arise that can “spoil your mood.” What are these problems and how can they be solved?
Temperature of heating water in the tank
Temperature of heating water in the tank
You need to “catch” the moment when it will be acceptable, but such a “moment” is almost impossible to catch. The fact is that while taking a shower, the stove continues to burn, and accordingly, the water temperature constantly rises. What to do? Putting out the fire in the stove? This, of course, is not an option.
We suggest solving the problem using a mixer. If there is a water pipe in the bathhouse, great; it will help not only create a comfortable temperature, but also, using simple automation, make filling the water container automatic. It will be possible to wash without saving water, and the risk of it boiling in the heat exchanger will be somewhat reduced. If there is no water supply, we recommend installing an additional container for cold water next to the warm water tank. It must be connected to the shower through a mixer.
Connection diagram
Water boils in the heat exchanger
Water boils in the heat exchanger
This happens especially often during installation of the heat exchanger directly in the furnace firebox. We guarantee that you will never be able to calculate the parameters of the heat exchanger in such a way as to completely eliminate such a phenomenon. The calculations are too complex and there are too many unknown and unregulated indicators. Calculations based on the speed of water flow can only be performed by a qualified design engineer who has an excellent knowledge of the laws of heat engineering, hydraulic engineering and installation. But the most important unknown quantity is the flame in the furnace.
No one will ever be able to say exactly how much heat a stove produces in each individual unit of time. It is impossible to quickly increase or decrease the flame intensity depending on the water temperature. We propose to solve the problem of boiling water using ordinary single-phase water pumps for heating systems. They are built directly into the pipeline, the power of the devices is 100÷300 W. Installing a circulation pump not only eliminates the risk of boiling, but also significantly speeds up the water heating time.
Circulation pump connection diagram
We hope that our information will be useful for bathhouse owners and will make it possible not to solve problems with heat exchangers, but to prevent their occurrence at the stage of manufacturing and installation.
Ways to increase efficiency
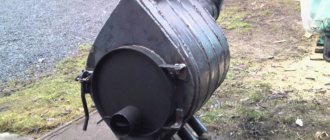
Potbelly stoves are made in various shapes and sizes. But they have one drawback in common - low efficiency. More than half of the thermal energy, in the literal sense of the word, flies out into the chimney. The irrational use of heat has led to the fact that the owners of these heating devices began to think about possible changes in the design of the furnace to increase its efficiency. The solution to this problem could be a partial modernization of the potbelly stove. There was no single concept for solving this issue, and each stove owner began to solve the problem independently, by trial and error.
Increasing the efficiency of a potbelly stove means receiving additional heat from the heating device while maintaining a constant amount of burned fuel. This can be achieved in several ways:
- changing the heat transfer surface,
- increase in heat removal;
- using more high-calorie fuel;
- increasing the heat capacity of the furnace.
The potbelly stove gives off heat to the surrounding space not only with its body, but also with its metal chimney. You can increase the heat transfer surface of the device by revising its dimensions upward. This option is possible when creating a stove with your own hands. Having already made a potbelly stove, you can do it in another way. Usually a corner is welded to a chimney made of a metal pipe. Position it with its apex facing the element along its entire length. The angle is installed around the pipe. Thus, the area of the heat transfer surface can be increased by 3-4 times, depending on the size of the corner.
Another option for increasing the heat transfer surface is to make a chimney running inside a large area. For this purpose, a chimney with turns is made. They are performed in the form of smooth transitions. It is undesirable to create turns at right angles, as the potbelly stove may start to smoke. The last section of the chimney is installed vertically. A pocket is made on it with a hatch for cleaning soot.
Bath stove with heat exchanger: operating principle and installation
Principle of operation
Let’s make a reservation right away: any calculations of the required dimensions of a heat exchanger for a sauna stove will always be approximate. For example, heating a standard sauna room will require approximately 5 kW of electricity. This means that this is exactly the amount of energy we should get from a furnace with a heat exchanger.
On the question of the shape of the heat exchanger for a sauna stove - it all depends on your imagination. The simplest, cheapest and therefore most common option is a stainless steel pipe system. An equivalent replacement can be considered units welded from several channels.
We will take sheet metal as a basis, the thickness of which is at least 2 mm. From it you will need to build a cylindrical (later upper) and rectangular (lower) tank, and connect them with pipes. The size (or rather the area) should be calculated in accordance with the dimensions of the intended room.
Before final installation, it would be a good idea to evaluate the accuracy of the calculations made. To do this, the cut parts are secured by welding. After checking, you can begin assembly. Next is the strength assessment: we weld the lower pipe, and fill the heat exchanger itself with water, while connecting the outlet hole to the main tank.
If a pump is not provided in the system, then the following device and relative arrangement of pipes is recommended: cold water from the tank flows by gravity through the pipe to the stove, and hot water returns to the tank. The main condition: the pipes must be installed at an angle of 2-5 degrees.
The need for thermal insulation of the tank is determined by the possibility of its multi-purpose use, including for heating adjacent rooms.
Regardless of the form and method of self-production, the weak point of any heat exchanger is metal corrosion. Metal surfaces, by definition, have low resistance to aggressive environments, including water. This is why there is a need for internal surface protection.
Experts in this field recommend taking a responsible approach to choosing a heat exchanger for a bath and not skimping on materials and proper installation. Proper operation is also important. Here are the basic rules you should know:
- The main property of pipes when heating a heat exchanger is expansion. As a result, there is a possibility of their length increasing. Therefore, it is prohibited to use fixed connections when attaching pipes to walls.
- Choose the heat exchanger wisely in terms of power (size). This should not negatively affect the performance of the oven. Ten percent heat extraction is the limit. And if the already designed sauna stove is not powerful enough, opt for a more modest heat exchanger.
- The external water tank should be selected based on the following condition: the water in the system should heat up only two hours after the start of the fire. Not before! Otherwise, boiling water will quickly fill the steam room with wet steam. I don't think this is of any use to you.
- It is better to fill the tank with water in advance. It is not recommended to do this when the sauna stove is already at a high temperature.
- It is recommended to use a material that can withstand high temperatures as a sealant for threaded connections. It seems to be an obvious fact, but it is often forgotten.
Nowadays, the construction market is flooded with offers of all kinds of bathhouse units. Starting from a massive cast iron stove, and ending with simple and cheap options for wood stoves with a heat exchanger, where the price of the latter has little effect on the overall cost of the system. The choice is yours! Let us just give you a little advice: the heat exchanger must be made of high-quality steel with a good level of heat resistance and heat resistance.
Power selection
Without knowing what the building's heating needs are, selecting equipment is difficult. The calculation can be approximate and accurate. The first option is preferred by sellers of heating equipment, as it provides a relatively accurate result. In this case, the thermal power is calculated in accordance with the area of the premises that are heated.
They look at a single room and find out what area it has. The resulting value is multiplied by 120. The energy required for the entire country house is determined after combining the indicators of all rooms. But the exact method is much better. It assumes:
- Multiplying the area of premises where only one wall is in contact with the street by 100. It is important that there is one window on the same side.
- Multiply by 120 if we are talking about a corner room with one window.
- Multiply by 130, when we mean a room with two or more windows, as well as two external walls. When calculating using an approximate method, residents of cold regions may not receive enough heat, while those living in the south may overpay for overly powerful equipment.
In this video you will learn how to make a heat exchanger: The exact calculation method is carried out by specialists. It provides a clear understanding of how much heat can be lost in any building. Before proceeding with specific calculations, determine the area of doors, windows and walls. Each building material has one layer thickness or another. It also needs to be taken into account.
Today, various types of boilers are produced with one or another type of fuel and energy carriers. The main types of household heat generators are:
- gas;
- solid fuel;
- electric.
We suggest you read: How to glue tiles to a stove
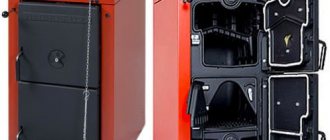
There are modifications that run on liquid fuel. Direct combustion boilers operate on solid fuel. The same applies to pellet and pyrolysis boilers. Such boilers are in demand, since their operation involves low costs. This is coal and firewood, which are relatively inexpensive. There is a possibility of connecting to natural gas, but this is expensive. People prefer to buy coal and wood-burning devices.
First, you need to select a boiler
Operating a heat source that runs on solid fuel is somewhat reminiscent of simple stove heating. You have to find firewood, spend time and energy, and load it into the firebox. Typically, solid fuel boilers have a certain inertia. This means that water heating will stop gradually after closing the air damper.
Types of heat exchangers for sauna stoves
Structurally, the heat exchanger can be a coil or a tank with a maximum volume of 5 liters and two pipes for connecting a water tank/radiator.
According to the mounting method, heat exchangers are divided into two types:
- internal.
Such products are fixed on one of the side walls of the furnace or mounted on its bottom. It is also possible to install a water jacket, which literally encircles the fuel chamber from the inside or is located in the space between the stove casing and the walls of the firebox; Heat exchanger for furnace - external.
Heat exchangers of this type are fixed to the chimney or attached to the wall of the furnace. External heat exchanger on pipe
Internal type heat exchangers have the best heat saving indicators. The water in them will heat up until the stove cools down completely down to its last brick or stone.
The fastest heating of water is provided by internal heat exchangers and external ones installed on the chimney. At the same time, the first products often imply the need to make design changes/additions to the sauna stove, while the second cannot be called a decoration for the steam room (a wide tank does not fit well into the interior).
Example of an internal steel heat exchanger in a brick kiln
If we compare products in terms of ease of installation, the palm is occupied by heat exchangers that are hung on the outer walls of the furnace. Such products have a long service life and do not spoil the appearance of the stove, but the water in them takes longer to heat up and cools much faster.
Main advantages
The undoubted advantages of using a heat exchanger in the furnace design are:
- Simultaneous implementation of several functions: heating water, air in several rooms, as well as steam generation;
- Options for installing the tank at a considerable distance from the stove (even in another room);
- Durability. When using modern materials and following installation technology, the service life reaches 20 years.
- Aesthetic appearance
- Availability of care;
- Easy installation;
- High efficiency;
- Possibility of installation both in a Russian traditional bath and in a modern Finnish sauna;
- Space saving due to compact dimensions;
- High power and, as a result, fast heating to the required temperature;
- Absence (or insignificance) of deformation during heating
Specifications
According to physical properties, warm air masses rise upward, and even in a steam room, where it is hot, the floors are cold. But such a dissonance between the heat from above and the cold from below makes bathing procedures uncomfortable.
Modern technologies make it possible to improve the microclimate in the bathhouse by installing different types of heated floors under the floor covering:
cable - are a heating cable laid under the finishing coating, powered by electric current;
infrared - a film with infrared plates inside that heat up when energy is supplied, the simplest structure in terms of self-installation;
water - a pipeline located under the floor in the bathhouse, the coolant is heated water.
However, the bathhouse has high humidity, so many building owners do not risk installing electric heated floors themselves.
In this regard, water heated floors are considered more popular. After all, the bathhouse is equipped with a stove, and it is possible to heat the coolant from it, so this combination is also economically profitable.
Advantages and disadvantages of an indirect heating boiler
The advantages of using a DIY boiler:
- connection to the central heating system;
- installation near a heating boiler;
- low costs for installing the circuit;
- significant reduction in energy consumption;
- providing water at a constant temperature.
The disadvantages include the following:
- installation of a boiler requires a large area or a separate room;
- heating a large volume of water requires a long time, while heating of the premises will be carried out with less intensity;
- rapid formation of deposits on the serpentine tube, requiring chemical or mechanical cleaning twice a year.
Then the water will be heated using electricity. In this case, you can turn on the boiler at night, when night, low tariffs are in effect, or as needed.
Making a boiler yourself
Due to the rather simple principle of operation, such a device can be made independently. Now let's look at how to make an indirect heating boiler with your own hands.
All work on the manufacture of a water heater consists of assembling the component parts of the structure:
Tank
A tank is used as a boiler capacity. Its volume depends on the needs of the home owners for hot water and is calculated from the amount of 50–70 liters per person daily. Approximately, a 200-liter boiler is suitable for a family of 4 people.
For the heating device, the tank must be made of stainless steel, aluminum alloys or other corrosion-resistant material. An alternative is a gas cylinder, but its walls must first be cleaned and primed. Without this action, the hot water will smell like gas.
5 holes are made in the tank: 2 on the side for mounting the coil, one at the bottom for the inlet pipe, one at the top for water intake and one at the bottom for the drain valve. To use the boiler outside the heating season, it is necessary to install a heating element. The bottom hole is also drilled for it. Shut-off elements or ball valves are attached to the holes made.
Coil
A copper or brass tube is suitable for this element, the diameter and length of which depend on the volume of the tank. On average, for every 10 liters, 1.5 kW of thermal power of the serpentine tube is calculated. You can use a tube made of metal-plastic or other metal with good heat transfer.
The tube is wound in a spiral onto a cylindrical mandrel. To do this, you can take a log or a large diameter pipe.
When winding the coil, it is important to monitor the turns:
- in order to ensure the best contact of the heating surface of the tube with the heated water, the turns should not come into contact with each other;
- You should not wind it with excessive force, otherwise it will not be easy to remove the coil from the mandrel.
- The number of turns on the coil is calculated from the volume and height of the tank.
Thermal insulation
The outside of the tank must be covered with a layer of insulation. It is necessary to increase efficiency and reduce heat losses. To insulate the container, polyurethane foam, mineral wool or any other heat-insulating material that is attached to the base with wire, glue or strip ties is suitable. For a neat appearance, it is better to cover the tank body with thin sheet metal or foil insulation.
You can also insulate the tank using another container of larger diameter. To do this, a do-it-yourself boiler is inserted into a large tank, and the wall is filled with insulating material or foam plastic, using the principle of a thermos.
Installation
- the coil is mounted in the center or along the walls inside the tank, and pipes are soldered to its inlet and outlet pipes;
- for a vertically standing boiler, supports are welded to the bottom, for a mounted device - “ear” loops;
- the heating element is installed;
- the boiler is tightly closed with a lid;
- connecting the coil according to the diagram for making an indirect heating boiler with your own hands to the heating system circuit;
- connecting the inlet/outlet pipe for water;
- pipe distribution to the kitchen or bathroom at the water collection point.
What is a heat exchanger and why is it needed?
Sauna stoves with a heat exchanger are stoves in which there is a special space where cold water enters, heats up and exits through pipes to radiators or a hanging tank. Moreover, the function of the heat exchanger of sauna stoves is not only to heat water for the shower - those remote tanks that are located in the rest room or dressing room also warm them up.
There are 2 options for heat exchangers:
- The internal heat exchanger is a coil inserted into the side of the furnace chamber or running along the bottom, or a so-called “jacket” that completely covers the firebox.
- The external heat exchanger is a chimney module, a pipe that is surrounded by a sealed container.
Absolutely all heat exchangers, regardless of their type, must be filled with liquid - antifreeze or water. The liquid is supplied to them by a communicating container - a water heating battery or a hanging tank. For connection, 2 fittings are traditionally used: one from below, the other from above. And the whole scheme of operation of the heat exchanger is extremely simple - everything happens thanks to the natural circulation of heated liquids, or by connecting a pump powered by electricity.
Experienced stove makers advise giving preference to open water heating systems in the bathhouse - that is, without pressure. Another important point is that the most effective water heating system in a bathhouse is considered to be one whose total length of pipes does not exceed three meters. Moreover, in practice, this turns out to be enough to place the tank itself right behind the wall of the steam room.
The thickness of the pipe is also important - it is better if it is not less than an inch, otherwise there will be noticeable resistance to the flow of liquid, and a sauna stove with a heat exchanger without a pump will not be able to circulate water.
Some recommendations
It’s not difficult to create a water jacket for a stove with your own hands. And it can already be installed in any stove - metal or brick. Heating a house with wood is fraught with frequent fiddling with heating equipment, but in the absence of gas, other alternatives look more expensive. To implement more efficient home heating, use our recommendations:
- Do not skimp on the thickness of the sheet iron - remember that the service life of the furnace depends on this;
- Be sure to use thermometers and pressure gauges to monitor the operating parameters of the heating system;
- Do not use alternative coolants that are not resistant to high temperatures;
- Ensure that you get rid of heat losses - this will allow you to count on economical use of firewood for heating your home.
Installing a heat exchanger on a sauna stove
Since all of the listed models differ significantly in their ability to withstand overheating, the installation location for a specific model is selected based on the design of the firebox and the material from which the heat exchanger is made.
Frame or register systems are typically used in brick sauna stoves. The device is embedded in the upper part of the firebox or in the roof of the furnace during its construction. In this case, the pipes for connecting to the tank are led out from the back or sides of the furnace body.
Flat coils made of copper and stainless steel are installed in the same way. They can be embedded either in the vault or in one of the vertical walls of the combustion chamber in a sauna stove.
Twisted copper coils are traditionally installed on the top chimney. Sometimes the coil is located directly under the top-mounted central hot water tank. The tank heats water for spraying the heater, and the copper heat exchanger heats water for the shower or washing compartment.
Disc and box heat exchangers are installed on one of the side walls in a sauna stove. They are usually used for steel or cast iron stoves. To install, just cut two holes in the wall. After that, spacer bushings are put on the outlet pipes, and the heat exchanger is installed inside the firebox using union nuts. This type of heat exchanger is also called dry, since water does not get inside the combustion chamber under any circumstances.
Important! Box and register heat exchangers are installed inside the sauna stove so as to reduce the contact of the metal surface with the hottest part of the combustion front.
The heat exchanger should receive most of the heat inside the stove not through convection and flow of hot gases, but in the form of infrared radiation from the walls and roof of the sauna stove. To avoid overheating, the heat exchange circuit pipes must be shielded with stainless steel sheets. As a result, the service life increases, and the water in the heat exchanger is heated more evenly, without boiling and steam fountains.
Connection diagram for a heat exchanger for a bath
Almost all models of heat exchange devices operate on the principle of gravity or natural convection of water in a semi-closed pipe system. Therefore, when developing an installation diagram for a heat extraction device, it is necessary to adhere to two rules:
- The inlet and outlet pipes of the heat exchanger must be located at different levels, the vertical distance between the lower and upper water supply points must be at least 20-25 cm. The lower pipe is used for supplying cold water, the upper pipe is used for discharging boiling water;
- Connection to the heating circuit pipes of the sauna stove must be made only using flexible connections, and the couplings must be sealed with heat-resistant silicone.
We are not talking about flexible rubber hoses in a metal braid; they are not suitable for these purposes, even if the label is marked “for hot water” or something similar.
Important! Due to the strong thermal radiation coming from the walls of the sauna stove, the rubber ages and burns out in a matter of weeks.
Experienced users recommend connecting the tank to the heat exchanger in the bath using flexible stainless steel gas hoses.
How to connect a heat exchanger to a sauna tank
The classic installation scheme is a remote tank for a bath with a heat exchanger. This means that a container with hot water for showering and cleaning the room is located either on the nearest wall or outside the steam room, closer to the shower stall.
It is important to ensure a certain height difference between the exit from the heat exchanger of the sauna stove and the bottom of the container with water. Typically this value is selected within the range of 50-70 cm
For box and register circuits, flat coils, the tank is located at a level of 120 cm above the floor level. This is convenient; you can scoop up hot water through the top hatch.
It’s another matter if the heat exchanger coil for the bath is installed on the chimney pipe. In this case, the tank will have to be raised to a height of 180-200 cm, so install a bronze hot water tap at the bottom or at the outlet of the circuit.
The pipelines leading from the heat exchange circuit of the furnace to the tank are usually located at a slope. The cold line from the lower pipe is supplied to the supply tank at a right angle, this ensures the maximum hydrostatic head in the circuit. The outgoing line is installed at an angle of 25-30°. This is done to separate air and steam bubbles formed in the water flow during heating.
On the cold main, be sure to make an elbow and install a drain ball valve, with which you can easily drain the water from the bath heat exchanger.
Tank with water circuit connection
The heat exchanger in the form of a tank located around the chimney is made of stainless steel or galvanized sheet. In this case, the design of the furnace should be taken into account. If it has a combustion mode for flue gases, and the smoke temperature at the furnace outlet does not exceed 200 degrees, you can use any material to make the heat exchanger.
In simple stoves without smoke circulation, the smoke temperature at the outlet can reach 500 degrees Celsius. In this case, it is necessary to use stainless steel, since the zinc coating releases harmful substances when heated strongly.
Most often, heat exchangers of this type are installed on a sauna stove and used as a water heater for domestic hot water. The tank is equipped with fittings in its upper and lower parts, and pipes leading into the system are connected to them. The hot water tank is installed in the shower or steam room. It is possible to use such a system for heating a utility room or garage.
Heat exchangers for industrial furnaces are sold complete with some modifications; when installing a new furnace, you can choose a suitable model with a ready-made water circuit. You can also make a heat exchanger for the chimney with your own hands. To make it you need the following materials:
- pieces of stainless steel pipe of different diameters with a wall thickness of 1.5-2 mm, sheet steel;
- 2 1-inch or ¾-inch fittings for connecting to the system;
- storage tank made of stainless steel or galvanized steel with a volume of 50 to 100 liters;
- copper or steel pipes or flexible connections for hot water supply;
- ball valve for draining coolant.
Manufacturing sequence for a sauna stove or potbelly stove:
- Work begins with preparing a drawing. The dimensions of the tank installed on the chimney depend on the diameter of the pipe and the type of stove. Furnaces of a simple design with a direct chimney are characterized by a high temperature of the flue gases at the outlet, so the dimensions of the heat exchanger can be quite large: up to 0.5 m in height.
- The diameter of the inner walls of the tank must ensure a tight fit of the heat exchanger on the smoke pipe. The diameter of the external walls of the tank can exceed the diameter of the internal ones by 1.5-2.5 times. These sizes will ensure quick heating and good coolant circulation. It is better to equip furnaces with low flue gas temperatures with a small tank to speed up its heating and avoid the formation of condensation and deterioration of draft.
- Using a welding inverter, the parts of the workpiece are connected, ensuring the tightness of the seams. Fittings for supplying and withdrawing water are welded into the lower and upper parts of the tank.
- The tank is installed tightly onto the smoke fitting of the furnace, coating the connecting seam with heat-resistant silicate sealant. An adapter from a non-insulated pipe to an insulated one is placed on top of the heat exchanger tank in the same way and the chimney is removed from the room through the ceiling or wall.
- Connect the heat exchanger to the system and storage tank. At the same time, the required degree of inclination is maintained: the cold water supply pipe connected to the lower fitting must have an angle of at least 1-2 degrees relative to the horizontal plane, the heated water supply pipe is connected to the upper fitting and, with a slope of at least 30 degrees, is led to the storage tank. The storage tank must be located above the heat exchanger level.
- A drain valve is installed at the lowest point of the system. In the bathhouse it can be combined with a tap for drawing warm water for the steam room.
- Before starting operation, the system must be filled with water, otherwise the metal will overheat and leak, which can lead to poor sealing of welds and leaks.
- The water supply to the storage tank can be done either manually or automatically using a float valve. When filling manually, it is recommended to place a transparent tube on its outer wall to monitor the water level in the tank, so as not to run the system dry.
A do-it-yourself water heater exchanger is shown in the video.
Securing the remote tank and installing the heat exchanger
Remote sauna tank
For a sauna stove, a tank with a volume of 80-120 liters is sufficient. This container must be hung on the wall of the bathhouse so that the level of the tank is higher than the stove.
Scheme for connecting the tank and installing the furnace with heat exchanger
Connection diagram
Step 1. Choose a place to mount the tank. This can be either a steam room or a shower room behind an adjacent wall. We determine the mounting height using recommendations for the slope of inlet/outlet pipes.
Layout of the furnace and tank
Step 2. Most experienced craftsmen do not recommend hanging the remote tank directly on the wooden wall of the bathhouse. Therefore, we measure the width of the tank, saw the rail into several sections of the appropriate size, and fasten the sections to the wall of the bathhouse with nails.
Step 3. The tank must have technological holes for attaching it to the wall. We secure the tank with self-tapping screws or dowels, checking horizontal and vertical. The structure can be further strengthened with brackets, fixing them under the bottom of the tank.
Brackets under the tank bottom
Step 4. The remote water tank has three or four pipes. Two of them are intended for connection to the heat exchanger, the third is for filling the tank with water (it may not be there), through the fourth hot water is supplied to consumers. A check valve is connected to the pipe through which the tank will be filled with water. If the system is open (water is added manually through an open tank lid), then a non-return safety valve is not needed.
A faucet with or without a shower hose is connected to the pipe from which heated water will flow.
Step 5. There are two pipes left, to which you should connect corrugated steel pipes or install a copper network. Connections are made using fittings. It is permissible to use metal-plastic pipes, connecting them with adapters to the pipes of the tank and heat exchanger. All threaded connections are sealed with thread sealant.
Flexible water supply
Which material is better?
When constructing a heat exchanger, metal parts are used - galvanized sheets, gas cylinders, pipes of various diameters, cast iron blanks, etc. Cast iron is not recommended because, compared to steel, it is brittle and heavy, which makes it difficult to install on a chimney.
The best option is austenitic steel. Stainless steel easily tolerates thermal changes, is resistant to mechanical damage, and can be independently processed and welded.
Table of main technical characteristics of AISI austenitic steels. You can see how the properties of material types 304 (304L) and 316 (316L) change when heated
Galvanized steel is inferior to alloyed or austenitic steel, since it is not intended to be heated. High-temperature conditions lead to the release of zinc oxides, which are harmful to health, so if you plan to increase the temperature in the chimney to + 419.5 ºС, galvanizing should be abandoned. It is better to purchase expensive but safe material.
