Savig
4020 0 0
Savig October 16, 2017Specialization: master of interior finishing works. I am well versed in power tools for repair and construction. Formerly a teacher at a radio engineering college.
Thermal insulation of the attic floor with sawdust - an old method proven by our ancestors
Are you planning to insulate your attic with sawdust? Then I propose to figure out together how to do it correctly. Additionally, we will consider the positive aspects of choosing such a thermal insulation material.
Insulating the attic with sawdust: preparation and methods
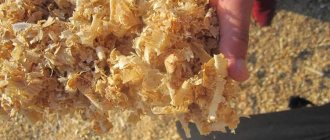
Sawdust is wood shavings that are formed as a result of processing wood materials. Insulating an attic with sawdust is an old and proven method that does not require serious financial and labor costs. This method of insulation is perfect for both commercial and residential buildings.
Methods of using sawdust
There are 4 methods for insulating with sawdust:
- backfill;
- fill;
- plastering;
- use of slabs.
To backfill, wood sawing waste is mixed with lime, which prevents the appearance of rot or mold even with increased humidity and protects the insulation from rodents and various beetles.
After backfilling, the insulation must be compacted, adding new sawdust, until a layer of the same density is obtained over the entire height.
After 2–3 years, and sometimes earlier, you have to add additional sawdust, because the lower rows are caked and compacted .
To fill, wood sawing waste is mixed with various binders in different proportions.
Then the finished composition is poured into voids or cavities prepared for it , where it turns into a fairly strong and hard material with low thermal conductivity.
By changing the amount of sawdust and binder, the thermal conductivity and strength of the insulating material are regulated.
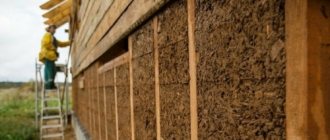
For plastering, the same compositions are used as for pouring, only more suitable proportions are selected . In addition, before plastering, the walls are lined with chain-link mesh or its plastic equivalent, this improves the adhesion of the insulating layer to the wall.
Insulating boards are made from the same compounds that are used for pouring and plastering, only by selecting the most suitable binder.
After manufacturing, the slabs are stacked in a dry, ventilated area, then secured to the walls or ceiling using the same mortar and anchor nails or bolts.
In addition, they can be laid in floor cavities formed by floor joists and the lining or ceiling of the lower floor.
The following are used as binders:
- cement;
- gypsum;
- clay;
- PVA.
Read more about these insulation methods, as well as about choosing the optimal binder and the correct proportions here.
Advantages and disadvantages of sawdust insulation
It should be said that today it is difficult to find a cheaper material for insulation than sawdust. They can be purchased cheaply in areas where woodworking is active or at any sawmill. The environmental friendliness of the material speaks for itself. Using sawdust mixed with clay or cement gives results no worse than mineral wool. The weight of sawdust is light, so it does not create a large load on the attic floor. They do not emit an unpleasant odor, do not cause allergies, and do not irritate the eyes and respiratory tract, such as mineral wool.
Sawdust is the cheapest and most environmentally friendly material for insulation.
Transporting sawdust to a cold attic will not cause any particular difficulties. They can be delivered there in small portions and this task can be completed by one person. Sawdust easily fills hard-to-reach places - cracks and curved gaps.
Rules for choosing insulation
The first thing you need to pay attention to is the size of the elements. Sawdust of the medium fraction is best suited: large ones show low efficiency, while small ones are more difficult to work with. You need to choose woodworking material - such material is already well dried and will not rot or deteriorate. If necessary, the insulation can be dried in the open air at positive temperatures.
The type of wood is taken into account - coniferous species are characterized by greater resin content, therefore they are considered the most suitable material for insulating residential premises. However, in a bathhouse, resin will cause inconvenience; here preference should be given to deciduous wood.
Important! Before insulating the ceiling of a private house with sawdust, the material must sit for 9-12 months. This is necessary to reduce the level of sugar, which causes fermentation and rotting of fractions.
If there is debris in the mass of raw materials, it should be selected, the sawdust sifted and further dried.
Advantages and disadvantages of sawdust insulation
It should be said that today it is difficult to find a cheaper material for insulation than sawdust. They can be purchased cheaply in areas where woodworking is active or at any sawmill. The environmental friendliness of the material speaks for itself. Using sawdust mixed with clay or cement gives results no worse than mineral wool. The weight of sawdust is light, so it does not create a large load on the attic floor. They do not emit an unpleasant odor, do not cause allergies, and do not irritate the eyes and respiratory tract, such as mineral wool.
Sawdust is the cheapest and most environmentally friendly material for insulation.
Transporting sawdust to a cold attic will not cause any particular difficulties. They can be delivered there in small portions and this task can be completed by one person. Sawdust easily fills hard-to-reach places - cracks and curved gaps.
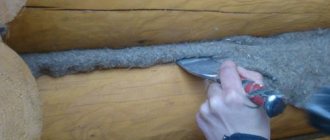
Before directly laying the prepared mixture, it is necessary to prepare the surface on which the heat-insulating layer will be laid. To do this, glassine or film is laid on the surface of the attic floor. Sometimes they use another method. The cracks in the ceiling are covered with clay, and a small layer of sand is poured on top. This is necessary in case of cracking of clay; sand will fill the resulting cracks.
Before preparing the mixture, sawdust must meet the following criteria
:
- dryness. You can take it into your fist and squeeze it. They should crunch and not release any moisture;
- aging must be at least 1 year;
- there should be no signs of mold and mildew;
- The sawdust size should be medium; small sawdust will require a lot of mixture, which will lead to a deterioration in thermal conductivity properties.
Main characteristics of sawdust
There are several characteristics that help you compare different insulation materials and choose the one that best suits your specific situation.
These are the characteristics:
- cost (excluding delivery);
- thermal conductivity;
- vapor permeability;
- resistance to high humidity and condensation;
- life time.
Cost is one of the most important parameters, especially if you have to insulate a large area . After all, the cost of 1m2 of the cheapest modern material, even without taking into account delivery costs, exceeds 150 rubles.
Therefore, when insulating a large house, the cost of purchasing insulation alone amounts to hundreds of thousands of rubles . Sawdust is much cheaper.
You can read more about their costs here.
Thermal conductivity is another important parameter on which the thickness of the layer required to reduce heat loss to a given level depends.
In this parameter, sawdust is inferior to all modern insulation materials, but you can slightly increase the thickness of the layer and bring heat loss to a given level.
In terms of thermal conductivity, 10 cm of wood sawing waste corresponds to a layer of mineral wool 8–9 cm thick and a layer of polystyrene foam 7 cm thick.
Vapor permeability is the ability of a material to pass water vapor through itself. This characteristic is very important for materials that are used to reduce heat loss in breathable houses built from wood or hollow clay bricks.
The main advantage of such houses is that the humidity in them is the same at any time of the year, because their walls remove excess moisture outside and into the atmosphere.
In terms of this parameter, sawdust leaves any other materials far behind, because of all modern insulation materials, only mineral wool allows steam to pass through at least a little. The rest of the materials completely block this process , which is why the microclimate in the house changes not for the better.
Resistance to high humidity and condensation is important for any insulating material, because humidity is always present in the air, and condensation occurs when temperatures change.
Sawdust absorbs excess moisture, and after a while, when air humidity drops, it releases steam. Therefore, humidity cannot harm them , which cannot be said about mineral wool, which, even if it gets a little wet, sharply loses its thermal insulation properties.
The actual service life of a material can only be determined by its condition after some time.
Polystyrene foam, polystyrene and polyurethane foam rarely withstand 30 years, because they are destroyed by oxygen and ultraviolet radiation , mineral wool can withstand 50–70 years, and sawdust can easily withstand a service life of 150 years.
In Russia and other countries there are houses built in the early and mid-19th century and insulated with sawdust. Despite such a considerable age, the sawdust insulation is in excellent condition and does not require either repair or replacement.
All this allows us to draw an unambiguous conclusion - in terms of the totality of its characteristics, sawdust is in no way inferior to any modern insulating material, and when used correctly, it is noticeably superior to them .
Methods for insulating an attic with sawdust
1. Insulation with plaster
.
Before actual work, sawdust should be treated with an antiseptic composition. Next, the resulting mixture is thoroughly dried and mixed with fluff lime. Its use will protect the thermal insulation composition from small rodents - mice and rats.
The amount of fluff lime should be 10% of the total mass of the base composition that will be laid on the attic floor. The prepared mixture is thoroughly mixed to obtain a homogeneous composition. To achieve uniformity of the composition, prepare a wooden or iron shield, on which the components are mixed with shovels until smooth.
To ensure that the insulating composition does not shrink over time and become loose, which will lead to a noticeable deterioration in the characteristics of the heat-insulating layer, it must be supplemented. To do this, add 5% gypsum to 10% fluff lime and 85% sawdust.
When preparing the mixture, I use moistened sawdust. First of all, sawdust is mixed with fluff lime. After this, gypsum is added and the resulting solution begins to be quickly laid, because the gypsum component quickly hardens. Taking this into account, it is necessary to prepare the mixture in small portions so that everything is laid before the gypsum hardens.
. Otherwise, there is a high probability that the prepared mixture will harden even before it is laid on the ceiling.
The resulting mass, after the above-described manipulations, will have a porous structure and good heat-insulating parameters. Shrinkage, which will occur artificially due to the addition of lime, will increase the service life of the heat insulator and improve its thermal insulation characteristics. The prepared insulation is poured into the roof cavity 20-30 cm thick. After laying the insulation, it must be compacted well. After compaction, a dense layer of thermal insulation is obtained, which prevents heat from leaking from the interior of the house.
2. Insulation with clay
.
When preparing a solution with clay, sawdust must meet the criteria described above. To begin with, take five or six buckets of clay, which are filled with water. The clay should be well soaked, after which it is thoroughly mixed with water until a homogeneous mass is formed. Sawdust is poured into a pre-prepared container and the clay solution begins to be added little by little. The resulting mixture should have medium thickness and a homogeneous composition.
On the surface of the ceiling, from the attic side, ordinary film or glassine is laid, which is secured using a construction stapler. For summer rooms, the solution is laid in a layer of at least 5 cm, and for winter rooms in a layer of 10-15 cm and lightly compacted. The solution is then left to dry for several days. After drying, the layer of thermal insulation of clay and sawdust is examined for cracks. If any are identified, they are sealed with mortar or simply clay. After these manipulations, the insulation layer remains to dry longer until it hardens completely. After this, you can lay down the flooring from the boards for movement around the attic space.
For greater clarity, we suggest you watch the thematic video below.
Insulation technology
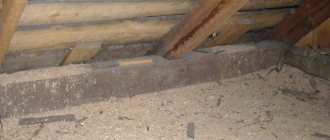
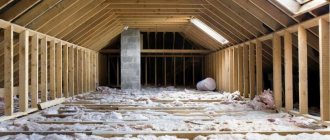
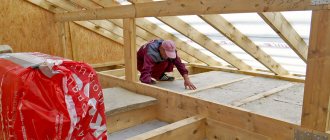
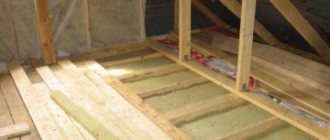
Often, dry sawdust or blocks of it are used to insulate the attic floor along the beams.
The technology consists of 3 stages:
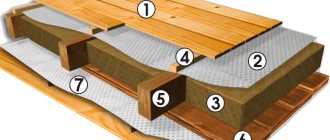
- Membrane installation. First, the beams and subfloor of the attic are wrapped in a vapor barrier membrane, with the vapor-permeable side facing down to allow air to pass through the sawdust. To save money, some use glassine, but this option is worse.
- Installation of insulation. Then sawdust is poured between the beams or blocks are laid.
- Installation of vapor barrier. A layer of the same vapor barrier is stretched over the beams on top. A ventilation gap of 20–50 mm is left between the membrane and the insulation. After which you can lay the floor of the attic.
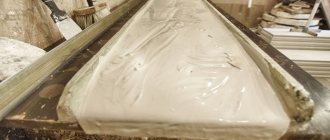
If the bathhouse floor is insulated, then instead of a vapor barrier, waterproofing is attached to the bottom, most often foil or polyethylene. But for baths there is an even better option: a cement or clay mixture can be laid between the beams in its raw form and immediately leveled (as in the photo below), here you can do without a vapor barrier at all.
Laying the raw mixture directly between the beams
How and how to insulate an attic from the inside? DIY thermal insulation
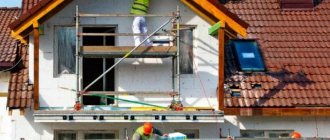
The construction of an attic space during roof construction is widely popular, since this space can be used to increase the area of the house. It’s not at all difficult to create comfortable and suitable living conditions by insulating the attic roof from the inside with your own hands. You just need to follow a certain sequence. Considering the fact that the contact of the roof with the external environment has a significant area through which up to 30% of heat energy is lost, special attention is paid to the choice of insulating materials.
The most common are: mineral wool, glass wool, polystyrene foam, ecowool, polystyrene foam and sawdust. Let's compare the technical characteristics, advantages, and disadvantages of the main types. The table also shows their estimated cost. By the way, contrary to popular belief, the price of insulating an attic with Penoplex is not the most affordable.
| Type of insulation | Brand | Advantages | Flaws | Prices, rubles |
| Mineral wool | Rockwool Minslab P 75 | plasticity, preservation of heat and sound insulation properties for 30 years or more | under the influence of high temperature toxic substances are released | 1650 per m3 |
| Glass wool | Izover classic 100 mm | ease of installation, fire safety, durability | emits harmful dust, care must be taken during installation | 650 per pack |
| Polyurethane foam | Eurotemp | allows you to create a monolithic layer, with no gaps, holds well on any surface, does not pose a health hazard, you can insulate the attic in a matter of hours | There are 2 types: closed cell and open cell, the second is cheaper, but not suitable for use without a vapor barrier, you need to hire or purchase a portable unit | from 390 to 600 per m3 |
| Ecowool | "Extra" | environmental properties are similar to wood; the composition contains an antiseptic that protects the material from exposure to the external environment; The thermal insulation of an eco-wool attic is absolutely safe for health; sound insulation properties are superior to polystyrene foam and mineral wool, does not require vapor barrier | shrinks over time, costs a third more than mineral wool | about 450 for 15 kg (packaging), for 1 m3 you need about 45-75 kg |
| Extruded polystyrene foam | Penoplex Wall | low thermal conductivity, high strength, immunity to moisture, quality, service life up to 40 years | vapor permeable, attacked by rodents, fire class G3 | from 1200 to 1400 per package |
| Sawdust | – | environmental friendliness, accessibility, possibility of use at home | one of the longest ways | from 20 to 70 per bag |
Features of the use of each type
Insulating the attic from the inside, according to experts, is the most effective measure for creating a warm attic.
The technology for performing thermal insulation work from mineral wool, penoplex and glass wool consists of the following stages:
- Cleaning rafters with antiseptic treatment.
- Installation of surface sheathing from the inside of the roof.
- Laying a waterproofing layer that protects against moisture penetration (for example, polyethylene film or special membranes).
- Location of insulation. The slabs are laid in a spaced pattern or in a checkerboard pattern, depending on its type.
- Installation of vapor barrier.
- Exterior finishing.
Despite the general principle of performing thermal insulation work, each material has its own characteristics:
- The plastic insulation should be supported by a thicker sheathing so that it does not sag.
- Rigid - requires greater strength of the roof structure, as it weighs more.
- Loose ones need protection from wind and moisture.
Insulating an attic floor using spraying requires expensive equipment. However, the installation of polyurethane foam or ecowool is greatly simplified: they are simply attached by blowing them out to a surface that has been cleared of dust and debris. Vapor barrier and other types of protection are not needed here. Only external finishing is possible.
Separately, you need to consider sawdust. This is one of the most convenient and inexpensive materials to use at home. Its only drawback is that it takes a long time to complete the work.
Stages of attic insulation with sawdust:
- preparation of a solution, which includes fine sawdust pre-treated with an antiseptic 85%, fluff lime 10%, gypsum 5%;
- diluting the mixture with water to obtain the required non-crumbly consistency;
- applying the solution in a dense layer, up to 25 cm thick;
- compacting, drying;
- final finishing.
It is important to remember that thermal insulation for the attic and attic implies strict adherence to fire safety rules. If the house has an existing chimney, it must be lined with non-combustible material.
How to prepare sawdust
Remember that fresh and wet sawdust cannot be used. It is better to prepare the material a year before use.
If this is not possible, then let the mass shake out in a warm and dry place for at least 3-4 months, while every 2-3 weeks it is advisable to fluff and mix the sawdust for ventilation.
In a private house, sawdust can be used to insulate almost all problem areas
A folk recipe for speeding up the drying of fresh sawdust:
- Add a little liquid glass to the sawdust and mix thoroughly.
- Liquid glass should neutralize the resin and increase adhesion with impregnations and binding materials.
To protect the wood from biological pests, fungus and mold, impregnations are added to it with regular stirring. The water will gradually evaporate and the working substance will be absorbed into the wood.
Advice! Theoretically, an antiseptic can be added to the water during the preparation of insulating briquettes, but with this approach the sawdust may deteriorate during the drying process.
- Professional product. The best, but not the cheapest, option would be to buy a ready-made factory-made antiseptic.
You shouldn't take a Chinese antiseptic - you don't know what's in it. It is better to buy domestic or European
- Copper sulfate. The next option is a solution of copper sulfate. No matter how much you pour it into water, it will still dissolve no more than 5%.
- Boric acid. A solution of boric acid acts in approximately the same way as copper sulfate.
- Borax. Borax works well, but it should be added to no more than 7% of the total mass of dry sawdust.
This is interesting: How and with what to insulate an attic in a bathhouse: types of insulation and installation methods
Folk antiseptics
Thermal insulation of a bath ceiling with sawdust
When installing a bath ceiling, the ceiling from below is hemmed with boards. Where the chimney pipe is laid, the boards are insulated with a piece of stainless steel and basalt wool.
The sequence of installation of thermal insulation of the floor is as follows:
- Lay a layer of vapor barrier with overlapping strips and gluing the joints. Place the material on the walls to a height of 100-150 mm.
- Lay out the sawdust mixture in layers, level it and compact it. For summer baths, the optimal insulation thickness is 50 mm, and for buildings used all year round - at least 150 mm.
- Let the insulation dry. Seal any cracks that appear. To reduce the likelihood of cracks forming, add salt to the prepared solution at the rate that 10 liters of water will require 75-90 grams.
- The mixture will dry within a month. After this, cover the surface with a layer of lime and lay a vapor barrier.
- Complete the rough plank flooring.
To protect a wooden building from fire, hide all wires in corrugated hoses and cover the ends with fire-resistant material. The described recipes for mixtures for thermal insulation of ceilings are suitable for insulating the walls of residential and commercial buildings.
Preparation of moistened sawdust backfill
The preparation process boils down to the following: an organic insulator (sawdust) and a special binder are poured onto a steel or wood sheet. The components are thoroughly mixed. Then add water and mix again until a homogeneous mass is obtained.
When sawdust is placed with slight compaction, the material dries within three to five weeks. This depends on the ambient temperature.
Thermal insulation of roofs is often accompanied by insulation of floors. This results in double protection from the floor and roof structure. If thermal protection is carried out with a moistened backfill, a vapor barrier layer is not needed. Otherwise, the accumulated moisture will cause fungus.
Features of insulation of various interfloor ceilings
When a wooden house is built, all floors (ceiling, basement, interfloor) are built using the same technology. But they have to be insulated in different ways. If all floors are thermally insulated equally, the frame house will not be very warm. Therefore, each type of floor requires a separate approach.
Basement and basement
The only difference between the basement and basement floors is their height relative to the soil level. But this insignificant difference forces us to change the approach to insulation:
- The basement floor is located below ground level. The wind from the street does not enter the basement, and therefore the air temperature in the room always remains above zero. But the basement is strongly affected by moisture coming from below, from the ground. And when choosing how to insulate the interfloor ceiling in the basement, you should give preference to materials with very good hydro- and vapor barrier properties. And their thermal insulation qualities are less important.
- The base is located just above the ground level, and the slightest cracks in its walls allow cold air from the street to pass through. Therefore, a thick layer of reliable thermal insulation material is required. But moisture and vapor protection are not as important here as in the basement.
Interfloor ceiling
The principle of insulating the interfloor floor using wooden beams largely depends on whether the upper floor is heated. If yes, then a thick layer of thermal insulation is not needed. The insulation here is used more as a soundproofing layer than for its intended purpose.
In addition, when choosing how to insulate the interfloor ceiling using wooden beams, you need to pay attention to the location of the bathroom, shower or sauna. If a room with a high level of humidity is located on the lower floor, then, in addition to heat-insulating properties, the selected material should also protect from moisture. This will protect the wooden beams from rotting, and the upper floor from high air temperatures.
Attic floor
The insulation of an attic greatly depends on its structural features:
- Cold attic (non-residential, empty, used as a warehouse or not used at all). This requires a thick and reliable layer of insulation. After all, in winter the temperature in the attic will always remain below zero, even if there is a thaw outside. And without reliable thermal insulation, the cold from the attic will fall down into the living spaces. Hydro- and vapor protection are also necessary - without them, condensation will flow abundantly along the walls of the lower floor.
- Warm attic (living, attic type). Since such a room is heated, it does not need a thick layer of insulating material. Moisture protection is also not required. But a soundproofing layer is necessary - any noise from the upper floor is very audible on the lower floor.
Another important nuance - in addition to the insulated interfloor ceiling using wooden beams, in a warm attic the walls and roof are usually additionally insulated.
Scattering sawdust over the ceiling
Filling the attic with sawdust in an even layer, of course, will not work. It is necessary to further level them. It is very convenient to do this by making a kind of shovel - just screw a piece of board to the handle and the convenient tool is ready. And then evenly distribute each batch, raised and poured onto the floor, according to the level of the laid beams. Wood dust, rising during work with sawdust, can become clogged in the respiratory tract and cause irritation of mucous membranes and skin. Do not neglect the elements of personal protection. A simple respirator, gloves, safety glasses. Clothes should be tightly buttoned and tucked in.
About sawdust as a material
Today, a variety of materials are used for thermal insulation of roofs, wall structures, floors, attics or interfloor ceilings. But sawdust, slag and shavings are considered the cheapest raw materials for creating an insulation system. Due to their low price, they are widely used in construction.
Sawdust is the cheapest option for insulating an attic.
Opponents of sawdust put forward arguments that waste from the wood processing industry has outlived its usefulness. But our grandfathers and great-grandfathers often covered roofs or walls with them, and many structures still exist. Moreover, the thermal insulation characteristics have not deteriorated, despite the impressive service life. The main advantages of using sawdust as insulation:
- availability;
- environmental friendliness;
- durability;
- ease of installation.
Arrangement of sawdust on the attic floor
The vapor barrier membrane is spread over the entire surface of the ceiling. If you decide to use polyethylene film, you should take into account its susceptibility to mechanical damage and poor resistance to low temperatures - ensure a loose fit, without interference. The vapor barrier should cover not only the space between the beams, but also the beams themselves (describe the surface). It is advisable to seal all joints with tape or lay them with a significant overlap. And sawdust is already placed on the vapor barrier - over the entire surface of the ceiling, filling the space between the beams in an even layer. It is only necessary to ensure that the chimney is thoroughly insulated with fire-resistant material from organic insulation.
