close ×
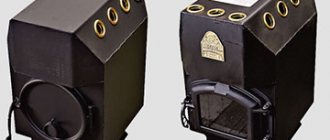
An excellent alternative to solid fuel boilers is a pyrolysis furnace. This is a long-burning stove that operates on a special principle and allows significant fuel savings. Compared to other types of heating devices fueled with wood, such a stove can work much longer, while being in no way inferior in the efficiency of heat supply. Let's take a closer look at how such a stove works, as well as what features of its operation and construction you need to know.
Internal structure of the long-burning stove "Bubafonya"
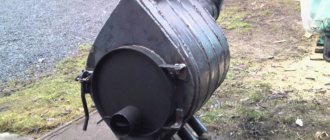
Let's look at the bubafoni device. An old household gas cylinder is the base of the stove. The wood inside the bubafoni burns. Pyrolysis, as the basis of the process, decomposes wood at high temperatures into gases, which, when burned, generate thermal energy. Wood burns in stages:
- Stage No. 1 - the fire heats the wood, burning out light flammable substances. Having crossed the two hundred degree bar, the firewood decomposes into simple substances and the gas begins to burn.
- Stage No2. This stage of combustion is the most efficient, as the gases are heated to a temperature of 700 degrees Celsius.
- Stage No3. We get what this device can provide - the required heat.
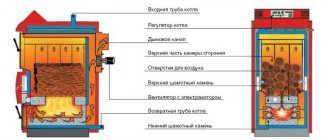
Construction of a pyrolysis boiler. The inner chamber is divided into two parts. This makes it possible to burn solid fuel in one chamber, and burn pyrolysis gas in the second. In the chamber below, which is filled with wood, the initial burning of the wood takes place. In the upper part, it is filled with wood combustion products, which ignite. The heavy press pushes the fuel down, and the wood is burned efficiently. At the top of the firebox there is a hole to which the chimney is connected, and the smoke leaves the stove through this system. Air enters the combustion chamber through an air duct located on one structure of the press. The air supply is regulated by the air duct damper.
Types of pyrolysis
https://pirolizeco.ru
The choice of type of pyrolysis depends on the composition of the processed raw materials and the planned final product.
Dry and oxidative method
Taking into account the temperature at which the process occurs, oxidative and dry types of pyrolysis are distinguished.
During the oxidation reaction in the installation, industrial waste is thermally decomposed. They are partially burned or come into direct contact with fuel combustion products. The method is optimal for neutralizing raw materials unsuitable for gasification or combustion:
- Pasty raw materials;
- Waste with high viscosity;
- Precipitation with humidity percentage;
- Ash waste and sludge;
- Contaminated land;
- Dusting raw materials;
- Waste containing metals and their compounds;
- Cables;
- Old cylinders;
- Waste car tires.
The oxidative pyrolysis method is suitable for the disposal of solid waste from industrial processes and wastewater.
Dry pyrolysis is a method of heat treatment of raw materials with its active neutralization. The fuel is a chemical substance. The method is used to create waste-free technological cycles.
Low, medium and high temperature types
The low-temperature process occurs at around 450-550 degrees. Characteristics of the method:
- Increased yield of liquid product and semi-coke;
- Reduced output of combustible gas with increased calorific value;
- Suitable for producing liquid fuel (resin);
- Used in the processing of rubber waste to obtain monomers;
- Semi-coke serves as a household combustible material.
The medium-temperature coking method occurs at temperatures up to 800 degrees. Accompanied by the release of an increased volume of gas with a reduced combustion temperature. The volume of residual products: coke and liquid is also reduced.
High-temperature type - coking in the temperature range of 900-1050 degrees. The release of solid and liquid residues is minimized. Gas production is increased to the limit with reduced combustion heat. Result: reduction in resin concentration, obtaining fuel suitable for transportation.
Fast and slow pyrolysis
A quick method is high-temperature decomposition of the material without the participation of oxygen at a heating rate of thousands of degrees per second. It has been compared to “explosive effervescence.” The destruction of substances occurs at the molecular level.
Slow pyrolysis is the long-term decomposition of a material under the influence of temperature at a heating rate of degrees per minute (hour).
Advantages and disadvantages of a pyrolysis oven
Let's start with the good, with the advantages of pyrolysis boilers:
- Fantastic efficiency, often reaching more than 85%.
- The ability to simply maintain the long-burning stove device
- When using high-quality materials in the production of the stove, durability and reliability.
- Meets strict environmental safety requirements.
- Availability of fuel. It is at every step. Wood, chips, other wood waste.
- Due to its small size, it is possible to install the unit in any room.
- There are no difficulties in servicing the oven.
- Baking a bubafonya with your own hands is simple and, most importantly, quick.
Unfortunately, this type of boiler has some disadvantages. One of the main disadvantages is weak traction. Without draft, a pyrolysis stove will be of little use, since there will be no good heat transfer. Let's look at the following disadvantages:
- Complex chimney design.
- There is no model range of pyrolysis systems that can be fired using mixed fuel. For example, fuel oil, diesel.
- It is difficult and unfamiliar for beginners to make the initial setup.
- Not everyone can assemble a pyrolysis boiler with their own hands.
However, the flawless performance of the bubafonya stove and the low price of fuel cover all the existing shortcomings.
Calculation of parameters
When designing a furnace, they strive to solve the main problem - to provide the required power. It will depend on the amount of fuel, so you need to correctly calculate the volume of the firebox. This can be done using a simplified method.
We set the required power
Suppose, based on the results of the heat loss calculation, it turns out that 10 kW of heat is required to heat the room at the lowest outside temperature.
We determine the required furnace power in normal (flame) combustion mode
It is known that in the gas generation mode the furnace power is 10-30% of that which develops in the flame combustion mode. Consequently, to obtain 10 kW with gas generation, the unit, when burning with a flame, must develop a power of W = 10 / 0.3 = 33.3 kW (we assume a 30 percent power ratio).
We choose the least energy-intensive fuel of all types that are supposed to be used
Here, for example, is data on the calorific value of some types of wood:
- beech: 15.5 MJ/kg;
- birch: 16.5 MJ/kg;
- aspen: 18.2 MJ/kg;
- oak: 20 MJ/kg.
Of all the listed species, beech gives the least heat, so we will focus on it.
We determine the volume of fuel reserve that can provide the required power
It should be taken into account that a portion of firewood burns in flame mode in approximately 4500 s. Therefore, during this time it should provide the following amount of heat: Q = 33.3*1000*4500 = 149.85 MJ.
Let's calculate the required mass of fuel, taking into account that it burns only 80% completely, and the efficiency of a homemade stove is approximately 50%:
M = 149.85 / (15.5*0.8*0.5) = 24.17 kg.
Knowing that the density of dry beech is 620 kg/m3, let’s convert the resulting mass value into volume: V = 24.17 / 620 = 0.039 m3 = 39 liters.
Determining the volume of the firebox
It should be taken into account that the furnace load factor is on average 0.63. Thus, it should have a volume: Vt = 39/0.63 = 61.9 l.
Therefore, the required volume of the firebox can be taken as 62 liters. Its length should be taken equal to 0.5 m - so that sufficiently long logs can be laid. Other sizes are optional. For example, the width can be 300 mm, then the height should be 413 mm (0.3 * 0.413 * 0.5 = 0.062 m3).
Making a stove yourself
Baking a bubafonya with your own hands begins with drawings. Like any pyrolysis stove for a bath or a pyrolysis boiler with your own hands, you start with a diagram. For drawings of pyrolysis boilers, see the photo below.
Drawing of the Bubafonya pyrolysis furnace. Calculation of basic proportions.
Scheme of a pyrolysis furnace.
Preparing the room, materials and tools for work
Initially, you need to choose a room where you will make a pyrolysis boiler with your own hands, where we will install a babufonya stove. This needs to be done for this reason. When the pyrolysis boiler operates, the lower part of the body heats up to a very high temperature. To avoid a fire hazard, you need to make a small foundation for the stove. Refractory brick is best suited. First you need to dig a “pit” measuring one meter by one meter. The depth of the swarm is 20-30 centimeters. We fill the hole with crushed stone. Pour in the liquid solution. As soon as the area is dry, we cover it with refractory bricks in two rows. It's best to do everything below the level. In some modern buildings, such as auto repair shops, production workshops, warehouses and other premises with concrete floors.
You don't have to make a foundation for the stove. The concrete floor is of sufficient thickness. If there is little space and there are walls nearby, in close proximity to the stove, it is better to install a reflector. Of course, made of heat-resistant steel.
The materials are as follows. A two-hundred-liter barrel (if the pyrolysis stove is made from a barrel) or an old cylinder will serve as the basis for the future stove. Select thick-walled boiler pipes for the production of a chimney. They can be found in any heating network. You will need a channel, a sheet of metal (not thin). The following tools will be needed: Welding, electrodes, hammer, chisel, metal saw, power cutting tool.
Installation and assembly of the structure. Chimney installation
Stage one. First you need to cut off the top of the balloon. Do not throw away the cut top. It will be needed as a future cover. The diagram of the pyrolysis stove is located above. A do-it-yourself pyrolysis oven begins with cutting off the top of the body.
Stage two. We will make a chimney hood. We make a hole of the required diameter along one of the sides of the body. Find a piece of boiler pipe that is bent at a 90 degree angle. The pipe diameter is suitable from 100 to 150 mm. We will make the chimney riser from a boiler pipe of the same diameter. The thicker the pipe, the better the draft in the chimney system. And we know that if the draft is good, then the pyrolysis furnace with your own hands will heat with good efficiency. We will weld the adapter for installing the chimney. We will seal the transition using asbestos cord, clay, or fiberglass.
Third stage. We will weld 2 holders and a top tube to the cover; it will be able to control the lowering of the system. We will attach a metal strip to the stove. It will serve as a side that prevents the stove lid from moving. In the lid of the cylinder, using a gas cutter, we cut out a hole for the pipe (air exhaust) approximately 88 millimeters. This pipe can have any shape. Round or square, it doesn't matter. This is not important for bubafoni to work. And the assembly will be simplified.
Fourth stage. We take a sheet of metal 4 mm and higher. Cut out a round pancake with a hole in the center of the pancake. The diameter of the pancake will be equal to the diameter of the air exhaust pipe. Between the edge of the air distributor and the wall of the furnace body we leave a gap that is equal to 5% of the length of the circle. We take the thickness of the iron under the plate, based on the size of the stove body. If the stove is made from a cylinder, take the thickness of the iron plate from 8 millimeters. If you make the stove body from a 200-liter barrel, then take the metal plate from 5-6 millimeters. We will weld six blades under the bottom of the air distributor plate. Their necessity is due to the uniform combustion of wood in the chamber from below, and the gases from above will burn completely. A do-it-yourself pyrolysis oven with this mode of operation will last a long time.
In the center of the air distributor we attach a second round pancake, smaller in size - 4 centimeters. The plate is necessary because there is sufficient space between the blade and the firewood for the gases to escape. And the coals did not block the air supply path. Having assembled all the parts together, you need to load the body with wood. The firewood is placed vertically, with paper, wood chips or birch bark placed on top of the firewood for ignition. What kind of wood will we burn with? Dry or raw? If you will often be using raw firewood, you definitely need to add one part to the boiler design. The chimney should be extended downwards, having received an elbow for collecting condensate. Place a drain valve on this elbow.
Alternative options for installing furnaces
There are three such options. Let's consider additional options for assembling bubafoni that can be implemented.
In option 1, we will cut out the top lid of a 200 liter barrel. Let's make a pressure circle for the air distributor from it.
In option 2, cut two circles from a sheet of iron, with the same diameter as the diameter of the pipe. Then we will connect the first circle to the pipe by welding. This will be the bottom. The next circle will become a pressing oppression.
In option 3 we use an iron cylinder (made of large sheet metal) instead of a barrel. Brew a sheet of rolled paper along the seam. The lid with the bottom is also made from a sheet of metal. Everything else is made in the same way, from previous design options.
Stages of installing bubafoni from a gas cylinder.
We will arrange all the work on producing Bubafoni from an old gas cylinder into logical steps: Fill the body with water (the cylinder valve is unscrewed). This will prevent a possible explosion of residual gases. Important, responsible operation!!!
Fill the body with water (the cylinder valve is unscrewed). This will prevent a possible explosion of residual gases. Important, responsible operation!!!
Using a grinder, cut off the top part of the cylinder. Please note that where there is a seam, an additional reinforced layer is glued to the inside of the cylinder. This will complicate the cutting process, but it can be solved. Without this there is no way, the curb will interfere with the movement of the piston. The action is not simple and it is better to cut below the seam. Let's make a hole in the body for the chimney near the top of the boiler. An elbow is made from an iron pipe with a cross-section of approximately 100 millimeters at a right angle. Then two pieces of pipes are cut at 45 degrees and welded together. Next, a 120 mm chimney pipe is connected to the elbow through an adapter. This will definitely make the traction better. The adapter must be sealed using fiberglass or ordinary clay. We will make the lid from a piece cut off from the cylinder, or from sheet metal. Of course, a flat lid would be better. You can place a frying pan or saucepan on it. We cut out the hole for the piston by welding. The section can be anything. Maybe not round. A square or any other pipe will serve its purpose just as well. Installation will be simple.
A pancake 27 cm in size is cut out of a 4 mm piece of metal. For the rod we make a hole in the center. The circle is made in such a size that there is a gap of 5 percent of the size of the pancake. Six blades are welded to the bottom of the disk. The blades are bent so that a turbulence of air masses is obtained in the direction of the arrow to the right. The wood will burn better and will burn off all the gas at the top of the chamber. In the center, on top of the blades, a disk with a 40 mm hole is attached. This is necessary so that the charcoal does not clog all the spaces in the air mixture supply rod, and there is sufficient clearance between the firewood and the blades. The stove is installed on the foundation, shielded from nearby walls and objects. This will achieve additional fire safety. The foundation, after heating, will serve as a good heat store for the room and will not cool down so quickly. When loading raw wood into the stove, an additional bend is added to the chimney pipe below, which accumulates condensate. And a tap is installed in the elbow to drain condensate.
Laying the foundation for a pyrolysis furnace
To build a foundation for a pyrolysis stove we need:
- Shovel
- A container for mixing mortar or a concrete mixer (whoever has one).
- Ready-made mortar in bags or individual components (sand, cement)
- Crushed stone
- Fire-resistant red brick
Let's get to work. We will conditionally divide all work into three stages: First stage. First, let's dig a hole the size of each side of the square, equal to one meter, or the side of the square, up to one and a half meters. Accuracy is not important here. The depth of the hole for the foundation of the bubafoni should be thirty centimeters. No need to go deeper. Otherwise, there will be cost overruns and materials.
Second phase. We fill the pit with crushed stone. Mix the concrete solution. The brand of solution is optional. We fill the crushed stone in the hole with concrete mortar. Make the surface smooth. A simple trowel will be enough. You need to pull it across the surface of the concrete with a flat, clean board. When the concrete has dried, check the quality of the plane using a building level. If necessary, we additionally adjust the resulting plane according to the level. Depending on the temperature at which the concrete dries, from several days to a week, we wait for the concrete pad to dry completely. After the concrete pad has dried, we move on to the next stage.
Third stage. We lay fire-resistant bricks on top of the concrete base. How many rows of bricks will be enough? Two or three layers of refractory bricks are enough. If there are walls nearby, then it is necessary to install screens to reflect heat from the walls of the building. Screen materials can be the most common.
Preparatory work
Before you start making a homemade pyrolysis furnace, rolled steel needs to be cut into blanks. This can be done in a home workshop using a grinder, however, this method cannot be called rational.
It will be faster and more profitable to pay for cutting at the metal depot where the rolled metal was purchased. There are powerful guillotine shears, gas cutters and other equipment with which the workpieces will be completed in the shortest possible time and with maximum quality. The customer will only have to clean off the burrs on the edges using a grinder.
Since the unit will turn out to be quite massive, it is best to assemble it directly at the installation site. Accordingly, before starting work, it (the place) needs to be prepared. They do it like this:
- A base of brick or other fireproof material is laid on the floor. Its length and width must be at least 600 mm greater than the corresponding dimensions of the furnace, that is, the base offset on each side must be at least 300 mm.
- In the boiler room, the base must be located in such a way that after assembling the stove, there remains a distance of at least 1 m between it and the nearest wall. This value can be reduced to 0.85 m if the wall has fireproof plaster with a thickness of 25 mm or more.
You can also offer this option for a fire-resistant coating for the wall: a steel sheet is screwed to it on ceramic linings, so that there is a gap of several centimeters between it and the wall; in this case, the lower part of the sheet should not reach the floor by 7–10 cm. The sheet heated from the stove will transfer heat to the air in the gap between it and the wall; it will rush upward due to convection, sucking in cold air from below. Thus, thanks to this simple technique we will get an additional convector.
The floor in front of the stove within a radius of 1.2 m from the center of the firebox must have fireproof protection. It consists of a steel sheet with a thickness of 1.5 mm (roofing iron can be used) and a sheet of asbestos or basalt cardboard laid under it.
Ignition of the Bubafonya stove
To begin with, remove the caps from the cylinder and remove the piston-press with the air duct from the stove. Let's put dry wood inside the stove. Any type of firewood. We place the firewood horizontally, as close to each other as possible. If we place the firewood vertically, we will get an unpleasant surprise.
The surprise will be next. An unburned log standing vertically will not allow the piston to move to the bottom. If this happens, there will be a full-fledged fire in the lower chamber. The fuel will burn quickly. The operating mode of the stove will be burning instead of smoldering. I’m generally silent about smoke from the air duct; it will definitely appear. Firewood does not need to be stacked above the level of the chimney opening.
Next, you need to press the firewood with the piston and put the bubafoni cover on the piston.
How to properly set fire to wood? Simply throwing a burning match will not work. It will definitely go out before it even reaches the firewood. We'll keep it simple. Take paper, rags or a piece of birch bark. Let's light it and throw it in the oven.
We need to wait 20 minutes for our bookmark to burn well. Then close the valve on the air duct. Air will begin to enter the stove in less quantity. In the primary chamber with firewood, the firewood will stop burning and begin to smolder. Pyrolysis gases will be released. But we need gas. After all, the installation is pyrolysis! This is how our super stove will reach its operating mode.
Video instruction. Ignition of the Bubafonya stove
Creation
To work with your own hands you will need the following tools:
- drill;
- grinder, cutting and grinding wheels;
- welding machine and electrodes;
- metal 4 mm thick (7.5 m2 is enough);
- refractory brick (10–15 pcs.);
- fan;
- temperature sensor;
- grate;
- round and rectangular pipes;
- two doors;
- steel strip.
Homemade pyrolysis boiler
Recommendations for increasing the efficiency of a homemade stove
How to increase the efficiency of bubafoni? What problem is preventing this heat generator from working to its full potential? One of the problems is that the stove body heats up unevenly. Because of this, we get poor heat exchange in the room. Is it possible to solve this problem? Of course you can. To solve this problem, let's take a sheet of corrugated metal profile. We wrap it around the stove, obtaining a protective “shirt” and spot-weld the profile sheet to the cylinder.
You can find another solution besides welding. It's up to you to decide. By implementing this solution into a finished design, we will obtain a long-burning furnace device that forms rising air currents. Cold air will rise from the bottom of the ribs. After passing along the body of the cylinder, the air will heat up and become hot at the outlet. In addition to this modification, you can do the following.
Cover the entire structure with bricks. This will allow heat to accumulate from the generator, releasing it evenly over the entire area of the building for quite a long time. In addition to the profile sheet, you can use pipe scraps. Profile or regular round pipes are suitable. They are welded around the cylinder body, resulting in an effective design for generating heat with uniform heating.
Main characteristics of pyrolysis boilers
The main features of boilers operating on pyrolysis technology are the following:
- Possibility of manufacturing from inexpensive structural materials.
- The long time of one pyrolysis cycle, reaching about 30 hours,
- Complete explosion and fire safety.
- Simplicity of design, accessible for self-production.
- A wide range of wood fuels used (from classic firewood to pellets).
- Highly environmentally friendly boilers, low amount of combustion products.
How often should you add firewood?
In a conventional furnace, you will have to add fuel at least every two hours. The reason for this is the high intensity of fuel combustion in furnaces of this design. Most of the heat literally “flies down the drain.” The efficiency of such boilers is minimal; in addition, there are a lot of residues left in it, which have to be raked out regularly.
But if you limit the flow of oxygen, the combustion period increases significantly. In this case, heat is released not only during the smoldering-pyrolysis process itself, but also from the combustion of the released gases. As a result, the operating time from one load can increase to a day or more.
Choosing a location for installation
The main task of the furnace is to uniformly heat the soil. Experienced gardeners recommend placing the installation in the center of the greenhouse so that the heat from it spreads equally in all directions.
The installation must be deepened by approximately half the height, leaving access for storing firewood in the lower compartment of the structure. This arrangement of the system will allow the soil and air to be heated evenly, and is the most acceptable from the point of view of fire safety.
If the floor and lower part of the walls in the greenhouse are lined with bricks or tiles, you can install the stove in the corner. But in any case, precautions and fire safety measures should be observed to protect the premises and future harvest from accidental fire.
It is important to stretch the smoke exhaust pipe in a horizontal position away from the stove, and then attach a vertical pipe through the adapter. This will prevent carbon monoxide from entering the greenhouse. Although a small amount of smoke inside the building will not harm the plants. If the chimney length is more than 6 m, the draft in the pipe will become significantly worse.
conclusions
Having considered how to make different types of pyrolysis furnaces, we can summarize that it is realistic to make only a structure from a gas cylinder. You won’t be able to build a brick oven yourself; it’s too difficult. A camping option made from cans also has a right to exist, but it can only be made at home; this cannot be done in the field. And finally, the exhaust furnace is simple but dangerous and requires very careful and careful operation. The risk is quite high, so we do not recommend it for heating a garage.
about the author
Sergey Surenovich Lachinyan is a famous inventor in the field of new physics, acoustics and electronics. The idea to create a new type of stove was inspired by the autonomous mobile housing he was creating at that time, based on a GAZ-66 car with a booth (there are many articles about it on the Internet and in the media). To heat the living area, a stove with low fuel consumption and the highest heat transfer efficiency was required. It would seem that these things are incompatible, but through trial and error the inventor found a solution and made the long-awaited stove.
The principle of its operation was the smoldering of coal in the complete absence of oxygen - in physics this phenomenon is called pyrolysis. In nature, it can be observed during the smoldering of peat springs and coal mines, where there was a fire years ago, but currently they are “mothballed” and still “burn” without oxygen and practically without emitting smoke.
The created pyrolysis oven can be used in tents, greenhouses, country houses, as well as in small agricultural buildings (chicken coop, pigsty). The inventor called it PNG 5-50, but truck drivers, fishermen and hunters, who warmed the interior of their cars and tents in the cold, gave it their own name, close to their hearts - “Lachinyanka”. Over time, the design of the furnace was modernized, acquired complete forms and could be assembled from more easily accessible materials. A patent was later received for the invention.
A little later, the PNG 5-150 model appeared with the possibility of using a water jacket for a complete replacement of blast furnaces and much greater power for the heated area.
Now the drawings of pyrolysis furnaces are available to everyone for a nominal fee, and as Sergey assures, in the future we will have proposals that will allow us to use this furnace not only for heating.
Only by purchasing drawings from us, you are guaranteed to receive support from the author - Sergei Lachinyan!
If you are interested in stoves for your home, then you have probably heard about the Lachinyanka stove. The model is truly unique and worthy of attention. Therefore, stay with us to take a closer look at its design, operating principles and even production stages (if you want to do it yourself, yourself).
about the author
Sergey Surenovich Lachinyan is a famous inventor in the field of new physics, acoustics and electronics. The idea to create a new type of stove was inspired by the autonomous mobile housing he was creating at that time, based on a GAZ-66 car with a booth (there are many articles about it on the Internet and in the media). To heat the living area, a stove with low fuel consumption and the highest heat transfer efficiency was required. It would seem that these things are incompatible, but through trial and error the inventor found a solution and made the long-awaited stove.
The principle of its operation was the smoldering of coal in the complete absence of oxygen - in physics this phenomenon is called pyrolysis. In nature, it can be observed during the smoldering of peat springs and coal mines, where there was a fire years ago, but currently they are “mothballed” and still “burn” without oxygen and practically without emitting smoke.
The created pyrolysis oven can be used in tents, greenhouses, country houses, as well as in small agricultural buildings (chicken coop, pigsty). The inventor called it PNG 5-50, but truck drivers, fishermen and hunters, who warmed the interior of their cars and tents in the cold, gave it their own name, close to their hearts - “Lachinyanka”. Over time, the design of the furnace was modernized, acquired complete forms and could be assembled from more easily accessible materials. A patent was later received for the invention.
A little later, the PNG 5-150 model appeared with the possibility of using a water jacket for a complete replacement of blast furnaces and much greater power for the heated area.
Now the drawings of pyrolysis furnaces are available to everyone for a nominal fee, and as Sergey assures, in the future we will have proposals that will allow us to use this furnace not only for heating.
Only by purchasing drawings from us, you are guaranteed to receive support from the author - Sergei Lachinyan!
