08/25/2016 Category: HeatingAuthor: Natalya Ivantsova
The boom in solid fuel stoves that arose in the heating equipment market has several reasons. It is largely due to the massive construction of dachas and country houses in places where there is no possibility of connecting to the main gas. A significant increase in energy prices also played a role, forcing the duplication of installed heating units with boilers running on wood and coal. But the main thing that I would like to note is the emergence of designs that use a completely different approach to burning solid fuel, thanks to which it is possible to increase the time between loads several times. Units using the new principle vary in complexity, size and performance. Today we will talk about a simple long-burning stove that you can build with your own hands in a weekend. Of course, such a unit is not suitable for heating a large house, but it will be indispensable for heating utility rooms, a garage or a greenhouse. Moreover, the materials for the work can be found at any scrap metal collection point.
- Advantages and disadvantages
- Types of long-burning stoves. Choosing a simple and efficient heating unit to make yourself
- Design and principle of operation of a top combustion furnace
- Drawings and diagrams
- Required materials and tools
- Step-by-step instructions for making a long-burning stove with your own hands
- How to load fuel and operate the unit correctly
- Video: Operation of a long-burning stove made from a barrel
Advantages and disadvantages
Modern long-burning stoves have a lot of advantages, which can play a decisive role in the initial selection of heating equipment. However, the disadvantages of existing designs require weighing the pros and cons before deciding to replace an existing heating unit with a newfangled pyrolysis boiler.
The advantages of the structures under consideration include:
- multiple increase in operating time on one fuel load;
- possibility of full autonomy - when entering the main mode, operation of the unit does not require operator intervention;
- the fuel burns with virtually no residue;
- the interval between downloads increases;
- using not only coal and firewood as fuel, but also wood chips, sawdust, dry plant waste, pellets, etc.;
- reduced weight and dimensions;
- possibility of adjusting the combustion process;
- The efficiency of long-burning pyrolysis boilers reaches 90%;
- smoke residues do not contain soot or harmful substances;
- many designs available for DIY.
Be sure to check out the disadvantages of this type of oven:
- increased requirements for the chimney. It must have sufficient height and thermal insulation;
- In long-burning furnaces, only dry fuel can be used. Excess moisture reduces the flame temperature, and water vapor blocks the access of oxygen, which makes it impossible for the unit to operate in gas generator mode;
- the reduced smoke temperature promotes the layering of soot and other combustion products on the walls of the chimney;
- when burning wet fuel, heavy fractions and dangerous chemical compounds appear in the smoke residues;
- higher cost compared to conventional furnaces.
If you weigh all the pros and cons, it is not difficult to understand that the wide popularity of long-burning stoves is not an accident at all, but the result of precise calculations and a carefully designed design.
How to make a sawdust stove
This design will allow you to save on firewood, and not just on the purchase of expensive equipment. To assemble such a stove, you can first find on the Internet videos and tips on its assembly and author’s drawings of this unit, which can be taken as a basis.
It can be assembled from any available materials and used for heating both residential country houses and non-residential utility rooms.
Before melting the cylinder in such a furnace, it is pulled out and the core is inserted into it. Then sawdust is placed in the resulting place, then the core is pulled out, and the cylinder is put back.
The place formed instead of the core will serve as a conductor for air during fuel combustion. Ignition occurs in the bottom drawer. Also, instead of sawdust, special pellets can be used in this design.
Design and principle of operation of a top combustion furnace
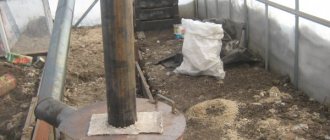
A long-lasting solid fuel unit with an upper burning layer can be made from an iron barrel for fuel and lubricants, a gas cylinder or large-diameter steel pipes. The thickness of the housing walls must be at least 4–5 mm, otherwise they may burn out due to high temperature. The height of the heating device must be at least 1 m, since the duration of its operation depends on the amount of fuel. However, you should not try to build a unit that is too high. Firstly, it will be inconvenient to load it, and secondly, a layer of firewood or sawdust that is too thick can reduce the draft so much that combustion simply stops.
Conventionally, a vertical oven can be divided into three working spaces:
- loading chamber - part of the body into which fuel is placed. During operation, the loading height decreases as the briquettes, firewood or shavings burn out;
- the combustion zone or working zone is the highest temperature section. In this layer of combustible material, oxidizing reactions occur, releasing a large amount of heat;
- flammable gas removal zone - a high-temperature space in which heat exchange and afterburning of combustion products occurs.
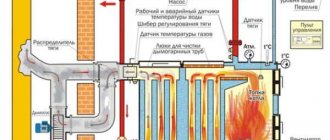
The schematic diagram of a long-burning boiler presented below allows you to get a complete understanding of its design and principle of operation.
Diagram of a long-burning boiler with vertical loading
In order to limit the combustion zone, an air distributor is used. This device is a flat metal circle 5–6 mm thick, in the center of which there is a hole for supplying oxygen to the work area. The air supply is carried out through a long steel pipe brought out through the top cover of the heating unit. The unimpeded movement of the air distribution device is ensured by the difference in the diameter of the metal pancake and the unit body, and the height of the burning layer depends on the width of the impeller. Since the latter determines the air gap between the fuel and the piston, its parameters determine how quickly the fuel will burn.
Homemade boiler air distributor
It has been established experimentally that the height of the air distributor blades should not exceed 50 mm, otherwise the fuel combustion rate will be increased, and this will lead to the need for more frequent refills of combustible material.
The diameter of the air channel must be at least 60 mm, while the size of the distributor opening of more than 20 mm is considered excessive - oxygen supersaturation increases the combustion intensity, which is unacceptable for a unit of this type.
Most often, the distributor pipe is made with an open edge, so that atmospheric air is used as an oxidizer. The place where the air duct enters the upper hatch is not sealed - free access of oxygen to the space above the piston makes it possible for volatile hydrocarbon compounds to burn. There is also an option when air enters the combustion zone from the upper chamber, where it is preheated. This design increases the performance of the heating device and makes its operation more stable. The amount of oxygen is regulated by a special damper installed in the air supply window.
To remove combustion products, the upper part of the boiler is equipped with a smoke channel with a small horizontal section. As a rule, 50–60 cm of straight pipe is enough to relieve the draft. Despite the fact that in furnaces of this type the completeness of fuel combustion reaches 90–95%, it is periodically necessary to remove ash and ash that accumulate at the bottom of the installation. To do this, a window is made in the lower part of the housing and a sealed door is installed.
To connect a long-burning stove to a liquid heating system, the unit is equipped with a heat exchange circuit or a water jacket.
Important aspects of keeping your garage warm
Providing a traditional heating system in a garage is not easy, and it is also quite expensive, but maintaining optimal air temperature in such a building is still necessary. After all, it is even better to store transport at a temperature of at least +5 degrees, but some work needs to be done at a temperature of at least +18.
Long-burning garage stove
For the most part, car owners and motorcyclists prefer to use small, economical stoves to heat their garages, which are highly efficient and allow the room to be warmed up well. It is also important that the stove not only saves the family budget, but is also safe and provides quick heating of the garage. It would be good if various wastes could also serve as fuel – for example, waste oil or wood waste. This will also make the furnace a less unprofitable structure.
Potbelly stove round
On a note! Portable electric heaters tend to be ineffective, which is why few people use them to heat their garage. Plus, they are not safe, and it is not recommended to leave such heaters unattended. But no one will spend the night in the garage and guard the stove.
Features of the functioning of the furnace
Heat loss in a garage is always high - it is rare that a building of this type is properly insulated with good thermal insulation materials. It is also important to understand that heating a small room often requires much more thermal energy than warming a house. To heat a two-story house, you will need a device with a power of about 10 kW, but a design with a capacity of 2.5 kW can heat a standard-sized garage. If you want to ensure that the temperature in the garage is always about 16 degrees, then you need to install a 2 kW unit. Sometimes, in order to save heat, motorists try to heat not the entire garage, but only the place where they directly work.
A garage oven is an important piece of equipment that will create optimal conditions even in the cold season
Advice! Good insulation of walls, gates and sealing of all cracks in the building will significantly save and reduce heat costs. It will be easier to maintain the temperature at the desired level under such conditions.
The best homemade stove for the garage
Drawings and diagrams
The undoubted advantage of the long-burning “potbelly stove” design presented above is its undemanding size. As a rule, for the stove to operate correctly, knowledge of the principles of its operation and compliance with the basic proportions is sufficient. However, we present to your attention drawings and diagrams of existing structures, manufactured and tested in real conditions.
Drawing of a vertical loading oven
Drawing of a long-burning boiler
Diagram of a long-burning furnace with an open air channel
Boiler drawing
Tips for use
You need to launch a brick rocket stove only when the chimney is warm. For a small device, this property is not so significant, and a larger stove on a cold pipe only wastes firewood.
Therefore, to bake a rocket before loading the fuel quota after a long break in operation, you need to heat it with paper, dry shavings, straw, etc., placing them in a ash pit with the door open. When the hum in the stove decreases in pitch or subsides, then you can load all the fuel into the firebox; it should ignite by itself from the existing fire.
A rocket stove with a stove bench is not a completely self-regulating device for external conditions and fuel energy efficiency. Therefore, at the beginning of the fire with the normal amount of fuel, the ash door is left in the open position. After the stove begins to hum strongly, it is covered until the sound emitted is barely audible.
Only dry wood can be used to heat the stove; wet wood will not allow the stove to warm up to the required temperature, which can lead to reverse draft.
Required materials and tools
Before you start building a long-burning stove, prepare the following materials:
- a two-hundred-liter barrel of fuel and lubricants. It is advisable to choose a container with thick walls, without damage or heavily rusted areas. As a housing, you can use a pipe of a suitable diameter or a propane cylinder (household 50 l or automobile 80–100 l). In addition, the stove can be made from sheet steel with a thickness of at least 3 mm;
- a metal pipe with a diameter of at least 60 mm - for arranging an air channel;
- steel pipe with a diameter of 100 mm - for the manufacture of a chimney;
- steel channel or corner with a shelf 50–60 mm;
- a sheet of metal 5-6 mm thick, slightly larger than the diameter of the body - for the manufacture of an air distributor;
- a steel sheet with a thickness of at least 3 mm, which will be required to make the lid;
- hinges for the bottom door.
As for the tools, any self-respecting home craftsman will have them:
- welding inverter or transformer;
- angle grinder (popularly “grinder”);
- cleaning and cutting wheel for angle grinders;
- electric drill;
- a set of drills for metal work;
- hammer;
- anvil;
- measuring and marking tools.
If the design of the heating unit provides for the arrangement of a water circuit, then it is additionally required to stock up on sheet steel and two threaded pipes for inserting the boiler into the hydraulic heating system.
Step-by-step instructions for making a long-burning stove with your own hands
1. To make the stove body, use a grinder, which is used to carefully cut off the top of the metal barrel. Of course, in the case of using a container with a thickness of more than 3 mm, the use of a gas cutter will be more justified. We remind you once again that the work must be done carefully - the furnace lid will be made from the cut part in the future. If a pipe is used as a body, then it is necessary to weld a bottom cut from sheet metal 5–6 mm thick to it.
When cutting off the cover, remember that this element will be needed later
2. In the lower part, four legs from a channel or angle are mounted to the body using a welding machine. Note that if the body is made of metal and has a rectangular shape, then you can do without additional supports.
One of the options for arranging support legs
3. Using the same grinder or autogen, an air distributor is cut out of sheet steel 5-6 mm thick - a circle that can fit into the barrel with a small gap. The edges of the metal pancake must be thoroughly cleaned to prevent the possibility of touching the walls of the oven.
4. A hole with a diameter of 20 mm is cut in the center of the air distribution device and a pipe is welded to supply air to the combustion zone.
The blades of the air distribution device are mounted at the same distance
5. On the back side of the flat piston, four sections of a channel or angle are welded, evenly positioning them in a circle. Note that the blades should not protrude beyond the air distributor. In the future, thanks to these elements, there will be an air gap between the metal pancake and the firewood, which is necessary for fuel combustion.
As a result, the air distribution device should look like this
6. A lid is made from the previously cut off top of the barrel. To do this, a metal strip is welded from the outside along the entire contour so that its diameter allows the top of the stove to be freely installed on the body.
Making the lid
7. A hole is cut in the lid, 3–5 mm larger than the diameter of the air duct pipe. In addition, two handles made of strips of metal are welded onto its top. With their help, it will be easier to open the hatch for loading fuel.
8. A hatch for cleaning the oven is cut out in the lower part of the body. Try to do this part of the work using a grinder with a thin circle installed. This will ensure a more precise fit of the door to the body. A thin metal strip is welded along the perimeter of the hatch to eliminate the resulting gap. Then the hinges are welded, the structure is installed on the body and the valve is mounted.
9. On the other side of the stove, at a distance of 50–100 mm from its upper cut, a smoke exhaust pipe is cut in. It is used as a piece of steel pipe, into which the chimney will fit with a slight interference.
Installation of a smoke exhaust pipe
It is better to use a chimney of a collapsible design, consisting of several sections - it will be easier to clean during operation.
At this point, the production of a vertical-type solid fuel unit can be considered complete. All that remains is to install the stove in place and connect the chimney.
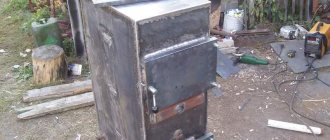
Long burning stove: final version
Making a jet
The next step is to make a simple nozzle for supplying secondary air. To do this, the author used a section of water pipe, which he slightly lengthened, and drilled 5 holes in it with a diameter of 8 mm.
The essence of the nozzle’s operation is as follows: air will be supplied from the bottom of the furnace, which is heated in the combustion chamber and then supplied from the holes to the secondary chamber. Due to this, unburned pyrolysis gases will burn out. While the stove is operating in smoldering mode, a flame bursts out of the nozzle holes.
How to load fuel and operate the unit correctly
A long-burning unit differs from a traditional furnace by an increased loading volume and limited access of oxygen to the working area. The operating time of the boiler depends on the amount of fuel loaded, so the firewood is stacked as tightly as possible, without leaving large gaps between the logs. If materials such as peat, fine coal, shavings, sawdust or pallets are used as fuel, then they are poured to the level of the smoke channel without compacting. The necessary compaction of the fuel will be provided by a heavy metal piston.
Fuel loading is performed in the following order:
- remove the top cover from the unit;
- remove the air distribution device;
- load the stove to the level of the chimney;
- spray the top layer of flammable material with lighter fluid;
- install an air regulator;
- return the cover to its place;
- A piece of rags soaked in a flammable liquid is thrown inside the air channel.
Steady combustion is accompanied by smoke coming out of the chimney evenly. As the wood burns, the duct pipe moves down. It can be used to judge the remaining operating time of the solid fuel unit.
It is best to light the stove using a rag moistened with a flammable liquid.
During operation, ash and ash accumulate at the bottom of the barrel. It must be said that their quantity does not have any effect on the combustion process. However, fuel combustion products must be periodically removed, since they reduce the thickness of the filling layer. To do this, open the bottom door and scoop out the ash using a regular metal scoop.
When removing ash, leave a layer 10–20 mm thick on the bottom of the oven. This will not have a particular effect on the amount of firewood; however, it will create an excellent heat-insulating cushion that will protect the bottom of the unit from burning out.
