Bricks can be made in two ways: semi-dry and dry pressing and by plastic molding. The difference between these methods is not great and lies only in the unequal amount of moisture contained in the raw material mass.
The second manufacturing method has become more widespread, but there is a tendency that semi-dry and dry pressing may eventually replace the plastic forming method.
Using the plastic formation method, it is possible to obtain both solid and hollow bricks. The technologies for their manufacture are almost the same, but for hollow bricks the clay is prepared more carefully.
Brick making can be divided into the following stages:
- Preparation of raw materials.
- Formation of raw brick.
- Pre-drying of bricks.
- Firing at high temperature.
Each technological stage requires compliance with certain requirements. Before you start firing bricks, you should carefully prepare it: starting from the preparation of raw materials and ending with natural drying, otherwise defects cannot be avoided.
Attention: Defects are also possible at the final, very important stage of brick manufacturing - firing, if you avoid temperature conditions.
Making a stove with your own hands
Wood stoves
Wood-burning kilns for firing ceramics are made mainly from brickwork, although the kiln can also be made from a barrel, but in any case it will need to be lined with refractory bricks. To do this, first of all, you need to prepare the foundation, and only then begin laying bricks. The foundation is also made of brick. Then it is necessary to install the body on the foundation; what it will be, in the form of a barrel or made of brick, everyone decides for themselves. But a body made from a barrel is convenient because it will be enough to cut a hole for firewood, it will take a minimum of time, but building a brick body will take much more time and effort.
Having cut a hole for firewood and cut out the bottom, we move on to the next stage. We install the barrel on the foundation and line the inside with bricks to the very top. In the middle of the masonry it is necessary to install a grate on which the products will be fired. The lid will be the bottom, which was cut from the barrel.
This is the kind of wood-burning kiln you should get for firing ceramics. This stove can only be installed outdoors. Today, wood firing of ceramics is becoming less and less common, since for the desired temperature you have to wait a long time before sending the product into the kiln. And besides, a wood-burning oven is only suitable for a small batch of firing.
Electric oven
An electric pottery kiln can be made from improvised means such as an old refrigerator or washing machine. But if you do not have such housings, then you can use a galvanized sheet from which you need to make a housing. The body can be of absolutely any size and shape.
Next, we strengthen the bottom, for which you can use either corners or pipes that need to be welded to the bottom. It is necessary to weld legs made of pipes of larger diameter to the corners of the structure so that the stove stands firmly.
We lay basalt wool 10 mm thick on the bottom and walls of the structure. It is necessary to place several pipes on the bottom of the cotton wool so that the wool does not wrinkle and only then lay the metal sheet. There is no need to lay pipes on the sides; a galvanized sheet on top is sufficient.
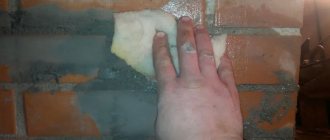
Next, the inside of the structure must be lined with bricks. You need to start from the bottom and you need to prepare a fire-resistant masonry mixture in advance for sealing the seams, which should be no more than 6 mm. Before laying the brick, it must be wetted so that the mixture on it does not dry out quickly.
Now we move on to the walls of the structure, so that the brick is supported on galvanized sheets, about 30% cement must be added to the mixture. We do the same with the top.
Next, you need to make a door, which will consist of the same galvanized sheet and bricks. The bricks must be laid out on a sheet according to the same principle as the walls of the stove were laid out. After this, you can weld the hinges and install the door.
At this stage, the oven should be left to dry for some time. After it dries, we proceed to installing the heating element. To do this, we make grooves inside the walls since we will use a spiral of the same diameter as a heating element. When heated, it will expand, so to prevent the spiral from coming out of the grooves, it is necessary to secure it with wire.
It is necessary to make 2 spiral circuits so that you can regulate the temperature inside the oven with a switch.
We bring the ends of the wire up.
At the top we install a ceramic plate, which must be secured and the ends of the wire attached to it with bolts.
In this design we will use a switch like this.
The switch must be installed so that its protruding part is outside on the front panel, and we connect the wires. Phase and zero are suitable for two contacts.
To the rest we connect the wires that go to the plate. One wire (blue in the photo) closes the 2 outer contacts.
Upon completion, it should look like this: at the first “speed” the circuits of the spirals are connected in series, this is the lowest temperature. And the third “speed” is the highest temperature.
The chamber kiln for firing clay is ready, now all that remains is to wait until it is completely dry and can be used for its intended purpose. It may take about a month to dry the stove, after which it must be connected to the network at low speed and left until steam stops coming from it. It is better to connect such a stove to a reinforced outlet.
If you need a muffle furnace for firing ceramics, then it can be made according to the same principle, only the heating elements will have to be located around the muffle.
This version of the stoves is more popular and easier both to operate and to manufacture. If you want to make a kiln for firing clay with your own hands on gas, then in this case, you can use a barrel as a body. It must be cut into two parts so that the lower part is larger. Than the top, since the top will be the lid.
The barrel must be lined inside with high-temperature mats in 3 layers and attached to the base with homemade ceramic buttons, and do the same with the lid. Don’t forget to make a small hole at the bottom for a gas burner, 20 by 20 cm. The lid also needs a hole for moisture evaporation. As a result, you should end up with a simple oven like this, to which you only need to install gas heating elements.
Brick firing
So:
- Raw brick, after preliminary drying, has from 8 to 12% moisture content, which requires a certain amount of drying in the oven. Then the temperature is gradually raised to 500-800ºС, as a result of which irreversible processes occur inside the raw material.
- When the temperature increases to 200ºС, organic impurities and various additives evaporate from the brick. After this, the temperature is raised to 300-350ºС and the raw brick is kept at this temperature until all the carbon burns out and only after that the temperature begins to be raised to 800ºС. At this temperature, the material begins to change its structure. The brick is kept at this temperature for some time, after which the temperature begins to gradually decrease.
- Firing time can range from 6-48 hours. During this time, the brick acquires unique characteristics: high strength, excellent thermal insulation properties, resistance to moisture, resistance to fluctuations and temperature changes.
Types of furnaces
There are different types of thermal energy sources:
- The oldest is the wood stove. The masters kept the secrets of firing and passed them on only to their students. Today, wood burning is very rare. Technological types have replaced them.
- The most popular is natural gas. With forced air injection, products can easily be heated to temperatures above 1500 °C . Gas equipment is easy to make with your own hands, and gas can be purchased in liquefied form in cylinders.
- The most high-tech is electricity. Electric spirals are evenly laid inside the oven, quickly and accurately heating the chamber with the products. Such equipment is more difficult to manufacture; high voltage requires compliance with safety precautions and electrical installation rules.
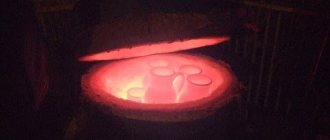
Photo 1. Small electric kiln for firing ceramics with evenly laid out spirals inside.
Wood-burning: structure and principle of operation
This is a great option for a beginner potter. It does not require large material costs to manufacture, and dry firewood is available everywhere. Wood stoves come in several types :
Earthen
A descendant of the ancient technology of burning in a fire flame. Above the narrow pit - the firebox - a clay roof is built on which the products are laid. A vault of bricks or strips of clay is built around the products, and a smoke hole is left at the top. The design works like this: charcoal is burned in the firebox, which gives a high temperature and does not smoke.
Hot gases without flames pass through the chamber with the products, heating them, and exit through the hole at the top. The temperature is regulated by the amount of coal and the “latch” on the chimney. After cooling, the stove roof is disassembled and the finished products are taken out.
Such a stove is suitable for one-time work , since each time you have to lay it out again. But, despite the labor intensity, the option is the cheapest - the cost of components is zero.
Brick
They are assembled from fired clay bricks and fire-resistant fireclay bricks . The operating principle is similar to earthen ones. They consist of a firebox with a grate, a chamber for products and a chimney.
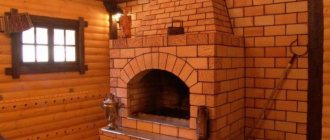
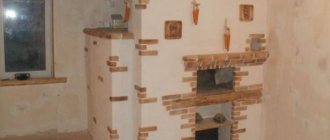
Photo 2. Kiln for firing ceramics made of refractory bricks with a chimney and firebox on the street, next to the house.
The difference is that the design is reusable and more efficient . Products are placed into the chamber through a collapsible wall or door; the stove can be heated with wood - the flame does not reach the products.
Reference! It is important to use dry firewood , otherwise the products will pick up moisture and become cracked. Brick has high thermal conductivity, the stove cools down, so this design is voracious.
Metal with lining
Thanks to the use of basalt and kaolin insulation, a wood-burning stove becomes more heat-resistant and efficient. Such a stove consists of a firebox on which a metal container is installed.
Photo 3. A ceramic kiln with an unheated metal body and lining has heat-resistant properties.
The walls and roof are insulated with non-flammable material; sometimes the metal frame does not even heat up. The heat from burning wood in the firebox rises, heating the products, and the cooled streams of air descend and rush through the chimney into the chimney. These stoves are much more economical than brick stoves and are easy to manufacture.
The downside is the need to use expensive insulation , the plus is the durability and mobility of the structure.
Gas
Has a number of advantages:
- The gas burns completely and contains no moisture.
- Gas burners develop high temperatures.
- Temperature regulation is easy.
A gas furnace for firing ceramics is made using different technologies:
- Muffle . A muffle is a separate sealed chamber in which ceramics are heated and makes it possible to produce earthenware and porcelain, since the workpieces do not come into contact with hot gases - combustion products.
The muffle is placed in the combustion chamber and the flames are distributed evenly over the entire area.
- Chamber. Excellent for firing conventional ceramics. Products are loaded into an insulated chamber through which hot gases pass. The burner is installed lower and separated by a partition. The temperature distribution occurs evenly, when cooled, the gases exit into a special hole at the bottom of the chamber.
What is this process and features of the technology
The heat treatment of clay building materials under high temperatures is called firing. This is the final stage of brick block production. The firing technology includes 3 stages:
- Warming up.
- Burning.
- Cooling.
At the first stage, the brick is heated to a temperature of 120 degrees in order to evaporate the water from it. Then, to burn out impurities of organic origin and finally remove the liquid, it is heated to 600 degrees. At the next stage, the brick firing temperature is 920-980 degrees. At the same time, the clay begins to shrink and strength is acquired. Under conditions of constant maximum temperature, the brick block is hardened and languishes for some time. At the final stage, the resulting clay building material is cooled. If there was no violation of technology during heat treatment, the color of the block will be orange-red and the structure will be uniform. To obtain glazed brick, repeated firing will be required.
In order to ultimately obtain durable and high-quality fired bricks without cracks, the heat treatment process requires strict temperature control
Difficulties that may arise during the process
diagram of a home mini brick kiln
The characteristics of the tunnel brick kiln can be familiarized with during assembly or use, but at the same time it is fraught with some difficulties. Before each new start of work, you must monitor
- the way fuel is consumed. Now, as you know, fuel is very expensive. And if several ignitions are required at maximum temperature, then its consumption will be enormous. Most manufacturers try to fit the entire batch of goods into the first ignition. If you do it as expected, the price of brick will increase many times over.
- furnace performance. If you lay 30 pcs per day. goods, then it will not be possible to obtain any benefit from this entire process. How to make a brick kiln is no longer the first question, because most production uses a cyclic method.
- Because many craftsmen claim that it is no longer profitable to fire clay products, the best way is to produce silicate under the M150 brand.
- temperature and always compare it taking into account partings, although this process is complicated because such high-quality and expensive equipment requires increased attention.
How to fire ceramics?
To properly fire ceramics, it is important to maintain the temperature regime in the kiln. Firing takes place in three stages:
- Evaporation of moisture. The products are heated to 250 °C and kept at this temperature.
- Heating up to 900 °C in a closed oven. Clay sintering occurs.
- Gradual cooling.
Firing furnaces must not only develop the required temperature, but also allow it to be regulated. The design should be as simple as possible , loading and unloading products should be easy.
Cage (laying)
Only well-dried raw materials can be placed in the kiln, otherwise a lot of fuel will be required during firing.
In addition, insufficiently dried raw materials produce up to 80% of rejects. The main reason for the defect is that excess moisture, turning into steam, seeks a way out and leads to cracking of the brick.
The laying of raw bricks in the furnace (see Fig. 7 ) is carried out so that in the first 3-4 rows of laid bricks the gaps between them are (for bricks located directly near the firebox) 10-15 mm, and as they move away (further from the firebox) increased to 25 mm.
The rows can be laid in any way, for example, “lattice” or “herringbone”. Methods can be alternated.
The main thing to remember is that each brick must be accessible to flue gases flowing around it.
The distance between the cage bricks and the furnace walls should be within 20-25 mm.
Furnaces for firing ceramics (clay) and porcelain
Firing in kilns is a mandatory technological operation, without which it is impossible to manufacture ceramic products. In this case, quite high demands are placed on the equipment used. The furnace must provide uniform heating of the working space, as well as maintain a stable temperature throughout the firing procedure.
It is necessary to purchase stoves exclusively from responsible, time-tested manufacturers. In this case, the customer can be completely confident that he will receive high-quality, reliable equipment that fully meets his needs.
Kiln for firing ceramics
Thanks to the customer, a high-quality muffle furnace for firing can be purchased at an affordable price. The organization produces products exclusively at the expense of its own production facilities, using specialized equipment and reliable components.
The company offers furnaces necessary for working with ceramic products of any configuration. The range includes both compact modules for small enterprises and large-scale installations for large industrial organizations. It is important to note that you can buy a kiln at a very attractive price, without unnecessary intermediary markups.
Machine for making bricks at home
You can make a machine for making bricks at home yourself, having the appropriate drawings, materials, tools and skills of a mechanic, welder, metal carver and turner. In addition, you can’t do it yourself and therefore, in addition to everything, you will need an assistant who also has some abilities in assembling metal-mechanical structures. Taking into account all these requirements, it would be more rational to purchase a ready-made machine manufactured by specialists at the relevant enterprise.
What is its operating principle? The machine compresses the ready-to-brick mixture, thereby simplifying the production process. This is all done manually
Such equipment costs about $800 and has the following capabilities:
a) productivity of approximately 100 units of bricks per shift (8 hours); b) produces standard brick sizes: 250 x 120 x 80/60; c) number of workers from 1 to 2 people; d) produces 1 brick in 1 cycle; e) the required production area is from 15 to 20 m²; f) approximate payback period for 1 month.
You can learn how the machine works by watching this video.
Homemade brick kiln
Homemade brick kiln
In addition to the machine, it is necessary to build a furnace for firing the formed raw sample. Unlike a machine, a kiln cannot be purchased; therefore, after calculating the manufacturing costs, it must be installed in the field of general brick production. Construction of a furnace will not take much time if you turn to specialists in this matter. Your task will be to decide on the shape of the stove, its dimensions, the heat source and the location of its installation. Naturally, this place should not be very close to the machine for making bricks, but not far away, so as not to waste a lot of working time.
Loading principle in tunnel kilns
loading bricks into tunnel kilns
To create gas kilns for firing bricks you need
calculate a certain number of products in the required time. Basically, in such furnaces there is a large chamber where the raw materials are placed. These chambers are similar to a tunnel, and in the middle there is an element for heating them. Thanks to these devices, the entire system begins to work. Each of them is divided into sections, which have a certain temperature during brick production.
The layout of brick kilns varies from the design itself, which has special pushers in each section. They, in turn, cannot work without carts, and to move them they must have rails. To speed up the work process, it is necessary to automate everything, this will significantly save financial investments, and this is a cherished desire for every entrepreneur who has decided to engage in this production.
tunnel kiln diagram
To design a tunnel kiln for firing bricks, you need to contact a specialist for a drawing, since it can have a different shape. At the moment when the brick is loaded, it is gray in color, and when it comes out it turns orange, which can be seen in construction stores and markets. During the manufacturing process of a product, the furnace operates according to a certain principle:
- On the 1st cart, which has a pallet, raw bricks are loaded in a couple of rows. When loading it, you must respect the height. It should be no more than 1 m; if this threshold is exceeded, the brick will become defective:
- In order for the tunnel brick kiln to work, automatic devices and pushers must be turned on. The trolley is activated loaded with material. As soon as she moves inside the stove, wet bricks fall into the 1st chamber. An ignorant person may ask the question: “How to put bricks on a trolley so that after the procedure they acquire a certain shape?”:
- The next step in conventional technology is intermediate drying of the raw product. The layout of a brick kiln at home is completely different from that of a production facility.
tunnel kiln design
When the oven gradually heats up, all the moisture comes out of the brick, and if this building material is loaded into a hot oven, it will simply tear or become deformed. Therefore, we need to be more careful about working volumes.
- To gradually move the raw product, chamber brick kilns are used. When the brick approaches the chamber, the temperature there already reaches about 900 degrees Celsius, and maybe even higher. Each material is in this department for a certain time. After the allotted period has expired, another batch arrives, and this one moves on to the next stage of processing. If you implement a tunnel structure like this at an enterprise, you can get a very good result in a short period of time.
- The next step when designing brick kilns involves connecting all the particles of the product. When the moisture that is between the crystals completely evaporates, the raw material somewhat resembles ceramics. The most interesting thing is that ceramic products are produced in exactly the same way.
- This, in general, is where the firing ends and the future building material moves into the next chamber for cooling. This process should also be gradual, not abrupt. Meanwhile, the automatic conveyor continues its work and the almost finished building material ends up in the last department. Before sale, the product is kept in a mobile tunnel brick kiln in the last section, where the lowest temperature is maintained.
- At the final stage, the pushers seem to push the trolley out, and the brick finally cools down without physical or mechanical intervention, as well as without a sharp temperature difference. After it cools down, it is transported to a warehouse.
A mini brick kiln is the most mobile and automated design for the production of this product. It cannot be compared with the results of the tunnel, because all the work is based on the conveyor method. Of course, a significant amount of money needs to be invested in such an enterprise, but with such equipment, which can produce a huge volume of products, all costs will quickly pay off.
Types of muffle furnaces
Based on their design features, the devices are divided into:
- tubular or cylindrical;
- horizontal or vertical.
By type of heat treatment composition:
- air;
- vacuum;
- based on inert gas.
You can only make an air muffle furnace at home, so this is what we will discuss in the article.
According to the features of the thermoelectric heater:
- gas;
- electric.
Of course, a gas furnace will be 3-4 times cheaper to operate than an electric one, due to fuel savings, but, firstly, it is prohibited by law to manufacture and use such a furnace, and secondly, making a muffle furnace with your own hands on gas is technically extremely difficult.
Using simple materials, the stove can be made in any convenient shape, including one that perfectly matches the interior of the room.
Photo 2 Scheme of an industrial muffle furnace
Manufacturing of the device
In this case, we will tell you how to make a vertical muffle furnace for firing ceramics with your own hands.
To do this you will need the following tools:
- angle grinder (grinder) and 1-2 wheels;
- electric arc welding and electrodes;
- metalworking tools, including wire cutters;
- 2mm nichrome wire.
- 2.5 mm steel sheet or used oven body;
- corner;
- fittings;
- basalt wool;
- refractory fireclay brick;
- fireproof mortar;
- silicone sealant.
Essential elements
Frame
The body of an electric oven or miracle stove is ideal as the basis for a homemade muffle furnace for fusing or cupelling, since it already has all the necessary insulation. You just need to remove or remove all the plastic elements.
Photo 3 Old oven in the form of a muffle furnace body
If you can’t find such an oven, the body can be welded from a sheet previously cut into blanks. Weld all the sidewalls, clean the seams with a wire brush or grinder and cover with a primer.
Making a body from sheets, although a little more complicated, allows you to make a design that is suitable in size for a specific room.
A heating element
A key component of the device, since it determines the temperature in the oven and the heating rate. You will also need to make a thermostat for the muffle furnace with your own hands, or purchase a ready-made one. The heating element will be nichrome wire, the diameter of which is selected depending on the maximum temperature. The minimum and most consumable diameter is 1.5-2 mm.
Nichrome on a standard spiral can withstand 1100 degrees, but it is necessary to prevent air from entering, otherwise it will burn. Fechral is best suited for a muffle furnace - its operating temperature is 1300 degrees, and it is also friendly with air.
Photo 4 Heating element
Any electric muffle furnace, even the smallest one made by yourself, consumes about 4 kW when heated to 1000 degrees. Before use, check all wiring and install a 25 A automatic stabilizer.
Thermal insulation
The most important aspect of the work, which is responsible for the integrity and efficiency of the entire structure. Fireclay bricks are installed inside the muffle furnace using fire-resistant glue. It is cut to the size of the stove using a grinder. Basalt wool is used on top.
Photo 5 Fire-resistant adhesive Terracotta
Some forums for the manufacture of muffle furnaces recommend using asbestos for masonry. This is truly a fire-resistant material, but already at a temperature of 650 degrees+ it begins to release carcinogens.
Making a homemade muffle furnace
The first point can be skipped by those who use an old oven as a body.
Manufacturing methods
Adobe is an unfired (raw) form of brick.
Today there are 3 methods of brick production known:
- adobe - unfired brick made with the addition of straw; raw brick; burnt red brick.
The adobe production technology is as follows. First, you need to make special molds for filling measuring 25x12x6.5 cm. The material for the molds is 20.5 mm thick boards and 2 small pieces of plywood, which are connected to each other with nails 5-6 cm long.
To form recesses in the brick, small projections are made in the two lids of the mold. This promotes better adhesion of materials. The top cover is made removable.
Next they move on to making the solution.
Lean, fatty clay and thoroughly ground straw are placed in a large container with low sides in a ratio of 1:1:5. Adding a little water, mix the resulting mixture with a shovel, and then pour it into previously made molds slightly moistened with water. The form is filled out completely, including all corners.
Excess solution is removed with a metal spatula. Sprinkle a little cement or dust on top and cover with a lid. After some time, the molds are turned over, having first removed the top cover.
Shelving under a canopy is used for drying bricks. Typically, drying takes 7-14 days, depending on climate conditions. During drying, avoid direct exposure to sunlight and ensure good ventilation.
Raw brick is made from clay without straw in an unfired manner.
Adobe is a fairly durable type of brick, and buildings made from it have been preserved for decades.
Raw brick is produced similarly to adobe, only sand is added instead of straw. At the same time, the proportions of materials remain the same.