Which side should we attach Penofol to in detail in our article earlier? Now let's talk about its application.
Additional space in an apartment or house will never be superfluous. After thermal insulation, they can even be attached to the living space. Therefore, thermal insulation of auxiliary rooms is important. To do it well and correctly, you need to determine the method of thermal insulation and the order of work. In our article we will look at which Penofol is best for insulating loggias and balconies, and what is needed for effective insulation.
Penofol - the newest generation of insulation
- Penofol can rightfully be considered the latest and most modern development in the field of insulating materials. The whole point of penofol is the ideal combination of polyethylene foam and aluminum. In addition to the insulation function, this material perfectly provides comprehensive protection for the balcony.
- Foamed plastic has low thermal conductivity properties, and aluminum foil perfectly reflects heat. In combination, these characteristics guarantee low heat loss in the room. They are able to retain about 95% of the heat on the balcony.
- Penofol perfectly repels moisture and can be used to waterproof a room. The insulation will not allow raindrops or moisture evaporation to enter the room.
- The porosity of foam plastic remarkably absorbs external noise. This fact takes on special significance if the loggia faces a busy street.
Penofol can be installed without the use of other materials. This is due to the rich protective functions of the insulation. The hydrophobic properties of the material make it possible not to lay a moisture-proof layer underneath when carrying out work on insulating the balcony.
Physical characteristics of penofol
Penofol is one of the latest developments from manufacturers of high-quality multi-tasking insulation materials. It is made of aluminum foil and polyethylene foam.
The main positive quality of this material is its high thermal insulation performance. Its additional positive characteristics include the possibility of using it for steam, sound and waterproofing, as well as for reflecting heat flows.
If penofol is laid in two layers, then the waterproofing of the room can be neglected. In addition, the characteristics of penofol make it possible to provide stable warmth in the room during the cold season and, conversely, keep it cool on hot days. Modern manufacturers produce this material in rolls, in which its thickness can vary from 3 to 10 mm, that is, during installation it has almost no effect on the free space.
We insulate the balcony with penofol with our own hands
Penofol has a structure that makes it easy to cut it into sheets of the required size and shape; it adapts perfectly to any repair conditions. The polyethylene foam included in its composition makes it possible to fasten this material with screws or nails, without reducing its thermal insulation characteristics.
Penofol with different properties is labeled with different letters. The marking in this case means the following:
- A: covered with foil, which ensures its vapor- and waterproofing properties, on one side (it is recommended to strengthen such sheets by placing them with foil against the wall adjacent to the street);
- B: The same coating is located on both sides, so it can be attached in any direction;
- C: on one side there is foil, and the other is self-adhesive (this material is used on walls for which the issues of vapor and waterproofing are less relevant, that is, on those adjacent to the interior);
- R: has a relief surface, and is covered with foil only on one side;
- M: has the same surface, but covered with foil on both sides:
- ALP: covered with polyethylene film with lamination on one side and covered with foil on the other.
Penofol contains a filler that has a structure with completely isolated pores and, due to the air enclosed in them, provides excellent thermal insulation with minimal dimensions. Polyethylene is covered on one (and sometimes on both) sides with aluminum foil no more than 14 microns thick.
Modern penofol can be classified as an average-cost heat insulator: its cost is significantly less than penoplex and mineral wool, but at the same time it is somewhat more expensive than polystyrene foam. Its thermal insulation characteristics are correspondingly lower than those of polystyrene foam, but higher than those of the cheaper materials mentioned above.
Types and advantages of foamed polyethylene
When carrying out work on insulating a loggia, you can use several types of penofol, which are indicated by letter indices:
Type "A"
This type is lined with aluminum foil on one side only. For this reason, it makes sense to use it only together with other insulation materials.
Type "B"
This type is lined with aluminum foil on both sides. This makes its thermal insulation properties an order of magnitude higher than those of type “A”, and it can be used independently.
Preparatory activities
Preparatory work includes cleaning the walls, eliminating roughness, and filling gaps and cracks with polyurethane foam. At the preparatory stage, you should choose which materials the penofol will be laid with, and also determine the number of layers. Most often, insulating materials are installed in two layers; you can get by with one penofol or combine it with other materials, for walls with penoplex, for the floor with foam, and two layers of penofol are laid on the ceiling.
Primary waterproofing is carried out using a two-millimeter polyethylene film attached to the walls, ceiling and floor using liquid nails or bolts.
The main advantages of foil insulation
This material guarantees:
- Excellent protection against fire, which is caused by materials that do not support combustion.
- Environmentally friendly.
- Penofol guarantees excellent protection from external noise, thanks to a layer of foamed plastic.
- Penofol is not at all interested in any insects or rodents.
- Easy to install.
- The insulation block is thin. This will be convenient when installation is carried out in difficult places.
- Penofol has excellent insulation properties and practically does not release heat from the room to the street.
Insulation of floors and ceilings using penofol
Scheme for insulating a loggia with penoplex.
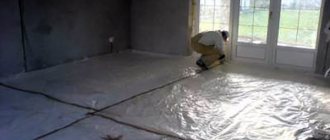
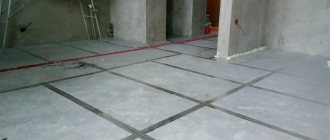
Thermal insulation of the floor is an important component of the renovation. The technology is similar to the previous one. First, you need to level the floor surface, remove old baseboards, and so on. Then the sheathing is made from beams. Their height depends on how many layers of insulation are required. The frame is attached, retreating 10 cm from the edge of the wall. The step between the beams is 50-60 cm. The sheathing is fastened with a puncher or hammer. First, drill a hole, insert a dowel and nail a self-tapping screw. At the next stage, the insulation is installed. It is important that the rolls fit tightly together. It is recommended to cut penofol sheets slightly larger than the distance between the beams. This will ensure they fit snugly.
After this, plywood sheets are laid. When attaching them around the entire perimeter, it is necessary to leave a small gap of 1 cm. The sheets are fastened with self-tapping screws every 45 cm. Thermal insulation with penoplex involves a concrete screed with a layer of about 4 cm. Insulation of the ceiling is similar to insulation of the floor. But there are also differences. Here, after laying the first layer of insulation, it needs to be fixed with a wooden strip using self-tapping screws. The slats are taken in length equal to the width of the loggia. The joints are filled with polyurethane foam. The second layer of penofol will be attached with horizontal slats.
Their length is equal to the length of the loggia. That is, you get a kind of lathing of crossed slats. The outer slats are placed at a distance of about 10 cm from the wall, and the third is placed between them. Penofol is overlapped with a margin. Next, the slats are fastened with self-tapping screws in increments of 50 cm. Finally, the ceiling structure, like the floor, is leveled and finished using panels.
Disadvantages of insulation with penoplex
- Difficult to install. It will not be possible to place the block on nails because this will ruin its waterproof and heat-insulating properties. You can only use staples, however, type “C” penofol provides an adhesive layer for installation.
- The insulation has low strength, which does not allow it to be laid under wallpaper or as an independent external insulation.
Laying penofol with an inner layer
Scheme for insulating a loggia with penofol.
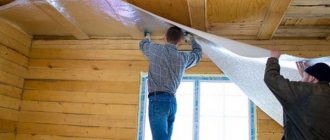
As with floor insulation, in this case you will need penofol. This is the next stage of work. The rolls are laid on foam boards. Before this, you need to carefully seal all the joints. It must be remembered that penofol is placed with foil inside. It is fastened with self-tapping screws. In addition to retaining heat, it serves as a vapor barrier film. The seams are taped with special tape. It is advisable to lay it evenly and not overlapping. After this, installation of the sheathing begins. It is necessary to ensure ventilation of the insulation and to secure the facing layer.
For lathing, it is optimal to use wooden slats with a cross-section of 40 x 20 mm. They are nailed to the surface parallel to the floor, that is, horizontally, at a distance of 40-45 cm from each other. Lastly, they are nailed at the window. Levelness is checked using a building level. If necessary, you can use polystyrene foam when you need to level the surface. By the way, you can also insulate a loggia with polystyrene foam, but this method is more effective. Once the sheathing is ready, you can begin the exterior finishing. For these purposes, lining or plastic panels are suitable.
Step-by-step instructions for installing insulation.
Even though this insulation is quite easy to install and performs many functions, it is necessary to adhere to certain standards and comply with technical conditions. This is the only way to achieve maximum effect from penofol insulation.
Work algorithm: how to insulate a loggia with your own hands
An insulated loggia or balcony successfully serves as a storage room where you can store canned food and other food supplies.
There are options for using a loggia or balcony as a dressing room or dining area, etc. How to insulate a balcony with your own hands - the main options for modern insulating materials will help you carry out the thermal insulation process carefully and with maximum heat-saving effect.
In general, the thermal insulation of a loggia or balcony, as mentioned above, consists of the following stages:
- Window installation;
- Insulation of floors, walls, parapets and ceilings;
- The loggia is being finished, i.e. lighting, ventilation, etc. are installed.
According to the recommendations of repair specialists, a balcony or loggia should be insulated in the summer. Thus, in winter it is possible to carry out repair work if the air temperature is not lower than -20°C. But in autumn and spring, you should take into account the increased humidity of the surrounding air.
Overview of thermal insulation materials
The insulation market is annually replenished with new types of high-quality products with low thermal conductivity, but the new options are mostly improved modifications of traditional materials for thermal insulation.
Technoplex is the best development of the TechnoNIKOL company. This is an already popular general purpose extruded polystyrene foam, improved by including processing additives and a steam generator.
There are universal insulation materials that are equally suitable for cladding floors, ceilings and walls (extruded polystyrene foam boards, for example, Penoplex), and there are materials suitable only for finishing one area of the balcony. Let’s assume that the floor is covered with expanded clay, but it is not used for the walls and ceiling due to its flowability.
Review of modern insulation materials, affordable and safe:
To decide the best and fastest way to insulate a balcony, you need to analyze the installation conditions. Let's assume that on balconies with limited space it is better to use thin materials - penofol, polyethylene.
If space allows or you need to raise the floor to the height of the flooring in the room, then any thick insulation in the sheathing will do - mineral wool, glass wool, polystyrene foam.
Polyurethane-based compositions
For the installation of penoplex such products are often used. Most are sold in cylinders, so they are convenient and easy to use even for a beginner. The products are ready for use, they do not need to be mixed, and the consumption is economical. The most popular composition of the series is “Insta-Stik”. It is sold in 750 ml cylinders, the consumption when gluing is 12-15 sq.
Another well-known glue is Titan Stiro-753. Its consumption is approximately the same (about 14 sq. m). The product has a high peeling force (600 kPa), and the setting time is even shorter (15 minutes). Penosil Fix{amp}amp;Go Montage is frost-resistant; it is used at -65... 130 degrees. Using the described means, it is easy to connect foam sheets together, stick them on wood, attach them to a brick wall, or to concrete.
If necessary, the adhesive will provide adhesion to most building materials. Among them are plaster, stone, wood, expanded clay concrete blocks, metal, cork, cellulose. If the material had to be foiled, this product is incompatible with it. Foam is also not suitable for polyethylene, silicone, and Teflon. Here are the main characteristics of the material:
- drying – 10-12 minutes;
- complete hardening – 24 hours;
- possibility of cutting – within 30-40 minutes.
The product is used both for external work and for internal thermal insulation indoors; it is suitable for insulating loggias and balconies.
Arrangement of sheathing for a clean floor
Since it is planned to use penofol (isolon), which has a metallized aluminum surface, as insulation, ceramic tiles or thin flooring (linoleum, laminate, parquet) cannot be directly laid on it. Due to the porous structure of the insulation, such a coating will “walk” underfoot and creak.
Therefore, when the screed has fully gained technological strength (indicated on the packaging), it is necessary to make a lath.
There are two options for laying the sheathing bars - longitudinal (along the length of the balcony) and transverse (along the width of the balcony (loggia). The first option is preferable for balconies of regular shape, the second for wedge-shaped, rounded, curved, corner balconies.
Be sure to focus on the material from which the clean floor will be laid. If these are panels (chipboard, moisture-resistant plasterboard 10-12 mm), it is necessary to take into account the dimensions of the material so that there is always a block at the places where the plates join. Otherwise, chips may occur during operation.
The bars prepared to size are drilled with a thin ∅ 2.5-3 mm. drill, laid out in increments of 400-450 mm. and with a thin long nail inserted into the drilled holes, drilling locations for plastic dowels are marked.
To securely fasten the sheathing, dowels of at least ∅ 10 mm should be used. Pay very close attention to the markup. Most balcony slabs have voids. If you drill holes for fastening the sheathing and get into them, the floor will “play.”
The second important condition is the use of a depth stop (limiter) for the hammer drill. The balcony slab is only 100 mm thick. Therefore, it is not worth drilling deeper than 80 mm. Otherwise, you will have problems with your neighbors living on the floor below because of the hole in the roof of their balcony (loggia).
Vapor barrier of the floor on the balcony
To insulate this area of the loggia from steam, a slatted sheathing is installed. After it, a vapor barrier strip is placed. Boards or plywood will serve as the floor surface. Linoleum or laminate should be laid on top of them. In the latter case, an additional thin polyurethane backing is needed.
Be sure to place vents in the space under the floor. They need to be connected to ventilation ducts. Then the vapor barrier of the balcony will function normally.
To create insulation from steam and at the same time insulate the floor, you can use Izospan. This material is cut into small rectangular pieces and overlapped. Its size should be about 8-10 cm. To prevent the edges of the vapor barrier gasket from coming apart, they are glued with construction tape.
