Insulating a bathhouse from the inside is the easiest way to create a “thermos” that will retain heat as efficiently as possible. This will also allow you to warm up the room faster, rather than waiting for hours to steam. However, in this case, the thermal insulation of the walls must be heat-resistant, resistant to moisture and not emit harmful substances when heated.
We'll tell you how to insulate a bathhouse from the inside, which insulation is best suited for a bathhouse, and how to properly install it on the walls and ceiling.
Is it necessary to insulate a bathhouse and steam room?
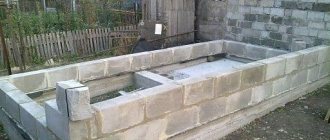
Brick baths always need insulation due to the high heat capacity of the structural material from which the walls are made. Simply put, walls take a long time to heat up, so a thermal insulation layer is necessary. Thanks to it, the temperature in the room rises at lightning speed and then very slowly drops. And in general, much less resources are spent on heating.
The heat capacity of wood is lower than that of stone. So you can do without insulation if the wooden wall is thicker than 150 mm. But then the bathhouse will take longer to heat up, retain heat worse, and spend more resources on maintenance and heating.
Therefore, the insulation of a bathhouse and steam room depends not only on the material of the walls, but also on the desire to make these rooms as durable and energy efficient as possible. In addition, thermal insulation can be completed without the help of professional workers in just a few hours. And it will subsequently save time and money for decades.
However, there are other important benefits. For example, due to the fact that LOGICPIR insulation does not allow moisture to enter the walls, it helps to maintain not only warmth in the room, but also an environmentally healthy environment. This material prevents the appearance of mold and mildew, which means it reduces the likelihood of developing asthma, allergies and other lung diseases. After all, their main enemy is high humidity.
Materials
Insulation of the steam room from the inside begins with the selection of material. The material for thermal insulation of the walls and ceiling of the bathhouse must meet a number of requirements:
- fire safety, the heat insulator should not support combustion and ignite under the influence of high temperatures;
- possibility of long-term operation in conditions of high humidity;
- the material should not be afraid of temperature changes;
- environmental safety, it is necessary that no harmful substances are released when heated.
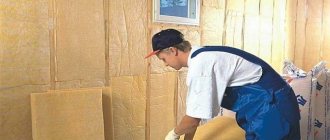
Mineral insulation materials are well suited as insulation for steam rooms. These include mineral wool and fiberglass. Available in rolls or in the form of slabs. They are durable, fire resistant, and unattractive to rodents. The fibrous structure of these materials contains air, due to which they have high thermal insulation properties. But when wet, cotton insulation loses its characteristics, so they need to be protected from moisture.
Why we recommend using LOGICPIR insulation
What is the best way to insulate walls in a bathhouse and steam room? We recommend LOGICPIR insulation. This is a polymer material with a porous internal structure, lined with aluminum foil on both sides. At high temperatures, catalysts and additives form closed cells filled with low thermal conductivity gas.
In addition, this rigid insulation is very easy to process, cut and install. At the same time, it does not generate dust, does not prick, and does not irritate the mucous membranes of the person doing the installation. And it performs two functions at once: insulation and vapor barrier.
The main advantages of thermal insulation of the steam room
The main advantage of insulating a steam room in a bathhouse is that it will be warm. Additional benefits are:
- fast warm-up;
- rational fuel consumption;
- long-term heat retention;
- microclimate that increases the effectiveness of health procedures.
If the steam room is insulated poorly, you have to heat it for a long time, burning a lot of wood. In addition, the cold layer of air accumulating below can lead to a cold.
High thermal insulation characteristics
Two features make LOGICPIR insulation most effective:
- record low thermal conductivity coefficient of 0.022 W/m•K;
- high reflection coefficient - from 95 to 98%.
The material belongs to the class of reflective thermal insulation - it fully complies with the requirements of GOST R for reflective thermal insulation. That is, it allows you to retain radiant heat from the stove, save its energy, effectively reduce heat loss in the room, and at the same time does not absorb moisture at all.
Beginning of plating
A bathhouse is a room in which the temperature rises quickly and lasts a long time, so here you need to create the so-called thermos effect.
We insulate the bathhouse from the inside using any type of insulation. Then you need to install a hydrobarrier and a reflector that returns heat to the steam room.
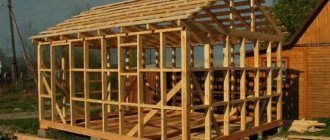
The next stage of work: installation of sheathing under the lining. If you do not plan to attach shelves to the walls, then you can use ordinary slats for the sheathing. Otherwise, purchase beams for the sheathing that can support the weight of a human body. Of course, the slats must be installed horizontally.
Wall upholstery elements placed vertically on horizontal bases
When the sheathing is ready, we begin to cover the bathhouse with clapboard, and you need to start from the corner. Eurolining is becoming increasingly popular. To install it, use clamps that allow you to attach the lining to the sheathing without making holes.
Claimer functioning
Experts advise that when covering a bathhouse with clapboard, use only the vertical type of installation, which eliminates moisture retention on the wood.
Vapor barrier properties
LOGICPIR insulation is laminated with vapor-proof foil - this eliminates the need for a separate vapor barrier layer. This will be confirmed by all professionals who know that only aluminum foil can be considered a full-fledged heat-resistant vapor barrier.
When gluing the joints of the plates with foil tape, a continuous and sealed vapor-tight layer is obtained, which reliably protects the entire structure from moisture. The foil does not allow moisture to pass through and reflects heat, like a mirror: it returns up to 95% of the energy of infrared rays from the sauna stove into the room.
Thanks to this, the bathhouse heats up faster, and the insulation layer becomes a reliable barrier between air with high and low temperatures. LOGICPIR retains heat in the room, like a warm fur coat.
Practical advice
Experienced craftsmen have formulated several tips for those who decide to insulate a steam room with their own hands:
- Window design. To reduce heat loss from windows, it is better to make them small and carefully insulate the opening and slopes. In addition, they need to be placed lower so that the hottest air does not touch them. At the same time, condensation on the glass will be reduced. Multi-chamber metal-plastic windows should be installed to reduce heat loss through the frame.
- The doorway should be low, with a high threshold. This will reduce the outflow of warm air through the upper part and the influx of cold air through the lower part of the opening.
- You should select the furnace power corresponding to the area of the steam room. It is also important to place a sufficient amount of stones in the heater. To speed up heating and increase heat transfer, stones are placed in special wire mesh around the chimney or firebox body.
A properly insulated steam room warms up quickly and retains heat for a long time. It is cozy and comfortable, fuel is consumed economically. If a home craftsman has the skills of general construction work and follows the recommendations given, he can easily insulate the steam room with his own hands.
How to properly install LOGICPIR insulation
We have already found out what is the best way to insulate a bathhouse, now we will tell you how to install the insulation correctly. You will need:
- insulation LOGICPIR Bathhouse 30-50 mm thick;
- adhesive foam LOGICPIR;
- LOGICPIR foil tape 50 mm wide;
- PVC tape 220 mm wide and epoxy glue (if necessary);
- fasteners for fixing insulation and wooden slats.
A pleasant bonus of LOGICPIR insulation is ease of installation. The owner of the bathhouse can easily cope with the installation himself, without hiring qualified workers. The whole process takes several hours and consists of 5 stages.
- Clear the bases of debris and level them. They should be strong, dry and even. In addition, there should be no wane on the wooden base.
- If the bases are stone, attach the insulation boards to the walls using special LOGICPIR foam adhesive. In order not to disturb the thermal circuit, places that are difficult to access for installation should also be insulated with foam adhesive. If the bases are wooden, it is better to install the insulation on self-tapping screws, and it is important to seal the installation locations of the fasteners with pieces of tape.
- Glue or attach the insulation with self-tapping screws along all bases with a continuous thermal insulation layer.
- Tape the joints of the slabs with aluminum tape to create a continuous and sealed vapor-tight layer that will reliably protect the structure from moisture and mold.
- If necessary, glue elastic PVC waterproofing tape with epoxy glue along the entire perimeter of the junction of the insulation with the floor. This will prevent water from getting into the gaps where the floor meets the wall.
As a result, you will get an easy-to-install, energy-efficient, fireproof and durable system. LOGICPIR insulation makes it easy to achieve the effect of a “real Russian bath” in a room.
Ceiling insulation
Insulation of a steam room from the ceiling is carried out according to the instructions:
— preparation of the base;
- use of cotton wool;
— installation of breathable film.
On the ceiling, it is worth removing the outer covering and going through it with a jigsaw. If you have a power tool, it is easier to process large surfaces. Craftsmen try to remove paint and damaged material.
There may be burrs left somewhere, which will affect the adhesion of the materials. If paint or other finishing material cannot be removed, you should use special primers.
In the store you can find products with quartz. It is important to check with the manufacturer for which surfaces the product is suitable. Quartz is considered to be a universal material. After priming, it is worth considering the step-by-step instructions for insulation.
For example, cotton wool and film were chosen for the steam room. This means that sheathing will have to be installed on the surface. When a square room is considered, the design is allowed to be made along guides. In this case, the planks are laid diagonally.
For installation of a guide, metal corners up to 2 cm wide are suitable. However, this option is not suitable for rooms with low ceilings. It is important to understand that the cotton wool will take another 3 cm, plus the film is laid. Next, the exterior finishing is applied.
If you use plasterboard for the ceiling, it is better to immediately choose a high-quality sealant. Some people love foam with good adhesive properties. As an option, you can consider professional cylinders.
It is quite possible to fix the sheathing on the foam, but such work looks extremely rough. Plus, it’s worth remembering that you won’t get a smooth surface. As a result, the cotton wool will not be able to adhere tightly to the surface. Once the insulation is laid, you can begin to apply the film. This is the finishing layer before finishing.
For this purpose, staples that can be fixed manually are suitable. Special guns make the job easier. Ordinary or decorative plaster is used as a finishing finish. If practicality comes first, you can simply smooth the surface.
When you want to create something beautiful, you can try decorative options with paints. Craftsmen try to first check the parameters with the manufacturer. In particular, I am interested in the maximum temperature that a fake can maintain.
Next begins the installation, where you can show the skill of using the tools. Also, do not forget about available materials. For example, you are allowed to use stencils for the ceiling. The result is an abstract drawing that will not leave anyone indifferent.
Homemade options are also appreciated when tulle is used. If you apply it to a surface, the design will quickly be imprinted on the surface.
Door installation
The door to the steam room should be multi-layered so that the heat is retained inside.
The steam room has an entrance door, and sometimes there is a lockable opening to the washing compartment. The flap in the hatch sits firmly, without gaps, but opening should be easy, without effort.
Step-by-step guide to work:
- assembly of the hatch and sash;
- marking hinges on the box and canvas, installing the corresponding parts of the canopies;
- installation of holes in the opening, spacers before applying foam, foaming;
- hanging the canvas on the awnings after the foam has hardened, trimming;
- installation of seals, cover strips;
- installation of platbands.
Choose solid wood so that canopies and handles are held in it. Doors from the steam room are always opened outwards for safety reasons.
Working with a wooden base
The work is performed as follows:
- Mineral wool is placed under the logs.
- Rolled roofing felt is laid on it.
- All wooden elements in the ceiling structure are treated with special antiseptic agents.
- The subfloor is laid on roofing felt.
- The work is completed by finishing the surface with a finishing floor covering.
After the insulation for the steam room is laid from the inside into the floor covering, the floor “pie” looks like this:
- foundation;
- wooden beams;
- vapor barrier material;
- lining and thermal insulation material;
- floor board.
Also, during the process of laying floors, care must be taken to create a high threshold under the front door. This is the most important functional measure aimed at protecting the steam room from cold air masses entering it. Naturally, complete preservation of water vapor inside the room can be ensured only if the door leaf fits as closely as possible to the frame and threshold.
We must not forget that a separate area in the room must be allocated for the installation of the stove and the subsequent removal of the chimney. A separate foundation base with a height greater than that of the main foundation is mounted under the furnace.
Bottom line
The article describes in detail the procedure for insulating walls, floors and ceilings in steam bath compartments
It is important to take into account all the recommendations and advice given in the article, and also pay special attention to the standards for construction work, since installation errors can lead to an unfavorable outcome.. https://www.youtube.com/embed/DK_7K-jGEQo
Also, the work can be entrusted to specialists who will take responsibility for all stages - from purchasing the necessary materials to installing and putting the bathhouse into operation.
Rules for visual inspection of boards and assessment of their condition
The following must be taken into account:
Pay attention to the quality of the chips. The boards must have a flat and smooth surface. This directly affects the economic benefits of finishing work. If the front side of the lining is rough, finishing will be complicated by the increased consumption of antiseptic and paint materials. The moisture content of the boards should not exceed 12-16% (GOST requirement). It is visually impossible to determine whether the material offered by the manufacturer meets this criterion. Therefore, it is necessary to request documents confirming compliance with GOST. If the wood is not dry enough, there is a high risk that it will suffer during the first years of operation of the finished premises. Pay attention to the depth and evenness of the groove. These indicators determine the quality of installation
And it doesn’t matter how it will be done: using clamps, nails or staples. If the groove is shallow, there will be nothing for the fasteners to grab onto.
An important characteristic of boards is width. Often there are lamellas on sale that are wider than standard ones (more than 88 mm) and managers assure that it is more profitable to buy such lining. This is not true, since such a finish will be less durable and there is a high risk of wide boards bending when exposed to moisture.
Decorating the rest room
The bathhouse is always perceived as a place of relaxation from everyday worries. Each room in it is intended for its own purposes. The name of the relaxation room speaks for itself: this is where you relax after water treatments
Therefore, it is important to create a cozy and relaxing environment in it.
Proper finishing of a relaxation room in a bathhouse is not an easy task, the implementation of which can be entrusted to specialists: designers and artists.
A cozy environment is created through the correct choice of facing materials, furniture, accessories, organization of lighting and illumination of various zones and architectural elements of the room.
Roof
Insulated ceiling, floor, doorway - very good. But there is one more heat release channel left, that is, the roof. A metal chimney pipe is usually routed through it, and steel, as you know, “perfectly” facilitates the “discharge” of funds spent on heating to the outside. In bathhouses with cold attics or in the absence of an attic, roof slopes and planes are not insulated. But if there is a residential attic upstairs, there can be no two opinions - thermal insulation is required.
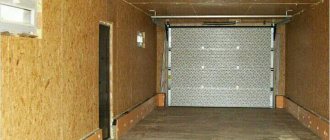
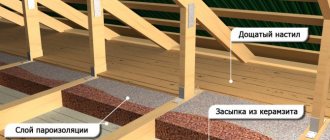
The ceiling is insulated from the inside (from the steam room) using metallized film materials. When laying fiber thermal insulation, it must be covered with a waterproofing membrane that conducts the steam flow strictly in one direction. Floor insulation (with laying boards and filling them with expanded clay) is carried out only on a wooden ceiling.
Concrete floor insulation technology
Thermal insulation of concrete floors in bathhouses is carried out after the installation of a rough concrete screed. To insulate a concrete floor, it is better to use rolled, coating or foam materials - mastics, roofing felt, mineral and basalt wool, polystyrene foam and expanded clay chips.
The work is carried out according to the following scheme:
- The rough screed is waterproofed using polyethylene film. The material is laid over the entire base, observing 6 cm allowances on the walls. When using rolled material, the connecting joints are glued with construction tape.
- Insulation material is installed. The simplest option is sheets of foam plastic, which are fixed to a pre-installed sheathing of thin bars. Screw self-tapping screws are used to install the sheathing.
- Concrete is poured and reinforcing mesh is installed. The height of the finished screed above the insulating layer is from 2 to 3 cm.
- After the concrete mixture has set, the rough screed is poured and leveled to remove air voids. The total height of the floor above the insulation is up to 8 cm.
- Finally, a decorative floor covering with additional vapor barrier is installed.
