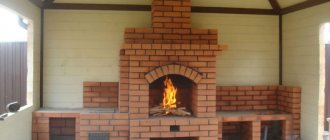
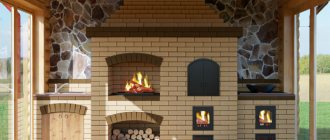
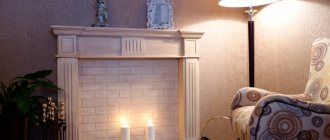
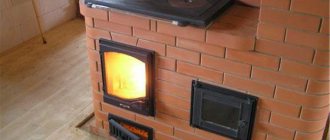
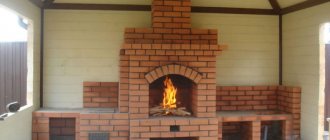
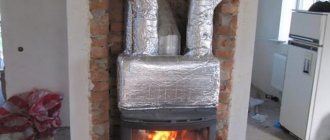
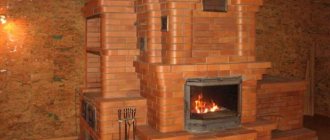
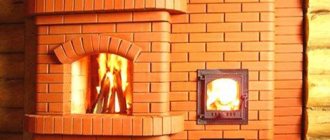
In a private home, a stove is used not only for heating rooms, but also for cooking. The design allows you to live comfortably regardless of the possibility of connecting the building to a centralized gas pipeline. However, the installation of a conventional stove with a hob is carried out by specialists. Despite the complexity of the work, it will be useful for the homeowner to know the selection criteria and popular models of brick heating and cooking structures. Let's also consider the "Swedish" order developed by Ryazankin.
Laying a stove with a metal surface for cooking Source pyromasse.ca
Calculation of fireplace dimensions and required materials
When building a brick fireplace with your own hands, you need to correctly calculate all its parameters so that it performs not only a decorative, but also a practical function, heating the room. First of all, determine the dimensions of the combustion opening or portal:
- The ratio of its area should be approximately 1:50 to a similar characteristic of the room. If the room is 20 square meters, then the firebox is 0.4 square meters
- The height and width should be in a ratio of 2:3. By making a simple equation, you can get the following aspect ratio - 51x77 cm
- An equally important indicator is the depth of the portal, on which the thrust will depend. It should be 70% of the height, in this case 34 cm. An increase will lead to unreasonable loss of heat, a decrease will lead to the appearance of smoke indoors
- The chimney area is made 10-15 times smaller than a similar characteristic of the portal
- In front of the combustion hole it is necessary to place a podium 45-50 cm wide
- Podiums on the sides of the portal – up to 30 cm
- The transfer sheet extends beyond the combustion area at a distance of up to 30 cm
If we talk about the required amount of bricks and various consumables that will be required for the work, it is not possible to give specific numbers. In each specific case, the obtained values will be different and directly depend on the size of the fireplace being built.
Everyone can make approximate calculations themselves, choosing the most suitable ordering option.
Find out also about how to install a heating and cooking stove
The nuances of finishing the stove
The walls of the stove, made of good brick, and even decorated on the outside, do not need to be finished: whitewashed and plastered. If there are no chips or cracks on the masonry elements, and the verticals and horizontals were observed during construction, the heating structure will still look great.
On stove masonry made of high-quality brick, it is enough to grout and carefully unstitch the seams. Without unnecessary finishing, the heating and cooking structure looks better.
If there are still complaints about the stove walls, there are defects on them, and the masonry is not ideal, then finishing is very necessary. Before finishing work, the outer surface is thoroughly mopped, rubbed with a piece of brick to improve adhesion, and then wait for it to dry.
The dried unit can be plastered using the clay-sand mortar used in the masonry. To increase strength, it is possible to add 1% asbestos chips to the composition. Heating options for stoves are lined with tiles - this is the most reliable and gas-tight, but also the most labor-intensive type of finishing.
Laying a stove with a cauldron
It is better to think through the masonry scheme in advance or find it on the Internet. The finished arrangement will make it easier to lay the stove and cauldron. The surfaces inside the oven should not have any ledges. Cast iron elements are used for the arrangement: doors, grates, views.
During the process of laying bricks, it is necessary to control the width of the horizontal joints. It should be the same.
First, lay the main part, then attach a compartment under the cauldron.
On the barbecue side, the wall is laid out with 2 bricks.
At the base of the cauldron stove there is a firebox. Two doors are installed in the front wall: the main one and for cleaning.
The internal walls are made of heat-resistant bricks; a grate must be installed in the lower part of the compartment.
The oven dries for about 2 weeks, after which you can begin lining. You can use plaster or facing bricks for this.
Calculation of the amount of building material
First of all, we choose a stove brick taking into account the place of its application.
Calculation of bricks for the fireplace is carried out in accordance with the working drawings of the orders (a certain order of laying the bricks). For the reserve, an increase factor of 1.15 is assumed.
Basically, any sand is used, but with mandatory screening. For parts exposed to high temperatures, lay out on a clay solution.
Laying a simple barbecue oven
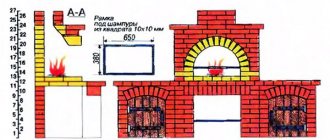
The laying pattern must be determined in advance. The wall is laid in half a brick, using concrete mortar for fastening.
Depending on the shape of the openings, the height of the walls is set at 80 cm for rectangular openings; for arched openings, 60 cm is enough.
The rectangular opening is covered from above with a metal profile, which serves as the basis for laying bricks. The arched opening on top is formed using a frame made of boards. The brick is laid on this frame and the mortar is allowed to harden.
a07ff0f2bc47417ca4e38dc4d992141a.jpe 8e74616542904f5ee431a56554ab2816.jpe
During the laying process, it is necessary to install a pipe if there is a cleaning. The water supply hoses will go through this pipe.
During the laying process, you need to remember three important rules:
- the quality of the masonry is checked by the width of the seams (the seams must be even),
- there must be at least 2 rows of bricks between the table and the upper edge of the opening,
- an arched opening on top must have a central brick.
After arranging the lower tier of the stove, it is necessary to screed the structure, providing a place for washing.
Wooden formwork is installed, after pouring the screed dries for about three days.
Then the countertops are installed.
Selection of materials
Stove brick is used as the main building material for a classic fireplace. It’s worth noting right away that such a brick must comply with certain standards, which are determined by the master immediately before using it. This process appears to be quite simple: lightly tapping a brick with a hammer produces a certain sound, by which the suitability of the building material is determined. If you build without taking this factor into account, there is a possibility of its incorrect functioning.
The mortar, which consists of clay and sand, is also important during construction. As for clay, almost any will do. But, as experienced craftsmen say, the best results can only be achieved using “red” clay. As for finishing materials, today the choice is wide. The material for the portal can be either natural materials: various stones, wood, or “products” of progress – metal alloys and a number of other materials. In this case, it all depends on the required design.
How to combine the advantages of a fireplace and the practicality of a stove
To get the decorative qualities of a fireplace in your home, but at the same time ensure the ease of use and practicality of a closed stove, you need to combine their advantages. There are at least three options to resolve this issue.
- Do-it-yourself independent stoves and fireplaces in one building, and with a common chimney.
- The fireplace is used as a combustion chamber for a brick oven.
- Metal stove-stove with convection heating of indoor air.
Let's take a closer look at each of the options.
Stove with attached fireplace
The easiest way is to build a stove and build a fireplace on the side. It turns out that one stone building will house two autonomous heating devices
When assembling such a fireplace stove with your own hands, it is important to consider that a common chimney will be used
The disadvantage of this design is its bulkiness, a large number of bricks for construction, and a large occupied area, but the stove can be used for constant heating, and the fireplace can be used as a way to quickly warm up near the fire.
Metal fireplace with brickwork
According to the second method, a finished metal fireplace is lined with brickwork. In essence, we get a regular stove, where the fireplace plays the role of a combustion chamber.
For better heat extraction efficiency, you can make many channels in the chimney. Then the chimney itself will also heat up and radiate heat into the room. Pre-finished metal fireplaces have glass doors. Through them you can admire the flames.
The efficiency of fuel use in fireplaces is an order of magnitude lower than in a good stove, so such a fireplace stove for a summer house will be characterized by increased gluttony. In addition, the chimney, which also produces heat, will be located too high and heat the air near the ceiling, and not at the bottom of the room.
220fa7f8c8f8ec884fc49c5ee537e9e6.jpe
Finished design - metal fireplace stove
One of the best options are metal fireplace stoves for summer cottages that use convection air heating. To do this, you need to fix the screen at a short distance from the hot metal walls.
In the resulting channel, the air will heat up and rise, and new cold air will take its place. Due to convection, the entire room heats up very quickly. The screen can be either an additional metal plate or masonry with holes at the bottom and top.
Masonry of a simplified version of the Russian stove
Let's look at a specific example of the specifics of building a simplified version of the Russian stove. Like all units in this category, it belongs to cooking and heating equipment, which means it is equipped with a cast-iron hob. It also has two fireboxes, which allows you to heat the room, cook delicious dishes and bake bread.
A special feature of this particular design is the presence of a specific ash collector located under the carbon dioxide exhaust. Ash is collected through a brick channel located under the grate. The ash container can be emptied from the street, so there will be no traditional furnace contamination in the house.
In order to move the metal box for collecting ash outside, a channel is installed in the foundation of the house, which is connected to the foundation of the stove. This structure should be located under the floor. From the outside, all this is covered with an insulated flap.
This design of the Russian stove provides an external ash collector, emptied from the street side, there is a compartment for the accumulation of carbon monoxide and a place for baking bread
Unique furnace foundation design
The foundation for this version of the stove is also special. It is built as follows. 85 cm of soil is selected for the foundation. The width of the pit should be convenient for constructing the foundation. The bottom of the excavation is covered with sand and compacted so that the resulting sand layer is 10 cm.
A metal case is installed on the leveled base, into which 4 rows of brickwork are laid in cement mortar. At a depth of 12 cm to the floor level, waterproofing is laid, from which a fume vent is constructed: a hollow foundation. This section of the structure is plastered so that cracks – places of gas leakage – can be immediately identified.
This solution allows you to close the chimney view immediately after the firebox, because carbon monoxide will be discharged into the hollow foundation without entering the premises. As a result, the thermal performance of the unit is significantly improved. Ash is removed periodically from a metal box put out onto the street to collect it.
The channel for extending the ash collector is constructed from brick simultaneously with the construction of the stove foundation. To form it, metal corners are installed. The channel is brought to a hole made at the same level in the foundation of the house.
The choice of a specific furnace design and the corresponding order makes it possible to accurately calculate the material costs for the construction of the unit
Preparation for construction
The beginning of the implementation of the idea of arranging a stove in the house should be characterized by the preparation of the project. Without it, all manipulations will be spontaneous and this will lead to the fact that the oven simply will not work. The functionality of the furnace is ensured by strictly defined compliance of certain sizes of significant components.
We begin our calculations by measuring the area of the room. The dimensions of the firebox are directly dependent on the calculated value. A firebox that is too small will not provide the required furnace power, and a large one will waste fuel. The area of the combustion hole is calculated from the area of the room by dividing by 50. Then, the height and width values are selected so that their ratio is 2/3. To determine the depth, you need to multiply the height by 2/3. Remaining village
Some nuances regarding the choice
They are classified according to many parameters. The main thing to do is to decide on the material.
For home use, concrete, brick or natural stone are better suited. For individual buildings, brickwork is more appropriate.
The most common types of lesions are:
- Closed - mounted into the wall during construction work.
- Semi-open - attached to the wall.
- Corner - has the appropriate shape.
- Island - located separately.
Experienced stove makers pay attention to the fact that the area of the room should not be less than 20 m2 in the absence of fresh air.
It is not allowed to install the structure in a draft!
Be sure to first draw up a sketch on paper. If you do not have the necessary knowledge, it is better to use the services of a professional in this field.
The main points that even a qualified master cannot do without:
- size of the foundation to be poured;
- height of living space;
- strength of brick structure;
- requirements for fire safety standards;
- aesthetic side.
With a competent approach to developing a circuit, you can significantly save time, effort, and provide functionality that will not lead to breakdowns and various unforeseen situations.
Safety requirements for barbecue ovens
Having conceived the installation of a recreation area with a barbecue on your site, first of all you need to choose a place to place it
At the design stage, it is important to take into account building codes and fire safety requirements for this structure.
To lay the furnace, refractory bricks are used, which are resistant to prolonged exposure to high temperatures and conduct heat.
The oven gets very hot, so wooden structures are not allowed near its back wall. The buildings on the site must be at least 5 meters away from the future installation of the stove.
There should be no flammable materials or substances near the barbecue area.
When arranging a recreation area or summer kitchen, it is recommended to use bricks, tiles, and impregnate wooden structures with a special fire-retardant solution.
The design of the recreation area must be provided with an exhaust hood, and the stove itself must be provided with a well-designed chimney.
The barbecue oven should have an optimal height of the countertop and work areas for ease of cooking on it, and should not have sharp corners or protruding parts.
Russian stove: drawings of brick stoves
Previously, such designs were found in every home, but nowadays they are already a rarity. Despite this, a Russian stove can successfully fit into the interior of the room. Also, Russian brick stoves are not only a heating device - they also have a hob. To lay the stove you will need the following materials:
- solid red brick – 1610 pieces;
- view for a valve measuring 0.3x0.3 meters - 2 pieces;
- dry clay solution in dissolved form;
- samovar 14x14 centimeters - 1 piece;
- flap 43x34 centimeters - 1 piece.
Firebox for barbecue oven
The next tier includes the combustion chamber and walls (partitions). The firebox is laid from two rows of bricks. The inside walls are made of refractory bricks, and the finishing bricks are on the outside.
The standard size of the combustion chamber is 600 * 700 mm. For a firebox with a rectangular opening, 9 rows of masonry are laid out; for an arched opening, walls 7 rows high are sufficient.
The combustion chamber is completed with 2 more rows of bricks. Then the length of the rows begins to be reduced to form a chimney. The side walls are reduced by 1/4 brick in each row, and the back and front walls are reduced by half a brick. 7 rows are laid out in this way.
Then the chimney is installed. The smoke exhaust pipe should not be made very high. It is recommended to lay 12-14 rows of bricks.
Without sufficient work experience, you can cope with the equipment of a brick barbecue oven of not only the simplest design.
With a careful approach, you can build a more complex version of a barbecue oven with your own hands.
Photo stages of fireplace construction
1-3 row Fireplace pedestal
4-10 row Fireplace portal
Fireplace insert
11-14 row Fireplace shelf
The fireplace is ready
Putting the stove-fireplace into operation
No matter how much you would like to test what the heating device is capable of immediately after installation, this should not be done under any circumstances. First you need to thoroughly dry the walls of the structure. In the hot summer this is no problem. This is why experts recommend building brick wood stoves in the summer, when natural heat can dry the walls in just a week. To do this, open all the doors and valves, and remove the burners from the stove.
The initial heating of the heating device is carried out with a small amount of firewood, avoiding an excessive increase in the temperature of the internal chambers. If the fireplace stove has separate chimney channels, then it is recommended to burn wood simultaneously in two fireboxes. Uniform distribution of heat throughout the furnace will only benefit it. This process is carried out 2–3 times a day for 7–10 days. You can tell that the oven is completely dry by the absence of condensation on the internal metal surfaces. Some stove-makers place crumpled newspapers in the lower cleaning channels, the moisture content of which indicates the readiness of the heating device for intensive use.
During drying and testing of the heating device, small cracks and tears may appear in the joints of the brickwork. To identify them, all external surfaces are thoroughly inspected. However, there is no need to rush to eliminate defects until the oven has been operating at maximum power for at least two to three months. Of course, this only applies to minor faults. Deep cracks through which smoke or carbon monoxide can enter the room are sealed immediately and with special care. The external surfaces of the fireplace stove are inspected regularly. As for cleaning the internal chambers and channels from soot, this work is performed every year, after the end of the heating season.
The advantages of fireplace stoves are obvious, since they allow you to solve many problems associated with heating and cooking, as well as with the design and decoration of the interior space of country houses. Such a heating device will not be superfluous even if you have gas heating, as it will give you confidence in the future and provide an incredibly warm and comfortable atmosphere. When choosing a heat generator design, it is necessary to take into account all the features of the room, and during operation, strictly adhere to the dimensions and be extremely assembled. Only fulfilling all the conditions will allow you to enjoy the warmth and comfort from a fireplace stove built with your own hands for many years.
Choosing a fireplace location
Now, after choosing the shape of the fireplace, we begin to determine the location. It is necessary to take into account the location of windows in the room, as well as air flows. Do not place the fireplace against open or opening openings.
First, the location of the chimney is determined. It is desirable that, when passing through the roof, it does not affect the load-bearing structures (beams, rafters).
It is necessary to maintain the distance to wooden structures. This distance should be more than 70 centimeters.
DIY fireplaces drawings and design
First you need to prepare a design for a brick fireplace. Having decided on the size and shape, take any standard solution as a basis and adapt it to your room. Don't ignore this stage as it will give you an accurate understanding of the entire process.
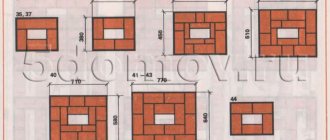
The order and diagram for masonry will allow you to calculate the required amount of bricks and binding material. As a rule, it is drawn for each row, except for the base one.
Diagram of a traditional fireplace
This option is most suitable for beginners. To complete it you will need very little material, however, this design will provide good heating for a room up to 35 square meters. m.
For the hall it can be built higher, the shelf can be decorated with various elements. In modern architecture of private houses, a rustic style is often used.
The hearth can also be placed free-standing without mounting it against the wall. This allows you to highlight its decorative features.
Or vice versa, to save space, build it into the wall.
Corner order: diagrams and photographs
A corner fireplace, as a rule, saves space, so it is often installed in small hallways or bedrooms. The order is given below.
The hearth may have an open or closed firebox.
A modified version - a corner garden fireplace with a stove is very convenient for a summer residence. Such a structure not only has a functional purpose, it will also decorate the summer cottage. According to this scheme, it can be mounted both on the street and in a private house.
The circuit can be easily modeled depending on your needs. And it can be easily adapted to create a beautiful summer kitchen.
Garden hearth
An outdoor barbecue fireplace is not so complicated, familiarize yourself with its order and design and you can easily install it in your garden following the diagram.
Finished with artificial stone, the garden barbecue fireplace looks very original. The basic scheme can be changed to your taste, as in the picture.
Buslaevskaya stove: projects
The design has a built-in hood.
The oven is small in size. It is ideal for any private home, as it allows you not only to heat the premises, but also to cook food. Despite its compact size, the stove heats spacious rooms well, which is why there are ready-made designs for houses with a stove. Special schemes for laying brick stoves will help you complete the work without carrying out complex calculations.
For installation you will need the following materials:
- doors - firebox (0.2x0.25 meters), VK (0.39x0.5 meters), blower (0.14x0.14 meters);
- refractory - 43 pieces;
- solid brick – 382 pieces;
- oven-cabinet 28x33x50 centimeters;
- cast iron stove 0.7x0.4 meters with burners (removable rings of different diameters);
- valves - steam exhaust (12x13 centimeters) and smoke (12x25 centimeters);
- grate - grate 30x20 centimeters;
- corner - three equal-flange blanks 1 meter long and 45x45 millimeters in size;
- steel - piece 0.3x0.28 meters;
- strip - 4 pieces of meter (4 graph paper), 0.25 meters (2 graph paper), 0.35 meters (3 graph paper);
- cast iron plate – 0.4 x 0.25 meters; 40x15 centimeters.
Projects for brick stoves of this type look like this:
- Full row.
- Blower door.
- Window opening for cleaning.
- The bottom of the oven is lined with refractory, three sides are lined with iron.
- Installation of the combustion door, grate, refractory under the firebox, cleaning cover, ash door.
- Installation of DS.
- Laying refractory on the edge around the door.
- Laying according to the scheme.
- The oven is top coated with clay (1 centimeter), the heater is covered, and a stove with burners is attached.
- Installation of smoke circulation with cleaning windows, the stove is not laid. Subsequently, the brick is placed on its edge.
- The cleaning is overlapped, channels are created, and 25-centimeter strips are laid.
- The cleaning is completed and the fastening wire is installed.
- The cap is installed.
- Installation of the VK ceiling, while the hoods remain.
- The stoves are laid out according to the diagram.
- The small stove ends in sheet iron, the masonry is done in the same order as a brick stove.
- The cleaning hole of a large stove is laid out, the edges of the side walls of the channels are cramped.
- Laying protrusions.
- The projections are duplicated and the corner is installed.
- The BP chimney is closed in the same way as row 19.
- A three-row neck is made, the size of the chimney is reduced to a section of 26x13 centimeters for the top valve.
- A chimney is created with grooves on this and subsequent rows.
The dimensions of the structure increase when using clinker facing bricks, so using them instead of solid material is not recommended. When finishing with tiles, durability is ensured (the material lasts for decades), in addition, it can be dismantled for cladding other heating structures.
Rules for operating a barbecue oven
A few basic rules for its operation will help extend the life of a brick outdoor stove.
- A sufficient amount of air must enter the firebox, which will ensure complete combustion of the fuel and will not allow a large amount of soot to settle on the walls.
- The oven damper must be open.
- It is better to heat the stove with hardwood wood.
- It is recommended to use special equipment for cooking.
A well-equipped recreation area, the center of which will be an outdoor barbecue oven, will not only allow you to have a wonderful time in the fresh air and prepare healthy dishes. It will be a great addition to any area.
Care and combustion
Let's start with the fact that constant use of the fireplace causes the formation of a large amount of soot, which must be removed regularly. This applies not only to the firebox itself, but also to the chimney. Of course, you shouldn’t clean the chimney after every use, but once a year you still have to take a closer look at it. For these purposes, it is advisable to provide convenient access to its outer part at the construction stage. As for the firebox itself, it must be cleaned after each use, since the resulting soot does not have a beneficial effect on the human body. By the way, its quantity depends on what to heat with. The classic source of fire in a fireplace is wood. At the same time, it is best to use birch and avoid conifers. But, since wood is now quite expensive and requires additional storage space, owners are increasingly using coal and briquettes. Although this fuel produces more soot, it is still less “troublesome”, and it produces more heat. Despite the fact that brick fireplaces are distinguished by the simplicity of their design, they require only a professional approach. This is due to a number of features that must be taken into account when constructing them. In addition, it is a source of open flame. Improper execution may cause a fire. Therefore, remember that building any fireplace, even the simplest one, BY YOUR OWN STRENGTH is IMPOSSIBLE! If you want to decorate your home with a modern masterpiece that will delight you with its warmth, then the specialists of our company are always ready to help you in its construction.
Foundation
Work on arranging a barbecue area begins with pouring the foundation, regardless of the size of the structure. The service life of the structure largely depends on the quality of the foundation.
For the foundation, it is necessary to dig a pit, the depth of which is 25 cm. The size of the base is measured 50 cm larger than the size of the stove.
a8036fda206dc9ae23b336cf6cd695a2.jpe
The bottom is compacted and covered with crushed stone. Then a small layer of concrete is poured and reinforcement is attached for strength.
Metal rods are driven vertically and laid horizontally, fastening at intersections to provide additional strength.
After this, the pit is completely filled with concrete and kept for 3 days, covered with a metal sheet. Bricks are placed under the edges of the sheet so that the surfaces do not touch.
To protect against moisture, a sheet of roofing material must be laid on the foundation.
Technical requirements
Taking into account the specifics of the fireplace, the following basic requirements must be met:
- The foundation must be able to withstand the load of the construction materials.
- The base is made autonomous.
- The height of the foundation is about 35 centimeters.
- The volume of the firebox is about 1/50 of the volume of the room.
- Fire safety requirements determine the height of the firebox, and the need for a stainless steel sheet in front of the fireplace.
- The smoke chamber is made with a protrusion that prevents sparks from entering the chimney.
