Despite the development of new technologies in the field of heating, a conventional wood-burning brick stove remains the main source of heat in many private and country houses, garages and various outbuildings. But building even a simple heating stove costs money - the homeowner needs to buy materials and pay for the services of a stove master. To save on construction costs, we suggest building a brick oven with your own hands. Below we will tell you how to build it correctly, provide drawings and masonry order diagrams.
Selection of furnace design
There are countless designs for brick wood stoves, and experienced craftsmen are constantly coming up with new designs. A home owner who decides to build a brick stove will have a hard time choosing a suitable heater. Therefore, first give clear answers to the following questions:
- What tasks should a brick stove solve in your home? Will it be for heating purposes only, or will it be used to cook food and heat water?
- How much space are you willing to allocate for the construction of a stove when building a new house?
- If the cottage or house has already been built, then you need to think about the location of the heater and the passage of the ceilings with the chimney pipe. In this case, it is necessary to take into account the construction of a separate foundation.
- Decide on the design in advance; you may want to build a fireplace stove with panoramic glass.
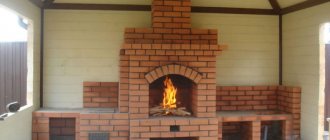
The only complex element of the barbecue is the arched vault, which is laid out according to a wooden template
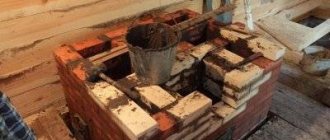
Advice. At first, a beginner should not take on the task of laying a serious brick stove in the house, but to begin with, build something simple and small in the yard - a barbecue or grill, fortunately, quite a lot of such projects have been published. After practicing and becoming more experienced, you will understand the nuances of this work and begin building a home heater with more confidence.
Layout diagram of an outdoor barbecue with cabinets
Of course, an ignorant person is unlikely to be able to immediately build a beautiful stove with a built-in panoramic glass with his own hands. But you can always invite a stove-maker to carry out this work and provide consultation. As a rule, these people are friendly, because building a home should always be approached with soul. As for choosing a project, you are offered 3 simple options:
- a regular 2-burner hob with a tank for heating water;
- Dutch duct heating stove;
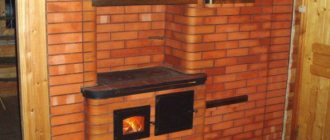
- heating and cooking stove of classical design.
The technology for building the original rocket stove is presented in our separate guide.
Cooker with water boiler
This stove has dimensions of 890 x 510 mm and is designed for cooking while simultaneously heating water in a tank located in the path of the flue gases leaving the furnace. The total heat output of the stove is 1.2 kW when adding firewood twice a day. Below this furnace is shown in cross-sectional drawings:
The stove contains a tank-boiler that is connected to the water heating system of the house
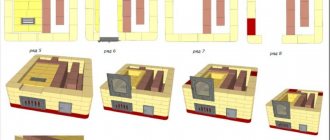
Such a small-sized brick oven, built with your own hands, is quite simple to make and will take up little space in the kitchen. Subsequently, a heating shield can be attached to it in order to extract more heat from the flue gases. The masonry diagram below shows the order of the furnace:
To assemble the hob yourself, you must purchase the following materials and stove accessories in advance:
- solid ceramic brick – 185 pcs.;
- cast iron stove with 2 burners measuring 530 x 180;
- grates 250 x 250 (cast iron or steel grate);
- firebox door 250 x 210, ash pan 130 x 140, inspection door 130 x 140;
- equal angle corner 30 x 4 – 3.6 m;
- oven 320 x 270 x 400;
- water tank 150 x 350 x 450.
Note. Hereinafter, the dimensions of fittings and materials are indicated in millimeters.
Also, for lining under the stove you will need roofing steel and asbestos sheets measuring 115 x 64 cm, and for laying in front of the stove on the floor you need a sheet of metal 50 x 70 cm.
Dutch duct stove
This classic duct-type heating stove actually comes from Holland. Its advantages are simplicity and undemanding quality of materials, and the body of the stove can be increased to any height and thus heat rooms on two floors. In addition, the Dutch oven can be safely considered a mini-oven, since it occupies a small area.
Making a simple 3-channel Dutch oven, shown in the drawing below, will not be very difficult for an experienced craftsman. A beginner will have to work hard to make high-quality masonry with plan dimensions of 1010 x 510 mm, extending to a height of more than 2 m plus the chimney. But first, it is suggested that you familiarize yourself with the laying diagram of this brick kiln and the order:
From the drawing it is not difficult to understand the principle of operation of the Dutch oven - combustion products heat the walls of the heater, moving along the internal vertical channels
For construction you will need the following materials:
- solid ceramic brick – 390 pcs.;
- grates 250 x 250 (cast iron or steel grate);
- firebox door 250 x 210, ash pan 140 x 140, inspection door 140 x 140;
- metal valve 130 x 130;
- asbestos sheet 1000 x 500;
- the same sheet of roofing steel.
Heating and cooking stove
The design of this heat source is more complex, although outwardly the stove resembles the same Dutch oven. Its dimensions are 650 x 510 mm, and the developed thermal power is about 1.5 kW. By the name of the brick stove - heating and cooking - it is easy to understand that it is intended both for heating rooms in the house and for cooking. The construction diagram is shown in the figure:
Diagram of a combined stove for heating and cooking
Important point. If you carefully study the diagram, you can understand that summer operation is not provided for in this simple design.
This means that cooking on a stove in the summer will be hot if it is located in the house. You will have to cook in a different way or choose a more suitable heat source design. Homeowners who are not embarrassed by this fact are offered a list of materials and procedures to successfully build a brick stove:
- solid ceramic brick – 211 pcs.;
- cast iron stove for 1 burner, size 360 x 410;
- grate bars 250 x 250;
- firebox door 250 x 210, ash pan 130 x 140, inspection door 130 x 140, ventilation 130 x 75;
- equal angle corner 32 x 4 – 300 mm;
- valve 140 x 140;
- knitting wire with a diameter of 1.5 - 5 m.
The grate bars are installed on bricks of the 5th row, the cast iron hob is installed on the 10th row
Prefabricated slabs
Prefabricated stove plates consist of several cast iron rings of different diameters, which are folded into a single surface like a puzzle.
Prefabricated Cast Iron Stove
Each cooking floor can be equipped with one or more burners, the dimensions of which can be changed (the rings are removed/put on) depending on the diameter of the cookware used for cooking.
A significant advantage of prefabricated flooring is the vertical thermal gaps located between the cooking rings. The presence of these small distances makes it possible to compensate for the expansion of the metal when heated. Thanks to this, the stove plate does not warp or deform during operation.
Particularly strong cast iron plates are cast with stiffening ribs located at the bottom. This addition increases the heating temperature of the hob, thereby increasing the efficiency of the entire oven.
What kind of brick should the stove be made of?
The main building material for the construction of the furnace is red ceramic brick grade 150, made from baked clay. Its dimensions are standard - 250 x 120 x 65 mm, although in past times other stones were also produced for stove making. But now all the dimensions are unified, so the fireclay (fireproof) brick, from which the firebox of the stove is often laid, is the same in size as a regular one.
Stone 88 mm high is also used in construction, but it is not suitable for laying stoves because it has cavities. Here, only solid stone is required, without voids and cracks, of good quality. True, there is 1 exception - a Dutch oven, it can be laid from used bricks. But you shouldn’t take it to the point of absurdity; a heat source made of cobblestones definitely won’t provide heat.
The fact is that a heating and cooking stove, built with your own hands from low-quality red brick, can crack even at the stage of drying of the masonry mortar. It should be noted that the clay mortar dries, and does not harden, like cement. Therefore, beginners are not recommended to experiment with bad or used bricks, otherwise the newly built stove will immediately require repairs.
The firebox of a wood stove is formed from fireclay stone (if required by the project)
A separate recommendation concerns masonry mortar. At first, you should not go to the nearest ravine for clay, because it still needs to be brought to the correct condition. It is better to buy a ready-made building mixture for laying stoves, clay or fireclay.
Important nuances and tips
Experienced stove makers sometimes ignore the dry masonry stage, but for novice craftsmen it is mandatory. This will help you understand the internal structure of the stove, all its channels and cavities, in order to prevent possible errors.
For the firebox, fire-resistant fireclay brick is used, the pipe and the stove mass are made of solid red brick. It is prohibited to use sand-lime brick in the construction of furnaces. Each element must be cleaned of any contamination before laying.
In almost every row, some bricks are adjusted to size. Experienced stove makers advise that when dismantling dry masonry, separately fold the elements of each row. You can also take a marker and put the row number and the number of the element’s place in the masonry on each brick.
Instead of mortar for dry masonry, it is most convenient to use wooden slats of the same thickness. They will also be useful in the future to control the amount of mortar between the bricks.
The work is carried out as follows:
- During “wet” masonry, each row is first laid out dry to once again check the position of all elements.
- On the bottom row, narrow slats that were used previously are placed on the sides.
- A layer of solution approximately 10-12 mm thick is applied on top.
- Lay the brick and hammer it with a rubber hammer until it settles on the mortar to the level of the slats.
- The laying continues in the same way.
- After removing the slats, the resulting cavities are filled with solution.
- The resulting fresh seam must be immediately embroidered to give the masonry an aesthetic appearance.
The slats are removed only when the row is third or fourth from the top. Now they can be reused. To carry out the work you will need about four sets of such slats.
Each row that is laid on the mortar must be checked by level and plumb for its position relative to the horizontal and vertical.
Crushed bricks cannot be used in laying parts of the furnace that are subject to constant temperature loads. In general, it is undesirable to use elements with cracks and chips in the construction of solid wood and chimneys. Crushed bricks may only be used to fill the base for the foundation of the stove.
Old brick obtained from dismantling destroyed structures is suitable for laying a foundation if it is not severely damaged.
The quality of the masonry largely depends on the adhesion strength of the brick and mortar.
To improve this point, experienced professionals recommend:
- Before laying, red brick is soaked for 7-10 minutes. Fireclay only needs to be dipped in water and shake off the drops.
- Place the brick in place in one clear movement, without moving or tapping it.
- Apply only the required amount of mortar to the masonry site. The seams in the solid wood should not be more than 5 mm, in the firebox - no more than 3 mm.
- During the laying process you need to “mop”, i.e. use a stiff brush to rub the inside surface of the smoke ducts and oven chambers to create the smoothest possible surface along the flow path of the flue gases.
If it was not possible to immediately put the brick in place, you should completely clear the mortar from both the element itself and the place where it is installed, and lay the brickwork on a fresh layer of mortar.
When laying pipes, it is allowed to use only red solid bricks, which are well resistant to acid deposits and temperature changes. The smoother the internal surface of the chimney, the better the draft and the less blockages. You can treat the insides of the pipe with liquid glass.
On our website there are articles with a detailed description of the technologies for constructing different types of brick kilns, we recommend that you read:
- DIY mini Russian stove: specifics and procedures for building a compact stove
- Do-it-yourself Russian stoves with a stove bench: construction manuals with diagrams and procedures
How to build a stove correctly
In the vast majority of cases, construction begins with the construction of a foundation for a future heat source. An exception may be outdoor mini-ovens, which due to their low weight are sometimes placed directly on the concrete screed of the yard. All others, regardless of location, must be built on a solid foundation. Moreover, it is not allowed for the foundation of the stove to be connected to the base of the house or placed close to it; it is necessary to leave a gap of at least 5 cm, and preferably 10.
Important. Failure to comply with this requirement may lead to the fact that after a year or two the stove may crack and even deviate from the vertical.
If the house has a good foundation in the form of a cement screed, and the total weight of the stove does not exceed 750 kg, then a foundation is not required; masonry can begin directly from the screed, having previously laid sheets of asbestos and roofing steel. The structures presented in the previous section weigh over 750 kg, and therefore it is necessary to provide a reliable foundation for them. There are 2 types of foundations for the furnace: rubble and reinforced concrete.
Regardless of the type of base, you first need to dig a hole whose dimensions exceed the area of the stove by 10 cm in each direction. The depth depends on the thickness of the upper layer of chernozem or other subsidence soil, while the base of the foundation should rest on a denser layer. In the first case, the pit is laid with rubble stone and dressing, using a solution of the following components:
- sand – 6 parts;
- cement – 1 part;
- lime mixed with water - 1 part.
All voids between the stones are also filled with this solution, and the upper part, located at a depth of 80 mm from the floor, is also leveled with it. The reinforced concrete base is poured with formwork and reinforcing mesh, having previously poured a 10 cm thick cushion of crushed stone onto the bottom of the pit.
Important. After the mortar or concrete has hardened, a waterproofing barrier made of roofing felt in 2 layers must be laid on top of the foundation.
The furnace is laid according to the procedures, observing the thickness of the joints within 3...5 mm. A few recommendations:
- After laying each row, it is necessary to control compliance with the vertical and horizontal using a plumb line and a building level.
- The mortar can be applied to the brick with a trowel or by hand; light tapping of the stone after placing it in place is allowed.
- The remaining mortar is removed from both sides of the wall, and the inside is wiped with a wet rag to create a smoother surface. This is necessary to ensure the least resistance to flue gases.
- When installing fittings and water tanks, it is important to ensure that there are no gaps between the masonry and the metal surface; the joints must be carefully filled with a solution, otherwise the stove will begin to smoke.
- Upon completion of construction, it is necessary to wait 2 days until the solution dries completely, after which you can test fire the stove, starting with a small amount of firewood.
How to build a small stove at home is described in detail in the video:
How can you paint a stove?
It is clear that a newly minted master will not be able to build a beautiful stove the first time due to lack of experience. But this is a fixable matter, because the outside of a brick wall can be covered with paint. Previously, they were plastered and covered with two layers of chalk or lime whitewash, but now there are simpler and more convenient means. In addition, lime is easily transferred to clothing by accidental touch and constantly needs to be renewed.
If we talk about how to paint a brick stove, here are the following options:
- organosilicon heat-resistant enamel of the KO brand, designed for high temperatures;
- silicate or acrylic paints;
- heat-resistant varnish (for example, PF-238) mixed with dye.
The most preferred option is transparent enamel KO-85, KO-174 and KO-813. It is suitable both for the stove itself and for painting metal parts, since it can withstand temperatures up to 600 °C. Silicate and acrylic paints will not last as long, but they are also cheaper. The oven can also be painted with transparent varnish PF-238 or mixed with gouache of the required color, as shown in the photo above.
In any case, the coating is applied 2 times, the second layer is applied after the first has dried. The tools used are a brush and a roller. It is advisable to pre-treat the surface with a special primer intended specifically for such purposes.
Solid slabs
A solid cast iron stove is a flat sheet of metal on which one or two burners of a stationary diameter are placed. In addition, there are solid stove floors; there are no burners on their surface at all.
Solid cooking floor
A small number or complete absence of thermal gaps makes a solid slab less practical and reliable. When highly heated, cast iron expands and, without sufficient free space, can become deformed.
But a solid stove slab also has its advantages: it is easy to install and is more affordable in comparison with prefabricated slabs.
For your information! To increase heat transfer rates, a cast iron plate can be cast with a notch or three-dimensional ornament.

