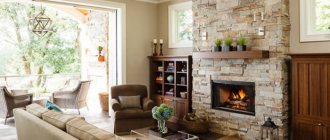
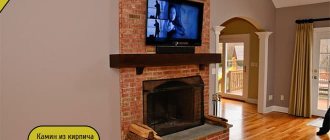
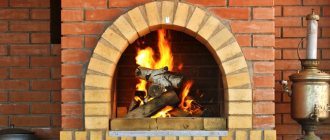
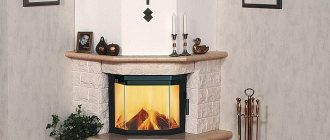
A closed fireplace insert is safer to use than an open one. Therefore, installing a fireplace with a cast iron firebox is the best solution if there are children in the house. We will talk about the pros and cons of such fireplaces, as well as how to install fireplaces with your own hands, in this article.
Fireplace with cast iron insert
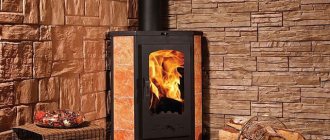
A closed firebox is a chamber made of cast iron for burning wood, in which one of the walls is replaced by a glazed door. A very convenient door is equipped with a lifting mechanism that moves it upward, under the lining, and allows you to instantly turn a closed firebox into an open one. An ash pan is located under the combustion chamber, through which air enters it. And the smoke is discharged through a pipe installed in the upper part of the firebox. In principle, installing a fireplace insert involves constructing a base for it with your own hands and a decorative cladding that allows you to hide metal parts from view, leaving only the firebox visible and giving the fireplace a familiar appearance.
How did the search for a specialist take place?
I've been dreaming about a fireplace for a long time. Not a single stove was built independently, so it was decided to immediately entrust the construction process to specialists in their field. There were problems choosing a specialist. The stove makers immediately named the cost of their work, without even looking at the initial project and estimate, when asked “how is this possible”, they said that they were specialists, about satisfied customers, as well as knowledge of all projects. Another stove maker asked for travel allowances, immediately named the price, and said that “the project is in his head.” In short, it was not easy to find a good stove maker.
There was an unfinished country house on two floors, as well as a basement and attic. The living area is on two floors, which must be heated; it is a total of 100 square meters. m. Ceiling height – 2.75 m. The house is located in the Nizhny Novgorod region. In winter, the house is not used without heating, as well as in early spring and late autumn. It was clear in my head what I wanted to have after the construction of the furnace - so that I could come for the weekend on Friday evening and quickly heat up the premises on the first floor (50 sq. m.). Then continue heating, accumulating heat so that you can go to bed and have enough for the night. This situation is quite typical, plus everything, you want aesthetics and comfort in order to relax outside the city from the city. Besides, I want it to be beautiful! So that it is beautiful and also so that it warms effectively. You also need a safe design that will delight you with its exceptional characteristics.
Solution
The masonry mortar can be prepared in one of the following types:
- From cement mixed with fireclay clay,
- Made from cement mixed with porcelain tile adhesive,
- Made of clay and sand.
Old masters prefer clay mortar. There are a great many types of clay in nature. Each of them has its own properties, so the proportions of the composition will be different in each case. If there is too much clay, the dried composition will crack, and if there is too little, it will not set well. For the sample, you can prepare a solution in which sand and clay are almost equal and dry it. The results of this experiment will indicate what changes need to be made.
INTERESTING! Modern technologies make it possible to use the simplest solution - a ready-made “kiln mixture” prepared on the basis of red clay.
Selecting a heating unit
It became immediately clear that a heating unit was needed that had the advantages of a metal stove, that is, quickly heating the air in the room, but at the same time preventing the stove from cooling down. A heating stove made of brick will have the ability to accumulate heat and maintain the temperature in the room for a long time. Low efficiency must also be overcome. As a result, it was necessary to combine a cast-iron fireplace insert and a Dutch brick stove into one. It is required to build a full-fledged stove made of 800 - 1000 bricks, and place a cast iron firebox there. Next, you need to provide the firebox with an intensive airflow system, including the basement. It is also necessary to organize an air supply to the second floor.
Finishing the fireplace - the last stage of work
Different options for finishing a fireplace can radically change its style. The vast majority of bricklayers would like to use natural texture as a decoration. But to achieve an aesthetic appearance, you have to practice bricklaying, and the stove does not tolerate mistakes. Then finishing will come to the rescue. Various options will allow you to put your artistic taste into practice. Decorative stone in the form of tiles will add originality to the composition, as it will return the observer to the primitive era.
We buy a firebox
A budget version of the firebox was chosen. Subsequent operation showed that secondary afterburning works perfectly, the lower damper and gate actually regulate combustion within the required limits. The “clean glass” system helps to leave glass behind during intense burning of dry hardwood firewood. When burning damp, resinous wood, as well as when laying a whole log and switching to a long burning mode, the glass smokes, but not much. In the morning, the cooled glass is simply wiped with a damp cloth. Operating practice shows that it is impossible to lift the glass to observe an open flame. Regular dry firewood is used for kindling.
Specifications
The technical characteristics of a cast iron fireplace insert are determined by the properties of the material of manufacture. Cast iron is a very durable and thermoplastic material, but keep in mind that when choosing a cast iron fireplace insert, you should have walls that are at least 7 mm thick. When choosing a cast iron fireplace insert, you should pay attention to the dimensions, rated power, and minimum wood load.
Advantages of using cast iron fireplace inserts:
- cast iron fireboxes are highly resistant to any deformation;
- The efficiency of cast iron fireboxes is 70% - 80%;
- cast iron fireboxes are able to withstand high temperatures during operation, while maintaining their original appearance;
- you can, if necessary, purchase a firebox of fairly compact size and light weight;
- a huge selection of models with a wide variety of configurations;
- in closed-type fireplaces, the burning time when the cast-iron firebox is fully filled with fuel, with the doors closed, is at least 4-5 hours;
- long service life.
Fireplace stoves with cast iron fireboxes are divided into:
- fireplaces with an open hearth (the traditional type of fireplace) have greater aesthetic appeal;
Also, closed-type fireplaces are additionally equipped with the function of additional combustion of gases generated during fuel combustion.
Depending on the design of the fireplace, closed fireboxes are divided into:
- for fireboxes with straight glass;
- for fireboxes with prismatic glass;
- for fireboxes with rounded glass;
- for fireboxes with corner glass;
- for fireboxes with double-sided glass;
- for fireboxes with three-sided glass;
- as well as for fireboxes with individual glass sizes.
Design, calculation and purchase of materials
The firebox has been purchased - you can start the project. The power of the device is 13 kW, which is already 2 times higher than the calculated one. The calculation was made using a special calculator, having the size, power, dimensions of the device available, and numerous photographs and videos were previously viewed on the Internet. It was calculated that 225 bricks were needed for the front part of the furnace. Shaped kiln bricks from the Engels plant were chosen for construction. The bricks were purchased with a reserve, and also in a convenient format - piece by piece at an affordable price. Cleaning doors were also purchased there, which were needed to close the hot air outlets from the furnace and a damper for the air duct from the basement for good air ventilation.
It was decided to lay out the sides of the stove facing the adjacent rooms, namely the kitchen and bedroom, with solid red brick, which was available. This can be done, since the parts will not come into contact with the fire. To prepare the solution, you can use ready-made masonry stove mixture, which was purchased in 20 bags. You also need a couple of bags of cement to fill the base for the stove and chimney in this design: up to the attic - a sleeve (heat-resistant stainless steel 321), lined with bricks, then through the attic and onto the roof a sandwich will go. I prepared a set of necessary tools, quite natural for such work. A grinder and a laser level are also necessary.
Step by step lining
The first row is laid completely without gaps.
For more reliable adhesion, the bricks are moistened with water. Ventilation holes must be provided in the second row. To do this, two small gaps (the size of half a brick) are left on each of the four sides. All subsequent rows are laid without holes, maintaining the same thickness of the seams, which should not exceed 5 mm. The door opening is designed to match the style of the room. To organize the door, jumpers above the opening for a metal corner or brackets are useful. You need to make a hole in the brick for them. The upper part of the stove or fireplace is placed arbitrarily. Here you can take into account the interior design of the room: for decoration you can use a cladding made of a glass panel or a decorative slab. You can place video equipment on top.
Finally, you need to clean all the seams, removing any remaining mortar, and you can clean the surface of the stove with a brush dipped in soap and water. To ensure strength, it is necessary to leave the structure for a day. Thus, we looked at how to line an iron stove with bricks, and even without studying the video lessons on this topic, we found out that it is easy to do it yourself. However, watching the video instructions will also be useful.
How to line a metal stove with bricks in a house Fireplaces and stoves: instructions for cladding with artificial stone Instructions for making metal barbecues How to line a stove in a bathhouse with bricks
Construction of the furnace
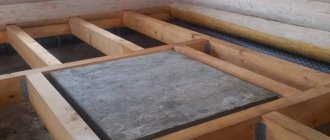
Construction began with the pouring of a 200mm thick reinforced concrete base. This is exactly what was required for the stove and chimney. The pouring was carried out on concrete floor slabs, always laying out brick formwork. In the basement, under the slabs, a base for the stove was built from reinforced concrete blocks, which coincides with the dimensions of the stove base. Under the closed valve, a channel for air intake was punched. Masonry began after the base was firmly in place.
The first row, solid, was made with bricks “on edge”. A firebox stood on top of it on legs without stands. Next was a row tab along the entire perimeter in accordance with the order. All rows were tied. The solution was mixed into the container in small portions; first it was necessary to lay out the row “dry” and saw through the bricks where it was needed. Before laying on the mortar, the brick had to be soaked. Seams should be made no more than 3-4mm.
Between materials with different thermal expansions, 3mm gaps were left. In the end, it turned out that the fireplace insert was installed so that it did not come into contact with the brick parts. From the side of the bedroom and kitchen at the bottom of the masonry, openings with a section of half a brick were made to take in cold air from the floor level. The masonry was covered on top with a sheet of metal and basalt.
Choosing a brick
First you need to select the appropriate material and calculate its volume. By following a few basic rules, you can easily cope with this task:
- For laying the firebox, it is necessary to choose a fireproof material that can withstand prolonged exposure to high temperatures. If you plan to heat only with wood, ordinary red brick will be enough (withstands up to 800⁰C). For coal fireplaces, you need to choose fireclay bricks that can withstand temperatures up to 1200⁰C and higher. Brick brand from M200;
For laying secondary parts of the fireplace lining, you can use both new and recycled bricks (without damage):
Only fireclay bricks are suitable for lining the firebox.
Chimney pipe installation
The chimney will be made of two parts. The lower part from the firebox through the first and second floors to the exit to the attic is a stainless steel sleeve. The steel was assembled “by smoke” and was firmly lined with brick. The upper part was made through a cold attic with access to the roof and a height according to SNiP of at least 0.5 m. Above the ridge is a stainless steel sandwich assembled over condensate. The structure is very heavy; the chimney was moved outside the stove and, as a result, has a separate base for the brickwork and does not come into contact with it in any way.
The chimney liner and sandwich were assembled independently after the firebox was in place and about half of the stove was laid out. The brickwork had to be done after the stove was laid. To attach the sleeve, stainless steel brackets were used, which were purchased along with the pipe. The chimney was installed autonomously, for which there were reasons:
- Nothing stopped him from making temperature fluctuations.
- Vibrations of other structures, such as interfloor ceilings, partitions, roofs and others did not affect it.
- Nobody excludes fire safety requirements and SNiP.
We did not encounter any difficulties during installation. Installing the chimney took half a day. A neighbor helped with difficult work, especially on the roof.
We begin the assembly itself
- The first stage is cutting the composite panels with a mechanical hacksaw so that as little construction dust as possible is generated. (Fig. 1, A)
- Preparing the wall . Next, you should clean the wall down to the concrete (brick) base (Fig. 1, B). Particular attention should be paid to any remaining adhesive to install the heat-resistant gasket. If there is electrical wiring in the wall, it must be routed to the side. After clearing the wall down to the brickwork and chimney, concrete blocks are inserted into the created opening (Fig. 1, B), which are tightly fitted to each other.
A brick chimney must be thoroughly cleaned of glue and cement. The gap between the chimney opening and the concrete blocks should be minimal (Fig. 2,A). The edges of the chimney and surrounding panels must be covered with lime mortar. Excess mortar must be removed and the edges of the blocks and chimney carefully aligned.
The projection of the installed fireplace should be drawn on the wall and floor, exactly according to the drawing, taking the middle of the chimney as the coordinate axis (Fig. 2, B).
- Installation of the transition cuff . The transition collar must be secured using metal screws (Fig. 2, B). To make it easier to clean the chimney in the future, a slope of 45 degrees should be made inside the cuff using lime mortar.
- Installation of the hearth . With the fireplace insert on its side, you should carefully screw the metal base (Fig. 3, A). The base must be able to withstand thermal loads and the weight of the oven. The fireplace hearth must be installed strictly along the axis of the chimney, a few millimeters from the wall (Fig. 3, B). After installing the firebox, use heat-resistant glue and bolts to install the fireplace outlet cuff for the exhaust pipe. Before final fastening of the cuff, it is necessary to ensure the accuracy of its installation, since the operation of the fireplace directly depends on this operation.
Post-operation report
The necessary heating of the premises is achieved, there is no doubt about it. The fire begins on Friday at 21:00. You must first warm up the chimney and firebox. Then dry firewood is laid in - in two hours the room is completely heated. Be sure to open the air supply valve from the basement and the hot air outlet door so that there is continuous circulation. In the morning the temperature in the room is +20-22. Work on the construction of the furnace took 3 months (May, June, July). As a result, the total cost of the furnace amounted to 80 thousand rubles. Concluding the story, it should be noted that prices in the field of construction of stoves, fireplaces and chimneys are very high.
A promising option for heating a home using a heat-intensive fireplace - Ferlux-701.
Fuel types
How to heat correctly is the main question when installing cast iron equipment. It is already clear that this is wood, but it can be different and has its own combustion characteristics.
Firewood is a natural material that, in addition to good heat generation, has a pleasant smell, but not everyone knows that not all raw materials are suitable for heating. Wood material that has been in storage for at least one and a half years must be used.
Different tree species have their own type of combustion, it should be taken into account that:
- coniferous varieties quickly burn out and emit a large amount of resin vapor, which can be unsafe for health;
- birch, despite the fact that it gives a lot of heat, smokes heavily;
- apple, juniper and cherry are mainly used to create coziness due to their pleasant aroma;
- any soft wood species - alder, linden, chestnut, willow, poplar emit a little heat and burn quickly.
It is most effective to use hard wood material such as oak, pear, ash, poplar. It burns well and produces high heat output. The only relative difficulty is processing and lighting these trees.
If you do not attach importance to the woody aroma and characteristic crackling, you can heat cast iron stoves with other raw materials; anthracite, peat, coke, charcoal, brown and hard coal are suitable for this. For different types of coal fuel, accurate calculations must be made, since it can produce temperatures above 1200 degrees when burning, which can cause melting of the cast iron chamber.
Masonry
The production of fitting brickwork is carried out “dry” without mortar. The fitting masonry is made directly on the floor close to the parallelepiped frame with gaps between the elements of 7 mm.
Upon completion, a contour of the brick cladding is outlined on the floor for further laying it with mortar. Angles must be constantly monitored horizontally and vertically.
The fireplace cornice is also first laid out “dry” from shaped material.
Work begins from the corners, constantly checking their horizontalness. Nails are driven into the side seams of the fireplace to tighten and secure the cord for laying an even row of cornices without deviations. Between the brick gap is filled with mortar.
Correctness of cladding
A cast iron portal can be easily lined with solid brick, thus turning it into a brick fireplace.
Only half a thousand pieces of standard material will be required, the laying of which will be done using cement-sand mortar with seams of 1 cm.
The masonry is ordinary ordinary. If it is necessary to cover the firebox supports, wooden formwork is used. Then, to form seams, the bricks will alternate with 10x10 mm rods, on which the reinforcing mesh is installed.
Next, the formwork is poured with concrete, the base of which includes gravel up to 1 cm or sand. The product is aged for up to 15 days.
From the inside, the facing part is thermally insulated with basalt wool mats covered with aluminum foil. Ventilation must be provided to remove radiated heat from the combustion body.
Convection of air masses is a firewood chamber under the firebox for the entry of room air. It passes behind the facing part, takes away the heat emitted by the fireplace insert, rises up into the convection cavity and goes out through the grate.
Due to the high temperature of the exhaust air, a sufficiently safe gap must be provided between the grille and the ceiling.
For preventive maintenance and repair of the firebox, a thermally insulated technological opening must be located in the lower part of the lining and covered with non-combustible materials.
