Hi all! In this short post, I will answer the most popular question that arises after purchasing a room thermostat.
This question sounds like this: “How to connect a room thermostat to a gas boiler?”
It often happens that the instructions for this useful gadget cannot answer this most important question.
Then you have to use imagination, logic and common sense. I hope this post makes it easier for you.
Let's start the description, as usual, from simple to more complex.
How to connect a room thermostat to a gas boiler?
Hi all! In this short post, I will answer the most popular question that arises after purchasing a room thermostat. This question sounds like this: “How to connect a room thermostat to a gas boiler. " It often happens that the instructions for this useful gadget cannot answer this most important question. Then you have to use imagination, logic and common sense. I hope this post makes it easier for you. Let's start the description, as usual, from simple to more complex.
Diagram of the operation of a mechanical thermostat.
A mechanical room thermostat is the simplest version of a room thermostat, in which a circuit is closed or opened using a bimetallic plate. This thermostat does not require power supply. The scheme by which it works is as follows:
As can be seen from the diagram, there are two ways to connect such a thermostat;
- Via the NC terminal - connection for turning on air conditioners.
- Via the NO terminal - connection for gas and other boilers.
On the other side, you need to connect the wires to the terminal box on the boiler control board. In this case, you must first remove the jumper and secure the ends of the wires with screws.
This connection diagram is the simplest and is used on mechanical and electronic programmable thermostats. In this article I will talk about another scheme.
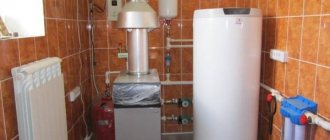
Stage one: boiler installation
Installing a gas appliance is usually not difficult. This is the simplest stage of installation of a heating system. Manufacturers have developed detailed installation instructions for each type of boiler.
It is easier to install a floor-standing one, despite the fact that it is heavier in weight and larger in size. For wall mounting you need special brackets. They come included with the device. The diagram for connecting a wall-mounted boiler to the heating system is indicated in the instructions for the device
The most important thing is to choose the right location for installing the boiler, while also considering how the pipes will be connected to the boiler.
When choosing the location of the unit, not only ease of maintenance is taken into account. It is necessary to comply with the standards and requirements that apply to gas appliances. Their implementation guarantees the efficiency and safety of using the heating unit.
Two basic rules to follow:
- The room where the boiler will be installed must be provided with a window or window that can be easily opened if necessary.
- No devices or objects should be placed near the gas unit.
The connection diagram for a floor-standing boiler requires careful preparation of the base. The wall-mounted boiler is placed at a height of 80 cm from the floor, no closer than half a meter from the walls. These are standard operating safety requirements.
To know how to properly connect a double-circuit boiler, you need to become familiar with the conditions required for the installation of a chimney and ventilation system.
Turbo boilers greatly simplify the task because they do not require the installation of bulky chimneys and exhaust systems. This type of boiler is becoming increasingly popular today. The peculiarity of turbo boilers is the device for the forced removal of exhaust gases and the simultaneous influx of street air, like a “pipe in a pipe”. This is the safest system, as it allows you to install gas units in almost any room.
There is another type: floor-mounted parapet boilers. These are chimneyless, energy-independent units. They are used where it is impossible to build a large chimney. Parapet boilers have a closed combustion chamber, it is completely isolated from the room. In such boilers, the coolant circulates by gravity, without an electric pump. This is their main difference from turbocharged boilers with a coaxial chimney.
Connection diagram for electronic thermostats.
An electronic thermostat has an electronic circuit inside instead of a bimetallic plate. This electronic circuit requires a supply voltage. It can be equal to 220 or 24 volts and is supplied through a wire.
Here the control signal is the potential (voltage), which is supplied to the terminal box of the boiler or special hub. To make it clearer, look at the picture below:
From the picture you can see that there are not 2, but 3 wires going to the electronic thermostat:
- L—supply voltage.
- N - neutral wire.
- I is the output signal.
The unconnected port is used to enable the “night” operating mode, in which the room temperature is reduced by 4 degrees without adjusting the thermostats.
Electronic thermostats are used to organize complex climate control systems in the home; such systems are popularly called “Smart Home”. They can be used to control pumps and valve actuators in heating systems. You can see how this looks in the figure above.
Stage four: connecting the unit to the gas pipeline
Connecting to a gas pipeline is an extremely important matter. The slightest mistake can be very costly. If installation work is not performed properly, serious emergency situations may arise that can lead to gas poisoning or explosion. There should be no small details when connecting the boiler to the gas pipeline.
The first step is to connect the pipe from the boiler to the gas pipe branch. There must be a shut-off valve on the gas pipe. A special filter for heating is also installed on it.
When connecting the gas pipeline to the boiler, you need to carefully ensure that all joints are airtight. Here, for sealing, you cannot use FUM tape or sealing thread, which do not provide high-quality insulation. The use of tow and paint is recommended.
Rubber hoses for connecting gas boilers to the gas pipeline are prohibited. Rubber may lose its performance properties (crack), this will inevitably lead to a dangerous gas leak. The hoses are attached to the unit nozzle using union nuts and paronite sealing gaskets. Seals are mandatory here, because they are the ones who will ensure sufficient sealing of the connection.
As for connecting the Baksi boiler to the heating system, you cannot do without the help of specialists. In this case, you can only complete the initial stages of its installation yourself. The boiler will work for a long time and efficiently when its connection is done professionally.
What wire can be used to connect room thermostats?
Another important point in connecting the thermostat is the choice of wire. Typically, the cross-section and number of cores are indicated in the instructions for a specific product. In addition, you need to remember the distance from the thermostat to the boiler or hub to which the thermostat is connected - if the output on the thermostat is potential, then the length of the wire can have a significant impact on the operation of the automation. This is due to the voltage drop on the wire. To reduce it, you should take a wire with the largest possible cross-section.
Most often, to connect mechanical thermostats, a two-core wire with a cross-section of 0.5 or 0.75 “squares” is used . For electronic ones, as I described above, it is important to consider the length of the wire. The longer the wire, the larger the cross-section should be (usually the cross-section does not exceed 1.5 “squares”) . But manufacturers do not recommend exceeding the wire length of 100 meters, although this is not specified in the data sheets and instructions for the products.
Where to put the wires
The situation is much more serious when installing wired models. And although Experts recommend combining this procedure with repair work, since the wiring will most likely have to be either masked or laid in the body of the wall in the formed channel after it is grooved.
Another disadvantage of wired thermostats is the need to allocate a separate room or significant space in the house for placing the device. Since, according to the instructions, the correctness of their operation may depend on the availability of sufficient free space.
It is also extremely undesirable to install it near household, external climate control equipment and heating devices, as well as in places where the device will be exposed to direct sunlight.
The process of connecting a thermostat is, in principle, not difficult. It is enough to follow the instructions drawn up by the manufacturer of the boiler and thermostat.
Wireless thermostat connection diagram.
At the moment, wireless thermostats have become widespread and have seriously displaced their wired counterparts. They are easier to work with; you don’t need to run wires from the thermostat to the sensor across the entire house. It is enough to simply set the address of the sensor and install it in a place with stable reception of the signal from the thermostat. As for the connection diagrams for such devices, there can be two of them:
Open circuit connection diagram.
The diagram is no different from the connection diagram for a mechanical thermostat. The boiler, pump or servo drive is turned on when current appears in the circuit.
Connection diagram based on potential (voltage).
In this circuit, when the circuit is connected, the thermostat transmits a voltage to the boiler input, which turns on the boiler, pump or servo drive.
Areas of application of thermostats
Thermostats are widely used in various fields, both in industry and in everyday life.
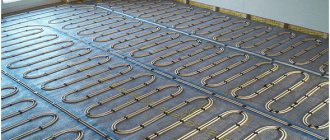
Most often, these devices can be found in underfloor heating systems with a heating element in the form of a heating cable, which is located in the screed. When power is supplied to the electrodes, the wires heat up and give off heat to all surrounding layers; for proper operation, the system is equipped with a temperature sensor built into the screed. The controller can be used for electric or water heated floors, the principle of its operation does not change. Thermostat with sensor for heated floors
The thermostat is also used in heating or heating boilers to automatically adjust the heating level of the internal environment. Many manufacturers equip heating devices with these devices already at the manufacturing stage, but even if the boiler design does not provide for this, you can install the controller on the line yourself.
How to connect a thermostat to a gas boiler - theory and practice
A thermostat is a device that automatically regulates the operation of a heating boiler. The adjustment is carried out by monitoring the air temperature in the room, and when it changes, the device increases or decreases the heating intensity. Many modern boilers have integrated thermostats, but sometimes you have to install them as additional equipment. This article will discuss how to connect a thermostat to a gas boiler.
The best choice
The selection of a thermostat for a heating boiler is based on the personal preferences of the room owners. When choosing, you should consider what characteristics are required when using a particular boiler.
Wired or Wireless
The communication between the control unit and the sensors and the boiler for different models is carried out wired or wirelessly. In the first case, you will need to lay a wire. The cable length reaches 20 m. This allows the control unit to be mounted at a great distance from the room in which the boiler room is installed.
Wireless thermostats for heating boilers are designed as a receiver and transmitter. A distinctive feature of products of this type is that there is no need for wiring. The transmitter signal can be received at a distance of 20-30 m. This allows you to install the control panel in any room.
Temperature setting accuracy
Depending on the design of the room thermostat, the room temperature setting differs. Inexpensive models have mechanical control. The disadvantage of cheap thermostats is the error reaches 4 degrees. In this case, the temperature adjustment step is one degree. Products with electronic control have an error of 0.5 - 0.8 degrees and an adjustment step of 0.5o. This design allows you to accurately set the required power of the boiler equipment and maintain the temperature in the room in a certain range.
Ability to set the hysteresis value
The room thermostat for a gas boiler has a difference between the switch-on and switch-off temperatures. It is necessary to maintain optimal heat levels in the room.
Hystersis principle
For mechanical products, the hysteresis value does not change and is one degree. This means that after switching off, the boiler will start working after the air temperature in the room drops by one degree. Electromechanical and electronic models have the ability to set hysteresis. The adjustment allows you to change the value up to 0.1 degrees. Thanks to this design, it is possible to constantly maintain the room temperature in the desired range.
Programmable
The function is only available for electronic or electromechanical thermostats. It is possible to program the control unit to set the temperature according to the clock. Depending on the model, thermostats are programmed for up to 7 days. This makes it possible to make the heating system with the gas boiler turned on autonomous. At a certain time, the thermostat turns on or off the boiler unit or changes the intensity of its operation. With weekly programming, gas consumption can be reduced by up to 30 percent.
Wi-fi or GSM
Thermostats with built-in wi-fi and gsm module connect to the internet. Gadgets with installed applications are used to control heating. This is how remote shutdown, connection of the boiler and adjustment of temperature indicators in the heated room are carried out. Using the GSM standard, the room thermostat transmits information about the occurrence of malfunctions in the heating system to the owner’s phone. It is possible to remotely turn on or off the gas boiler.
Safety
When choosing a thermostat for gas boiler equipment, you should pay attention to the presence of safety systems. Functions are available to prevent the circulation pump from stopping, protect against freezing or exceeding the maximum temperature in the heating system, etc.
The presence of such options allows you to safely use boiler equipment in autonomous mode.
Boiler operation adjustment
The gas boiler can be configured in two ways - manually or automatically. With manual settings, everything is clear - if there is a noticeable cooling or warming in the house, the user needs to change the boiler power accordingly each time so that the house has the most comfortable temperature. This method of adjustment has a right to life, but its effectiveness is not high enough, and it cannot be called convenient.
If you have a programmer connected to the boiler, the convenience of controlling heating equipment increases significantly. When the room temperature drops below the set level, the boiler starts and operates until the temperature reaches the maximum value set on the programmer. As soon as the air in the room warms up to the required level, the gas boiler is given a command to turn off.
In addition to the convenience of using the boiler, connecting a thermostat to a gas boiler also allows you to save on heating. The thing is that when manually configured, the boiler very often turns on and off for short periods of time. To circulate the coolant, a pump is used, to which electricity is supplied. As a result, heating equipment will require much more electricity - and the presence of a thermostat significantly reduces these costs.
Thermostat operating principle
A thermostat is a fully automatic device that allows you to minimize human intervention in the operation of the heating system. Such automatic programmers set a certain temperature value that must be maintained in the room. If there are deviations from the set value, the thermostat gives the boiler the appropriate commands.
The boiler, having received a command to start, begins to work and warm up the coolant, as a result of which the room heats up. As soon as the temperature reaches the upper set value, the gas boiler turns off - and this cycle repeats all the time. A special feature of this operating cycle when the thermostat is connected is the fact that the circulation pump is also turned off along with the boiler - and this ultimately has a positive effect on the cost of heating.
Unlike manually setting the boiler, the programmer evaluates not the temperature of the coolant, but the temperature in the room. This feature makes it possible to reduce by an order of magnitude the number of times the boiler is turned on for the next heating - even if the batteries have completely cooled down, but the air temperature is still quite high, the heating equipment will be in standby mode.
The regularity of turning on the boiler is greatly reduced due to the following factors:
- Heating the room with solar rays;
- An increase in air temperature outside and, as a result, a decrease in temperature difference;
- Increasing the number of people in the room;
- Receiving heat through enclosing structures.
Statistics show that savings when using a thermostat can reach 30% - and this is a fairly high figure that allows such a system to be called energy efficient. That is why it is worth thinking about how to connect a room thermostat to a gas boiler and take advantage of the opportunity to save.
Features of operation
So, in order to understand the features of the thermostat, you need to understand how the boiler works:
The user starts the boiler, sets the required temperature for heating the coolant;
Modern equipment can be equipped with a surface-mounted or immersion sensor, which transmits information regarding heating to the control unit of the device. When the set heating temperature is reached, the sensor is triggered, as a result of which the sensor is automatically activated, cutting off the fuel supply. The coolant continues to move through the system thanks to the built-in circulation pump;
As soon as the coolant temperature drops below the stated one, the gas supply to the burner is automatically resumed, the burner is ignited and heating of the coolant begins.
It turns out that the boiler, due to automation, simply heats the coolant to the specified temperature, after which it simply maintains the specified parameter. The absence of a temperature sensor does not allow the equipment to receive information regarding the ambient temperature, for this reason, in transition seasons, namely spring-autumn, clocking can occur, namely, frequent turning on and off of the burner, which reduces not only its working life, but also the unit as a whole .
Installation and connection of the thermostat
It is best to install a thermostat in a residential area. A kitchen, large hall or boiler room is far from the best choice, since the temperature regime in these rooms is initially disturbed, and as a result the heating operation will be unstable. Typically, a cold room (corner, for example) or a room where people often gather is chosen for installation.
The rules for choosing a location for installing a thermostat come down to the following list:
- There should not be any heat sources directly near the device;
- The thermostat should not be exposed to sunlight;
- Installing the thermostat in a place where there is a constant draft is also not recommended;
- If possible, you should avoid installing the thermostat in close proximity to electrical appliances, since they generate heat during operation.
The gas boiler is turned on and off by a relay. The vast majority of modern heating devices have special elements that allow you to connect a thermostat to a gas boiler. Usually, to connect to the boiler, the appropriate terminals or cable included in the delivery of the thermostat are used - before work, you should decide how to connect the temperature sensor to the gas boiler in a specific situation.
The choice of a specific connection method must be chosen individually, depending on the characteristics of the boiler. The technical documentation that comes with the boiler always contains a number of recommendations for connection - and these recommendations are worth using. Connecting a thermostat to a gas boiler is not difficult, so it can be done with your own hands.
Main types of boilers and temperature control
There are several types of boilers: solid fuel, gas, electric and liquid fuel.
Boilers have become widespread throughout the world. There are domestic samples, and there are also imported boilers. Material of manufacture: steel or cast iron. Easy to use, economical, with the function of adjusting the coolant temperature. In cheaper models, this function is implemented using a special device - a thermoelement.
Structurally, a thermoelement is a metal product, the geometric dimensions of which decrease or increase under the influence of temperatures (depending on the degree of heating). And this, in turn, changes the position of a special lever that closes and opens the draft damper. The photo shows an example of such a regulator:
Photo: thermostat sample
The more the damper is open, the stronger the combustion process, and vice versa. Thus, the volume of air that enters the closed combustion chamber is completely controlled by the thermostat, and if necessary, its supply is stopped and the combustion process is extinguished. More modern models are equipped with controllers that, depending on the specified thermal conditions, control the air flow, turning on (or off) a special fan (see photo below):
Setting the Thermostat
If everything turned out to be clear on how to connect the room thermostat to the boiler, and the work was completed successfully, the device needs to be configured. Before setting up, you should study the instructions, which describe all the necessary aspects. Usually on the front side of the programmer there is a certain number of keys and switches that control the device.
In different thermostat models, switches allow you to:
- Adjust heating and air conditioning;
- Adjust the response delay of the sensors (for example, if a draft sometimes occurs, the device can give the boiler a command to turn on - and the switch makes it possible to set the delay);
- Set temperature thresholds at which the programmer should turn the boiler on or off.
Correctly setting the thermostat allows you to set the optimal temperature regime, at which the house will be warm enough and heating costs will be reduced. Standard thermostats have a day and night mode, the latter of which reduces the temperature in the home at night. In addition, the thermostats are initially preset with a certain number of operating programs, which, if desired, can be turned on immediately without touching the individual settings of the device.
Advantages of automatic devices for gas boilers
Of course, the main advantage of automation for gas boilers is energy efficiency. Even the simplest programmers can save up to 15% on heating costs - and more expensive and efficient devices will increase this figure by an order of magnitude.
In addition to increasing efficiency, automation has the following advantages:
- The operation of heating equipment becomes more stable as the number of on-off cycles decreases.
- It becomes possible to fine-tune the temperature regime, taking into account individual wishes and capabilities.
- The thermostat is easy to install, easy to configure and connects to a gas boiler without any problems. Before connecting the thermostat to a gas boiler, you just need to carefully read the instructions and refer to them during operation.
- The operation of the heating system in general and the boiler in particular is significantly simplified.
- The heating system becomes much more reliable and durable.
All these advantages are obvious even upon superficial examination, but in practice they turn out to be even more noticeable. When the slightest opportunity arises, you need to connect the room thermostat to the Proterm gas boiler so that its positive qualities can fully manifest themselves.
Advantages
Thus, we have completely disassembled the principle of operation of a heating system using an electronic or mechanical thermostat. This is a very convenient solution for several reasons:
- Eliminates the need to manually adjust the water temperature to keep the room at a comfortable temperature.
- When using a wireless thermostat, there is also no need to adjust the boiler itself; this is extremely convenient if the boiler is placed in a separate room - the boiler room.
- It becomes possible to set different temperatures for day and night, this significantly saves gas at night.
How to connect a room thermostat to a gas boiler?
To install the regulator, you will not need any professional skills or special tools , just understand the installation diagram, follow the instructions of the manufacturer of the gas boiler and regulator, and follow safety precautions for working with electric current. Then the installation can be done independently, without the help of a specialist.
Connection diagram
The diagram of the gas boiler must indicate whether it is possible to connect a thermostat to it. It is important to make sure that the installation of additional equipment is permitted by the manufacturer and will not harm the heating system.
Incorrect installation can lead to breakdown of expensive equipment and loss of warranty.
In the case where the control unit will be installed inside the boiler, find a suitable place for it . If necessary, you can use an installation box.
Important! When connecting a thermostat, to comply with the requirements of the boiler manufacturer !
If you study the diagram of the main board of a gas boiler, you will see that there are two contacts on it, connected by a jumper , where the electric current first leaves the board and then returns to it, controlling the switching on and off of the heating boiler. In many modern models, for ease of installation, this jumper is located on a separate terminal block, where the thermostat is simply connected.
Photo 1. Printed circuit board of a gas boiler. The part circled in red shows the possibility of connecting various thermostats.
But on some types of heating equipment you will have to look for the installation location directly on the board. In this case, unscrew the screws that hold the jumper , remove it, and install the wires going to the thermostat in this place.
A correctly connected thermostat passes through itself an electric current going to the boiler from the network, thus controlling the switching on and off of the entire heating system. If the air in the room is heated more than what was set on the regulator during its setting, the device turns off the gas boiler, and when the temperature drops below the specified limit, the heating turns on again and the air in the house is heated.
Materials and tools
To install the thermostat to a gas boiler, no special tools are required. Everything that is necessary to install the device in the heating system is included in the delivery kit .
To install the regulator, you will need technical data sheets for the thermostat and heating boiler to verify electrical connection diagrams, a household screwdriver, a tester to check the presence of voltage in the network, and a set of tools for mounting the device on the wall in a living room.
Choosing a location to install the thermostat
Before starting installation work, select the location for installing the thermostat. Choosing the right room for the device is extremely important , because it is based on the temperature and humidity of the air in this room that the entire heating system in the house will be adjusted.
The thermostat must be installed in a residential area, and not in a technical one . Usually choose the coldest room in the whole house, for example, the corner. Installing the device in a boiler room or pantry will lead to incorrect heating operation. Do not hang the regulator near heating radiators or household appliances that emit thermal interference: stoves, heaters. It is not recommended to place the regulator in a draft, near windows, or where it will be exposed to direct sunlight.
The thermostat should be easily accessible and visible so that you can change the temperature settings or replace the batteries at any time.
rules :
- The installation height is no more than one and a half meters above floor level.
- Do not install on an external , cold wall of the house.
- The device must be freely accessible.
- Do not hang near stoves, air conditioners, or windows.
- Do not expose the device to direct sunlight .
Homemade external thermostat for the boiler: instructions
Below is a diagram of a homemade thermostat for a boiler, which is assembled using Atmega-8 and 566 series microcircuits, a liquid crystal display, a photocell and several temperature sensors. The Atmega-8 programmable microcircuit is responsible for compliance with the specified parameters of the thermostat settings.
Strictly speaking, this circuit turns the heating boiler on or off when the outside air temperature decreases (increases) (sensor U2), and also performs these actions when the temperature in the room changes (sensor U1). It is possible to adjust the operation of two timers, which allow you to adjust the time of these processes. A piece of circuitry with a photoresistor affects the process of turning on the boiler depending on the time of day.
Sensor U1 is located directly in the room, and sensor U2 is located on the street. It is connected to the boiler and installed next to it. If necessary, you can add an electrical part of the circuit that allows you to turn on and off high-power units:
Another thermostat circuit with one control parameter based on the K561LA7 chip:
The thermostat is assembled on the basis of the K651LA7 microcircuit and is simple and easy to adjust. Our thermostat is a special thermistor that significantly reduces resistance when heating. This resistor is connected to the electricity voltage divider network. This circuit also contains resistor R2, with which we can set the required temperature. Based on this scheme, you can make a thermostat for any boiler: Baxi, Ariston, Evp, Don.
Another circuit for a microcontroller-based thermostat:
The device is assembled on the basis of a PIC16F84A microcontroller. The role of the sensor is performed by a digital thermometer DS18B20. A small relay controls the load. Microswitches set the temperature, which is displayed on the indicators. Before assembly, you will need to program the microcontroller. First, erase everything from the chip and then reprogram it, and then reassemble it and use it to your health. The device is not capricious and works fine.
The cost of parts is 300-400 rubles. A similar regulator model costs five times more.
A few final tips
:
- although different thermostat options are suitable for most models, it is still desirable that the thermostat for the boiler and the boiler itself be made by the same manufacturer, this will greatly simplify the installation and operation process itself;
- before purchasing such equipment, you need to calculate the area of the room and the required temperature in order to avoid “downtime” of equipment and changes in wiring due to connecting devices of higher power;
- before installing the equipment, you need to take care of the thermal insulation of the room, otherwise high heat losses will be inevitable, and this is an additional cost item;
- if you are not sure that you need to purchase expensive equipment, then you can conduct a consumer experiment. Buy a cheaper mechanical thermostat, adjust it and see the result.
Modern technologies make it possible to install a heated floor in several ways, depending on which connection you plan to use. Water underfloor heating systems have proven themselves to be highly reliable and economical. Electric heated floors are easy to install, their wide popularity is due to the ability to be placed under any covering. Of course, all the positive aspects take place only when using high-quality equipment and its correct installation
Since part of the work on energy saving and ensuring convenience is assigned to the thermostat, special attention must be paid to its installation and connection
A modern thermostat can be programmed to change the temperature not only by hour, but also by day of the week
The use of a thermostat allows you to use any heating device without the danger of overheating and failure. This is why thermostats are built into electric irons, kettles and water heaters. Cable, rod, and film heated floors were no exception. Thanks to the installation of a control device, you can not only change the temperature under your feet, but also program the operation of additional heating to save energy.
All existing thermostats can be divided into two types:
The electronic thermostat sensor is installed in the controlled area, and the control unit is mounted separately