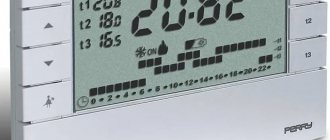
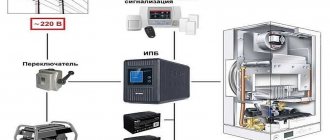
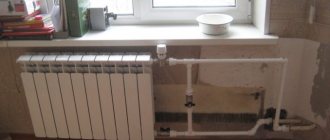
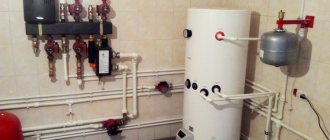
Manual and automatic adjustment of room temperature from modern heating sources is carried out using thermostats or thermostats.
They are mechanical and electronic. Each of them has its own pros and cons.
Among electronic models, three types are most widespread:
- thermostat for water heating
- for electric underfloor heating
- for gas boilers or boilers
In appearance, they are all very similar to each other, but their circuitry is different.
Let's take a closer look at the features of connecting a thermostat to a gas boiler, its diagram, errors and possible problems when operating such devices.
Benefits of using a thermostat
To choose the right thermostat model, turn it over and carefully examine the back side. Namely, the diagram, inscriptions and contact blocks.
If it says “Dry Contact”, you have made the right choice. This is the designation for thermostats designed to work with gas boilers.
The term “dry contact” means that in any condition there is no voltage at these terminals. That is, the supply of 220V power to the L and N blocks of the thermostat will not be connected in any way to the dry contacts, and the voltage will never get there.
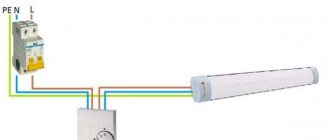
Unlike underfloor heating thermostats, as in the diagram below. Their power supply contacts (3-4) and load contacts (1-2) are connected directly to each other.
Why do you need this thing for a gas boiler? Without such a programmer, the boiler, after reaching the set temperature, will operate with a delay of approximately 3 minutes.
It turned on, worked, reached the temperature and went out. After three minutes it turns on again and everything repeats in a new cycle. The device will start up about 200-240 times per day.
Thus, over the entire heating season, the gas boiler will turn on and off 40,000 times. By connecting a thermostat, you reduce these commutations several times, thereby achieving not only gas savings, but also reducing wear and tear on heating equipment.
What temperature should I set?
The logic of work here is as follows. In factory settings, the boiler heats water according to the coolant temperature.
By installing an external thermostat, we thereby give it a command to heat the water not as the boiler wants, but according to the settings of the thermostat, i.e. to a certain temperature in a particular room.
With normal insulation of the house and minimal heat loss, a gas boiler with a thermostat will operate for only 3-4 hours per day.
If the thermostat after installation did not affect the operating time of the boiler in any way, then most likely the temperature on the gas appliance is set lower than necessary. The regulator sensor simply does not have time to warm up to the desired value and operate, while the temperature of the coolant has already reached the specified threshold.
The instructions separately specify the minimum temperature on the boiler when using an external thermostat. As a rule, it should be at least 65 degrees.
Initially, it is recommended to set the design temperature on the heating device, which completely covers the heat loss of the building. When these heat losses are not known, values from 60 to 70C are taken for a standard heating system.
If you live in a relatively warm climate, and in winter you do not raise the temperature in the batteries above 45C, you will still have to increase it to work with the thermostat.
Some people wonder, what is the point of installing a regulator and how does this lead to savings?
There is nothing to worry about because the temperature will be higher:
- firstly, the boiler cycles less, warms up the system faster
- secondly, at a higher coolant temperature, the heat in the rooms lasts longer
- and the maximum efficiency of batteries is observed precisely at t 65C-70C, and not at +45C
How does the draft control work?
The main part of the air regulator is a mechanical thermoelement placed in a cylindrical housing. Through a lever and a chain, it regulates the rise of the air damper on the ash pan door.
The device is a sealed flask filled with a heat-sensitive liquid that expands greatly when heated. The flask stands inside the housing, which is screwed into the sleeve of the boiler's water jacket and is in contact with the coolant. How a thermostat with a chain drive works is shown in the diagram:
The operating principle of the automatic draft regulator is based on controlling the flow of air flowing into the firebox under the influence of chimney draft. The algorithm looks like this:
- When solid fuel burns and the coolant heats up, the liquid inside the element expands and acts on the actuator and lever, overcoming the elastic force of the spring.
- The lever weakens the chain, the valve begins to close and reduce the flow area. Less air enters the firebox, and the combustion process slows down.
- The temperature of the water in the boiler tank decreases, the liquid is compressed and the return spring forces the lever to open the damper again through a chain.
- The cycle is repeated until the wood in the firebox is completely burned out, then the spring opens the door as wide as possible.
The draft limiter works on the opposite principle - the higher the water temperature in the boiler tank, the more the damper closes.
The adjustment handle at the end of the thermostat serves to limit the stroke of the lever and, accordingly, the air damper. This sets the maximum coolant temperature.
Reference. In addition to mechanical regulators that do not depend on electricity, there is automation for solid fuel boilers with a controller and a blower fan (or smoke exhauster). The latter supplies air to the firebox at the command of the electronic unit, which is guided by the signals from the temperature sensor. Similar automation kits are installed on all pyrolysis and pellet boilers.
The installation location of the fan depends on the design of the TT boiler. The supercharger is attached to the ash pan door opening (instead of the damper) or to a special flange on the top panel of the heater
Where and where to connect the wires on a gas boiler?
To connect the thermostat from the boiler terminal block to the Dry Contact contacts, you need to connect two conductors.
According to the instructions, the recommended cross-section of copper conductors is at least 0.75 mm2.
The cable length to the thermostat installation site should not exceed 50 meters.
Look for the necessary terminals on the boiler itself in the manufacturer's instructions, or refer to the inscriptions on the terminals.
These terminals are most often located on the back of the control board.
However, sometimes manufacturers take them outside the board.
During installation, some installers also connect the cable here and take it out, so that the consumer does not later go to the board and mess up something. Since the thermostat has not yet been installed, the ends of the cable are short-circuited.
By the way, be careful with this remote pad. Some consumers have encountered the problem of factory wires being mixed up, such as with Protherm.
As a result, everything started to work as it should, only when connected back.
Initially, there is a jumper between the terminals. If the jumper is broken, the gas boiler will simply stop working.
When connecting the thermostat, the factory jumper is removed and a cable laid to the installation site of the thermostat is installed in its place. The most important thing is that you don’t need to change any internal settings on the boiler.
A low voltage control pulse (usually 24V) is supplied through these contacts.
We have a control device (thermostat) and a slave (boiler). Between them, a set of requests and responses is constantly transmitted over a low-current line.
The principle of operation here is simple - by closing the dry contact, we thereby allow the operation of the boiler, by opening it, we interrupt the data transfer and prohibit it. Closing and opening occurs through the thermostat relay, depending on the set temperature on the device and comparison of the current readings in the room.
When triggered, the burner is first switched off, then after a certain period (pump run-on time) the circulation pump is switched off. Although the pump operation algorithm may differ in different models.
One of the algorithm options
It is not advisable for the pump to turn off immediately after the thermostat is activated. In this case, set the run-on time from 5 to 10 minutes in the menu. Then the entire heating system will cool evenly and the time intervals for automatic operation will increase.
On expensive models that support the OpenTherm protocol, through a remote programmer you can control many built-in parameters of the boiler, and not just turn it on and off.
Here are clear examples of where to connect the thermostat for different boiler models:
BaxiBoschElectroluxVaillantJunkersBuderusViessmanFerroliAtronAlfa CalorImmergas
What happens if the thermostat fails? How will the boiler behave in this case?
It all depends on the position in which the dry contact remains. If it is closed, nothing bad will happen. The boiler will simply start operating according to its last set program.
If it is open, the heating will not start and will not work.
Please note that the thermostat does not affect the operation of the burner in hot water supply mode.
A voltage of 220V is supplied to the power contacts of the thermostat - phase and zero (L and N). This can be done either from a separate outlet or junction box, or taken directly from the boiler itself.
On a regulator with dry contacts, it makes no difference where the phase or zero is connected, but on models for electric underfloor heating this plays a significant role in the issue of operational safety.
Since if the connection is incorrect, only the neutral conductor will break, and the phase will be constantly on duty on the heating cable.
How to install and configure the regulator
In most cases, installing a thermostat yourself entails emptying the boiler's water jacket. This will not create a big problem if the piping of the solid fuel boiler is done correctly and the water heating system can be cut off with taps. Otherwise, you will have to drain all the coolant. After this, the plug is removed from the sleeve, and the device is screwed in instead and the system is filled with water again.
To adjust the draft regulator, you need to light the boiler and follow the instructions:
- Without attaching the chain to the door, open it to allow air to enter.
- Loosen the locking screw on the adjustment handle.
- Set the handle to the position corresponding to the required temperature, for example, 70 °C.
- Watching the boiler thermometer, connect the chain drive to the damper at the moment when it shows 70 °C. In this case, the damper should be slightly open by only 1-2 mm.
- Tighten the fixing screw.
Attention! It is necessary to ensure that the free play of the chain does not exceed 1 mm.
Next, you should check the operation of the thermostat in all modes, up to maximum. In this case, you need to take into account that some time passes between the moment the damper closes and the drop in coolant temperature and do not rush to reconfigure the device. Solid fuel heat generators are characterized by a delay, because the firewood or coal in the firebox cannot go out at once.
Mechanical or electronic thermostat
By the way, for a gas boiler you can use another simple type of regulator, which does not even have to be supplied with 220V voltage. For example, a mechanical thermostat Termec Emmeti or other similar models.
Here is a "normal" Termec wiring diagram.
You need to use only normally closed contacts 1 and 3, completely eliminating 220V alternating voltage (L and N).
The built-in sensor will close and open the internal contact when the temperature in the room changes. He doesn't need any nutrition. In this case, the entire logic of heating operation is similar to that discussed earlier.
Just don’t forget that almost all mechanical models have a very large hysteresis. You cannot create a comfortable room temperature with their help.
Therefore, whenever possible, choose electronic devices with a WiFi connection. Fortunately, nowadays you can find very decent and inexpensive options from the Chinese.
For example, such as this one (thousands of satisfied customers and positive reviews). More details
Some models have contacts labeled NO (normally open), NC (normally closed) and COM (common). Someone advises connecting through them, namely through NC and COM.
However, be careful, there are different thermostats and always read the instructions. An alternating voltage of 220V can also be supplied through them, and you will thereby start a phase on the control board where it is not needed.
Here is a striking example of such multifunctional regulators Fluoreon and Beok.
On multifunctional devices, the temperature in the room is also determined using the built-in temperature sensor.
However, they have terminals on the body for connecting and external (Sensor). It is most often used for heated floors.
Types of control devices
Thermostats for heating boilers with the option of temperature control are divided into several types:
- mechanical models with one function;
- programmable models with a large range of auxiliary settings.
Also, similar designs are wireless and wired. Thermostats are installed in the selected location, a temperature sensor is connected and connected to the control device.
Design diagram of the control device
Note! Thermostats must be provided with constant air access to prevent overheating. It is also not recommended to install electrical appliances nearby.
Selecting a room programmable device
The option of an electronic temperature sensor for a heating boiler helps you select the appropriate temperature mode and change it at your discretion. The room thermostat sets the set values every day. Some setpoint values can be programmed, for example when day turns to night.
Such controllers have additional options. For example, a function that allows you to stop heating for a while and then resume it. You can also change the programmable temperatures for the duration of the configured periods. Another useful option is the ability to change the heating intensity.
Room type regulator
Thermostat as a central element
The central thermostat for the heating boiler (temperature regulator) is located at a certain distance from the heating unit and allows you to turn off and turn on equipment throughout the house.
Installation diagram of thermostats in the heating system
Related article:
Thermostat for heating radiator. What task does this device perform and what is its advantage? What is the operating principle and correct installation? Prices also matter. More details in a special publication.
Models from previous years are connected directly to the heating unit by wires, while more modern designs are distinguished by remote control. The latest devices are mounted in dual-circuit units Beretta, Ferroli and AOGV. Room control mechanisms for boilers of the Protherm and Gsm brands are popular. They differ in their dilatometric mechanism.
Protherm equipment models
Room devices stop heating when necessary. They monitor the air temperature and turn on the heating when the temperature drops. The best place for a microcontroller is considered to be the bedroom and living room.
Installing a controller will allow you to obtain accurate data on the microclimate of the room
Helpful information! The recommended temperature for the thermostat is 20 degrees, and in the children's room - 21-22 degrees. At night, the temperature can vary from 19 to 21 degrees.
Thermostatic valves for regulation
Such a device allows you to create a certain coolant temperature by mixing the forward and return flows. The device helps control temperature values by changing the flow of hot water through the battery. In this case, the mechanism controls the supply of hot water through the battery, but not through the boiler. It is installed in any room where you need to maintain a certain temperature.
Thermostatic valve design using the example of a specific model
Installation location
As you know, the air temperature in a room with traditional radiator heating systems warms up unevenly. It is lower near the floor, higher under the ceiling.
Based on the presence of a built-in temperature sensor in thermostats, their installation height is regulated.
Such thermostats should be placed at a height of 1.2-1.5 m from the floor level and as far as possible from heating sources, including protection from direct sunlight.
It is also not recommended to place thermostats in the hallway or kitchen.
Connecting a heated floor thermostat to a gas boiler
Consumers often wonder whether it is possible to use a standard 220V thermostat for underfloor heating to work with a gas boiler?
What if you haven’t found a special thermostat with dry contacts, but you already have a model for heated floors in stock. Such a connection is possible.
However, for this you will need to “untie” the 220V voltage. In most underfloor heating thermostats, it comes to the power terminals and is then removed from the terminals going to the heating cable. And as mentioned above, when working with a gas boiler, “dry contacts” are used, through which low voltage pulses are transmitted.
If you directly connect the cable from the boiler control board here, you will cause a short circuit and damage your boiler.
For a safe connection, you will have to add an intermediate relay or an additional contactor with normally open contacts to the circuit.
From the thermostat terminals, instead of the underfloor heating cable, you supply 220V voltage to the relay coil (contactor), and through its normally open contacts (1-2 or 3-4), connect the wires to the gas boiler.
The principle of operation here is the same as discussed earlier. However, keep in mind the following feature.
Since this is a thermostat for heated floors, most likely it will work according to the scheme: air sensor + floor sensor. This means that it will require you to install and set a temperature limit using a floor sensor, which you will not have.
Therefore, in the settings you will have to unplug the floor sensor and leave only the air sensor in operation. How to do this, read in detail in the instructions for your model. There may be differences between different devices.
For example, with the Devi Touch, for this you have to break a special jumper on the back side.
In order to avoid all these difficulties and problems, it is better to initially choose the right thermostat model.
DIY making
The thermostat, as an automatic device for regulating the operation of the heating system, can be purchased at the electrical goods retail chain. At the back of this device there is a heat removal plate; it will need to be pressed against the exposed part of the unit.
The thermostat has three contacts inside: common, normally open and normally closed. By rotating the adjusting knob, you can change the positions of the contacts.
So you need to set the handle to the minimum mark and connect to the open contacts:
- to the general one .
- We connect one wire from the turbine to the open one
- to the second wire from the turbine .
An automated control system is rightfully considered not only convenient, but also an effective device. With its help, you can significantly simplify the process of operating the heating system.
To control the boiler and the entire heating system, special elements are provided that reduce energy costs for heating, and also help create an optimal temperature regime and at the same time prevent overheating of the room. These elements include a thermostat for a heating boiler. The temperature regulator allows you to save up to 20% of fuel resources, and by what means, we will tell you in this review.
