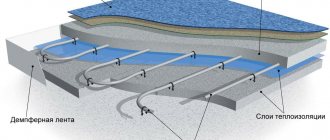
Will a car radiator work in the heating system?
While studying the issue of increasing the power of the heating system in the garage, my search led me to industrial fan heaters (hereinafter referred to as TV). Since there is already a hot water boiler, the type of TV was obvious, water.
But unfortunately, the price for such devices was equal to 48 sections of aluminum batteries from Leroy Merlin. Since my system already has 64 sections, I wanted TV. Not having the required budget, I began to look for an alternative.
By chance, the idea flashed into my head that the same industrial TV is in every car))) I started studying this question on the Internet, I didn’t find a sensible answer, but I had thoughts on this matter. And I started sculpting...
I took a couple of radiators from a Subaru, with fans, a power supply from a computer, a resistor from a VAZ, radiator pipes and clamps + mounting of aluminum radiators from Leroy.
My current heating system is based on the Tichelmann system, where the coolant moves along the same path. The system is open, with a circulation pump, boiler 15 kW, power of aluminum radiators 8 kW. I decided to mount the TV at the very end of the system, already in front of the boiler, roughly speaking. This is what happened.
How to increase the heat transfer of a steam heating battery without significant costs?
Description of a simple experiment proving the effectiveness of the proposed low-cost method of increasing the air temperature in residential premises equipped with central heating systems.
The article provides experimental data and illustrations.
Prologue.
This year we are experiencing unprecedented frosts. In some areas of the republic, the air temperature dropped to -24ºС, which is an anomalous phenomenon for warm Moldova. I don’t have a thermometer hanging in my room, but I felt that my hand lying on the table began to freeze, and I had to put a piece of foam rubber under it.
We, in general, like the Amundsens, are already accustomed to the coolness, but yesterday the chairman of our condominium, while collecting signatures for an appeal to the heat supplier, asked what the air temperature was in our apartment. It is unlikely that the heat supplier will increase the temperature of the coolant, but perhaps the chairman wants to demand a penalty under the pretext of providing poor-quality services.
Be that as it may, this event first prompted me to measure the air temperature in the apartment, and then to conduct this experiment.
Of course, to say that this experiment was unclean is to say nothing. There are too many variables that could affect the accuracy of the result, from the direction of the wind overboard to the activity of the computer running in the room being tested.
But the most important parameter, which at another time would not have allowed this experiment to be carried out at all, is the stability of the coolant temperature.
The fact is that in warmer periods of time, the temperature of the coolant is actively regulated during the day to save energy consumption. When the temperature outside is abnormal, all the valves open wide.
Heating in a garage using antifreeze - installation details
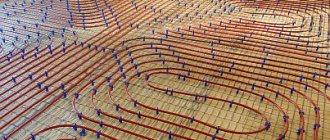
Installation of the entire heating system begins from the stove.
- Based on our preferences and capabilities, we install a heating device in the selected location. Electric or gas boiler. A stove that runs on wood, exhaust or another type of fuel.
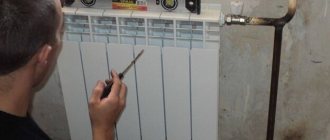
- We hang aluminum or cast iron radiators in such a way that the heating of the entire room is uniform.
- Pipes for connecting radiators to the stove should be selected taking into account the viscosity of the antifreeze. That is, their diameter must be at least 1.5 times larger than for water heating.
- The circular pump is installed in the system at a distance of at least 1 meter from the heating device. It is recommended to install shut-off valves on both sides. This is done so that it is possible, if necessary, to remove the pump, without having to drain the antifreeze from the entire system. The pump itself should be selected so that it is twice as powerful as when used in a similar heating system operating on water.
- We install the expansion tank as high as possible. The ideal option would be to take it to the roof
- Carefully connect all elements. It is better not to use threaded connections. This is due to the increased fluidity of antifreeze, which easily seeps through such connections. But a high-quality welding seam will easily hold it.
- Filling the antifreeze system is carried out as follows:
- Approximately 2/3 of the required volume is poured into the expansion tank.
- The circulation pump turns on.
- You should drive the system a little, carefully monitoring the antifreeze level.
- Add if necessary.
- After making sure that everything is working properly, there are no leaks and the antifreeze level is appropriate, you should carefully seal the expansion tank.
- Now you can start the stove for the first time.
- During the first month or two, it is recommended to conduct a daily visual inspection of the entire system, especially the joints and connections for leaks and other faults.
When installing a heating system in a garage using antifreeze, special attention should be paid to ensuring that all elements are made of materials that are neutral to the substances contained in this non-freezing liquid. Aluminum meets these requirements, but it is quite expensive and much more difficult to install. You can use thick-walled iron pipes, especially if your system includes a homemade stove.
Temperature sensor.
To determine the effectiveness of one or another method of blowing the battery, it was decided to measure the difference in coolant temperatures before and after the central heating battery.
In fact, I started by measuring the battery temperature at different points, but I was unable to process the data obtained.
For this purpose, two identical temperature sensors were manufactured based on KMT-17 semiconductor thermistors.
And this is how the sensors were attached to the steam heating pipes. To improve contact with the pipe, the thermistor was lubricated with heat-conducting paste KPT-8.
To reduce the measurement error introduced by air flows, the sensors had to be additionally insulated with foam tape.
DIY water fan heater
Some craftsmen make low-power water fan heaters on their own. The main difficulty in assembling a homemade device is the manufacture of a coil (heat exchanger).
It uses a copper tube with a diameter of at least ½ inch . It is filled with sand and bent into the required configuration.
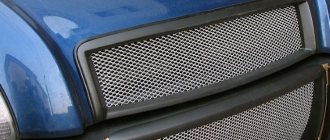
However, there is a simpler way - a car radiator can become a heat exchanger. A 220 V duct fan is added to it, mounted on springs that dampen vibration.
All parts are assembled into a housing made of stainless steel, and the device is connected to the heating system using flange connections.
Selecting the optimal fan position.
Coolant temperature measurements were made at different fan positions relative to the battery. The fan power, however, did not change.
During the experiment, the coolant temperature was 43ºС, the air temperature in the room was 20ºС.
In all cases, the distance from the center of the blades to the center of the battery was 70 cm.
The difference in readings between the coolant temperature at the inlet and outlet is indicated in arbitrary units, since there was simply nothing to calibrate the thermometer with such high accuracy. In this case, 0 (zero) conventional units were taken as the starting point, at which the battery was cooled naturally.
The air flow is directed from top to bottom, and the angle of inclination of the fan shaft relative to the horizon is 50º. At the same time, the temperature difference at the input and output of the battery is 11 Conventional Units (hereinafter referred to as CU).
The air flow is directed from top to bottom, the fan operates in the “toady” mode (turns from side to side). Temperature difference – 8 UE.
When blowing the battery from the side, the temperature difference between the input and output is 13 CU.
By directing the air flow to the center of the battery, it was possible to obtain the highest temperature difference - 15 CU.
If you direct the air flow to the center of the battery, but at the same time turn on the “sneak” mode, the temperature difference will drop to – 12 CU.
The most advantageous, from the point of view of heat transfer, turned out to be the direction of air flow from the floor towards the plane of the battery.
Part 10. Heating.
To be honest, I monitored the Internet for more than a year to see who was drowning with what and how. I understood one thing - the fastest heating is “air”, that is, when an air flow carries warm air throughout the room. This is much faster than heating a room with classic radiators/batteries. With batteries, until you warm up the entire volume of water/antifreeze in the system, until the batteries themselves warm up and begin to give off heat, a sufficient amount of time will pass.
The most common heating in workshops, potbelly stoves based on waste, I crossed out from the list right away - because this waste itself accumulates a very small amount, and buying it, transporting it, refilling the tanks is a fuss, not a clean one, and it’s a little dangerous ( There are fireproof potbelly stoves, but still not my thing.).
Full size potbelly stove under development, the simplest option
In the same way, I immediately crossed out various types of gas and diesel guns from the list, since they burn oxygen in the room, and over time it becomes impossible to stay there. Electric guns were also not suitable, due to the fact that for a large room you need about 20 kW of electricity, and I only have
15 kW (maybe a little more) of energy. Yes, and it’s expensive if you pay by meter.
gas gun (a diesel one looks similar) electric fan heater
I also looked at different types of buleryan, and even bought in Ufa, on one ad site, the largest used buleryan with 16 pipes (firebox 110cm) for quick warming up of the workshop... in the end, when the transport company brought it to me, I realized that it was really huge and I’m tired of feeding it, plus it needs firewood and a place to store it... to install a pipe with a diameter of 180 mm to a 6-meter height... the smell of smoke... in general, I resold it with a plus.
Buleryan with 16 pipes and a 110cm firebox
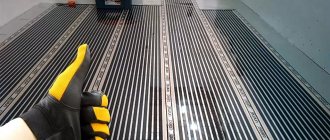
Also, remembering the long-standing experience of heating a tire shop in winter, a frozen room from the night, where the room was warmed up in a fairly short time using IR heaters, I considered the location of these same IR heaters in the area of the work area... but they need such a quantity that the network could not withstand it, and the price was not particularly favorable to them. Of course, it was possible to use film heaters, but in this case the ceiling preparation would need to be close to ideal for fixing these films.
Full Size IR Heater Film IR Heaters
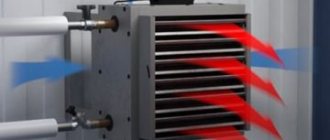
As a result, I came to the topic of a water-cooled fan heater, such as Volcano.
fan heater volcano
Its characteristics are quite tempting - the output is up to 60 kW of energy. In an hour it can drive more than 5000 cubic meters of air through itself. They are installed in all major shopping centers and car service centers, as well as in greenhouses... I was looking for a used VR1 model in the advertisements, it suited my requirements, but I accidentally came across a used VR2 model for the same money (the difference from VR1 is that of VR2 double heat exchanger, with all other parameters being the same)… again, delivered by a transport company from the Moscow region. The price with delivery is almost 60% of the price of a new one. 20tr.
The question remains: how to heat the coolant (water or antifreeze)?! Since I need to quickly warm up the workshop without unnecessary fuss (delivery and kindling of firewood, mining...) on the rare days when I want to appear there, the choice was between a gas or electric boiler. A gas boiler is more powerful and economical, but there is still a fuss in the form of replacing and transporting gas cylinders, plus, due to safety precautions, cylinders cannot be stored indoors...
I decided to try to install an electric boiler with 12 kW and 380 volts, realizing that for a fan heater that can easily “digest” 60 kW, these 12 kW will not be enough for it (a boiler of higher power does not allow installing a cable that is routed to the workshop). Trying is not torture. I chose an automatic electric boiler that is not afraid of power loss (the scourge of all garage companies) Warmos EPO-1-12 380V Evan, also used in excellent condition for 25% of the price of a new one. 9tr. I went to a hardware store to buy pipes and fittings and other “fittings,” and began soldering the heating system.
In the end, this is the picture we got, so far using ordinary water for testing. (I’ll add antifreeze coolant later)
Full size of the heating system wiring, the boiler is not yet covered by the front panel
I hung the fan heater, turned it and directed the air flow with the blinds into the work area...
Experimental data.
First day of the experiment.
All graphs show temperature changes from 8:00 am to 12:00 pm.
The coolant temperature is 42ºС.
The graph shows that the system worked more efficiently while the temperature difference between the air and the battery was large. When the difference decreased, the system stabilized.
The air temperature in the center of the room at a height of 65 cm from the floor rose from 15ºС to 20ºС in 9 hours.
Subsequently, the temperature rose another 0.5ºС.
The fan power consumption was 35.2 Watts.
When, during the experiment, I left my room into the corridor, I immediately felt the temperature difference, because by that time I had already taken off my warm clothes.
I went to the barn and brought out another fan. This fan was not equipped with a power switch, so I connected it through a homemade triac regulator, the design of which is described in detail here.
Well, life has become better, life has become more fun!
Second day of the experiment.
In the morning I again measured the coolant temperature, as well as the air temperature in the room. All values remained unchanged, including the outside temperature.
No changes in temperature were noticed during the day.
Autolux HBA-18 – with direct connection to the battery, power – 300 W
Ceramic heater with a powerful fan that quickly and evenly supplies warm air, which is convenient for warming up the car interior. Connects to the on-board network or battery (via terminals).
The advantage of devices with a ceramic heater is that they heat up 3-4 times faster than traditional heating elements. Doesn't dry out the air, doesn't burn oxygen. The heating element does not oxidize, so it lasts longer.
The power of the device, manufactured in Taiwan, is 300 W, voltage is 12 V, current consumption is 25 A. The connection cable is quite long - 4 m, so the fan heater can easily be installed in the rear window area. Adjustable horizontal airflow direction within 360 degrees. Dimensions – 11 x 15 x 12 cm. The device weighs 1.5 kg.
- power 300 W;
- ceramic heating element;
- adjustable airflow angle within 0 – 360 degrees;
- powered by cigarette lighter or battery;
- 4 meter cable.
- not detected.
Results and conclusions.
- I managed to increase the air temperature in the room by as much as 6ºC, and in extreme fan operation mode even by 9ºC, which confirmed the assumption that it is possible to increase the heat transfer of a central heating battery, even at such a low coolant temperature.
- When using a regular household fan without a speed controller, the room becomes too noisy. However, if you use the heat accumulated in the room, then, for example, you can turn off the fan in the bedroom at night, and, on the contrary, turn it on in the dining room. Then you can use the fan at full power.
- If you are in that part of the room where the movement of air generated by the fan is most noticeable, then a false sensation of a decrease in temperature is created.
- Those who are afraid that the fan will wind up a lot can calculate the monthly energy consumption.
35 (Watt) * 24 (hours) * 30 (days) ≈ 25 (kW*hour)
A few words about the fan
The cooler that is installed in most PC power supplies operates at 12 V. The revolutions are sufficient to cool the transformer, but not enough for a homemade heater. In addition, the heater parts will overheat.
If you connect the fan not to 12 V, but to 24 V, then the speed will be sufficient. But where can you get such voltages in a passenger car? A DC/DC converter can be used as a reliable source. You can either purchase it or make it yourself.
Small details.
To quickly and accurately measure the temperature of a steam heating battery, it is enough to apply a small amount of “KPT-8” thermal conductive paste to the sensor ball of a digital thermometer. During the measurement, the contact area should be covered with several layers of fabric or a layer of foam rubber.
The above experiment made me question the accuracy of my digital thermometer. To make sure his readings were correct, I compared them with the readings of a mercury thermometer. To do this, I immersed both thermometers in hot water to the same depth and monitored the readings as the water cooled.
Prolonged operation of fans immediately revealed the weak point of modern devices.
If the 1973 Penguin fan has a front sliding bearing equipped with an oil seal (the arrow marks the hole for filling the oil seal), which has allowed it to work for almost 40 years, then in a modern fan there is no trace of such an oil seal.
In addition, the Penguin has a spring that prevents longitudinal vibrations of the shaft. The new fan, after two days of operation, began to rattle, because due to the longitudinal runout of the shaft caused by the eccentricity of the propeller, one of the fluoroplastic gaskets quickly wore out.
To eliminate the longitudinal play, several ordinary and two thin-walled washers were needed, as well as a gasket cut from foam rubber.
First I disassembled the stator.
Then I put thin-walled washers and a gasket on the motor shaft, and used the remaining washers to increase the gap between the bearings.
To ensure any long-term operation of the fan, I cut out an oil seal from felt, and a seal plug from some nylon cover and pressed it all into the recess around the shaft. Naturally, I didn’t skimp on the oil either.
I started thinking about buying two dozen 120mm computer fans. I think if you install them directly between the battery sections, it should reduce noise and increase heat transfer efficiency.
Option number 2: homemade thermal film
Nichrome makes good thermoelements, but what to do if you don’t have this material at hand? It turns out that ordinary soot can replace it.
It is also a high-resistance conductor, but it has an important feature: a significant part of the thermal energy is released by the heated material in the form of infrared radiation.
This means that heaters with a carbon element heat not only the air, but also the user directly who is in the area of infrared radiation. This property made it possible to create thin film heaters based on carbon emitters.
The device will consist of the following components:
- two rectangular pieces of glass measuring approximately 30x70 mm;
- aluminium foil;
- 2-wire wire with plug.
You will also need some tools, materials and products:
- soldering iron;
- multimeter;
- candle;
- sealant or glue;
- cotton swab.
The heater is manufactured in several stages:
- The glass must be washed, treated with a degreaser and dried.
- We light a candle and begin to move one of the glass rectangles over it, as a result of which it will become covered with soot. The more soot there is, the lower its electrical resistance will be.
The operation must be interrupted periodically to allow the glass to cool.
Now you need to cut out two parts from aluminum foil in the shape of oblong rectangles, the length of which will correspond to the width of the soot strip.
They will serve as terminals for connecting wires.
At this stage, you need to measure the resistance of the carbon coating. We place aluminum contacts on both sides and press them with the second glass.
Now you can use a multimeter by placing its probes on the protruding pieces of aluminum foil. We are satisfied with a resistance of 120 Ohms, then the power of the device will be 1.2 W. If the device shows a different value, you need to remove (to increase resistance) or add (to decrease) a little soot.
- As soon as the desired resistance is achieved, using a cotton swab we clean the edges of the glass from soot to a width of about 5 mm.
- Lubricate the cleaned edges of the smoked glass with glue, then again lay out the foil contacts (they now need to be shortened by 10 mm) and glue the second glass blank on top. The job is done, now the heater can be connected to a 12-volt source.
Instead of carbon black, you can use a mixture of graphite and epoxy glue. Then, instead of glass, you can use laminated paper plastic as a base.
Comments (50)
Pages: « 1 2 3 4 [5] Show all
no one had in mind video recording. For it I use lamps that say 2700K. In my house, in general, all the lamps are 2700K, simply because we like the light reminiscent of incandescent light. I set the balance to the target and shoot. Everything is as usual.
For photography, of course, flashes are more convenient for a number of reasons. Firstly, you can shoot handheld, secondly, if you shoot with a DSLR, you can provide a large depth of field at low ISOs, thirdly, the spectrum is much better than that of CFLs, fourthly... again, energy saving.
Some of the heat escapes through the windows by heat transfer
Please describe. At least briefly.
Or rather, this is what interests me specifically:
I have a solution that I have been using for 20 years.
SZ, if about heat leakage in the IR range, then I already wrote about the heat shield, which I have been using for many years. Link to article >>>
The temperature is slowly rising, it’s -20 outside the window and I somehow want to heat the room quickly. I tried to install a fan, but it’s really noisy and due to the fact that the room is cool in any way, the excessive circulation gives coolness
Dmitry, you’ll have to wait a couple of days until the room warms up. To prevent the fan from making noise, it will have to be prevented. Alternatively, you can install 120mm computer ones under the battery, but the efficiency will be lower.
Well, I'll try it, I'll have to turn it off at night to make less noise.
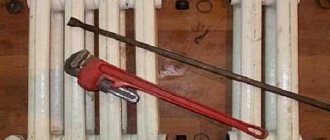
Hello, dear discussants! I accidentally came across an article about a fan and batteries and couldn’t pass it by. Maybe someone is interested in my experience of dealing with winter. 1) Increase the number of sections in the battery. It's absolutely quiet and works great. If the batteries are connected to the riser as in the photographs in the article (input on the bottom right, exit on the top right or vice versa), then this will not work - approximately the first 7 sections will be warm, and then it is useless. You need to connect the input-output diagonally, then the entire battery will be hot (tested by me). There is another, less obvious, way to connect pipes, which not everyone knows about - the inlet is from below, the outlet is also from below, from the opposite end of the battery. In this case, the entire battery also heats up (I tested it). Of course, this requires some basic plumbing skills, but polypropylene works wonders. In some cases, it is convenient to run pipes (at least one) inside the battery, especially if your battery does not have partitions (manufacturers are lazy, and recently such batteries have dominated the market) so that they interfere less. Unfortunately, it is better to modify batteries in the summer, and not in the coldest weather. 2) Of course, increasing the air flow on the battery increases the temperature in the room. Those same decorative boxes help to silently increase the airflow of the battery. But most often they are only decorative and cover the battery only from the front and top. It’s better to make them yourself from any material (yes, even cardboard!) so that they wrap around the battery on all sides, without any gaps on the sides, but with completely open ends at the top and bottom. The battery will develop traction like a classic stove (samovar, boiler) pipe. To take this idea to perfection, the casing around the battery should not simply end with an open top end, it should continue with an air duct that goes almost to the ceiling. The air duct can go around the window, repeating the course of the upper branch of the riser (hiding the riser in itself). The cross-section of this air duct can be 2-3 times smaller than the cross-section of the battery casing, so as not to spoil the appearance of the apartment too much), but it should still be large enough so as not to create noticeable air resistance. I haven’t tried this myself, but I’m sure the traction will increase significantly, a fan may not be required! There will be no noise either. Or rather, I have not tried to do this with air, but I have tried it with water. This is how we warmed up the shower in our dorm for several years: at the bottom is a heating element from an electric kettle, around it is a pipe made from a plastic bottle. The water was spinning very strongly, the whole tank had the same temperature. I think that the air will behave exactly the same. 3) And of course, a fan for the battery! In my life, this served as an emergency measure that allowed me to survive several days of severe frosts; I never left it permanently. The fan, absolutely right, you need to take a large floor-standing Chinese one, it is quieter and more efficient, and not the old Soviet small one. A very high speed is not needed here; the mode when the fan is still almost inaudible, or when it is audible but not yet annoying, is enough. You can slow down the fan by connecting a 400 volt paper capacitor in series with the motor. The capacitance is selected for a specific case at random. It is compact, cheap and quiet (LATR sometimes makes noise itself, and the thyristor regulator can make the fan motor make noise). This is especially true if there are children in the house - they will definitely turn on the LATR and the thyristor regulator. And the capacitors are so compact that after selecting the capacitance, they can be hidden forever in the box where the fan buttons are located; they will not heat up. If you want to further enhance the air duct method, you can add “computer” fans of as large a diameter as possible to the bottom of the battery casing, of course, also slow ones. A couple more words on the topic. My batteries do not hang at some distance from the floor, as is common practice everywhere, but stand directly on the floor (on 7 mm thick plywood). Therefore, our floor is always quite warm, despite the first floor, that is, there is no layer of cold air on the floor. In the case of air duct casings, it is not necessary to reweigh the batteries; you just need to extend the casings almost to the floor, leaving only a gap with a total area comparable to the cross-section of the casing. Then the cold air from the floor will be sucked in by the battery and sent upstairs. Here. Sorry if it's confusing, but so much of my life has to do with this fight against this damn cold! Over the past 1-2 years, our heating has accidentally become much better. This is due to the fact that our ruined buildings are being demolished one after another, and those who remain are getting more heat. But for most of my adult life, this was far from the case! Good luck to everyone and warmth in the house! spock2004
Homemade air conditioner from a car radiator
Background
I was away from Moscow for about 5 weeks.
Returning through the intense heat, which began in Pskov, and smoke in the Tver region, the capital was greeted with a surprise - a great demand for air conditioners and fans. In many stores these items were not available at all, and even if there was something, it cost 3-4 times more. The queue for installation of a split system stretched for 2-3 weeks.
An absurd mess? No, not at all! After thinking a little, on the day of my arrival, I assembled an air conditioner in my apartment with my own hands. However, it was necessary not only to “think about it”, but also required some financial expenses.
I will try to clearly explain my thoughts in this article.
So, the problem statement:
Given: Enough money, smart hands, there is a desire to buy a split system or a fan, but there is neither one nor the other.
Question: What should I do? The answer is obvious! We will do air conditioning.
Radiators for water heating
First, we will examine radiators designed for operation in central and autonomous heating circuits.
Register
The simplest and most affordable homemade heating radiators are made from pipes of large (100 - 250 mm) diameter, capped at the ends and connected by jumpers. These devices - the so-called registers - have a large internal volume and, accordingly, significant thermal inertia, which makes them an ideal solution for systems with solid fuel boilers.
Hint: a solid fuel boiler needs lighting every few hours. The greater the inertia of the heating system and, in particular, heating devices, the less the heated room will cool down between kindlings.
How to make a simple horizontal register?
- Pipes are cut into sections of 1.5 - 4 meters (depending on the expected length of the register).
- Holes for jumpers are drilled or burned with a gas cutter . An important point: the configuration of the jumpers should create a closed circuit inside the device, eliminating stagnation of the coolant in dead-end areas.
- The pipes are connected by jumpers - pipes of sizes DN20 - DN32.
- Parallel to the jumpers, pipe sections of the same length are welded, but already welded to the blank walls . They will add rigidity to the structure.
- The ends are capped with bottoms cut from a steel sheet 4 - 5 mm thick.
- Nozzles are welded into the lower and upper sections , which will subsequently connect the register to the supply line.
In most cases, a regular round water and gas pipe is used as register sections. It is attractive due to its low price per linear meter and maximum tensile strength with minimal wall thickness, which is ensured by a circular cross-section.
Homemade register device.
However, sometimes you can find homemade heating radiators made from a profile pipe - square or rectangular. Its advantages are the relative compactness of the register and a slightly larger surface area for the same cross-sectional area.
Important: at a constant temperature of the heating device, its heat transfer linearly depends on the surface area on which heat exchanges with air.
Convector
The simplest convector is a coil of pipe with plates pressed onto it, increasing the notorious heat transfer surface. The most accessible material is steel. New buildings often serve as sources of ready-made convectors for garage owners: apartment owners in them en masse replace the heating devices installed by the builders with sectional radiators that are more attractive in appearance and have greater heat output.
Residents of new buildings often remember the creators of this masterpiece with quiet, kind words.
However, steel has a serious drawback - low thermal conductivity. In order not to be unfounded, we will present the thermal conductivity values for three metals that are most often used in the manufacture of heating devices.
| Metal | Thermal conductivity, W/(m*K) |
| Steel | 47 |
| Aluminum | 220 |
| Copper | 401 |
It is obvious that when creating a convector it is advantageous to use non-ferrous metals: their thermal conductivity will sharply increase heat transfer, making the heating of the fins more uniform.
Homemade heating radiators made of copper are all kinds of designs based on a copper water pipe and plates - copper and aluminum. Aluminum fins are much more affordable compared to copper; some difference in heat transfer is compensated by its increased area.
To assemble the convector, solder intended for copper water pipes is most often used; somewhat less commonly, the plates are simply pressed onto the pipe.
The convector in the photo is completely soldered from a copper water pipe.
Here, plates are pressed onto the copper core, increasing heat transfer.
Building a dream garage from scratch part 5 Fan heater
Hello everyone. We continue to build a large budget dream garage. Material for insulation has been purchased, but the weather does not yet allow them to work on it. While it was cold outside I decided to work on the heating system. Large garage 6*12 ceiling height in its pure form 3.20. And so the question arose of how to heat such a room. The main sources of heat will be underfloor heating and radiators. But it will take a long time for it to warm up. It will be the same story with radiators. It was decided to make a fan heater to quickly warm up the air, like volkano.
Full size
Found two copper heaters
Full size
The connection manifold was made from a regular profile pipe 50*50 wall 2
Full size
An automatic air vent is located in the upper part. And at the bottom there are 2 taps at 3/4.
Things were much more interesting with the fan. Initially I thought of installing a regular household fan. I was lying around idle, so I think this is where it will come in handy. I started making fastenings for it.
Full size Full size
And then finally the motor began to hum. This fan blows radiators 10-12 meters away. I started making a diffuser for it.
Full size Full size
Well, since it will stand under the ceiling, it would be nice to be able to regulate the direction of air flow. The simplest solution is to make rotating blinds.
Full size
Well, basically, all that remains is to paint it, which will happen in the warm season. But I hope the connection and testing will take place next weekend. I will be glad to hear questions, ideas on heating, or constructive criticism.
Full size Full size
Tags: fan heater, volkano, do it yourself, heating, heat gun, dream garage
Comments 113
With such a height, you probably just need to drive air from the top to the floor. There will be a warm pillow at the top.
This fan will drive warm air from top to bottom
I would just drive down from the top point. With a heat gun in a small garage there is the same collapse - it’s warm at the top, but not at the bottom.
Well, physics can’t fool her. Warmth always goes up
It is precisely by forced convection that it is deceived.
Without a car
Our workshop was heated in this way, only steam was the coolant and there were box-shaped pipes throughout the workshop, branches down with valves. The temperature of the steam was more than 150 degrees, but it was blowing approximately like from a stove in a car.
I have a 12x8x3.3, I’m also thinking about how to heat it, I plan to work in the garage every day.
If you plan to work every day, then it’s easier. The heating can be left on
Well, yes, I made a good copy of the “volcano”... Perhaps even based on the output in kW, it will warm up the room quite quickly. But what will cause it to warm up?! If from a general system, then in any case you need to wait until ALL the coolant warms up in the system and only then this parody of a volcano begins to give off heat...
I also have an original volcano and radiators (without heated floors).
It will heat up from such a solid fuel boiler. Still a little unfinished. But maybe next weekend I’ll check this system.
it’s the coolant that will heat up from it!) and the volcano after...
Well, or you can start it in a small circle right away - but you will need to watch so that the boiler does not boil, or vice versa, so that it does not quickly cool down with a small amount of coolant in a small circle.
Well, I think you understand the idea of what will cause the fan heater to heat up). The boiler will have an automatic system that will control the fan and pump.
Myatnokriliy
Well, yes, I made a good copy of the “volcano”... Perhaps even based on the output in kW, it will warm up the room quite quickly. But what will cause it to warm up?! If from a general system, then in any case you need to wait until ALL the coolant warms up in the system and only then this parody of a volcano begins to give off heat...
I also have an original volcano and radiators (without heated floors).
Well, you have a larger room)) and the volcano is low-power + the electric boiler was discussed above; electricity requires too much power. How did the volcano perform with a diesel boiler?
Good with a diesel boiler! But, I repeat, the volcano does not work until all the coolant warms up to at least 60 degrees. And in a small circle the coolant does not have time to heat up - the volcano cools down quickly!
I read your blog. He heated 120 m2 with a 12 kW electric boiler to +15 in 2 hours. This is already an indicator. How long will it take your room to warm up to this temperature without it)?
without whom without him? without a fan heater?! I don’t know, I didn’t time it - it took a long time! everything happens much faster with him!
for rare work in the garage - this is the best for frequent work - crap that is harmful to health
Without a car
Wirenumberheight
for rare work in the garage - this is the best for frequent work - crap that is harmful to health
why is it harmful? Radiation from the radiator?
why is it harmful? Radiation from the radiator?
the first couple, three years (emnip - 2000-2003) I used hot air heating, its different variations (there are a couple in my stash - 220/5 kW, 380/12 kW) uneven heating of the room, the draft often got cold, it was uncomfortable to work
I thought there were a lot of problems with him. You need to find it, buy a housing, it’s not so easy to make, 12 volts need to be taken somewhere and be able to adjust the speed
The fan must be centrifugal. The idea is that the kit made from a car heater does its own thing beautifully. Immediately both pressure and airflow with adjustment. And an engine with an impeller.
Or an engine cooling radiator, also with a fan and an area larger than the radiator itself
There's a different fan there. The whole system is 3 kilowatts on the stove.
Yes, but you can expand it)
What's the point? It won't make less noise. I'll install an internal air conditioner unit in my place. You can eat your ass off of thermal power. The fan is quiet. Usually no one needs an external unit - compressors die; they are on external ones.
In the condenser, the freon tubes have a small cross-section and there will be no flow
More precisely, one thin tube. Well, she's soldering herself. The second one is normal.
Maybe I won’t argue))
I already got it. In the spring I will install the pipes and redo the Condey - connect the engine, install electronics for the damper drive.
I hope you put it on public display)) I’d love to see it. Good luck in this matter
Not soon, I'm afraid. Some things take a long time. The extension is being built, given that it is large, heating must be supplied. It doesn't warm up on its own. There is no point in redoing the old heating yet, so I decided to attach a circuit with a glycol heat exchanger. They made a moonshine still. I'll turn it on to the heating in a minute. The pump there is small - it distorts the old system, unfortunately it is not at all ideal. We bought half a house with such a miracle. In general, it stands on the bypass loop near the boiler. Otherwise, air accumulates somewhere in the bend of the pipe and the heating becomes stuck. Well, since there is a pump with a circuit there, a moonshine still will be installed with an outlet for this air conditioner block. But for now the extension needs to be completed.
Autonomous heaters
What to do if there is no central heating or gas in the garage, and the frequency of your visits to the premises does not allow organizing a scheme with a solid fuel boiler?
In this case, it would be quite logical to use electricity for heating.
Oil radiator
The simplest homemade oil radiator is a welded register already familiar to us with several modifications.
- There are no welds for connecting to the connections.
- The register, as a rule, is made portable, which implies the presence of legs.
- Jumpers between sections are present on both sides. Their diameter is made slightly larger than when assembling a register for water heating. The instruction is due to the fact that natural convection implies a minimum hydraulic pressure, and if so, the hydraulic resistance should also be minimal.
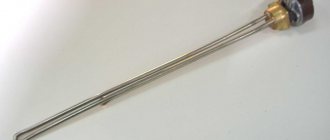
- A heating element or several parallel connected heating elements are installed at the end of the lower section.
- Oil acts as a coolant. Ideally, a transformer one, but even testing will do.
- The register is equipped with a small open expansion tank. As an option, the oil is not added a little to the top of the register, and the weld on its upper section is equipped with an automatic air vent.
Homemade oil radiator.
Warning: installing a safety valve instead of an air vent is a bad idea. When triggered, it can douse the owner of the room with oil at a temperature of 60 - 90 degrees, which obviously will not benefit his well-being and mood.
Heater from a car radiator
Another interesting solution is a homemade garage heater made from a radiator.
Heater from an old radiator.
The diagram is indicated by numbers:
- Radiator.
- Expansion tank.
- Forced air fan.
- A casing that protects the fan blades.
- Water pump.
- Oil supply pipe.
- Actuator.
- Fan drive belt.
- Electric motor.
- Frame stand.
- Drain tap.
- Block of heating elements.
- Blinds for adjusting the direction of air flow.
A few tips for assembling this product:
- Partially clogged radiator tubes are not a problem. They will miss the oil.
- Optimal motor characteristics are 300 - 500 watts at 1500 rpm.
- To heat the oil, heating elements with a total power of up to 3 kW are used. It is better to provide stepwise power adjustment by switching them on separately.
Use a block of three 1 kW heating elements with each of them switched on independently.
- Due to the small diameter of the radiator tubes, it is not worth using mining in this design. Transformer oil or antifreeze A-40 is suitable.
- The heater will operate most efficiently at an oil temperature of about 80C. The temperature is regulated by selecting the power of heating elements and fan speed.
How to make a car heater with your own hands and power it from the cigarette lighter: instructions
The operating principle of fan heaters is based on the formation of a heat flow by blowing a heated body. The air flow is generated by a fan, and a ceramic heating element acts as a heat source. Previously, there were models with tubular electric heaters and nichrome spirals.
Selection of components
You can create additional heating for the car interior in winter using improvised means. One of the simple schemes includes components available to any inventor:
- IP65 electrical junction box which serves as housing.
- Nichrome spiral for a household electric oven, acting as a heating element.
- Two axial fans.
- Two terminal blocks for fastening sections of spirals and tying them with connecting wires.
- Wire with a cross-section of at least 2.5 mm2.
- Cigarette lighter connector.
- Switch button.
Spiral
When choosing a ferronichrome spiral element, you must be guided by its cross-section. It is not recommended to choose products with a diameter of more than 0.6 mm. The optimal diametrical characteristic is 0.6 mm - and can be easily found on sale, and the connection diagram is simple. We will adhere to this advice when designing the electrical part.
For your information. You can take a nichrome spiral from a toaster, microwave or convection oven by measuring its diameter and adjusting the design of the device.
Cooler
Small fans can handle the heat dissipation function. The specific size depends on the dimensions of the junction box. For example, for a box 88x88x60, two coolers 30x30x15 are suitable. Of course, the electric motor must be designed for 12 Volts.
Manufacturing
When creating a heater circuit for a car with your own hands, powered from a cigarette lighter, it is important to understand that its electrical resistance depends on the length of the section of the nichrome spiral, which affects the amount of current consumed and, as a result, the amount of heat emitted. The larger the length and cross-section, the lower the resistance of the conductor and the greater the power of the installation.
It is important not to overestimate the scheme here. The standard cigarette lighter power circuit is designed for no more than 15-20 Ampere load. Based on this, we construct a scheme, taking into account the following aspects:
- Number of spirals – 5.
- The length of the spiral element is 20 cm, diameter is 0.6 mm.
- Two sections are powered in parallel: one consists of two series-connected spirals, the other – of three. The first is located closer to the fans.
Installation of spiral elements is carried out in “terminal blocks”, the connection to each other is also made through the holes of the terminal clamps with pieces of wire. At one of the ends of the distribution box, a cutout is made for the fans, which are glued together and glued to the body. On the opposite side there is a window through which air will escape from the product. You can use a drawing as a visual aid.
Attention! The presented circuit is designed based on the use of only a nichrome spiral with a diameter of 0.6 mm and a length of 20 cm. For other characteristics of the heater, it is necessary to design a different electrical circuit.
In fact, the power of the device is about 150 W. Current consumption is 13 A. A more powerful device involves the use of spirals with a diameter of 0.8 or 1.0 mm of a similar length. Connecting such installations to the cigarette lighter socket is impossible - the product is connected directly from the battery through a 30A fuse and relay.
Materials for assembling the device
- The heater itself with a fuel tank and control panel,
- corners and flat rods necessary for making the frame (30 mm),
- toroidal transformer 220 / 12 V, 300 VA,
- rectifier diode bridge 50 A and radiator,
- voltmeter 1-25 V,
- holder with fuse 25A,
- 4 wheels 120 mm,
- 2.5 mm cables,
- power cable with 220 V plug,
- main switch with backlight,
- screws, nuts, connectors,
- pipes with a diameter of 130 mm for the release of gases.
Other garage heating options
For regions with frosty and long winters, antifreeze in the garage heating system is the most acceptable option. However, there are other ways.
- Water heating. The system is identical to the one described above. Only instead of antifreeze, water is poured into it. Heats up faster. Among multi-level homemade products, one of the simplest. But in case of untimely start-up, it can lead to defrosting of the pipes and complete failure.
- Air heating. Probably the only system that does not have significant drawbacks. Installation is no more difficult. Can be left indefinitely without needing to reheat.
- Electric heating. Using air heaters, air guns and other devices. Practically safe, but very expensive.
- On liquefied gas. A gas heating boiler is required, to which a propane cylinder is connected. Quite an economical option, but there is a risk of fire. It is not recommended to leave a running installation unattended.
- "Potbelly stove." A small iron stove that consumes all types of solid fuel. Fast heating, good heat dissipation. The disadvantages include the mandatory construction of a chimney and increased fire hazard.
Whatever type of heating system you install in your garage, the main thing is to understand that safety should always come first. Choose a place for the stove away from reserves of fuels and lubricants.
For car enthusiasts, a garage is a personal space for doing what you love. The space is arranged to suit your own needs, be it a workshop or even a place to relax. That’s why it’s so important to come up with high-quality garage heating. We will try to find the most economical way in this review. With the right approach, the heating system in the garage will be economical and safe.
High-quality heating allows you to create comfortable conditions in any garage
Heating a garage: the most economical way, what to choose
If the outbuilding is located next to the main building, gas heating is often used. In this case, the heating system can be connected to an existing one in the house.
To heat your garage yourself economically, you can use the heating option using different types of solid fuel raw materials. Which can be used as firewood, peat, coal and diesel products. At the same time, you can save on resources, but it is important to think about the storage of raw materials.
A simple potbelly stove can adequately heat a small room
For your information! A simple solution is a gas convector. In such equipment, heat circulation occurs due to convection. The device is connected to a cylinder, but it will need to be refilled every few days.