Many of us love to sculpt things from clay. Making crafts is a fun and creative process. But if you leave them as they are, they will quickly collapse. To give clay products new characteristics, they are exposed to high temperatures. This is called roasting. Due to this, the clay loses moisture and the weight of the craft decreases. The clay becomes a single strong object, and resistance to liquid appears. The fired product is made more durable and ready for use. If desired, it can be painted.
Materials and tools for assembling the structure
Before you start making a muffle furnace with your own hands, you need to acquire a set of tools. For work you will need:
- welding and electrodes;
- Bulgarian;
- nippers and scissors;
- respirator, glasses;
- steel or oven body;
- metal corner;
- galvanized mesh with a cell of 2 x 2 cm;
- door - ready-made or homemade;
- fireclay brick;
- fireproof mixture;
- heat-resistant silicone;
- perlite or basalt slab (roofing insulation 1 - 2 cm thick);
- nichrome wire 1 mm.
The thickness of the metal for the body should be 2 - 2.5 mm, since the final structure will be very heavy. For the same reason, if thin-walled household appliances are used, they need to be strengthened with a steel angle.
Those who intend to fire ceramics will not need temperatures above 800 ° C, so they can make a muffle from any porcelain or earthenware dish or an old flush cistern.
Making a muffle electric furnace with your own hands
Before starting work, select materials, instruments, and electrical equipment. The oven is connected to the household electrical network .
Selection of materials
The stove of this model is compact; its production does not require special materials and parts . To work you will need:
- mortar (ready mix) - 5 kg >;
- sheet steel thick (2.2 sq. m);
- fireclay bricks 16 pieces;
- rolled mineral wool (basalt);
- tube made of fiberglass , ceramics (diameter 10 mm , length - 15 cm >);
- rolled steel angle section - 3 m >;
- spiral (fechral, nichrome) for electric stove (1.6 m);
- thermocouple.
Important! Used materials and electrical components do not guarantee normal operation of the electric furnace.
Preparing tools and equipment
To lay the muffle you will need stove maker tools (trowel, spatula, tape measure). To work you need to buy or rent equipment and tools:
- electric drill and drill bits >;
- grinder for cutting metal and brick, set of discs;
- arc welding machine and electrodes;
- ruler, square;
- electrician's tools (screwdrivers, large and small pliers, round nose pliers, side cutters, wire cutters).
- Sheet steel is marked , outlined using a pencil, ruler and square, then the parts of the casing and door are cut out with a grinder.
- The casing is welded using a welding machine .
- Fastenings for the door are welded to the casing . A lock is welded onto the door.
- Grooves are made in the bricks using a Pobedit drill (for a spiral).
- A frame (for the muffle chamber) from an angle profile
- A muffle (chamber) in the frame
- The chamber is dried for 5-6 days.
- carefully placed into the grooves, the ends are brought out beyond the muffle through a pre-drilled hole.
- The spiral is fixed in 3-4 places with a solution.
- A thermocouple is inserted through the hole into the muffle chamber ; the contacts are protected with a fiberglass tube.
- The places where the wires come out are covered with masonry mortar.
- The chamber is dried for 2-4 days.
- is placed on the back wall of the housing .
- A lattice stand is placed in the body , and a muffle is placed on it.
- The gap between the body and the fireclay chamber is filled with a porous thermal insulator (mineral wool).
- A layer of porous thermal insulator and fireclay plates to the inner surface of the door
- The door is hung on hinges , and the seals are adjusted to the dimensions of the chamber.
- thermostat;
- electromagnetic starter (relay);
- terminal blocks (made of heat-resistant plastic);
- steel casing for the shield;
- electrical two-core wires;
- fork.
Step-by-step instruction
Before starting work, mix the masonry mortar. Construction of an electric furnace includes the following stages:
Important! The grid plays an important role , thanks to it the heavy muffle will not compress the porous heat insulator.
Photo 2. Finished working chamber of the muffle furnace: metal casing, layer of insulating material, brick with a spiral.
The brick does not have to be attached to the door. When firing, it can be placed directly in the muffle, in front of the door. The next stage of installation is connecting the stove to the electrical network . For this you will need:
Reference. The technical parameters of the circuit are calculated in advance . Based on the calculations, a thermostat and relay and heater parameters are selected.
In the electric furnace under consideration, a standard M-1-K thermostat . The device allows you to set the firing temperature to 1250–1350 °C. four buttons on the front panel of the device to switch modes . Connecting the thermostat is described step by step in the documentation for the device. The thermostat, electromagnetic starter, and terminal block are mounted in a shield box with brackets and bolts.
Possible problems and difficulties
A big problem during the construction and startup of a furnace is the incorrectly selected electrical equipment, heating elements, and spiral parameters.
This leads to destruction of the heating elements or coil. If the technician does not have experience in calculating electrical circuits, you should seek help from a professional electrician.
When laying a fireclay brick muffle, mortar or fireclay-sand mixture is not always used . Instead, amateur craftsmen take a regular clay-sand mixture. As a result, cracks appear . When the furnace is first started, the cracks increase. To solve the problem, the muffle is disassembled and the bricks are placed on fireclay mortar.
Advice. For a muffle furnace, fireclay bricks with the letter “Ш” are suitable . Brick with the letter “U” (recycling) is less durable.
When making an electric muffle furnace, not all home craftsmen install thermostats . This leads to overheating and damage to products already at the first start-up. To solve the problem, you should install a thermocouple and a thermostat.
If old, used brick cracks appear in it even during test runs . The camera will have to be dismantled and a new one built.
Basic recommendations for firing
To begin with, the product must be left in a dark place (or without direct exposure to sunlight) to dry. Temperature changes and drafts will adversely affect the quality of clay firing - this is worth taking into account. The thinner the walls of the product, the faster it dries and the less time it takes to get rid of unnecessary moisture, and vice versa. This also applies to the firing time; the larger and thicker the object, the longer it takes to bake; the range varies from 4 to 12 hours. On average, this happens to be about 6 hours, but this is all individual.
When laying out your works, you should follow their arrangement according to the “pyramid” pattern: the largest objects should be located at the bottom, then higher with a gradual decrease
Weight is of no small importance: the heaviest products should be at the bottom. At this stage, you don’t have to be afraid that they may stick together - feel free to lay them on top of each other
Close the oven.
The maximum clay firing temperature reaches 900 degrees. But warming up should occur with a gradual increase. If you have a professional oven with temperature control, then the first heating should be set to 150-200 degrees. This temperature will remain for no more than 2 hours. Then we add another 200 degrees and keep the clay objects in the oven for the remaining 2 hours. And we repeat this until we reach a value of 900 degrees, and hold it for some more time.
HEAT
20 — 100
At the initial stage of heating, moisture is removed from the clay or other ceramic mass. Warming up should be slow. The most important thing is to maintain uniform heating. The heating rate is determined by the thickness of the walls of the product: the thicker the walls, the slower the heating should be.
100 — 200
At this stage, the process of removing moisture from the mass continues. It is important to remember that the temperature readings on the device are usually higher than the temperature of the product itself, especially if the product is thick or if the product is located on a thick stand that absorbs some of the heat. The shrinkage of the glazes also begins. During this heating period, as water is still being evaporated from the piece, the glaze coating is at risk of cracking or fragmented chipping. Heating must be uniform, as volatile organic compounds are released from chandelier coatings.
200 — 400
Organic compounds burn out in this range. A good air flow is especially necessary if the content of organic matter in the mass is high (decals, chandeliers, binders of overglaze paints and mastics).
550 — 600
When the furnace is heated to these temperatures, a phase transformation of quartz occurs, which is characterized by abrupt changes in the internal energy of the substance and, accordingly, its density, as well as heat capacity, compressibility and coefficient of thermal expansion. Therefore, during the cooling stage, the ceramics may crack (so-called “cold” crack).
400 — 900
In this gap, chemically bound water is released from the clay, and a number of minerals contained in it also decompose. Chloride and nitrate salts also decompose.
600 — 800
At these temperatures, melting of overglaze coatings, as well as low-melting fluxes (lead and others), begins.
750 — 800
In this interval, which is sometimes called the third decorative firing, the burning of sulfides occurs, as well as the softening of the glaze surface and the diffusion of paints, gold, etc.
850 — 950
In this interval, the chalk and/or dolomite contained in the ceramic mass decomposes. The interaction of a component of the ceramic mass - silica - with calcium and magnesium carbonate begins. These processes are accompanied by the release of carbon dioxide. At this stage, all transformations of clay substances also end: the strength of the shard is ensured by sintering of the smallest particles. By the end of the majolica glaze interval, as a rule, they are completely melted.
1000 -1100
At this stage, compaction and deformation of the shard occurs, and the feldspars begin to soften. The liquid phase appears as a result of the intense interaction of silica and lime. Sulfates also decompose intensively, which is accompanied by the release of sulfur dioxide. Melting of nepheline-syenite occurs.
1200 -1250
In this range, earthenware and white-burning ceramic masses are sintered. Silica and kaolinite dissolve in the feldspar melt.
1280 — 1350
In this temperature range, mullite needles penetrate the porcelain mass, which, after leaving the firing, is the basis for high strength and heat resistance. The process is called mullite formation. Fine quartz is also transformed into cristobalite.
1200 — 1420
This interval is used for firing porcelain. At such high temperatures, diffusion occurs very quickly. Also at such temperatures, if the necessary redox firing conditions are provided, the processes of reduction of red iron oxides into more noble blue ones occur.
Coloring clay products
You can paint the clay with acrylic or latex paint if it is allowed to air dry
It is important that you follow certain rules here too.
Some coloring tips:
- Make sure that if you are firing clay, the paint is suitable for kiln use.
- Some paints do not require firing, which can sometimes be a convenient option.
- Choose a paint that matches the required temperature, as air-dried clay cannot be fired.
- Apply paint with brushes, sponges or other methods.
- Allow the paint to dry according to the paint instructions.
- If you are going to kiln cookware for food and liquids, use paint and sealant first, and then start firing after drying.
- If you are using a kiln, also use glaze to fully seal the paint.
Painting adds a touch of uniqueness to your pieces, and while it may not be necessary at first, you can really benefit from it if you have some interesting painting ideas. Some also prefer to paint the products after baking in the oven, you decide for yourself what you like best.
Water is not allowed
When you have made the product, you need to dry it thoroughly and before firing, make sure that no water gets on it.
But you may ask, what happens if water gets in?
In an undried product, water is retained inside, and pressure is created from heating. Then an “explosion” occurs and a crack or chip appears on the product. This is not what we were going for, unless of course you were specifically trying to make beautiful artistic cracks.
Therefore, make sure that your product is completely dry before firing.
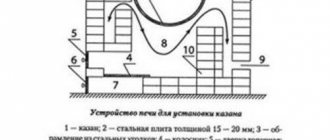
Scheme and drawing
Designing a heating device yourself is a rather labor-intensive process, but making a properly functioning unit is quite possible. A schematic diagram of an industrial muffle furnace is shown in Figure 2.
Figure 1. Diagram of a muffle furnace for firing ceramics
A special feature of the muffle furnace is the location of the heating elements inside the chamber (muffle).
Before starting work, it is advisable to sketch out a drawing of the device in order to understand the laying of layers and the connection diagrams of the heating elements. The device drawing may look like this:
Figure 2. Approximate drawing of a muffle furnace for firing ceramics.
The main thing is that a person understands the structure of the future device down to the smallest detail. Next, select the necessary materials, components and tools.
Composition of raw materials
Clay is heterogeneous, the amount of impurities in it varies. Depending on their percentage, a certain type of firing and temperature regime are selected. Natural raw materials contain sand, and the less it is, the lower the temperature should be.
The composition should not contain foreign stones or air. Due to the fact that the density of these elements differs from the density of the base material, they will tolerate temperature differently: change their properties and expand at different rates. In some cases, this may result in the product exploding. The color of natural clay is influenced by the presence of certain elements in the composition. So, it turns red due to its high copper content. The firing time for clay varies depending on the composition.
Firing in the oven and kiln
Oven firing is an option if you are working with fire clay. But, if you're willing to spend a little more money, you can buy an inexpensive stove.
Benefits of oven roasting:
- It's cheap because you already have it.
- Usually allows you to create decent ceramics.
- The resulting products are quite durable.
But if you want to take the process more seriously, then you need an oven, because your home oven will not produce the desired temperature. It has many advantages over the oven:
- Your products can be more varied.
- You will be able to create the right atmosphere for work.
- You will be able to work with a wider variety of glazes and clays.
- The process is easier to manage because it is slower.
- Allows the use of high-temperature (bisque) firing, which makes the ceramic stronger.
An oven is a good place to start if you're going to learn how to do this at home. But we advise you, once you have learned a little, consider buying a kiln or firing at a studio near you.
Milk firing of clay. Master Class
Milk firing of clay (milk firing) is an ancient method by which pottery was made waterproof. After this firing, the product acquires a beautiful brown color of various shades. For milking, a product is taken that has undergone the first (final) firing at a temperature of 800 to 950 degrees. The product is dipped in milk, kept in it for some time and carefully removed, trying not to spoil the delicate milk film. After the ceramic has dried, it is fired again at a temperature of 300 to 350 degrees. The product is kept at this temperature until the desired color is achieved. Nevertheless, it is impossible to accurately guess the color during milk firing of clay , since it depends on the fat content of the milk, the firing temperature, and keeping the product at this temperature.
I sometimes got beautiful transitions of shades of brown due to the fact that under the oven, on which the products stood, was somewhat colder than the rest of the oven space. In addition to the beautiful color, the product becomes waterproof after milk firing. This is achieved due to the fact that milk casein coagulates at the firing temperature and clogs the pores of the ceramic.
Almost everyone who writes about milk firing of clay recommends using exclusively country fat milk. This is correct advice, but all the children's works shown in the photographs were fired using store-bought bottled milk with a fat content of 3.5-3.7 percent. It is necessary to avoid contact with the product of heavy cream, which leaves unsightly stains after firing. My initial attempt to do without additional costs failed: the school where I work provided me with some powdered milk, but it didn't do any good. So you need to use natural milk.
Dishes that have undergone milk firing are washed with a soft sponge without the use of abrasives. It should not be left dirty for a long time, so as not to breed mold. In the latter case, it can only be removed by repeated firing.
Since guests of my site are often interested in how to fire clay at home, I tried to do milk firing in the oven of a gas stove.
For the experiment, I took already fired small beads that I found at home.
I bathed them in store-bought milk.
And, strung on a wire, she hung it from the grate of the gas stove. I turned on the gas to the maximum setting. I don’t have a graduated thermometer in my oven, but I know to what division the needle can turn as much as possible. This time I was unlucky: it’s cold in the house, the heating hasn’t been turned on yet, people are heating themselves with gas and its (gas) pressure drops. So the oven reached its maximum temperature instead of the usual half an hour for two hours, no less.
I kept my beads in the oven for another half hour, more - I didn’t have enough patience. And this is what happened. The result is not ideal, but it suggests that milk firing of clay in the oven of a gas stove is possible.
Sometimes decorative items are impregnated with wax or wax mastic after milk firing while still warm. As a result, they acquire a soft, silky shine.
If you are interested in methods of processing clay without special equipment (“on your knees”), look also HERE and HERE.
Rules for firing at home
You can fire clay at home. First you need to dry the product and then fire it in the oven. In this case, you need to gradually increase the temperature over two hours to 200 degrees. Clay figurines can be placed in a frying pan or cast iron pot. It should be taken into account that full firing in the oven is impossible, because the temperature is insufficient, it cannot harden it, but only dry it.
How to determine if a product is ready?
Very easy based on color, weight and sound. If the color of the baked clay is black, then the figurine is overheated. If the color has not changed, then the product has not been fired enough. Fired colored clay should be red in color.
Latest publications
Drying and firing clay
To give clay products additional properties, they are exposed to high temperatures - firing. But the technology of firing clay is quite complex and resource-intensive, so I will try to talk about some of the nuances that you may encounter.
Preparing for firing
Before firing the product, it must be thoroughly dried for 2–7 days, depending on the size of the product. The product should be dried away from heating devices, direct sunlight, and drafts - that is, to exclude any sudden changes in the environment in which the product is located. At room temperature and in a dark, dry place, the product will dry evenly.
If the product dries unevenly, the product may crack and its small parts may simply fall off. Insufficient drying will lead to defects during firing. It is impossible to overdry the product.
After the product has dried, you need to carefully inspect it for cracks. If there are any, you can try to cover them with liquid clay, but this does not guarantee the safety of the product during firing. The best option is to prevent cracks from appearing, and this is achieved with high-quality modeling and proper preparation of the clay.
Be sure to check the sound of the whistle - if it disappears or becomes dull, then it is not too late to try to fix everything.
In some situations, during drying, a spider may settle in the products (there was a case when it took a fancy to one of my whistles), in which case it needs to be moved to a safe place .
The final stage of preparation will be sanding the product. When sanding, fingerprints, various crumbs and bumps can disappear, and the product will acquire a noble appearance. Sanding can be done with small sandpaper.
Conditions for firing
Temperature. The most important thing in firing is a gradual increase in the firing temperature and gradual cooling of the product after firing. In the first two hours, the temperature should not exceed 400 degrees. The temperature range should be between 300-900 degrees Celsius. At lower temperatures, firing will be insufficient and the product will not acquire the necessary properties. At high temperatures, the product can be completely destroyed.
Duration. Depending on the size of the product and the firing method, the duration of the process can vary from 8 hours to several days. Very small items can be fired in a minimum amount of time.
Composition of the material. The firing technology largely depends on the composition of the clay. Natural clay contains an admixture of sand, and the less sand, the lower the firing temperature. In my practice, there have been cases when purchased powdered clay literally boiled at 750 degrees and dried out in the form of a porous sponge. The product was completely destroyed. The clay should not contain stones or air. If the material is not homogeneous, a rupture will occur. Since materials of different densities will expand differently with temperature changes.
The quality of the sculpt. The main requirement for modeling is the absence of air bubbles in the product. As the temperature rises, the air will expand and seek a way out, tearing the product. Therefore, when covering cracks and fastening parts of the product, eliminate the possibility of the formation of air capsules.
Firing methods
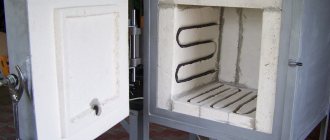
Firing in a muffle furnace. There are several methods of firing clay products, but the most common is firing in a muffle furnace. This is an electric oven equipped with a temperature control mechanism.
Modern kilns have automatic firing programs for various types of products, a window for viewing the status of products, and other options. Another important characteristic of a muffle furnace is the volume of the chamber. Some swords have a cylindrical chamber that can only accommodate small items, while there are large kilns for firing pottery and sculptures.
Firing over a fire or in a non-electric oven. This is a rather non-trivial task, primarily due to the fact that it is not possible to completely control the temperature. In addition, the stove is rarely heated for eight hours, and it’s difficult to sit by the fire for a third of the day. However, if you do get ready, place the product in a container with sand - this will smooth out the sharp increase in temperature.
Firing at home. You can also fire a clay product on a gas or electric stove, but I warn you - this is quite dangerous and the quality of the firing will still be far from ideal. To do this, you can take a cast-iron frying pan with dry washed river sand and put it on the fire. You need to carefully place the product on top and cover it with a fireproof container - a clay pot or pan. The process must be supervised and the room should be regularly ventilated so as not to cause overheating and oversaturation of the air with toxic gases.
Why is firing necessary?
During the firing process, the clay gets rid of almost all moisture, so the product becomes much lighter. In addition, clay elements are sintered and transformed into a single ceramic ingot, which is resistant to deformation and moisture penetration. Hence the whole need for firing.
The fired products are ready for painting, and after painting, for use.
This is important to know
After firing, the clay is not suitable for modeling, since it is no longer clay, but ceramics.
Firing can be done several times, gradually increasing the maximum temperature to achieve optimal results and gain experience.
After the main firing, the product can be coated with a special composition and fired again. When the composition melts, it forms a glaze.
During the drying and firing process, the product may be deformed and ultimately become smaller than planned. Therefore, when creating a product, you need to take into account the composition of the clay and the purpose of the future product. Clay with a high sand content is less susceptible to compression.
During the firing process, organic compounds will burn out (especially in natural clay) - this can lead to unpleasant odors. It is necessary to be able to ventilate the room.
The readiness of the product can be determined by weight, color and sound. After firing, any colored clay turns red. If it turns black, the product has overheated; if it has not changed color, it has not been burned enough. Fired products have a lighter weight and a ringing nature. However, when fired, whistles can completely lose sound (irreparably) or, on the contrary, be transformed.
In any case, correct firing of clay products can only be achieved with experience. So go for it and good luck!
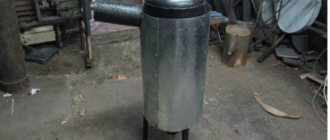
Method two. We make a stove without having a metal casing at hand
The manufacturing process in this case is not much different from that described above, but there are definitely some nuances here. Let's start with the fact that the working volume of the design below will be about 13 liters. The spiral, as mentioned above, can warm up to a thousand degrees in just 1.5 hours, while the temperature of the outer walls of the device will not exceed 100 degrees. The algorithm of actions should be as follows.
Step 1. First, using a 4x2 centimeter profile pipe (with a square cross-section), we build a stand for the device. After this, we paint the finished stand with enamel.
Step 2. We attach a sheet of galvanized steel on top of the stand (its thickness should be approximately 0.1 centimeters), using “metal” self-tapping screws.
Step 3. We make the walls from fireclay bricks and a special fireplace composition (everything is the same as in the previous version). After the solution hardens, we make grooves for the spiral.
Step 4. We assemble the bottom from brick separately, and use the same mortar for fastening. Before continuing work, wait until the structure is completely dry. Do not forget to wet each brick immediately before laying.
Step 5. We lay a thermal insulation layer on top of the metal base (we can use the same basalt wool for this). In order to maximize compaction of this layer, it must be moistened before fixing the brick bottom.
Step 6. We continue the traditional laying of the stove, but we try to ensure that all voids and seams are carefully filled.
Step 7. We traditionally make the lid for the chamber from fireclay bricks, but at the same time we fasten them together with a metal tie.
Step 8. Place the spiral in the prepared grooves and insulate the structure from the outside with thermal insulation material. Next, we cover everything with sheets of galvanized steel, which are cut according to the dimensions of the resulting chamber.
As you can see, this requires knowledge not only in the furnace business, but also in the field of electricity. You can see another possible manufacturing method in the video below.
Video - wood burning stove
How to make a Bubafonya stove yourself
Previously, we talked about how to make a Babufonya stove on your own, in addition to this article, we advise you to read this information, see all the details here
FIRING OF FIRECLACE PRODUCTS
When firing fireclay products, sintering occurs, as well as a change in the phase composition, reversible thermal expansion and an irreversible change in the volume of the product.
The main physical and chemical processes during firing of products occur in the binder clay, however, some processes also continue in fireclay. Within 150-200° C, residual moisture is released from the raw material (mixing water, hygroscopic water). During this firing period, if there is insufficient draft and a large release of water vapor, condensation may occur on the products, leading to the formation of nicks and cracks. The higher the residual moisture content of the raw material and the larger the crack in the product, the slower the raw material should be heated. The firing rate during this period depends on the design of the kiln, the mass and humidity of not only the raw material, but also the binder clay and fireclay. There are cases when, when using fireclay with low water absorption, the clay binder becomes waterlogged and when drying in tunnel kilns, cracks form on the products. With further heating of fireclay products at 400-600 ° C, kaolinite decomposes in the clay binder with the release of chemically bound water: in this case, only a slight linear shrinkage occurs (up to 0.5%). In the range of 600–900°C, a uniform and small volumetric change occurs, generally corresponding to a linear shrinkage of 2–2.5%, and a further increase in the strength of the products. At the same temperatures, carbon impurities and sulfides are oxidized, calcium and magnesium carbonates decompose.
When the firing temperature is increased to 1000—
1/00°C sintering of products begins. In this temperature range, cracks may form.
Volumetric changes during firing are calculated using the equation
Where p is volumetric shrinkage, fractions of a unit, e0, ei is the true porosity before and after firing, fractions of a unit, p0, pi is the density before and after firing.
Equation (VI.6) can also be represented as
P = l_(Fn + FM), (VI. 7)
Where Vn, Vu are the volumes of pores and material after firing, calculated from the condition that their sum before firing is equal to unity.
The use of highly burnt fireclay, multi-chamotte masses, joint grinding of clay and fireclay, and the use of high pressures during pressing reduce shrinkage during firing.
The permissible rate of temperature increase during firing in the range of 1000–1300°C depends mainly on the ratio of the amount of clay and fireclay in the mass and the firing temperature of the latter. The more chamotte in the mass and the higher the temperature it is fired, the higher the rate of temperature rise in the furnace can be for products of the same standard size. Firing of fireclay products is usually completed at a temperature 100-150° C higher than the temperature of complete sintering of the binder clay. With a short temperature range for sintering the binder clay, the firing temperature is taken to be 50–100° C higher than the sintering temperature of the binder. The final firing temperature for products made from kaolinite clays rich in alumina is 1350–1400° C. Further increasing it to 1430–1450° C promotes more complete sintering and a reduction in additional shrinkage. However, the resulting softening of the material causes deformation of the products, especially in the lower loaded rows of the charge, and excessive compaction of the products with the loss of the granular structure of the material leads to a decrease in heat resistance. Kaolin products are fired at 1450-1500° C. When using low-sintering refractory clays, overburning of products may occur, which is expressed in a decrease in their apparent density, a strong increase in closed porosity and the appearance of swelling on the surface of the products.
In the range of 1300–1400° C, to equalize the temperature in the furnace, the speed is adjusted to 10–16° C/h, depending on the type of charge. The holding time at the final firing temperature of fireclay products is 5-6 hours.
The cooling process of fireclay products is accompanied by a decrease in the volume of the material, therefore, up to 800–1000° C, cooling is carried out at a rate of 25–45° C/h. Below these temperatures, the cooling rate slows down somewhat due to the presence in the furnaces of a large amount of heat accumulated by the masonry.
When firing fireclay products, two types of stress arise in them: the first are associated with linear expansion and the temperature difference across the thickness of the product, the second - with transformations occurring in the binder clay and the melting agent. The magnitude of the first stresses is influenced mainly by the size and shape of the products, on which the temperature gradient depends. The magnitude of the second stresses is influenced by volumetric changes in the raw material during firing, which depend on the nature of the clay and fireclay, their quantity in the charge and the firing temperature of the products. Both types of stress also depend on the rate of temperature rise in the furnace.
Currently, fireclay products are fired mainly in tunnel kilns. In periodic and ring kilns it is permissible to fire a variety of shaped and large-sized products that require a differentiated firing regime. The mounting of such products turns out to be quite complicated. Sometimes it is necessary to protect shaped products from direct exposure to flame. The stability of cages made from shaped products is significantly lower than those made from normal products, so the former are planted on a subsurface (the lower third of the cage) made from normal products, of which 30-40%, and sometimes more, is required.
Modern tunnel kilns make it possible to fully automate the firing process. Their use eliminates manual labor in difficult conditions when loading and unloading products.
Refractory masonry
We buy fireclay bricks at the construction market. This brick is intended for laying furnaces of stoves and fireplaces. This brick is able to withstand prolonged exposure to heat at a temperature of 1000 degrees and repeated cycles of cooling and heating, has a high heat capacity and thermal inertia. As a binder, it is best to buy a special fireproof dry mixture for laying fireclay.
Fitting and marking
- We lay out the side and back walls of the future chamber on a flat floor so that the back wall is between the side ones, as if creating a “scan”.
- We imitate the thickness of future seams with wire with a diameter of 3-5 mm.
- We adjust the bricks to each other. If necessary, we cut the bricks using a stone-cutting machine or a grinder
- Then we mark the route of the future heating coil on the walls.
- We cut grooves on the bricks for the spiral.
View of the working chamber from the inside. The top is made in the form of a vault.
The brickwork must be very dense. The thickness of the seams is no more than 5 millimeters.
- The masonry mixture is diluted with water in accordance with the manufacturer's instructions.
- Before laying, immerse each brick in a container of water for 15-30 seconds so that the water fills the pores of the brick.
- We lay out the bottom of the future stove.
- Then we lay out the walls.
- The vertical joints of the masonry should not coincide with each other.
- We lay out the top in the form of a vault with a keystone.
Fireclay bricks also need to be secured to the door.
- To do this, we weld or rivet a thin corner or square pipe at the bottom of the door. The corner will take on the weight of the masonry, that is, not only the mortar will work.
- Add cement to the masonry mortar, up to 20%.
- We attach a galvanized mesh with a cell of 20x20 millimeters to the metal surface of the door.
- We remove the door, lay it horizontally and lay fireclay bricks on it.
Seal
To increase the efficiency of the oven, it is necessary to eliminate heat loss through door leaks. The tightness can be increased with heat-resistant silicone.
- To do this, carefully degrease the edges of the brick at the junction points.
- We apply a release agent to the ends of the chamber walls at the junction points. It could even be solid oil.
- We apply a “sausage” of heat-resistant silicone to the door.
- We close the door.
- The silicone will stick to the door, but will not stick to the ends of the chamber walls due to the release agent. You will actually end up with a silicone sealing strip on the door.
- We wash the separating agent from the ends of the chamber, for example, with alcohol.
- Silicone will not be able to withstand heat for a long time, so periodic repairs will need to be made to restore the seal of the door. The repair consists of re-making the silicone gasket in the same way as described above.
Taking Precautions
Polymer clay (the material must be baked in the oven, observing safety precautions) in a plastic state is not a toxic material. Harmful substances are released only when heated.
When working with polymer clay, protection with a mask (respirator) and gloves is required.
How to protect your health while baking polymer clay:
- Open the windows in all rooms. The room should be well ventilated.
- Before opening the oven door, your respiratory system must be protected. You can wear a respirator or gauze bandage. Protection is needed even when the clay is baked under a lid or in a baking bag!
- When baking clay in your home kitchen, you need to remove all food items. Place the bread and baked goods in bags and lock them in cabinets. Place vegetables and fruits in the refrigerator for a while. Close all spice jars.
- Under no circumstances should you bake clay and any food at the same time! The food will absorb all the toxins and become dangerous to eat.
- After use, the oven must be thoroughly washed, dried, and then burned at maximum power for 10 minutes.
By adhering to all the recommendations and following the instructions compiled by the polymer clay manufacturer, you can create beautiful crafts in your home oven. For the baking process to be successful, it is necessary to control it, constantly monitoring the appearance of the clay and the temperature.
Types of muffle furnaces
Based on their design features, the devices are divided into:
- tubular or cylindrical;
- horizontal or vertical.
By type of heat treatment composition:
- air;
- vacuum;
- based on inert gas.
You can only make an air muffle furnace at home, so this is what we will discuss in the article.
According to the features of the thermoelectric heater:
- gas;
- electric.
Of course, a gas furnace will be 3-4 times cheaper to operate than an electric one, due to fuel savings, but, firstly, it is prohibited by law to manufacture and use such a furnace, and secondly, making a muffle furnace with your own hands on gas is technically extremely difficult.
Photo 2 Scheme of an industrial muffle furnace
Manufacturing of the device
In this case, we will tell you how to make a vertical muffle furnace for firing ceramics with your own hands.
To do this you will need the following tools:
- angle grinder (grinder) and 1-2 wheels;
- electric arc welding and electrodes;
- metalworking tools, including wire cutters;
- 2mm nichrome wire.
and materials:
- 2.5 mm steel sheet or used oven body;
- corner;
- fittings;
- basalt wool;
- refractory fireclay brick;
- fireproof mortar;
- silicone sealant.
Essential elements
Frame
The body of an electric oven or miracle stove is ideal as the basis for a homemade muffle furnace for fusing or cupelling, since it already has all the necessary insulation. You just need to remove or remove all the plastic elements.
Photo 3 Old oven in the form of a muffle furnace body
If you can’t find such an oven, the body can be welded from a sheet previously cut into blanks. Weld all the sidewalls, clean the seams with a wire brush or grinder and cover with a primer.
A heating element
A key component of the device, since it determines the temperature in the oven and the heating rate. You will also need to make a thermostat for the muffle furnace with your own hands, or purchase a ready-made one. The heating element will be nichrome wire, the diameter of which is selected depending on the maximum temperature. The minimum and most consumable diameter is 1.5-2 mm.
Photo 4 Heating element
Thermal insulation
The most important aspect of the work, which is responsible for the integrity and efficiency of the entire structure. Fireclay bricks are installed inside the muffle furnace using fire-resistant glue. It is cut to the size of the stove using a grinder. Basalt wool is used on top.
Photo 5 Fire-resistant adhesive Terracotta
The first point can be skipped by those who use an old oven as a body.
COOLING
1420 — 1000
The mass and glazes are in a fairly plastic state, so the product is cooled as quickly as the technical characteristics of the furnace allow. If you are using glazes that are prone to crystallization, then slow cooling or holding for up to 10 hours in this interval will usually lead to crystal growth.
1000 — 700
Here the oxidation of manganese, lower oxides of copper and other metals, if any are contained in the composition, into higher ones begins. Lack of oxygen in the furnace can give the surface of the product metallization. If restoration is planned, then it must be done within this interval. The reducing environment must be maintained at least to 250-300C, and preferably to almost room temperature.
900 — 750
The mass (shard) and glaze have become brittle and are cooling as a single whole. If the CTEs are not agreed upon, then rebound of the glaze, cracks, and even damage to the product are possible.
600 — 550
At this stage, a reverse phase transformation of quartz occurs with a sharp volume change. Going through this interval too quickly can cause a “cold” crackling sound.
300 — 200
In this interval, the phase transformation of cristoballite occurs. It was formed at a temperature of 1250 - 1300, if the mass contained very finely dispersed silica. The oven door does not need to be opened quickly.
250 — 100
Cooling continues in this interval.
In the thick parts of the products, as well as in the depths of the furnace, the temperature is much higher than in the thin parts and as indicated by the measuring element. The products must be allowed to cool evenly. Firing clay products at home
Before firing clay products
must be dried at room temperature for 3-5 days, depending on the size. This evaporates most of the moisture in the clay. If the outside of the product is dry, but moisture remains inside, it may explode when fired. It also explodes when there are rocks in the modeling clay. After firing, the clay acquires new qualities - strength, rigidity, durability.
At home, when there is no muffle furnace, products can be fired on a regular electric or gas stove.
In this tutorial we will use an electric stove.
I use a small frying pan and a cast iron pot to fire my clay products. Pour fine sand into the bottom of the frying pan to gradually heat it up. We place the figurine on the sand and cover it with a pot.
The heating temperature must be increased gradually. First, turn on the minimum heat for 30 minutes, then raise the temperature to maximum for 5-6 hours. Before you take out the clay figurine
, you need to wait for it to cool completely.
Many of us love to sculpt things from clay. Making crafts is a fun and creative process. But if you leave them as they are, they will quickly collapse. To give clay products new characteristics, they are exposed to high temperatures. This is called roasting. Due to this, the clay loses moisture and the weight of the craft decreases. The clay becomes a single strong object, and resistance to liquid appears. The fired product is made more durable and ready for use. If desired, it can be painted.
Necessary materials
Directly for the manufacture of the furnace you will need the following materials:
- fireclay brick
- one and a half kW spiral
- heat-resistant clay or mortar
After its manufacture, it is placed in a casing. It can be welded from 2 or 3 mm steel sheets. Its dimensions are taken based on the size of the oven. You can also use an old gas or electric oven as a casing, after first removing all plastic parts and elements from it. The space between the furnace and the casing is filled with insulating material such as mineral wool.
Vertical loading kilns are better suited for ceramic firing. In furnaces where work will mainly be carried out with melting, hardening or other processing of metals, the heating process of the product should be controlled by using a temperature sensor; workpieces are loaded into such chambers horizontally.
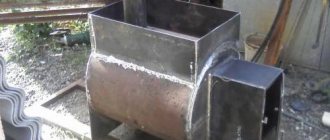
Let's look at a step-by-step example of a muffle furnace
In this case, an old iron rectangular tank is used for the casing. It needs a little tweaking and it will be fully suitable for its role. Using a grinder, I cut off the edge of the tank, which has a round hole, 5-10 cm wide. Along the edges we drill holes for fastening the door to the body on the curtains.
The work should begin with planning: Assemble the oven dry from brick, make markings on it from the inside, in those places where the spiral will need to be laid. In the brick, according to the markings made earlier, using a drill, using a Pobedit drill, you should make indentations. In the illustration below, the drill is placed at an angle to the groove, this is how the desired result can be optimally achieved.
We put the prepared brick into the oven; an external frame for it should be made from the corner. We put a spiral into the grooves. We coat the entire structure with a solution of mortar and water. All cracks should be sealed.
Next, you should make an electronic unit that will control the heating of the coil. Moreover, heating the oven will not be easy, but it will be a stepwise heating. For this, a step thermostat is used. A stand should be made for the muffle furnace to avoid losses below. The frame from the corner is cut out and welded at the corners, legs are welded on the sides, also from the corners. A row of plates is welded on top.
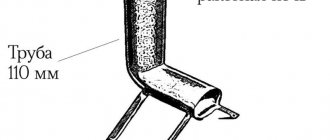
We use special fiberglass heat shrink. It serves to protect a thermocouple, the characteristics of which are as follows: chromel-alumel (TCA) diameter 0.5 mm, length 1 m. We also use a ceramic tube with two holes for a thermocouple. You will also need thick heat shrink to power the spiral. We put a heat-resistant fiberglass casing on the thermocouple, and insert its end into a ceramic tube. At the top of the stove, a hole is made with an ordinary drill and a thermocouple must be inserted there and covered with a lethal solution. Let it dry.
To connect, you will need a special heat-resistant wire for electric ovens. The coated stove is hidden in a casing; its thermal insulation will be provided by basalt wool. At the top of the casing body you need to make a hole for the output of power wires and a thermocouple to control it. Before final packaging in cotton wool, a test connection of the oven should be made.
The device itself is installed on an asbestos sheet. The placement of cotton wool should be carried out wearing medical gloves. Control unit for the furnace. Next, we proceed to the manufacture of the furnace control unit.
The set of components consists of:
- housing (taken from a small electrical panel)
- electromagnetic contactor (in this case also “Soviet”)
- terminal blocks (one ceramic one for connecting the nichrome spiral from the muffle furnace to the power wires, and more made of fire-resistant plastic for the main switching)
- 16A automatic; bolts, nuts, engravers; thick wire and plug
- thermostat Profile-M-1K multi-stage single-channel
The thermostat can heat according to a complex schedule; you can set the heating time and temperature during this interval.
This is what the finished device looks like:
Flower pots made of polymer clay
From two bags of clay I made 8 pots in just 2 hours. This clay is easy to work with. Everything went without major setbacks, hurray!
Let's start with a list of materials that we will need for work:
1. 2 packs of white polymer clay, 794 g each;
2. A small glass or ceramic bowl to use as a mold. Mine is 11.5 cm in diameter;
3. A piece of lace, napkin or other texture;
4. Cotton cord with a diameter of 0.5 cm;
5. house plants (I have succulents);
6. soil for planting;
7. medium-grain sandpaper;
8. bamboo stick or other object to make holes for hanging flowerpots.
I decided to make two types of pots. In the first case, I stretched and molded the clay onto the bowl. In the second case, I pinched off the excess clay to give the bowl a more “handmade” look. I liked both options!
Also, in one case I untwisted the rope into three thinner ropes, it turned out more elegant, and in another I used untwisted ropes - it was more cumbersome.
Furnace structure
The final stage of creating a ceramic product is firing it. In this case, pottery kilns are indispensable devices. Before you start building your own, or purchase a ready-made one, you need to understand the design of this invention. It has a very simple structure:
- Thermally insulated firing chamber made of refractory material
Gas burner, or heating device
Loading and unloading device
Regulating devices
A serious approach to the selection of equipment will ensure the production of quality products. Moreover, not only the design is important, but also the accompanying materials, be it a mixture for fireplaces and stoves, solutions and other means. All modern furnace equipment is equipped with a software system, thanks to which the heating or firing furnace has convenient control. With the help of this system, the execution of work can be regulated by dozens of specially established modes, in which it is possible to fire a wide variety of materials and objects.
Today, the production of bricks and other clay-based materials is a very profitable business. Large enterprises use large-format industrial ovens available in a wide range of sizes and shapes. (See also: DIY tandoor oven)
Of course, for your own production, by the way, a small-sized oven is ideal. Many enterprises today are engaged in the manufacture of custom-made devices at the request of the consumer. Moreover, this option for purchasing equipment is the most optimal, since the furnace will be made for a specific job.
Electric ovens are now very popular. They have a special welded chamber made of metal profiles. It goes without saying that it has high thermal insulation, since there are fire-resistant bricks and various fibrous materials here. Such furnaces are characterized by small dimensions. This design is often mistaken for a decorative stove, however, this is not so. Its small size is associated with the smaller thickness of the lining. The equipment is equipped with a swing door and high-level heating coils. This approach eliminates the possibility of deformation of the fired products. The equipment is equipped with a software system and a microprocessor temperature controller.
How to sculpt correctly
Clay, although a plastic material, is more durable than plasticine. Therefore, there are several important recommendations for handling it during sculpting:
- The clay should always be moist, do not let it dry out.
- If cracks appear, immediately smooth them out with water or a water-clay mixture.
- Modeling work begins with large objects, smoothly moving to smaller ones.
- You should not roll foreign objects into the clay; it is better to make separate recesses in the product for this purpose.
When everything is done, you need to leave your figurine to dry for a couple of days. Although unfired modeling clay looks great, you can additionally bake it in the oven or microwave, but this is at your discretion. At the final stage, PVA glue can serve as a glaze for the product.
Selection of mixtures for structural elements of the furnace
Fireproof fireclay mortar is necessary for laying the firebox and elements close to an open fire
To select masonry materials, you must take into account that the stove consists of several elements:
- The foundation cushion is a monolithic element built separately from the foundation of the house.
- The base of the furnace is not subject to temperature stress, therefore it is built from solid red brick. Lime or lime-cement mortar is suitable for masonry.
- Fire blind area - represented by a sheet of asbestos or mineral cardboard, on which there is an iron sheet and felt impregnated with clay.
- The furnace mass - due to the increased impact of hot flue gas on the structure, is built from ceramic bricks with clay mortar.
- The firebox gets very hot, so it looks like a monolith on a fire-resistant clay-chamotte mortar.
- The beginning of the chimney is heated to 400 degrees, which requires laying on a mixture with a clay base.
- Otter, or fluff, is an element connecting the chimney and the ceiling. Temperature and aggressive effects on it are minimal, so a lime composition is suitable for standard bricks.
- Fireproof cutting is a heat-insulating metal box that does not require a solution.
- The chimney and fluff are exposed to wind and chemicals. Installed using red solution.
Lime mixture
Lime mixture is used for laying outdoor stoves as it does not absorb water
The refractory mixture for stoves consists of sand, lime paste (1 part quicklime 3 parts water). To prepare it yourself, you will need to sift the sand, mix it with the dough in a ratio of 1:3 and add water until the sour cream becomes thick.
Cement mixture
Cement-based mortar is used in foundation construction
Divided into three types:
- Cement - preparation requires water, cement and sand. Greater strength and low gas density allow the compositions to be used for foundation construction.
- Cement-clay - durable mortars, with the help of which the thermal part of the fireplace and the beginning of the chimney are laid out.
- Cement-lime mixtures are strong, but have a low gas density. Suitable for the construction of fireplaces, foundations, chimneys.
To make it yourself, you will need to mix 1 portion of cement with 1-3 portions of additives and 6-15 portions of sand.
Clay mixture
The material is suitable for the construction of a furnace array. The ideal mixture does not crumble, has a homogeneous structure without lumps and the consistency of sour cream. Factory materials are made on the basis of:
- white clay - increases the fire resistance of the mass, suitable for the construction of wood-burning stoves with heating of the firebox up to 1000 degrees;
- fireclay clay is a universal product that ensures the strength of the stove structure at any temperature.
To increase strength, you can add to the solution:
- table salt or sodium chloride - 100-150 g are needed for 1 bucket;
- Portland cement - for 1 bucket you will need from 500 g to 1 kg of product.
We suggest you familiarize yourself with a remedy for mold and mildew on the walls in an apartment: which antifungal and antifungal antiseptic is the best against fungal colonies
How to make smooth sandstone?
To make smooth sandstone in Minecraft you only need 4 sandstones, which are easy to make from sand. In addition, sandstone can be obtained in large quantities in the desert by digging several blocks down under the sand. You can combine sandstone into smooth sandstone in Minecraft directly in your inventory or at the workbench.
Interesting materials:
Where should the bride stand in the registry office? Where should single pedestrians go on a road outside a populated area? Where should wedding icons be placed? Where is Shani the Witcher's house? Where can there be a magnet at home? Where can I get moonlight? Where can I get Grave Moss? Where did JK Rowling write Harry Potter? Where else can you find armor from Kaer Morhen? Where else has Jared Padalecki filmed?
Fire brick
The preparation of mortar from fireclay clay for laying stoves is carried out by analogy with plaster mixtures, the application methods are also similar, which gives a big advantage to the material.
The following features of fireclay include:
- It does not crumble under high temperature.
- The material is resistant to the external environment.
- The original form remains unchanged for a long time.
Fireclay clay is also often used to make this sought-after building material. The method of using kaolin mixture when laying stoves and fireplaces was discussed above. Refractory brick, as you remember, is laid exclusively with fireclay mortar. The result is a structure that can withstand temperatures up to 1600 0C.
Since fireclay bricks are much more expensive than regular bricks, they are most often used to make only those parts of the stove or fireplace that are in direct contact with the fire: fireboxes, chimneys. It is also used to make various types of production plants for the metallurgical, chemical and manufacturing industries. These can be boilers, blast furnaces, fuel chambers.
We invite you to familiarize yourself with: Wood-burning stove for the Varvara bathhouse
Tags
after firing, acquired by firing in obtained by firing clay Firing Fired clay baked clay Fired clay in a simple clay block fired clay Minecraft colored clay fired clay can burnt clay in Burnt clay is obtained in ordinary clay blocks. these are products from The products from ceramic products are made to make products from Fired clay baked clay can be fired clay in
degreeswayscompositionfiresizeblockstimeceramicfigurinesminecraftsteppotterysand
Clay selection
One detail you'll want to get right is the types of clay. If you were working in a studio we would say just use regular clay that is used for firing depending on the temperature of your kiln, you can even work with porcelain.
Clay and ceramics are different materials that are widely used in pottery making. However, the main difference between these two materials is that clay is a natural material that is naturally mined. On the other hand, ceramics are different groups of substances that are added to clay to harden it when heated.
Because ceramics contain metal oxides, when heated they change the molecular structure of the clay. Therefore, all clays can be considered ceramics, but not all ceramics are considered clay. While there are different types of ceramic clays, the main types used in pottery are porcelain, pottery clay and stone clay.
How can clay be useful?
Any activity that involves a combined interaction of manual labor and imagination not only captivates the mind of the master, but also helps the young body develop fine motor skills of the fingers. This means that thinking, imagination, sense of color, geometry of an object and much more will give the child the opportunity to develop his creativity. In addition, it is well known that modeling has a calming effect and makes it possible to concentrate on a specific subject - “here and now.” And a gift made with your own hands and from the heart will not leave anyone indifferent.