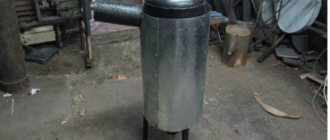
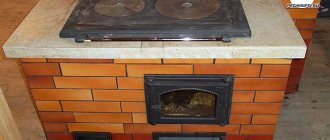
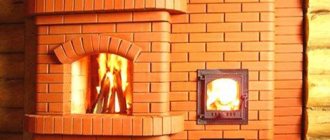
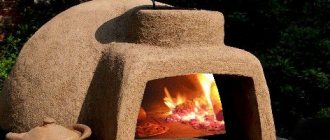
Since time immemorial, our ancestors have built adobe ovens. They were usually built in villages and, due to the lack of a chimney, the first versions of such structures were called “black-style” stoves. Accordingly, the house where there was a clay stove of this type was called a “chicken” hut. This name directly depended on the design of the stove, since at first the smoke filled the home, and only over time it came out through a small hole (top) under the ceiling to the outside. It is clear that the entire hut was filled with smoke, and through the window, which was specially built for this purpose, not only gases and smoke escaped, but almost all the heat.
Classification of furnaces
People have long noticed that when strongly heated, clay turns from a soft material into an impenetrable stone.
No one now even remembers when the first kiln for firing clay products appeared. Over thousands of years of human activity, not only pottery, but also the kilns necessary for it, have constantly developed and improved. This kiln will help you make handmade ceramics
There are several main categories of kilns:
- by type of fuel or energy source on which the unit operates. This section distinguishes gas, electric and solid fuel;
- according to the location of the heater. There are two main types: muffle, when the heaters are placed around the muffle, and chamber - the heater is inside the firing chamber;
- difference in the type of chamber environment. This classification is divided into three types: vacuum, when air is pumped out of the chamber, air - conventional furnaces, and with a protective gas environment, when auxiliary gas is pumped in for better processing of products;
- differences depending on the type of loading. Three categories: tubular - loading from above, for uniform firing of art products, bell-shaped - the same loading, but for large objects, horizontal - when loading from the front;
- by power and maximum heating temperature. The final quality and color of the product depend on the firing temperature, so this category is of great importance for those who experiment in these directions.
Overview of ceramic kilns:
Where is the best place to use the mixture?
Clay building mixtures are necessary when the structure is exposed to different temperatures. Also, their plastic properties are in demand when decorating premises. Both materials are actively used in the manufacture of pottery, but here the mixture used is different.
For masonry and repair of stoves - proportions
The ratio of components is chosen taking into account how much the part of the furnace structure heats up:
- Clay mortar is used in the construction of a heat-storing area. It heats up to 550–600 C, does not come into contact with flame, and is not exposed to oxides. The fluff and the source of the chimney also do not heat up very much - up to 400 C, although they cool more strongly. The proportions are determined by the plasticity index: from 2 to 5 parts of sand per 1 part of clay.
- Fireclay solution can be heated to 1200 C and higher. It is needed for laying the combustion chamber. In some cases, the entire stove or fireplace is made of fireclay. The usual ratio is 30% clay and 70% fireclay. But if the clay mixture is oily, the proportions change - 50:50.
- Rows 1 and 2 of the stove can be placed on a lime-sand option.
- Cement is not elastic and breaks down under high heat. Mixtures based on it are only suitable for the foundation and chimney cap.
For plaster - ratio of materials
For finishing work, white and red clay of different fat contents are used. Only the cleanest sand is taken - river, sea, alluvial quarry, fine or medium fraction. The ratio is standard: for high fat content 1:5, for medium fat content – 1:3, for lean fat content – 1:2. Read about the differences between quarry and river.
The characteristics are selected in accordance with the purpose of the plaster composition. To level the wall and fill defects, you need plaster that fills the unevenness well and sets quickly. It is preferable to take quarry or artificial sand: its grains have an angular shape, are rough and adhere better to the binder component. For decorative finishing, river wood is chosen: its particles have a rounded shape and are more evenly distributed throughout the volume of the material.
For sandblasting work
For sandblasting, only sand or slag is used. The best choice is loose yellow or white quartz. Different jobs require different fractions:
- Dust-like – with grain sizes up to 0.1 mm. They process fragile surfaces in order to create a matte background or pattern.
- Average – 0.1–0.4 mm. This is how complex images are obtained on glass and mirrors with varying degrees of dullness.
- A relatively large fraction with particles up to 1 mm is used to obtain three-dimensional images.
Construction of a summer stove
Indoor structures are most often built from adobe bricks or blocks. But with the help of layers of adobe you can make, for example, a summer stove or, as it is also called, an outdoor stove with your own hands.
The algorithm for constructing a street structure from adobe is as follows:
- Prepare the foundation for the future furnace structure. To do this, you can use an ordinary whole brick, which must be laid out in a semicircle, and the inside must be filled with broken brick, glass or other material. For the hearth you need to use fireclay bricks.
- Knead the clay with straw (preferably chopped) and sand in a large container (you can use a used bathtub). It is best to do this with bare feet, making sure that the resulting mixture is viscous and homogeneous.
- On the finished base, using wet sand, create a mold for the future structure, on which to mark the entrance. Usually, it is built hemispherical, and wet sand is ideal for creating this shape.
Place adobe on, under, or around the form. After this, the building material is gradually placed on the previous layer and slowly moved towards the top. It must be remembered that the higher the sand dome, the thinner the masonry must be, otherwise the structure may “float”.
That's it, the structure is done, and you need to wait until it dries, after which you need to smooth it out a little with a trowel. This technique will protect the structure from dry grass, leaves and other debris sticking to it. If the structure becomes more or less dry, then you need to remove sand from its inside, which has already played its role. It is also recommended to light small fires inside the dome to help the structure dry out faster. You can build a stove from adobe with a chimney, or it is possible without it.
Thus, an adobe oven is not just a building structure, but, one might say, part of our history, one of the oldest Russian traditions, if you like. And this is really true. Therefore, let's respect our history, our customs, multiply our traditions and then everything will be fine with us. We are convinced of this! published econet.ru
If you have any questions on this topic, ask them to the experts and readers of our project here.
If you liked the article, please share it
Previously on the topic:
Share
Clay oven
Clay ovens have been built from time immemorial, since there were no bricks in the villages before or they were too expensive. Nowadays it is almost a forgotten art. We made our own stove, relying on our own intuition and information gleaned from books; we also had no experience in this matter.
Our stove is a Russian “black” stove, that is, without a chimney. Such stoves used to be installed in so-called “smoking” huts, where the smoke came out into the room and then out through a small window near the ceiling. Over time, the window was replaced with a chimney - a wooden pipe starting from the ceiling. In huts, such stoves could occupy up to 1/4 of the room area. Our oven has dimensions of 1.2×1.6 m. The names of the main parts and dimensions are shown in Fig. 1.
Rice. 1. Chicken adobe baking oven. Dimensions are given in meters.
Before building the furnace, it was necessary to make a foundation for it. To do this, on the site we removed the turf and the top soft layer of soil to a depth of 20-25 cm. The bottom of the pit was filled with liquid clay mortar, boulders were laid and they were also filled with clay mortar. Then formwork was installed around the pit and the masonry was raised 20 cm above ground level. The top of the masonry was leveled with a thick clay mortar and a layer of waterproofing material was laid (Fig. 2). Any material is suitable for it: roofing felt, plastic film, old bags. In the old days, birch bark was used for this purpose.
Rice. 2. Construction of the furnace foundation.
For waterproofing, we laid two layers of 25 mm thick boards crosswise and overlapping. Thanks to this, the load from the furnace is evenly distributed over the entire foundation.
After the foundation of the furnace was laid, we began to construct the hearth and hearth. To do this, stones were laid above the foundation to a height of 20 cm and bound with clay mortar, and the top 5 cm of these 20 cm were made of clay only. If the clay layer is thinner than 5 cm, then when heated it will fall off the stones and there will be holes on the hearth.
A few words about clay
For an adobe stove, a properly prepared clay solution is the most important thing. The solution must provide minimal shrinkage and at the same time be durable. It is made from clay, sand, and water. The more sand, the less shrinkage, but the lower the strength. The clay/sand ratio depends on the fat content of the clay used. There should be very little water in the solution, again to reduce shrinkage.
In our case, the situation was simplified, since we had no sand at all in the forest clearing. I had to make everything from clay “as it is.” The clay was taken out of the pit and transferred to a 1.5 x 1.5 m shield, where it was stirred with a small amount of water with feet until the consistency of stiff dough.
External and internal formwork was installed on the pole. The external formwork consists of four plank walls, knocked together into a box with overall dimensions of 0.6 × 1.2 × 1.4 m. The internal formwork is shown in Fig. 3.
Rice. 3. Internal formwork.
A hole of 20x20 cm was left in the front circle. It was needed later, when burning out the formwork. The outer formwork was wedged with stakes so that it would not be deformed when filling with clay. The hole in the front circle was closed with a piece of board from the outside. Then they filled the space between the formwork with clay.
The clay was laid in layers of 10 cm and carefully compacted. To increase the strength of the structure, we reinforced the corners, roof ceiling and mouth with Ø10 mm rods. Even if the clay cracks, the rods will prevent the stove from falling apart. At the same time, we took into account that the mouth will be cut in the front wall of the furnace to a height of 32 cm and the rods should be 10 cm higher. The same was done with the overlap of the furnace. The rods were placed 10 cm above the internal formwork.
Removing Impurities
Almost all quarry clays and sands contain impurities and require purification. Remains of plants, roots, grains of sand, pebbles, and pieces of crushed stone are removed from raw materials in various ways.
How to remove impurities from clay
Impurities greatly degrade the quality of the masonry. Purification of raw materials is carried out in three stages:
- manual sampling of plant remains, roots, crushed stone, pebbles;
- sifting through a metal sieve with a hole size of 1.5 mm;
- soaking clay;
- rubbing through a metal fine-mesh sieve.
Photo 2. The process of sifting clay through a metal sieve. You need to press it with your palm so that all the particles pass through the mesh evenly.
In practice, to clean clay for mortar, craftsmen do without the labor-intensive process of soaking the raw materials.
How to remove impurities from sand
The sand is considered prepared when the water passing through it becomes clear. To prepare the material, you need to do the following:
- Plant remains, roots, and large stones are manually selected from the sand.
- After a rough sampling, the material is sifted through a metal sieve with a mesh size of 1.5 mm.
- The sand is placed in a burlap bag (or net) and washed with running water. A hose is used for flushing; water is supplied under pressure.
Advantages and disadvantages
In modern days, people have again begun to show interest in the original Russian adobe oven. They are built not only in rural villages, but also by people living in the city. The equipment can be erected on the street or directly in the house.
Clay stoves are used not only as a heating unit, but also as a decorative element that can be used to decorate a garden, a country house and similar buildings. The design is very simple, so it won’t be difficult to recreate it in any room. To make it, you only need to have a great desire to build, as well as clay.
The stove is gaining great popularity due to its obvious advantages:
- Maximum ease of construction - there is no need to spend money on expensive materials and tools. The design is created by hand and you don’t even have to use electricity.
- Compact sizes.
- Completely environmentally friendly - only natural materials that do not pollute the environment are used for combustion and manufacturing.
- Low cost. You won't have to buy anything from hardware stores. Even on sand, there is an option to save money - go to the nearest beach and collect the required amount there.
- Great practicality. The oven is used not only for heating, but also for cooking and drying clothes. It is also a good decorative element.
Despite the large number of advantages, any device also has disadvantages. The only downside is that you will need a lot of building material – clay. It needs to be mixed properly to get the right consistency. But if you conduct several experiments and practice mixing small quantities, then difficulties will not arise in this situation.
Features of operation
Before you start using the equipment, the internal formwork must be set on fire - otherwise it will not be accessible. This operation should be carried out extremely carefully so that the structure does not collapse and cracks do not appear. If cracks cannot be avoided, they are covered with a clay solution, but they must be widened before filling. Only after completing all the steps in the stove can you light a fire.
Before you start baking baked goods or similar foods, you must thoroughly heat the oven for 2 hours using dry wood. As soon as the firebrands appear, they are removed with a poker. The oven closes tightly. You will need to wait 15 minutes. During this time, the temperature inside will even out, and the bread will be baked well on all sides.
To determine the degree of readiness of the oven, you need to use a splinter - it is placed inside the oven for a few minutes, and then carefully examined. If it is charred, then you need to give the oven more time to cool, and if it has changed color - it has become browner, then you can start cooking. This will mean that the temperature has reached approximately 200 degrees. The baking technology is quite simple - you need to make sure that the dough is well baked.
How to make an adobe oven
The clay should be fairly plastic, with a minimum moisture content. The solution should provide minimal shrinkage while being strong enough. The ratio of clay and sand is 1:6
In this case, it is necessary to pay attention to the fat content of the clay. The mass must be mixed thoroughly, this will take time
And under favorable conditions and following technology, you can build a stove with your own hands in one day. With each fire, the stove becomes stronger, which ensures a solid structure. Tools needed to make an adobe oven
- beaters, which are wooden handles with knobs;
- chekmari - large wooden hammers;
- tamper - used to knead clay;
- use a knife to remove excess clay;
- pestle is used to lay the mortar;
- grater and scraper - for leveling walls.
Excursion into history
The Russian clay stove has been known to mankind since ancient times. Previously, in villages they built just such stoves, which were also called “black” stoves because they did not have a chimney. Even houses with such stoves had their own unique name - “smoking” huts. This name was explained by the fact that the smoke did not escape through the chimney to freedom, but first entered the room, and only then gradually ventilated through a small window under the ceiling, which was created specifically for these purposes. Needless to say, there was a lot of smoke, and the window greatly undermined the thermal insulation of the room in the cold winter? But with all this, the smoke did not spoil the ceiling, did not pollute it with soot. And all because people managed to achieve absolutely complete combustion of firewood, so all the soot settled only around the “top”. How did they do it? The whole point is to heat the house with hardwood logs. They had to be placed in the oven so that there was free access to fresh air, and a few aspen logs were placed on top. (See also: Clay for stoves)
Later, the Russian adobe stove acquired a chimney (a wooden pipe that originated from the ceiling) and there was less smoke, but the risk of burning, on the contrary, was reduced. The dimensions of such a device (a stove with a chimney) were not small; it could occupy a good quarter of the entire room, but modern adobe stoves are much more compact.
The closest “sister” of such a Russian stove was the Pompeii clay stove, but, unlike the more patriotic version, it always had a pipe and was made of brick, and it was better to use refractory brick inside. Needless to say that such a stove, then and now, is an expensive pleasure?
Clay oven construction techniques
There are two technologies for clay stove construction. In the first case, formwork is used, and in the second, an adobe oven is formed with your own hands from pre-prepared blocks. The first option is complex and is more suitable for small fires intended for baking bread and preparing baked dishes, while the second can be used to build a functional Russian oven.
Preparation of clay solution
To prepare the solution you will need clay, sand and water. In many regions, all this can be found absolutely free. Oily clay of a reddish hue is best suited for construction. Red granular clay is not suitable for kilns. If independent extraction of raw materials is difficult, then you can buy it in construction stores. It’s more profitable to buy in large packaging - it’s cheaper.
There is no exact recipe for the solution - the proportions depend on the fat content of the clay. In some areas, sand is not added at all, while in others it is required twice as much as the main raw material. The output should be a very dense and thick homogeneous solution.
Baking in formwork
It was no coincidence that the name of the adobe oven was given - the construction technology involves beating the mortar that fills the formwork with special wooden hammers. One end of the tool is flat - it is used to compact and level the surface, and the second has a wedge shape and is used for beating clay between the formwork. It will not be possible to build such a hearth alone - in the old days, neighbors were involved in the work, assembling teams of 15-16 people.
Formwork for baking
Making formwork is not an easy process; it is assembled from wood during the formation of the furnace, but all the details are prepared in advance. The most difficult thing is to correctly make the “work” for the firebox. The firebox blank has the shape of half a barrel, while the arc of the arch starts from the base and does not have straight walls - this enhances draft and provides good heat. The boards are sawn from the inside and tied to the parts with ropes so that after drying it is easy to remove the shape.
Modern adobe oven
Before placing the clay solution in a wooden “shirt,” the clay is beaten in small portions on the floor to get rid of lumps and voids. After filling the mold, cover the top layer with pieces of clay measuring 30*40 cm and cover the top. After three days, the spacers are removed, the mouth is cut out with a knife, and the front boards of the mortar are knocked out. The top formwork is carefully removed and covered with the error solution. If desired, stoves are cut out on the walls, which collect heat and decorate the hearth. You can think about the first firebox no earlier than in 2 weeks.
Construction of a clay block oven
To build a clay oven with your own hands using blocks, first make homemade bricks. To do this, the solution is kneaded for a long time, achieving a uniform composition and a dense layer. In the old days, this was done with feet and with the help of horses, later they pressed the clay with a tractor, and now they use all kinds of devices.
A well-compacted clay layer is chopped with an ax into blocks of the required size, without waiting for it to dry. A stove is built from the blocks, but no mortar is used to bind the bricks together, but the joints are compacted with hammers. To obtain a firebox of the desired shape, wooden formwork is made, which can not be removed, but burned during operation.
Stylish clay stove in a modern interior
It is allowed to start a fire only after final drying - after two weeks. In the first few days, small portions of brushwood are burned to dry the clay and give it strength. Over time, a clay oven only becomes stronger - the raw materials are baked and transformed into a monolithic structure.
Soak
Dry packaged clay purchased in a store should be soaked. To work, you need a wide container (trough), tank or other vessel:
- The container is filled 80% with clay.
- Fill the container up to the sides with clean water so that it completely covers the material.
- After a day, the solution is stirred. If there is not enough water, add it again and leave the clay to soak for another day.
- The soaked material is transferred to another container.
Clay extracted from a quarry yourself is soaked in the same way. If the material is wet, it is also soaked, since it usually does not contain enough water.
What methods exist for creating adobe ovens?
A do-it-yourself adobe oven can be built using two methods:
- Using formwork. This option was used in cases where it was necessary to build a small fireplace with which it was possible to bake bread and prepare baked dishes.
- Using clay bricks or formed blocks. Such designs ensured the versatility of Russian stoves.
Clay making in formwork
The first option is more complex and requires more time and solution. Therefore, first we will focus on this option - very reliable and cheap, but more complex.
Let's look at how a black stove is built, which is placed in the garden, near a room or in some other place on the street. The clay oven for baking bread has the following external dimensions: 0.6x1.2x1.6 m.
The waterproofing section must then be covered with two layers of boards (25 mm) in a crosswise manner, which will help to evenly distribute the load on the base of the structure.
To construct the hearth and hearth, a certain number of stones are laid out at a height of about 20 cm, which are filled with not very liquid clay, while its layer above the stones should be about 5 cm.
Internal formwork
After this, they install external and internal formwork (see figure). The structure of the external structure is simpler: a box measuring 60x120x160 cm.
The internal formwork can be clearly seen in the figure. The front circle is equipped with a hole of approximately 20x20 cm, which will be useful in the process of burning out the formwork.
To avoid unnecessary deformations, the outer part is wedged with pegs. After this, it is necessary to fill the space between the formwork with previously prepared clay.
To improve the quality of the structure, it is necessary to lay the clay in low layers (up to 10 cm) and compact it well.
In order for the entire structure to be strong, the corners and arches must be reinforced with 10-12 mm rods. The mouth, which will have a height of approximately 32 cm, can also be reinforced.
Oven made of adobe blocks
The second method was most often used by rich people who could purchase bricks or blocks to build a furnace.
Today you can make blocks or bricks from clay with your own hands. For this purpose, it is necessary to knead the clay solution until a homogeneous composition and a dense layer is obtained, after the formation of which it must be cut into blocks of a certain size. A stove is built from such elements.
It should be taken into account that during the creation of the structure, no mortar is used to bind the adobe bricks together. The joints between them must be compacted using hammers.
To give the firebox a specific shape, they use homemade formwork, which 2-3 weeks after construction is burned inside the structure during the first “idle” operation. This means that before full operation it is necessary to light a small fire inside several times with brushwood so that the entire structure gradually dries out completely.
The initial stage is preparing the solution
Builders recommend using components in a 2:1 ratio to create the mixture, where the first indicator is the content of fine-grained sand, and the second is clay. Before preparing the solution, you need to know exactly how much composition is needed to make the stove. As a rule, for laying a medium-sized structure you need approximately 3.5 m3 of clay-sand mixture.
The solution must be prepared in a special wooden container, lined with tin, in which the clay must be soaked for two days. After this time, sand must be added to the solution. The resulting mixture will have to be stirred with your feet until you get a thick mixture without lumps of clay. Large fragments can be chopped using a shovel or hoe. If, as a result, large clots remain in the solution, they will have to be pulled out and broken by hand.
To prepare the solution, add an amount of water equal to ¼ of the volume of clay. The main thing is to use high-quality liquid. This can be river or rain water. The result should be a plastic mixture from which the adobe oven will be built.
Method two. We make a stove without having a metal casing at hand
The manufacturing process in this case is not much different from that described above, but there are definitely some nuances here. Let's start with the fact that the working volume of the design below will be about 13 liters. The spiral, as mentioned above, can warm up to a thousand degrees in just 1.5 hours, while the temperature of the outer walls of the device will not exceed 100 degrees. The algorithm of actions should be as follows.
Step 1. First, using a 4x2 centimeter profile pipe (with a square cross-section), we build a stand for the device. After this, we paint the finished stand with enamel.
Step 2. We attach a sheet of galvanized steel on top of the stand (its thickness should be approximately 0.1 centimeters), using “metal” self-tapping screws.
Step 3. We make the walls from fireclay bricks and a special fireplace composition (everything is the same as in the previous version). After the solution hardens, we make grooves for the spiral.
Step 4. We assemble the bottom from brick separately, and use the same mortar for fastening. Before continuing work, wait until the structure is completely dry. Do not forget to wet each brick immediately before laying.
Step 5. We lay a thermal insulation layer on top of the metal base (we can use the same basalt wool for this). In order to maximize compaction of this layer, it must be moistened before fixing the brick bottom.
Step 6. We continue the traditional laying of the stove, but we try to ensure that all voids and seams are carefully filled.
Step 7. We traditionally make the lid for the chamber from fireclay bricks, but at the same time we fasten them together with a metal tie.
Step 8. Place the spiral in the prepared grooves and insulate the structure from the outside with thermal insulation material. Next, we cover everything with sheets of galvanized steel, which are cut according to the dimensions of the resulting chamber.
As you can see, this requires knowledge not only in the furnace business, but also in the field of electricity. You can see another possible manufacturing method in the video below.
