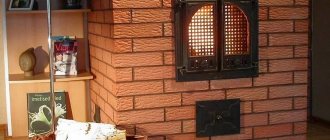
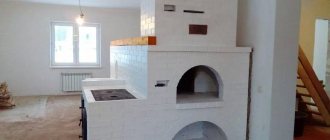
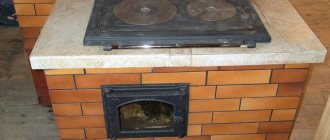
A stove, a fireplace, and a stove are structures familiar to Russian people that allow them to heat a house, even during severe frosts. Currently, they continue to serve as an excellent means of heating in villages and dachas.
Gradually, cracks may appear in the brickwork of the stove for various reasons. The following article will talk about how to coat the stove so that it continues to fulfill its useful role and at the same time be safe for others.
Furnace Maintenance
The oven can break down at any time. It is better to prevent bad consequences and inspect the stove for integrity. According to SNiP, dacha heating devices need to be inspected at least twice a year.
If the stove is located inside a year-round residential building, then it is inspected at least once every three months. Unfortunately, the furnace is not inspected at all. It is better to prevent than to suffer the consequences.
The most dangerous thing in a stove is the cracks. These cracks are not visible to the naked eye. Carbon monoxide passes through them, which can harm the owners and the house as a whole.
Causes of cracks
Owners of brick fireplaces, having discovered a problem, rush to find out how to cover the stove in the house so that it does not crack in the future
It is important to understand that damage is caused by various reasons, and not all of them can be eliminated by cosmetic repairs. In most cases, violation of the integrity of the masonry is not dangerous and can be easily eliminated
Seams crack for the following reasons:
- Irregular use. In winter, the house is heated with long breaks (for example, the owners come to the dacha on weekends). Temperature changes inevitably lead to the appearance of cracks in the seams of the furnace walls.
- Violation of operating rules. Cracks cannot be avoided if the stove is not given time to stand and dry well after laying.
- Design flaws. Different zones of the structure are heated unevenly, and the material expands differently when heated. Cracks run along the boundaries of areas with different temperatures.
- Finishing errors. Poor quality solution selected; its layer is too thick, or, conversely, too thin.
The problem is obviousSource pechdoc.ru
Error in choosing a masonry mixture. Problems arise when masonry is done with the wrong mortar, causing the thermal expansion of the brick and the mixture to not match. The result is a network of microcracks that appears on the heated structure.
The question of how to coat a stove with clay so as not to crack goes to another level if the reasons for the damage are more fundamental:
- Construction errors. If errors are made in the foundation design, restoration of the seams will not help, and the owners will face a major overhaul. The solidity of the furnace walls is also compromised if there are defects in the furnace design. Both options are life-threatening due to through cracks, a source of carbon monoxide.
- Calculation errors. If the physical characteristics of the materials were not taken into account when calculating the seams and no reserve was left for thermal expansion, the resulting cracks create a threat of collapse. The stove structure will have to be rebuilt.
Cracks around the hearthSource tengrinews.kz
Clay for stove repair
- A component such as clay is present in all mixtures for sealing stove cracks.
- When heated, it becomes hard as stone.
- Dry clay crumbles when heated.
- When heated, oily clay begins to crack and dry out.
- The proportions of solutions are always different.
- A solution consisting of sand and clay is successful in repairing stoves.
What is the best way to cover the cracks in the stove between the bricks and the stove?
As a rule, the stove complex in a residential building includes the presence of metal inserts - doors or stoves. Masonry and metal differ in their coefficient of thermal expansion, which can cause destruction of the integrity of the structure. The following are suitable for repairing damage:
- Fireclay clay – it has good fire-resistant properties.
- Adhesive designed for working with stoves, hearths and fireplaces. The thermal indicators of the solution indicate possible heating up to 1000 °C.
- There are special grouts for eliminating cracks in the oven between the bricks.
- A solution based on clay and sand. Suitable for those who prefer to control the production of grouting material themselves.
On a note!
When choosing a particular solution, it is recommended to carefully study its properties, especially fire resistance characteristics and expansion level.
Sand-clay mortar for repairs
- The composition consists of sand, water and clay.
- When preparing the solution, much attention is paid to the quality of the water. It must be free of silt and mineral salts.
- The sand is sifted through a sieve. Through this process, the sand is cleared of various debris and becomes clean.
- Before making a sand-clay solution, you need to let the clay lie in water for half a day.
Work technology
When the material for the restoration of the heating structure has already been selected, it’s time to figure out how to properly seal the stove (so that the lining and the brick itself do not crack).
The method of applying putty is selected depending on the type of solution.
So, if you decide to eliminate cracks using a homemade mixture of clay and sand, the process will not cause you any particular difficulties.
1. First, the brick is cleaned of old finishing material and plaster.
2. Next, the oven should be slightly warmed up and the cracks should be poured with water. This is necessary so that the dry brick does not absorb moisture from the putty, since in this case it will lose all its properties.
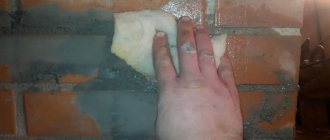
3. Now you can start sealing the holes. First, the solution must be firmly pushed into the cracks, and the residue must be spread over the surface in an even layer. The work can be done with bare hands, as this composition is absolutely harmless.
4. The final stage will be plastering the external surfaces.
Please note that you can light the stove only after the solution has completely dried!
Now let's look at how to seal the oven (to prevent it from cracking) with heat-resistant glue. This process is almost identical to the previous one, but differs in that after sealing the cracks with a plastic composition, the entire surface of the furnace is treated with solid varieties of adhesive fire-resistant mixtures.
Since the glue dries in less than 30 minutes, you can begin decorating the stove on the same day.
In this article, we looked at what and how to cover the stove so that neither the structure itself nor the lining cracks. In conclusion, I would like to note that even the best and most expensive refractory compounds are not able to protect your stove from cracks. Here the main role is played not by the quality of the material, but by strict adherence to the technology of construction and repair of the heating structure. Carry out the work thoughtfully and slowly, and then your stove will serve you for many years.
fb.ru
Stages of preparing sand-clay mixture
- First, mix the clay solution. It should be free of lumps.
- Add clean sand to the clay. Usually they put four parts clay and two parts sand.
- Lime is added if the stove will not be whitewashed. Stir the solution until smooth. Cover with a plastic bag and let rest for half a day.
- After 12 hours the mixture is stirred. Then they mold it into a ball and squeeze it.
- For reinforcement, straw is added to the mixture.
Afterwards it is better to whiten the stove thoroughly. This will help the stove last a long time without repair work.
Drying time
It is not recommended to heat the stove immediately after plastering the cracks.
It is not recommended to use the stove immediately after treatment, since heating will cause the plaster and putty to expand, so the surface will crack again. The heat-resistant ready-made solution dries within 3 – 4 hours, the exact time is indicated on the packaging. The clay composition will harden for about a day.
The first firebox includes a small amount of firewood, the amount is gradually increased with each addition. You cannot use a full load so as not to spoil the work.
Repair using fireclay clay
- This clay is also successful in repairing stoves.
- They are resistant to elevated temperatures and vapor-tight.
- Safe for people and animals.
- The downside of this clay is the price.
- Since it almost does not tolerate moisture, sand and cement must also be added to the solution.
- The solution for filling cracks consists of seven parts sand, one part cement and one part clay. Water is added at discretion.
- You can mix the solution with a regular shovel, but the end of the mixing process must be done with your hand.
Advantages and disadvantages
Heat-resistant putty does not emit substances harmful to health when heated.
Heat-resistant putties have advantages over traditional solutions. They are characterized by high strength when exposed to high temperatures due to the presence of binding fibers and the use of refractory materials.
Positive aspects of use:
- The solution consists of safe components; when the surface is heated, harmful air impurities are not released.
- Putty prepared in compliance with the technology and application rules lasts a long time.
- The mixtures adhere well to the surface of the stove made of various materials; there are varieties that are used for finishing metal.
Disadvantages include higher cost than standard ready-mixes. Such compositions are rarely used as a finishing layer - they need to be painted or tiled.
Features of stove repair with heat-resistant glue
- Designed specifically for stove repairs.
- You can even buy it ready-made.
- To prepare a dry glue consistency, you will need water.
- The finished version is suitable for small sizes of smearing. For specific repairs, it is better to buy dry glue.
- The composition of the glue consists of clay, sand, cement and various additives.
- Dries in half an hour.
How to cover up cracks?
For these purposes, you can use several options that will reliably seal cracks in the walls and prevent gas from escaping into the room. Let's look at each method in more detail.
Fireclay clay
Before you cover cracks in the stove with fireclay clay, you need to know its advantages:
- the material is resistant to temperature during fuel combustion;
- high level of vapor permeability;
- resistant to moisture when heated;
- environmentally friendly material, safe for humans and animals, therefore can be used in residential premises.
To make the solution you will need to mix several ingredients:
- 1 part cement grade 500;
- 2 parts fireclay clay"
- 7 parts river sand.
The solution is mixed well and water is added. The consistency depends on the skill and type of work, but you should not make it very liquid or thick. To get rid of stones and lumps, the clay can first be soaked in water for several hours and the lumps of material can be crushed, and the cement and sand can be sifted. Such a solution will be plastic and laid on the surface in an even layer.
Plastering walls is easy if you have a certain skill
To do this, it is important to install beacons and, distributing the solution, level the layer on the wall. You will need to prepare a trowel or spatula, the size of which depends on the surface area
Clay and sand
This is the most affordable, inexpensive solution for plastering surfaces. Such a solution for the oven has sufficient plasticity and is not subject to destruction under the influence of high temperatures.
It’s easy to prepare the solution for use; for this you will need:
- prepare a large trough in advance, add the required amount of clay and completely fill the layer with water. For 1 bucket of clay, pour 3 buckets of water. The clay should soak for 24 hours;
- then mix the solution and add more water to it. We pass the slurry through a sieve, get rid of lumps and let the solution settle;
- drain the excess water, making the solution as thick as homemade sour cream;
- add river sand in a 1 to 1 ratio and mix the solution.
Expert opinion Pavel Kruglov Stove maker with 25 years of experience
Important! At this time, you can determine the quality of the solution. Having lowered the shovel holder into it, and seeing the adhering clay - in this case, you will need to add a little sand
Only after seeing small clumps of sand and clay solution on the holder can you start plastering the walls of the stove.
With this solution it is necessary to repair all cracks that appear, after wetting the surfaces and then plastering the stove in several layers. In villages, they still use the old method, adding horse manure to the prepared solution. This solution is obtained with increased thermal insulation properties. Hay plays the role of air layers that prevent the free passage of heat.
Grout
This oven putty is sold ready-made, but it’s easy to make yourself. The main advantage of this material is the ability to retain its properties even when heated to 10,000. Industrial materials are used for arranging and repairing stoves and fireplaces, but the price of such grout is high, so home craftsmen do it with their own hands.
The mixture for coating the oven is made in several stages:
- knead large lumps of clay and pour it into a trough;
- fill it with water and leave for 10-12 hours;
- pour part of the sand into the soaked clay, maintaining a ratio of 1 to 4, mix the solution well, adding 5 parts of chopped straw in small portions;
- Add 1 kg of coarse table salt to the finished putty and finally mix the solution.
The finished grout can be used to fill gaps between bricks, crevices, cracks and complete the first rough layer of plaster.
Furnace glue
In order to repair a cracked stove, you can buy heat-resistant special glue at a hardware store. Due to its properties, it is not exposed to high temperatures for a long time. It consists of the addition of fireclay clay and cements with high fire-resistant properties.
A plastic and hard adhesive mixture is produced. Using hard materials, the surfaces of the stoves are plastered. Plastic glue is used to fill cracks and seams between bricks.
When using this material, you must follow the instructions when diluting and using the heat-resistant substance. You should not make it in large portions; it dries out quickly and becomes unsuitable for work.
Oven repair using grout
- You can buy and make it yourself.
- When preparing the mixture, the crumbly clay is transferred to a basin. Then fill it with water and leave it alone for ten hours. Sand is added to the mixture. In a ratio of one to four.
Lastly, one kilogram of salt is added and the mixture is mixed thoroughly.
Video description
Plastering a brick oven with your own hands.
Special oven glue is not diluted in large quantities as it tends to harden quickly. After this, it cannot be used a second time, since repeated dilution will cause the composition to lose its strong qualities.
Using special oven glue to seal joints between brick joints in a home oven Source waysi.ru
Secrets of caulking the stove
You can buy a ready-made mixture in the store and prepare it yourself.
- Before caulking the gap, you need to heat the oven a little. Then the cracks are wetted with water.
- Do not heat the stove until all the solution has dried.
- First, all the plaster around the gap is removed.
- The mixture is applied in 2 layers to the stove.
- With a sand-clay mixture, take one part clay and three parts water. You need to determine how much sand to add yourself. To do this, mix the solution with a stick. If clay sticks to the stick while mixing, this means you still need to add sand. The solution is considered ready when almost nothing sticks to the stick.
- Chamotte clay grout is very durable. Before you start preparing the solution, you need to steep this clay in water for two to three days.
- Ready-made glue is suitable for those who do not want to spend a lot of time fiddling around. For small cracks, purchase ready-made viscous glue.
- The quality of ready-made solutions is better than those you prepare yourself.
- Time is saved when using commercial products to seal cracks.
- If the correct proportions are observed when preparing solutions, the stove can last more than ten years.
- The main thing is to inspect the condition of the stove once every few months. Don't forget to do this. After all, this is dangerous to life and health. Everything must be examined carefully. Even a small gap can harm human health. After all, carbon dioxide can escape from there and poison the air.
- Cracks can be due to improper foundation, shrinkage, and so on.
When filling cracks, unusual compounds are also used. For example, a composition that contains sand, clay and horse manure is popular. It is better to knead this solution with your feet.
There should be no lumps. To understand the solution, you need to dip your foot in a bowl of solution. If the water is clear when you pull it out, you're done.
Damage diagnostics
Therefore, at the first sign of smoke in the house, you will need to do the following:
- diagnose the furnace surfaces and find the fault;
- after this, immediately prepare a solution or buy ready-made material for filling cracks;
- cover the walls and plaster them again.
But first of all, diagnostics will help determine the size of damaged surfaces and the approximate amount of materials to be repaired. If the mortar has simply cracked due to high temperatures, you simply need to remove the layer of plaster and apply a new layer of high-quality materials.
It’s worse if the cracks are through and continue to expand after the work has been done. In this case, it may be necessary to call specialists to identify the causes and lay a new stove. Stone stoves are a complex structure, so you shouldn’t try to lay it out from a book; it’s better to entrust this work to an experienced stove maker.
Such cracks can no longer be simply covered up
In this example, you shouldn’t cover it up either. The brick was badly cracked.
If the cracks are small and their size does not increase, you can begin to troubleshoot the problem yourself. To do this, it is important to prepare a high-quality solution and apply it correctly to the wall. How to cover up cracks in a stove so that it does not crack from the heat - knowledge of the basic materials for making the mortar will help in this matter.
Examples of small cracks:
Example 1
Example 2
Example 3
