Laying a furnace is an expensive and labor-intensive process. These circumstances reinforce the already high importance of proper operation of the device. Certain rules for caring for a stove or fireplace come into force immediately after completion of construction work. Many people wonder how long it will take to use the constructed structure?
Their doubts are not without foundation; a newly built oven contains a lot of moisture, which is absorbed from the mortar into the bricks, and if it seems to us that the mortar has already hardened, then this is only an external appearance, since removing moisture from the volume of materials takes a long time.
To describe the full picture of the seriousness of the situation, we note that the remaining moisture in the form of liquid is contained in the smallest pores of the material. When lighting a new stove without following all the recommendations, the water in the pores will begin to evaporate, the steam pressure will increase sharply and it will lead to destruction of the structure of the substance. As a result, many cracks will appear throughout the entire volume of the firebox. It is simply pointless to fight with such a large number of them. Therefore, the answer to the question of when it is possible to light a newly built stove does not come down only to indicating a certain period.
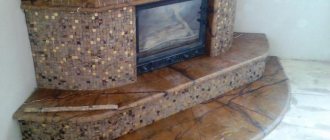
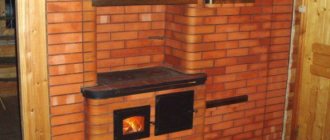
Ready-to-use structure
When can you light the stove after laying?
There are two main stages in the oven drying process:
- Natural drying of the stove after laying for 5 - 7 days. At this time, heating it with wood is strictly prohibited, since the main removal of moisture from the structure occurs
- Drying by heating lasts from 7 to 14 days, depending on the intensity and number of ignitions of the oven.
In total, the entire process from laying the last brick to complete drying and full use of the stove takes about 2 - 3 weeks.
The entire drying process takes about 2-3 weeks (depending on weather conditions)
Stages of work - step-by-step instructions
You have already chosen how to plaster the stove so that it does not crack. Now is the time to start the application process:
- we clean the masonry from the old coating (if any), debris, dirt, dust;
- seal cracks with cement mortar;
- We prime the masonry. To do this, you need a solution, which is sold at any hardware store. Costs from 50 to 100 rubles per liter. There is no need to dilute with water or other liquid. From a can, bucket or bottle, apply the primer to the wall with a brush;
- we attach the reinforcing mesh to the self-tapping screws;
- plastering.
Important: all dust, dirt, and debris from the masonry must be thoroughly removed. Otherwise, cracking or chipping of the finished coating is possible.
If the wall is not cleared of debris and dirt, the plaster will not last long.
Choose your primer carefully. Choose a composition with deep penetration so that in the future the plaster will lie tightly on the wall. After applying the primer, wait at least 24 hours, then plaster the stove.
The fittings are attached with self-tapping screws so that the mixture stays firmly on the wall and does not crumble, and the heater itself becomes more stable and strong.
The final coating is done step by step:
- apply in an even layer;
- smooth with a spatula, then with a trowel. The reinforced mesh should not be visible through the coating;
- if another layer is needed, then leave the first one for a day, prime and apply the second (also the third);
- after the mixture has dried (after 24-48 hours), the surface is sanded with sandpaper to make it smooth;
- The final stage is sweeping away dust from the structure and putting the heater into operation.
After the stove has been plastered, it is usually covered with lime. Dilute the dry lime mixture with water and salt. Proportion – 10: 1: 0.1
It is important to maintain the proportions, otherwise the mixture will turn out incorrectly, it will not lie on the wall in a dense layer
Why is it prohibited to heat an undried stove?
A large amount of moisture contained in the structure, when heated, can lead to deformation of the masonry, up to the loss of individual elements, as well as cracking of bricks and cement mixture. This will negate all the efforts of the stove maker; the stove will need to be rebuilt in a new way.
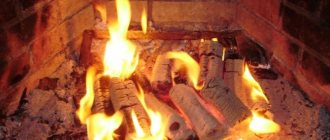
Possible cracks
Even after repairing the furnace, if it is not heated and dried properly, carbon monoxide may enter the living space. The culprit will again be moisture, which, with intense evaporation, forms microscopic channels and cracks through which dangerous carbon monoxide and smoke will enter the home.
How can I speed up the drying process?
It is better not to force the natural drying process; the stove should release maximum moisture naturally.
But, there are some tricks that increase the evaporation of water from the structure:
- It is recommended to use a fan heater, directing the air flow into the combustion chamber.
- It is possible to use a powerful incandescent lamp of 200 - 250 watts; it is also placed in the firebox, after which it turns on and slowly heats the air inside all compartments of the furnace.
To intensify drying by heating, the stove is ignited 3-4 times a day, adding a small amount of quick-burning firewood.
It is important that the exhaust dampers are half open and the access of fresh air to the combustion area is closed. After the wood has completely burned out, close the dampers and open the stove door. You can completely dry the stove after laying it after 5–7 days of such procedures.
Useful tips
Drying the stove is accompanied by ignition of the fuel. You will have to deal with this process every time, so prepare in advance for the specific features of your design. It is known that two identically built stoves can melt differently.
Before you force dry the device, you need to make sure that there is draft in the chimney. To do this, a tourniquet is made from newspaper and set on fire. The flame should deflect towards the pipe. With this maneuver we also achieve heating of the air in the pipe, so use this method every time you light the stove.
There are certain restrictions on how to dry the stove, for example, in bad weather it is better to abandon this idea. The total time for one cycle should be about 3 hours. By drying, you have not protected the device from mechanical damage.
Cracks in the masonry can also form if the structure is not treated carefully enough. The firewood must be stacked carefully to avoid hitting the walls of the firebox. Remember safety at any stage of using the oven.
Signs that you can light the stove
The main indicator that the oven is completely dry is the absence of condensed moisture on the oven doors and the main valve 3 to 4 hours after all dampers and oven doors are completely closed.
There is another Siberian way to find out if the stove is completely dry:
- To do this, you need to open all the windows in the room, as well as all the doors and dampers in the oven.
- Afterwards, place a bucket of water near the stove.
- As soon as it completely evaporates, the oven is ready for full operation.
And the last way to finally make sure that the brick structure is completely dry is to test the kindling upon completion of forced drying.
After such kindling and burning of the wood, you should close all the dampers and monitor the condition of the seams. If no serious cracks have formed on them within 3 to 5 hours, then the oven is completely ready for full use.
Fuel types
In general, the Russian stove belongs to the category of solid fuel. Several types of resources can be used to kindle them:
- coal. The most effective is stone, but it is rarely used for private houses,
- peat. It burns well, but leaves behind a lot of ash and is not particularly efficient,
- pellets. Granules made from wood waste by hot pressing,
- eurowood. Essentially the same as pellets, but made in the form of bars.
All these types of fuel are environmentally friendly, they are convenient to use and are not too expensive. But the championship in the ranking is held by another resource, which from time immemorial has been used to maintain a fire in the hearth - wood.
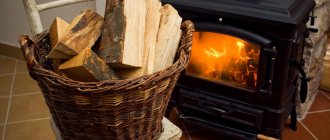
Logs are the optimal type of fuel for a Russian stove. They burn for quite a long time, giving off a large amount of heat. From an environmental point of view, there are no questions about them; firewood is absolutely harmless to the environment. This fuel is available almost everywhere and comes at a low price.
Of course, there are also disadvantages. For example, firewood has a fairly high level of humidity and produces a lot of smoke when burning. In addition, they take up a lot of space, so you have to allocate a separate area or room for storing supplies.
However, these disadvantages do not make firewood less popular. If you choose the right logs, you will get excellent, highly efficient fuel. There are several main selection criteria:
- humidity. Firewood for lighting the stove must be absolutely dry. If you purchase them somewhere, then pay attention to this point. If you harvest it yourself, then know that after cutting, the logs must lie for at least a year, only then will they dry to the required level. During drying, they need to be fully protected from possible getting wet. To do this, the woodpile is placed in a covered shed or under an outdoor shed. If you put wet logs in the firebox, they will, of course, still burn. But at the same time, the moisture contained in them will turn into steam, which will first cool the walls of the chimney and then settle on them in the form of condensation. As a result, under constant exposure to water, the stove will begin to collapse. Therefore, special attention must be paid to the dryness of the logs.
- density. One of the important qualities of firewood is the duration of combustion. The speed of this process depends on the density of the wood. The higher this indicator, the longer the fuel will burn. Accordingly, it will release much more heat than a log belonging to loose wood. The optimal wood for kindling is birch, oak, aspen and linden. They are the hardest. Moreover, each variety has individual beneficial qualities. For example, birch burns evenly and does not throw sparks, and also has the highest heat transfer of all the listed species. If you need to rid the chimney of soot, then alder firewood will help. Aspen burns quickly, leaving no coals behind. It is best to use oak that is approximately halfway through its life cycle. When burning, linden firewood releases many useful substances into the air; the optimal direction for its use is to kindle a sauna stove. Coniferous trees also have the same properties.
- size. In order for the logs to burn evenly, while providing high-quality heating of the oven walls, their thickness should be from 8 to 10 cm.
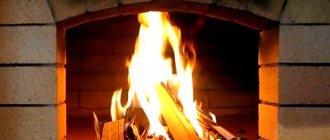
How to properly fire a new brick oven?
The first fire of a new brick stove begins with checking the presence of draft; to do this, just bring a lit match to the chimney, all dampers must be open.
Then follows:
- Make sure there is no condensation on the doors and internal bricks;
- Make sure there are no serious cracks in the dried mortar; thread-like fractures are allowed;
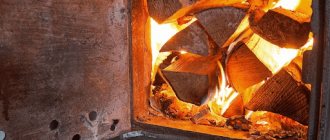
- Place the wood in the firebox to 2/3 of its volume. Ignite the stove using paper and wood chips; the use of gasoline and other flammable liquids is strictly prohibited;
- After the wood has completely burned, wait 15–20 minutes and close the exhaust damper.
Security measures
Brick stoves require careful care and mandatory compliance with safety regulations when working with them. It is imperative to remember that carbon monoxide is a dangerous and invisible killer, therefore, increased attention should be paid to the issues of ventilation and sealing of cement joints when using such devices.
Do not immediately close the chimney damper to avoid carbon monoxide poisoning. Before lighting, be sure to check the presence of draft and regularly clean the chimney from soot, and the ash chamber from wood combustion products.