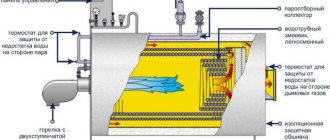
The cellar, as a place to store crops and other supplies, is considered an extremely useful element of any private household. In an underground structure, air circulation is difficult, so the question of how to make ventilation in the cellar arises before every owner who decides to equip this useful room. We will understand what methods of organizing ventilation exist, how to equip the system yourself, and what rules of arrangement must be taken into account.
Ventilation is an essential element of the basement floor Source vremenynet.ru
Why is ventilation needed?
A cellar (or underground) is considered a room fully adapted for storing food if the following conditions are maintained in it:
- Humidity . The optimal relative humidity level is 90%. Thanks to this level, vegetables that are stored in their natural form (potatoes, carrots) are well preserved. To prevent groundwater from entering the cellar, good waterproofing is important.
- Air temperature . It should be kept at the same level, from +2 to +4°C, regardless of the climatic conditions on the surface.
- Exclusion of natural light . It is no coincidence that the cellar has no windows. For the safety of products, it is important that they are not exposed to sunlight; The use of electric lighting is permitted.
- Ventilation . Maintains normal air exchange, providing air flow from the street.
Of all the conditions listed, ventilation may seem the most unnecessary. However, it largely depends on it whether the harvest will last until next year or only until mid-winter. If circulation is disrupted, the air in the cellar becomes damp (the current absolute humidity increases) and musty.
Ventilation device for a separate cellar Source saucyintruder.org
High humidity attracts mold fungi, colonies of which quickly grow and spoil everything that they can spoil. That’s why air circulation is so important, it normalizes humidity and provides access to fresh air. However, not all air exchange is beneficial; for example, a draft is a bad solution, as it violates the storage conditions of root crops.
That is why the cellar, although not a living space, needs a well-organized hood that helps maintain the required air parameters.
Optimal microclimate in the cellar
To preserve food, it is necessary to create a favorable microclimate in the basement. The humidity level of the room is of great importance.
Equipping a cellar with a ventilation system is undoubtedly important, but it is far from the only condition for maintaining optimal humidity and the required temperature conditions.
It is necessary to make a good waterproofing of the basement and periodically carry out a number of measures to drain it. There are several ways to get rid of excess dampness.
With high humidity, you need to ventilate the basement more often. This is especially true in the summer, and if natural ventilation is installed in the cellar.
To get rid of dampness and lower the humidity level in the basement, you must ventilate it by opening the entrance hatch
To dry the basement, you can use simple but quite effective methods. For example, ordinary coarse table salt and quicklime absorb moisture well. They can be brought into the basement and left there for a while.
Another old method that our grandmothers used is to place a lit candle near the exhaust pipe. The flame creates a strong draft in the air duct, thereby accelerating the circulation of air flow.
This method only works in a small cellar, and even in this case it will take several days to dry the room.
To prevent the candle from falling, it must be placed on a flat metal surface.
You can dry the cellar using an electric heater, heat gun or fan, which are installed in the middle of the room. But all these methods are quite expensive, because... will require large amounts of electricity.
Sometimes, on the contrary, it is necessary to increase the humidity in the cellar. In these cases, you can spray water using a spray bottle. A good method is to bring a box of wet sand into the basement or sprinkle the floor with sawdust; they must be periodically sprayed with water.
Types of ventilation systems
The solution to the question of how to properly make ventilation in the cellar depends on whether it can maintain optimal conditions for storing supplies. In order for the system to be effective, when arranging it, it is necessary to adhere to certain rules and carry out some calculations.
Otherwise, air circulation may not be sufficient, which will make the microclimate excessively humid and favorable for mold. Excessive circulation will make the air excessively dry, which will immediately affect the root crops in a negative way.
Ventilation diagram for the basement of a private house Source stroy-okey.ru
It's nice to know that there is a choice in arranging ventilation: it can be done in several ways, but it is important to take into account the size of the cellar and its characteristics.
Natural
Natural ventilation is possible thanks to the laws of physics. From the school course we know that warm air is lighter than cold air, so it always rises. Temperature differences lead to the movement of air masses.
Air exchange in the cellar exists because, when heated in the cellar (or in the underground), the air rushes to the ceiling, and its place is taken by heavier cold air from the street. Cold air masses displace heated ones, the cycle repeats, and adjustment is carried out independently (naturally).
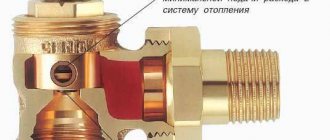
Air temperature is related to pressure. If we reformulate, during natural ventilation air masses move due to the difference in pressure at the outlet and entrance to the room. Systems with natural circulation are also called supply and exhaust systems; they are organized in two ways:
- Two-pipe system . Two separate pipes are installed, one works for air supply, the other for exhaust.
Drilling a hole on the facade for cellar ventilation Source metasold.com
- Scheme with one pipe . The internal space of the pipe is divided lengthwise by a partition; in fact, the supply and exhaust are located in one housing. This system is less effective than the previous version.
The main disadvantage of organizing air exchange naturally is that it only copes with ventilation of a small space. It is not advisable to arrange it in a large room.
Forced
Compared with natural ventilation, forced ventilation in the cellar (or in the basement of the house) copes with ventilation much more effectively. Air exchange occurs thanks to the following system design:
- The supply pipe , located near one of the walls, ends near the floor.
- The exhaust pipe , located on the opposite wall, is raised much higher.
- Fans . With their help, air is pumped in and out.
Forced supply and exhaust systems ensure air circulation in large cellars with ceilings two or more meters high. In addition to systems with fans, there are fully automated forced analogues.
The microclimate of the wine cellar is automatically regulated Source ideas.homechart.ru
The climate control system automatically regulates the microclimate in the room, maintaining the set temperature and humidity. It is resource-intensive, requires special organization of the room itself, and therefore is justified only in a wine cellar.
Do-it-yourself cellar ventilation: diagram and work process
Not a single basement room can do without a ventilation system, since in the absence of a constant flow of fresh air, dampness cannot be avoided. In basements and cellars, not only canned supplies are usually stored, but also fresh vegetables and fruits, which “breathe”, causing moisture to accumulate in the room. In addition, the walls can absorb dampness from the soil located on the outside if the waterproofing of the foundation and basement was poorly done during construction.
DIY cellar ventilation
Do-it-yourself cellar ventilation is quite simple. Moreover, it is possible to install and organize the operation of this constant air exchange system not only at the construction stage, but also in a finished storage facility.
How the system works
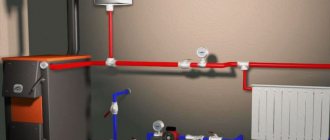
The operation of the ventilation system is based on the laws of physics, and if you carefully examine its circuit diagram, you can see that its structure is very simple and understandable.
The general principle of ventilation is extremely simple
There are two ventilation holes in the cellar, through one of which fresh air enters the basement, and through the second it is exhausted along with all fumes. But the system would not be effective enough if pipes of a certain diameter were not connected to the ventilation holes.
Also, the quality of ventilation highly depends on the correct location of the exhaust and supply pipes and on their elevation above the ground surface above the cellar.
Ventilation pipes can be installed in the walls of the basement if it is located under a house or garage, or through the ceiling if the cellar is located in the yard as a separate building.
Another important point when calculating and installing the system is the height of installation of the pipes from the basement floor and their discharge to the street, since too much cold air may enter the room, which will be dangerous for vegetables stored fresh in chests. You cannot make the holes too small, since the musty air will not leave the room completely, which means that the products stored in it will definitely begin to deteriorate.
Recommendations for cellar ventilation
Before you begin installing any type of ventilation system, you need to familiarize yourself with some recommendations that must be taken into account during design and construction work:
- It would be correct if the ventilation system begins to be laid during the construction of the cellar - in this case, channels are left in the masonry walls into which ventilation pipes are installed.
Of course, the best option is to install a ventilation system during the construction of the cellar.
In order to avoid guessing later where it is better to install the pipes, ventilation must be immediately included in the cellar design.
- The installed pipes must have the same diameter - this parameter will make air circulation uniform. If it is necessary to speed up the removal of stagnant air saturated with dampness, the exhaust pipe can be taken with a slightly larger diameter than the supply pipe. However, under no circumstances should you install an exhaust pipe with a diameter smaller than that of the supply pipe, since under such conditions air may begin to linger inside the room. This will negatively affect the products stored in the cellar, but the main danger is still different - it creates a certain threat to human health when descending into a gas-filled underground room.
- Never place both ventilation pipes next to each other, since in this case the room will not be well ventilated. They must be mounted on opposite walls or in opposite corners. This is done so that the fresh flow, before going outside, passes through the entire room and pushes the stagnant air to exit into the exhaust pipe.
- The exhaust pipe opening must be mounted near the ceiling, since the warmer exhaust air rushes upward. This location will contribute to constant air purification, without stagnation in the ceiling area, and therefore to good preservation of food.
- To ensure good draft, the ventilation pipe of the hood rises above the ridge or embankment above the ceiling of the cellar, at least 1500 mm.
- For the ventilation system, plastic pipes intended for sewerage are most often used. For small rooms this diameter is usually sufficient.
- If the cellar is located under a garage or under another utility room, then the entrance hatch can be used as an exhaust vent.
In this case, two doors are made, one insulated for winter, and the other in the form of a frame, with a small grille attached to it. The grate is necessary to prevent small rodents from sneaking into the basement.
The insulated hatch is removed in the summer for constant ventilation of the cellar. If the room above the basement is insulated, then ventilation sessions can be carried out in winter.
Option - cellar in the basement under the house
- When installing ventilation in a cellar located under a house or garage, you need to ensure that there are as few bends and turns in both the supply and exhaust pipes as possible. Ideally, it is better to achieve such an arrangement that the pipe is absolutely straight.
- The pipe along its entire length must have the same diameter, without expansions or contractions.
- On the street, the supply pipe, if it is located not high above the ground, must be covered with a mesh (grid) to protect the cellar from the penetration of rodents or other small animals and birds.
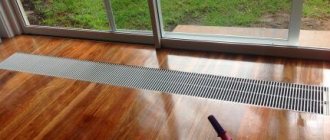
Supply pipe covered with a grill
- It is recommended to install dampers in both pipes that regulate the inflow and outflow of air, which are especially necessary in winter. They help control the flow of cold air in severe frosts and, accordingly, the outflow of warm air to maintain the necessary microclimate in the cellar.
Umbrella for the exhaust pipe head
- If the pipe heads are located strictly vertically, they must be protected from precipitation, dust and debris getting inside by installing a metal umbrella or deflector on top.
A deflector is more profitable, since it creates an artificial vacuum and increases thrust.
When using a deflector, a vacuum area is created around it, and this phenomenon helps to increase thrust.
- The section of the exhaust pipe located outdoors must be well insulated to avoid condensation during the cold season.
Types of cellar ventilation systems
There are two basic types of ventilation systems - natural and forced. And one or another option is chosen depending on the volume and layout of the basement.
Natural ventilation system
Natural ventilation is based on the difference in pressure and temperature indoors and outdoors. Effective operation largely depends on the correct location of the pipes. Thus, the supply opening should be located at a height of a maximum of 250 ÷ 300 mm from the floor, and the exhaust opening should be 100 ÷ 200 mm below the ceiling level. It is not permissible to place it even lower, otherwise the ceiling will begin to become damp.
This ventilation system may be clearly insufficient for a large cellar room, or if it consists of several rooms.
Video: Natural ventilation in the cellar under the garage
Forced ventilation system
The forced ventilation system has the same channels (pipes), but fans are built into them to create forced air movement.
In the simplest forced-type systems, the fan is installed in the exhaust duct. Thus, an artificial vacuum is created in the room, facilitating the active flow of fresh air into the cellar through the supply opening. The power of the selected fan will depend on the volume of the room.
Duct fan in casing
They do it differently - they install fans on both the supply and exhaust ducts. This can be true in voluminous, complexly configured basements. Here you will definitely need the help of a specialist to calculate the consistency of air intake and outlet, that is, the diameters of the channels and the power (performance) of the fans installed in them.
Video: example of homemade forced ventilation of a cellar
Calculation of ventilation duct diameters
For any type of ventilation, it is very important to correctly determine the diameters of the pipes. The calculation algorithms used by professional designers are very complex, and it makes no sense to present them in full. However, when installing ventilation in a small private cellar, you can use a simplified calculation method.
So, with some assumptions acceptable under these conditions, we can assume that for one square meter of cellar area, 26 square centimeters of cross-sectional area of the ventilation duct is required. So, as an example, you can estimate what pipe diameter will be needed for a cellar measuring 3 × 2 meters.
Finding the area of the room:
S = 3 × 2 = 6 m²
According to the indicated ratio, it will require a pipe with the following channel cross-sectional area:
T = 6 × 26 = 156 cm²
It remains to find the radius of the pipe:
R = √ (T / π) = √ (156 / 3.14) ≈ 7.05 cm
Therefore, the diameter of the supply pipe is:
Dп ≈ 14 cm = 140 mm.
Provided that only supply ventilation is installed in the basement, and the hatch will play the role of exhaust, then you can slightly increase the cross-section of the inlet channel by installing a pipe with a diameter of 150 mm.
To guarantee air exchange, it is customary to install a pipe on the exhaust duct with a diameter 10 ÷ 15% larger than at the inlet. In the example under consideration, you can install on the exhaust duct:
Dв = Dп + 15% = 140 + 21 ≈ 160 mm
Ventilation installation
Having carried out the necessary calculations, taking into account all the nuances described above, you can proceed to the installation of ventilation.
Approximate location of supply and exhaust pipes
- If the ventilation system is installed after the construction of the cellar, then a hole must be made in its ceiling for the air duct to pass through.
- Then, a pipe is lowered into the cellar through the hole, which will work for the hood; it is fixed under the ceiling, no more than 100 ÷ 150 mm below its surface.
- On the street, the exhaust pipe is raised to a height of at least 1500 mm above the ground or above the roof surface.
The supply pipe is always located below
- In the opposite corner of the cellar, a hole is also made in the ceiling or wall, and a supply pipe is installed and secured into it, which is lowered low to the floor. It should be located no lower than 200 mm from the floor and no higher than 500 mm.
- On the street, the supply pipe should not be made very high. If it comes out through the ceiling, it is enough to raise it by 200 ÷ 250 mm. It should be taken into account that the lower the intake opening of the supply pipe is located, the higher the difference in pressure at the inlet and outlet, the stronger the natural draft will be, and therefore the flow of air.
- If the supply pipe is discharged through the wall, then a ventilation grille or plastic deflector is placed on it.
Possible location of the supply pipe
- In the case when the installation of ventilation for the cellar is carried out in a house where a fireplace or stove is installed, it is recommended to raise the exhaust pipe next to the chimney, as this activates the removal of exhaust air from the basement due to the large temperature difference.
The dampers on the pipes will help you accurately regulate the ventilation process.
- It is recommended to install dampers on the pipes inside the cellar to regulate the strength of air flows. By opening them to the required light in the room, the intensity of circulation, humidity and air temperature are regulated. It is the presence of a damper and proper regulation of the microclimate in the cellar that will determine whether the workpieces will be kept in proper condition for a long time.
After the system is assembled, be sure to check it for normal traction.
- To check the air flow pressure at the inlet, you need to attach a piece of thin paper to the supply pipe. If it begins to clearly sway, it means that the air flow rate is good.
- Another way to check the operation of the system is to direct the smoke that may come from burning paper in a metal bucket. A couple of old newspapers will be enough, which needs to be lit, allowed to burn to half, and then extinguished until smoldering.
Additional actions to maintain a normal microclimate
To maintain a comfortable microclimate for storing food in the cellar, you should periodically carry out the following actions:
In order to help reduce humidity in the basement, it is necessary to ventilate it regularly. So, in the summer, all doors or hatches are opened and the dampers on the openings are fully opened. The hot summer wind will do its job - dry and ventilate the cellar. Other, more effective methods for forced drying of the cellar will be described below.
There are times when it is necessary, on the contrary, to increase the humidity in the storage room. Then, in the cellar, use a spray bottle to spray water, sprinkle the floor with wet sawdust, or install a box filled with wet sand. Sawdust and sand are moistened with water as needed.
Drying the cellar
The process of drying the cellar can also be classified as ventilation measures, so you should also have a sufficient understanding of them. Moreover, there are several ways to perform this procedure.
As mentioned above, all drying processes are carried out in the summer, but it is additionally recommended to perform them one more time immediately before storing vegetables in the cellar.
If the room is very damp, then all items of “basement furniture” and boxes (chests) for storing vegetables should be removed from it. It is advisable to dry them in direct sunlight - their ultraviolet component will be an excellent “cure” for mold and mildew.
All doors and hatches open wide, and if a fan is installed in the basement, then it can also be turned on. Thus, the cellar should be ventilated for 3 ÷ 5 days, and this will become a preliminary preparation before the main drying activities.
The first method is boxes with a hygroscopic substance
During the drying process, sometimes you can get by with a very simple method. A box filled with quicklime or coarse table salt is brought into the cellar. These components are inexpensive, highly hygroscopic and perfectly absorb moisture. Not only that, they also disinfect the air and walls of the room.
The second method is the old method with a candle.
A very old, popular, extremely simple and affordable way of drying is to install a burning candle near the exhaust pipe. It must be installed in an iron container and on a stable stand.
A simple and effective way to dry - using a candle
The candle helps create more intense draft in the exhaust pipe, so the air circulation in the room accelerates, and its exchange occurs much more often than with normal ventilation mode.
In addition to a candle, a regular alcohol lamp with liquid or dry fuel can be used for the same purpose.
It will work just as well using dry alcohol.
Drying in this way continues for several days, depending on how humid the room is. The candle or fuel in the burner is replaced several times as necessary until the desired result is obtained.
The third method is a metal brazier
A more troublesome, but no less reliable way to quickly dry it is to use an improvised roasting pan, which can be made from a metal container, for example, from an old bucket.
Drying scheme using a homemade roaster
Several holes are made in it to increase draft, and then firewood is loaded into the container, preferably birch, as they can create a favorable disinfectant smoke.
You can create a more complex structure using a cast iron grate, which is installed on bricks placed at its corners. A bucket without a bottom is placed on top of the grate, into which firewood is also placed and set on fire. The advantage of this method is that the grate can become red-hot and then slowly cool, releasing heat into the room. At the same time, draft increases and, accordingly, air exchange accelerates.
The fire must burn continuously for at least 12 ÷ 14 hours, so you need to set aside a whole day for these procedures and prepare quite a lot of birch firewood.
Raising the brazier to reload firewood and lowering it through the hatch using a cable with a hook. The place for such an improvised “fenced fire” must be prepared in advance so that no preconditions for a fire are created.
The fourth method is the use of electric heaters
The method using electric heaters is not too troublesome. Any of the commercially available devices will be suitable for this purpose, but it is best to use convector or “wind-blown” models.
Electric heaters can help with drying, but it will be quite expensive
The heater is installed in the middle of the cellar so that the heat is distributed evenly throughout the entire area of the room.
When using this method, you need to fully understand that such a drying process is quite long and, therefore, expensive, so you need to immediately calculate your financial capabilities.
Drying the cellar with a powerful heat generator is quite popular, as this method is very effective. It is even used to dry out the basements of houses that have survived a flood.
A heat gun will be more effective
Due to thermal radiation and the powerful flow created by the fan, the cellar dries out quickly enough. The device also runs on electricity, but such drying will be cheaper, as it will happen much faster. However, you can try to find a heat gun that also runs on propane.
Prices for popular models of electric heaters
Electric heaters
Fifth method - a regular home fan
Since fans are found in almost every home, they are also often used to remove excess moisture from the cellar. The fan is installed in the center of the cellar and turned on for three to five days. In this case, all existing openings, doors or hatches must be wide open.
The sixth method is a portable stove
Conventional potbelly stoves are also used for drying procedures in basements.
In this case, the chimney pipe of the stove is brought to the exhaust vent, and the potbelly stove is heated for three to five days. At the same time, air exchange in the cellar rapidly increases, which leads to effective drying of the room.
You can install a small potbelly stove in the cellar for drying time
If there is no exhaust pipe in the cellar, then this method does not make sense, since there will be a lot of smoke in the room, but the drying effect will be very small.
Waterproofing treatment of the cellar
After drying the cellar, in order to preserve the achieved state of the room for the longest possible time, it is recommended to cover the surfaces of the walls and floor with waterproofing compounds.
- If the walls are made of concrete, then deep penetration impregnation is used, which is used to treat the surfaces in several layers.
With each layer, it penetrates deep into the concrete slab, closing all the pores inside it, thus creating a waterproof but breathable surface.
- The dried cellar is also covered with roofing felt, which is an excellent waterproofing agent.
Waterproofing a basement floor with roofing felt
In this case, you can get the desired effect if the material is laid on a flat surface. Mastic is applied to it, which is then heated, and then roofing felt is glued to it, creating waterproof walls and floors.
- An excellent waterproofing environmentally friendly material is clay.
This method of waterproofing a room is called padding. The only requirement for natural material for flooring and walls is a high percentage of fat content.
Clay floor padding and grouting
— The process will require stones that will strengthen the cellar floor. They are poured onto its surface, then a solution of clay with the addition of sand is laid on top of them. This layer must be at least 100 ÷ 120 mm. The consistency of the clay solution should be quite thick.
— The clay is spread over the surface and compacted among the stones, creating a mixed coating.
— Having completely compacted the surface to an even state, a layer of coarse sand is poured onto it, the thickness of which should be 40 ÷ 60 mm. The sand is also compacted with a tamper - this makes the surface even denser. The remaining sand is then simply swept off the floor. If you want to achieve a neat, even surface, then the top is finally smoothed using a special grouting tool.
— Clay floors take a long time to dry, from 20 to 40 days, so this work needs to begin in early summer. Then the cellar will be fully ready for use in the fall.
- Earthen walls can also be waterproofed with clay. A chain-link mesh or ordinary soft wire is attached to them using small metal staples. Then a clay mortar is poured onto this base. When it dries, another layer is applied, which is leveled manually or using grout in a circular motion.
In addition to these waterproofing materials, others are used, but the ones listed above can be called the most affordable and safest for the room where food will be stored.
A ventilation device in the cellar is necessary, and it is better to think about it in advance by installing it during the construction of the storage facility. If the system is installed correctly, then serious and long-term drying processes can be avoided, since ordinary ventilation will be sufficient.
Video: how ventilation can be arranged in the cellar
Prices for ventilation units
Ventilation units
Natural or forced: tips for choosing
Designing and arranging proper ventilation in the cellar begins with choosing the type of ventilation, and here several points must be taken into account. Many cellars and basements simply do not need a forced system due to their relatively small size. If you provide them with excessive ventilation, the result can only be a worsening of the microclimate and storage conditions.
In large rooms, installing a forced ventilation system is a must if you want humidity and temperature to remain at the desired level. If you are in doubt which option to choose, a combined air exchange system can be the golden mean.
A large room needs forced ventilation Source comfortclub.ru
See also: Catalog of companies that specialize in engineering systems (heating, water supply, sewerage and others) and related work
It is important to understand that the functioning of natural ventilation is significantly influenced by external conditions: the climate characteristic of a given region, the duration of winter and summer, and the outside temperature.
It works best in winter, when the difference between outside and inside temperatures increases. The greater the difference, the better the air exchange, but it is important that it does not become excessive. When frosty air enters too actively, the cellar and all its contents can freeze. To prevent a catastrophe from occurring, it is necessary to monitor temperature fluctuations and, if it drops significantly, temporarily block the air supply.
In summer, the temperature difference becomes minimal, which leads to the cessation of air circulation. Therefore, a natural supply and exhaust ventilation system is not recommended for southern regions with hot and long summer periods. Here the optimal choice (even for a small cellar) would be a combined ventilation device.
The cellar may have a common ventilation system with the garage. Source garazhov.ru
If the room is small, it is permissible to limit yourself to one pipe, but divide it into two channels vertically, and provide a valve on each. Then it will simultaneously work for inflow and exhaust, and it will be possible to regulate the intensity of the flow using valves. To check the presence and strength of air flow, you can attach a sheet of paper to the opening of each channel.
Preparing the cellar for permanent use
The installation of ventilation in the basement intended for storing food does not end with installation work. To ensure a normal microclimate in the cellar, it is necessary to dry it well, check the efficiency of the system and follow certain rules during further operation.
Ways to dry a new room
Before you start drying the cellar, you need to check the efficiency of the installed system. This is due to the fact that moisture must be removed during drying and the easiest way to do this is through an exhaust pipe. To test, roll up an old newspaper and wait for it to burn about a quarter of the way through.
After this, extinguish it so that it continues to smolder. If the smoke from the newspaper is freely removed through the hood, then the system is working normally, if not, then you need to once again check the correctness of the calculations and the height of the outlet of the pipe head.
Drying should be carried out in the warm season, before storing food in the cellar for storage. The essence of common and accessible drying methods is to increase the indoor air temperature, which will provoke increased air exchange and removal of evaporated moisture through the hood.
Moisture-absorbing materials
It is possible to use hygroscopic substances, such as quicklime, calcined table salt or expensive technical silica gels that actively absorb moisture. These are very time-consuming methods and also require additional financial costs.
Flame at the entrance to the exhaust pipe
If you light a large candle or a simple alcohol lamp and bring it to the exhaust vent, the air will begin to heat up and the circulation will increase. Dry and warm air coming from the street will begin to warm up the cellar, actively absorb moisture and go outside. However, more than one candle is required and the process takes several days.
Using a Heat Source
Warming up the cellar room is much faster if you install a heat source of any type. This could be a brazier, a stove, an electric heater, or even a simple gas burner. The use of a flame makes it necessary to solve the problem of effective removal of combustion products, so they are usually lowered down on a suspension.
Drying using a broiler.
Electric heaters of any design are safer due to the absence of carbon monoxide, but will require payment for electricity. Therefore, the choice of heating method is yours. You can also read about the fight against dampness in the basement in this article.
Calculation of the required section
In many cases, a single-pipe hood turns out to be quite effective, so its installation (with subsequent testing) is technologically justified. Work on proper ventilation of the cellar begins with cross-section calculations. If you skip this step, then the pipe section will have to be chosen at random. You may simply not guess correctly, and then the air exchange will be disrupted.
Professional formula calculations for hooding include many variables; they are needed for complex forced ventilation systems, and are not always convenient. For the conditions of a small private cellar, a simplified calculation scheme is suitable. To correctly select the required pipe diameter, perform the following calculations:
- The cellar area is determined by multiplying its length and width.
Calculations for a small cellar Source metasold.com
- Calculate the total area of the ventilation openings, taking into account the fact that per 1 m² of area it is necessary to provide 26 cm² of exhaust duct (normative data). For example, with a room area of 6 m², we get 6x26 = 156 cm² - the total area of the channels (or one channel).
- The radius of the pipe is determined by the formula R=√S/π=√156/3.14=3.67 cm. Therefore, the cross-section will be 8 cm (the value of 7.34 cm is rounded up). For better functioning, the indicator is increased by 10-15%, that is, up to 9 cm.
How to determine the diameter of pipes?
The determining factor for the effectiveness of ventilation is the proportionality of the cross-section of the air duct to the area of the room where it is installed. Calculating the required pipe size is easy.
Experts advise adhering to the following rule in calculations: per 1 sq.m. basement space needs 26 sq.cm. sections.
It turns out that for every centimeter of pipe diameter there are 13 square meters. see sections. Based on this, you can calculate the required pipe diameter using the following formula:
(S cellar × 26) ÷ 13
For example, if the square footage ( S ) of the room is 8 sq.m., then it turns out that for the cellar it is necessary to purchase a pipe with a diameter of 16 cm.
(8×26) =208÷13=16 cm.
If single-pipe ventilation is installed in the cellar, then the diameter of the air duct should be larger. In this case, for a basement of this area it is recommended to use a pipe with a cross-section of 17 cm.
You may also be interested in the information on calculating the area of air ducts, discussed in our other article.
Selection of materials
If the cellar or basement has a small area, then installing one two-channel pipe would be optimal. For a free-standing cellar, you can use boards carefully matched to each other.
For manufacturing, lumber with a thickness of 3-4 cm and a width sufficient to build a box with a side of 18 cm is selected. A diagonal partition is installed inside, and a control valve is made for each channel. It is important to understand that the gaps between the boards significantly reduce the efficiency of air exchange. Therefore, it is necessary to take care of the tightness: coat the joining lines of the boards with molten bitumen.
Plastic ventilation pipe Source ytimg.com
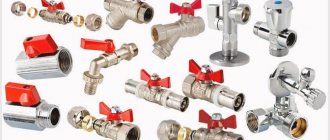
To organize ventilation in the basement or cellar (including two-pipe), round or square pipes made of the following materials are used:
- Asbestos-cement . Asbestos-cement pipes are convenient because they are long enough, and you don’t have to think about how to connect them correctly. The material has additional advantages: relatively light weight and affordable cost. The products are resistant to corrosion, are not afraid of frost and humidity fluctuations, and have a long service life.
- Plastic . They are made from different types of polymers and are suitable for installing hoods due to their low cost and light weight. Polymer pipes are chemically inert, do not rust, do not require cleaning, and are durable in use.
- Galvanized (metal) . Cast iron and steel pipes are galvanized, and it is preferable to use the second option, as it is lighter. Galvanization enhances corrosion resistance; The products themselves are relatively cheap and easy to install. During installation, it is important not to damage the galvanized layer, this will reduce the service life of the product.
Metal pipes for ventilation Source gidroguru.com
Pros and cons of ventilation pipes
Plastic pipes are considered the most popular material used for the construction of natural aeration structures. Their main advantage is their relatively low cost, which reduces the overall costs of the project. In addition, the positive aspects of plastic include low weight, high ductility, flexibility and resistance to temperature changes. However, despite obvious advantages, they also have obvious disadvantages associated with low strength and instability to mechanical stress.
Asbestos-cement pipes are considered no less popular among builders. Their strength exceeds that of plastic products, which expands the scope of application of the material. In addition, its cost is also quite economical, which makes it possible to get an effective model for relatively little money. However, this is where the advantages of asbestos cement end. Its negative aspects include weight and bulkiness, lack of adapters, the need for additional reinforcement of fasteners and sealing of joints.
Galvanization is the most popular material for the construction of ventilation systems made of two pipes. The material is not subject to corrosion, is durable, accessible, does not deform, is resistant to thermal influences and has a wide range of products. Highways of various shapes, lengths and directions are created from galvanized metal, without worrying about their tightness and functionality. A relative disadvantage of the material is the cost, which exceeds other products, affecting the cost-effectiveness of the project.
How to install air ducts correctly
In the case of a large room, you will need to install two air ducts. Regardless of whether you are going to arrange ventilation for the basement of a private house, or a separate cellar, you must adhere to the following recommendations:
- Air exchange will be uniform if the pipes have the same cross-section. If you want the air to be exhausted faster, choose an exhaust pipe with a slightly larger diameter (the total cross-section should not change).
- The pipes are installed at the maximum distance from each other, that is, on opposite walls. The greater the distance, the better the room is ventilated. It is important for the process that the pipes have no bends or turns.
- The exhaust pipe is installed so that its lower edge is located under the ceiling (not lower than 1.5 m from the floor). Then all the warm air will be forced out without stagnation.
Pipe insulation with mineral wool Source ytimg.com
Premises requirements
To keep the cellar warm, dry and safe, you must comply with certain requirements for the following parameters:
- location - you cannot build a cellar in a low-lying area, next to a compost heap, a well, a barn where animals are raised, fuels and lubricants or toxic substances are stored;
- depth - the bottom of the pit should rise 0.5 m from the groundwater level;
- thermal insulation - if the cellar is earthen, a thick layer of earth plays the role of insulation, expanded clay, foam plastic, a mixture of clay with sawdust, slag, etc. are also used;
- air exchange - provided by supply and exhaust ventilation, designed to replace the entire volume of air over a certain period of time;
- area - calculated based on the amount of stored stocks, taking into account their layout on shelves, racks, containers;
- layout - the pit can be of any shape, the optimal height of the room is 1.8-2.2 m, the entrance is equipped with an insulated hatch or door, and a strong, stable staircase.
All materials for constructing a cellar must be moisture-resistant and safe, and not emit harmful substances. Wooden parts are treated against rotting, metal parts - against corrosion.
Video description
About the ventilation of the cellar with your own hands in the following video:
- If ventilation is installed in the house, the pipe is installed on the roof, 1.5 m above the ridge. To avoid the formation and accumulation of condensation (frost in winter), the part of the hood that runs along the street is insulated. The easiest way is to put a larger diameter pipe on top, and lay a layer of insulating material (optional) between them.
- The upper opening of the hood is covered with a fine mesh. If you wish, you can install a deflector. It will not only protect the ventilation duct, but also provide constant traction.
- The supply channel is placed so that its lower end is located 40-50 cm from the floor. The minimum difference between the heights of the channel openings is 1 m.
- If cellar ventilation is installed in a private house, the pipe is also led to the roof. It is important to take into account that the supply opening is raised above the roof only 20-25 cm in order to maintain the required minimum difference in height with the exhaust duct.
- If the supply channel is discharged through the wall, it is covered from the outside with a grille that protects the room from debris and small animals.
- Both pipes are equipped with dampers to regulate air flow.
Exhaust pipe for cellar ventilation Source homele.ru
Adjusting the system in winter
*
The penetration of frosty air into the cellar causes the temperature to drop below 0 degrees. Similar values have a negative impact on the safety of fresh products and preservation. Maintaining an optimal temperature of +2+6 degrees and preventing it from decreasing is an important task, which can be solved with the help of ventilation. However, if the cellar freezes due to insufficient thermal insulation, it will not be possible to solve the problem by restricting the incoming air. It is possible to increase the temperature inside the cellar by reducing the intensity of circulation. To do this, special plugs are installed at the inlet, allowing you to regulate the flow of incoming air or completely limit them.
Pipe freezing in winter
Installation of natural ventilation
Installation of the ventilation system in a separate cellar is carried out in the following order:
- Before starting work, parameters are calculated based on the area of the room.
- Based on data on the throughput of ventilation ducts, pipes of the required diameter and suitable material (metal or plastic) are selected. Purchase pipe clamps, grilles or deflectors.
- Choose a place to install the exhaust and supply pipes (in different corners).
- Holes of the required diameter are made and pipes are installed in them, taking into account the optimal relative location. For fixation, use foam or cement mortar.
After installation, the quality of the resulting ventilation is checked. The easiest way to do this is to use a piece of medium-weight paper: it will show whether the influx and draft are working in the system. Another experiment can be done with a lit match. If it burns evenly and brightly, this indicates good air circulation; if the flame quickly dies out, the hood cannot cope, and carbon dioxide accumulates in the room.
Mesh on the top hole of the hood Source sladkiyson.net
Cellar under the house or in the garage: ventilation features
A free-standing basement does not pose a danger to surrounding buildings, but if the cellar is in a house or garage, precautions must be taken. Moreover, they concern not only the safety of the above-ground structures themselves, but also the supplies directly stored in the cellar.
A cellar in the house is convenient and practical. It is installed under non-residential premises and with maximum insulation to prevent the penetration of excess heat into the pit, and from there humid air into the house. It is not allowed to combine basement ventilation with home ventilation, only a separate riser.
Construction of a cellar under a residential building
The cellar in the garage requires double attention. Ventilation should solve the problem of not only removing air from the storage, but also sufficient air exchange in the room for the car. The interpenetration of gases can cause the accumulation of toxic substances in food products, and excessive humidity can cause accelerated rotting of the metal parts of the machine. Ventilation ducts should also not be combined to avoid air mixing.
Setting up a cellar in the garage
The supply pipe in basements should not be placed directly above the vegetables, as this will cause them to freeze in winter frosts. You can organize a primitive mixing chamber and place a small partition in the path of cold air so that it warms up and mixes with warm air.
Installation of combined and forced ventilation
Combined ventilation is arranged according to the same principle as natural ventilation, using a supply and exhaust pipe. The difference is that a fan is additionally installed in the exhaust duct. It will help remove stagnant air, and clean air from the street will be supplied automatically.
If the room has a large area, the fan is also installed in the supply duct. Such forced ventilation in the basement does a good job of quickly drying the room, but at the same time increases energy consumption.
Fans with a power of up to 100 W are chosen for installation. Since the basement is a place with high humidity levels, it is better to use low voltage for power supply. Two types of devices are suitable for installation:
- Duct . Such fans are economical in operation; they are mounted at any point in the pipe.
- Axial . They require much more energy, but they are more powerful and move air more efficiently. It is recommended to install an axial fan in combination with a check valve that blocks the flow of air from the street.
Air throttle valve for round air ducts Source panoramavent.com
Pipes for basement ventilation
When installing ventilation systems in apartments and private houses, galvanized, enameled and plastic PVC ducts are used. But the listed options are not suitable for cellars - galvanized air ducts will quickly rust from moisture, and enameled steel and PVC are expensive.
On the left in the photo is an exhaust air duct from an internal sewer pipe, on the right is an inflow from a PVC pipeline
Supply and exhaust shafts in basements are made of inexpensive and moisture-resistant materials:
- from sewer pipes for internal wiring - gray polypropylene;
- the same, for the external gasket - orange polyvinyl chloride;
- asbestos-cement pipelines.
Addition. If the farm has a pipe Ø100-150 mm made of black steel, feel free to use it when arranging the exhaust/supply. The underground section of the canal should be covered with bitumen mastic, the outer part should be painted 2 times with any resistant paint, for example, PF or NTs brand.
The most profitable and easy-to-install option is a sewer pipe for ventilation made of gray polypropylene. The material is cheap, lightweight, resistant to any chemical influences. An additional advantage is the presence of ready-made shaped elements connected to straight sections into a socket. The air duct is attached to the walls with standard clamps.
Asbestos pipes outperform sewer pipes in price, but lose in ease of installation. The pipelines are quite heavy, there are no shaped parts - the channel turns will have to be made from scrap materials. For a brief overview of various ventilation ducts, watch the video:
Briefly about the main thing
Ventilation is as important a part of the cellar arrangement as hydro- and thermal insulation. A poorly designed ventilation system will not cope with the job, which will result in spoilage of supplies. Air circulation for underground ventilation is organized in two ways: natural and forced (mechanical).
The choice of a suitable system (pipe diameter) largely depends on the area of the room. You should not install one pipe in a spacious cellar (or basement); two channels will provide the required level of air circulation. If natural circulation is weak, it is made combined or completely forced, installing one or two fans.
Combined ventilation: step-by-step instructions for installing a duct fan
To make the system work more efficiently, a duct fan is mounted into the pipe or at its end. Installing it is simple, you can do it yourself without any problems. You will need the fan itself, mounting brackets, which are usually included in the kit, and fasteners suitable for this type of wall. It is not recommended to use the device without firmly fixing it to the wall. When the engine operates and air moves in the channel, vibrations occur, which can lead to weakening of all components of the system.
First, you need to make a gap in the air duct equal in length to the dimensions of the fan. If the installation is carried out sequentially, the section of pipe adjacent to the equipment is not rigidly fixed to the wall so that further manipulations can be done.
Couplings or clamps are used to connect the fan to the air duct. The units must be as tight as possible so that there is no access to air from outside, except for the channel. Then the efficiency of the device is maximum.
You need to monitor the direction of the air supply. If the fan is installed incorrectly, instead of exhaust, pressure will follow, that is, the system will not work.
Holes are drilled in the wall and anchors are installed. The fan housing has mounting perforations that can be used to secure the device.
Pipes are supplied to the supply and outlet and connected to the equipment with clamps.
This is what the finished assembly looks like
If the diameters do not match, adapters are used. The power connection is made according to the instructions for the device. When performing electrical installation work, safety precautions must be strictly observed.
Waterproofing treatment
After the cellar is completely dry, waterproofing treatment is carried out on the floor and walls. For this purpose, special protective compounds are used. For concrete walls, it is optimal to use impregnations with structural penetration. They are applied in 3-4 layers. The consistency will close the pores in the structure of the base, thereby creating a waterproof material that can “breathe”.
The dried basement is often covered with a layer of roofing felt. Despite its availability, this is one of the best waterproofing agents
It is very important to lay the roofing material on a completely flat base. The floor surface is pre-treated with a layer of mastic, on which a protective layer is laid
Environmentally friendly and absolutely safe material – natural clay. It has also proven itself excellent as waterproofing. The process itself comes down to the so-called stuffing of the material. A layer of stones is first poured onto the floor of the cellar, due to which the base is strengthened. A solution of clay and sand (layer height from 10 to 12 cm) is brought to a thick consistency and evenly distributed over the floor surface, simultaneously compacting the composition between the stones. The upper part is covered with coarse sand - from 4 to 6 cm. Due to this, the surface is compacted. A floor with clay waterproofing takes at least 30 days to dry.
Fill the floor with clay
Cellar waterproofing
Ventilation in the cellar is an important component of effective air exchange. It is better to arrange it at the stage of designing the room. In this case, a huge number of problems will be avoided.
Thermal insulation of pipes from condensate
Drops of water appear only on the surface of household pipelines through which cold liquid flows (drinking water and sewage). Moisture present in the indoor atmosphere condenses on cold pipes due to the temperature difference between their surface and the air.
The colder the pipes, the more saturated the air is with moisture, the more active the process of water condensation occurs.
If cold water flows through the pipe, condensation will collect on it. Each such pipe must be covered with thermal insulation
The temperature difference between the air and the surface of cold water supply pipes in private homes is usually small. After all, when households infrequently consume cold water, there is no movement of it through the pipes, so the temperatures of the home atmosphere and the pipeline are almost equalized.
But in a multi-storey building, residential or office, cold water is used almost continuously and the pipe is constantly cold.
The simplest way to combat condensation on pipes is to equalize the temperatures of the pipes and the atmosphere. It is necessary to cover the cold pipeline with steam and heat insulating material along its entire length.
Condensation collects on a cold pipe, regardless of what it is made of. Polymers, ferrous metals, cast iron or copper – it doesn’t matter. All “cold” communication pipes will have to be insulated!
It is not difficult to isolate water pipes from the effects of condensation and moisture suspended in the air. All you need is a LDPE foam tube, a wallpaper knife and reinforced tape
A tubular heat insulator made of foamed LDPE will prevent contact of a cold pipe with air. The wall of the heat-insulating “tube” is at least 30 mm. The diameter of the tubular insulation is chosen slightly larger than that of the pipeline insulated from atmospheric humidity. It’s easy to put on the insulation – cut it to length, then cover the pipe with it.
Immediately after sealing the pipeline with a heat insulator, it is necessary to wrap it on top with reinforced pipe tape. For maximum thermal insulation and greater attractiveness, wrapping with foil tape (aluminum) is carried out.
Shut-off valves and complexly curved sections of a cold pipeline that cannot be covered with tubular insulation are wrapped with tape in several layers.
Calculation of air exchange in the basement
Before searching for ventilation equipment and planning the location of ventilation ducts in the basement, it is necessary to determine the air exchange needs. In a simplified format, i.e. Without taking into account the possible content of harmful substances in the atmosphere of the basement, the air exchange in it is calculated using the formula:
L=Vpodv • Kр
Wherein:
- L – estimated air exchange requirement, m3/h;
- Vbasement – volume of the basement, m3;
- Kр – minimum air exchange rate, 1/h (see below).
The resulting air exchange value will allow you to determine the power characteristics of the basement forced ventilation system.
The air volume of the basement is calculated by multiplying the height, width and length
However, to calculate the formula, data on the air volume of the room and the air exchange rate are required.
The first parameter is calculated like this:
Vsub=A•B•H
Where:
- A – basement length;
- B – basement width;
- H – basement height.
To determine the volume of a room in cubic meters, the results of measurements of its width, length and height are converted into meters. For example, for a basement 5 m wide, 20 m long and 2.7 m high, the volume will be 5 • 20 • 2.7 = 270 m3.
The air exchange needs of a given room directly depend on the number of people in it. The degree of physical activity of visitors is also taken into account
For spacious basements, the minimum air exchange rate Kp is determined based on the needs of one person for fresh (supply) air per hour. The table shows the standard human needs for air exchange depending on the use of a given room.
Air exchange can also be calculated by the number of people who will be (for example, working) in the basement:
L=Lperson•Nl
Where:
- Lperson – air exchange rate for one person, m3/h•person;
- Nl – estimated number of people in the basement.
The standards state that a person needs 20-25 m3/h of supply air during low physical activity, 45 m3/h when performing simple physical work, and 60 m3/h during high physical activity.
Calculation of ventilation network resistance
The higher the speed of air movement in the ventilation duct, the higher the resistance to the movement of air masses in the ventilation complex. This unpleasant phenomenon is called “loss of pressure.”
If the cross-section of the ventilation air ducts is gradually increased, it will be possible to achieve a stable air speed along its entire length. At the same time, the resistance to air movement will not increase
The ventilation unit must develop an air pressure sufficient to cope with the resistance of the air distribution network. This is the only way to achieve the required air flow in the ventilation system.
The speed of air moving through the ventilation ducts is determined by the formula:
V=L/(3600•S)
Wherein:
- V – design speed of pumping air masses, m3/h;
- S – cross-sectional area of the air duct, m2;
- L – required air flow, m3/h.
The choice of the optimal fan model for a ventilation system should be made by comparing two parameters - the static pressure developed by the ventilation unit and the calculated pressure loss in the system.
By placing the ventilation unit in the center of a branched air duct system, it will be possible to stabilize the air supply speed along its entire length
Pressure losses in an extended ventilation complex of complex architecture are determined by the summation of resistance to air movement in its curved sections and stacked elements:
- in the check valve;
- in noise suppressors;
- in diffusers;
- in fine filters;
- in other equipment.
There is no need to independently calculate the pressure loss in each such “obstacle”. It is enough to use pressure loss graphs in relation to air flow, offered by manufacturers of ventilation ducts and related equipment.
However, when calculating a ventilation complex of a simplified design (without prefabricated elements), it is permissible to use typical pressure loss values. For example, in basements with an area of 50-150 m2, the resistance losses of air ducts will be about 70-100 Pa.
Calculation of air exchange taking into account heat and moisture
If it is necessary to calculate air exchange, taking into account the elimination of excess heat, the formula is used:
L=Q/(p•Cр•(tу-tп))
Wherein:
- p – air density (at t 20 °C equal to 1.205 kg/m3);
- Cр – heat capacity of air (at t 20°C equals 1.005 kJ/(kg•K));
- Q – volume of heat released into the basement, kW;
- tу – temperature of air removed from the room, °C;
- tп – supply air temperature, °С.
The need to take into account the heat eliminated during ventilation is necessary to maintain a certain temperature balance in the basement atmosphere.
Gyms are often located in the basements of private houses. In this option for using the basement, complete air exchange is especially important.
Simultaneously with the removal of air, the process of air exchange removes moisture released into it by various moisture-containing objects (including people). Formula for calculating air exchange taking into account moisture release:
L=D/((dу-dп)•p)
Wherein:
- D – amount of moisture released during air exchange, g/h;
- dу – moisture content in the removed air, g water/kg air;
- dп – moisture content in the supply air, g water/kg air;
- p – air density (at t 20°C it is 1.205 kg/m3).
Air exchange, including the release of moisture, is calculated for objects with high humidity (for example, swimming pools). Also, the release of moisture is taken into account for basements visited by people for the purpose of physical exercise (for example, a gym).
Consistently high air humidity will significantly complicate the operation of forced ventilation in the basement. Ventilation will need to be supplemented with filters to collect condensed moisture.