There are two ways to avoid heat loss through the ceiling: insulate either the roof or the ceiling. A lot of attention is paid to roof insulation, which is understandable: in this way attic spaces are insulated, which, with due diligence, become residential. They are usually called an attic, although this does not always accurately reflect the essence of things.
The ceiling insulation is located in the shadow of the roof. The editors of the StroyGuru website decided to rectify the situation at least a little and prepared a number of materials on insulating the ceiling with different types of insulation. In the work below we will talk about how ceiling insulation with expanded clay is carried out, how effective it is in terms of heat conservation and justified from an economic point of view.
Pros and cons, material characteristics
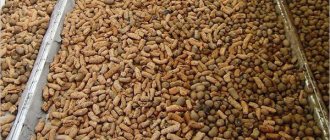
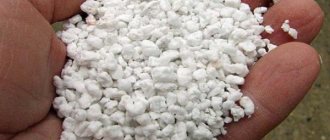
Expanded clay is a loose type of insulation. It is produced by firing low-melting clays or shale in a rotating drum. At the exit from the furnace, several fractions of ceramic pellets are obtained.
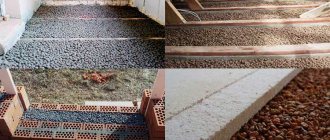
Types of expanded clay.
Depending on the size and shape of the granules, expanded clay is divided into:
- sand - grain diameter does not exceed 5 mm;
- gravel (not to be confused with quarry gravel) - round granules from 0.5 to 4 cm;
- crushed stone - irregularly shaped pellets measuring 5-10 mm.
In turn, gravel is divided into fractions:
- fine - granule size 5-10 mm;
- average - 10-20 mm;
- large - 20-40 mm.
Advantages and disadvantages
The steady popularity of expanded clay among consumers is explained by its many advantages. Among the advantages :
- relatively low price per m3;
- long service life - 40-60 years;
- fire resistance (class NG);
- resistance to temperature changes;
- high frost resistance;
- light weight of granules;
- Possibility of use in cement mortars;
- environmental Safety;
- biological resistance - does not serve as a basis for the proliferation of fungus and mold;
- is not a rodent habitat;
- simple and convenient installation - all work can be done with your own hands.
The disadvantages include :
- high level of water absorption - 15-25% of weight;
- large thickness of the thermal insulation layer;
- dust formation during insulation work.
When insulating the ceiling with expanded clay, the pros and cons require additional comments and explanations. All this was done in the work “Expanded clay as insulation.”
Characteristics of expanded clay
The physical and technical characteristics of expanded clay depend on the size of the granules. Moreover, they differ greatly from each other in different sources, which is caused by the measurement technique and the type of expanded clay taken for analysis: immediately after firing (absolutely dry) or lying in a warehouse for some time (absorbing moisture from the air). Average data can be viewed here.
Table 1, for comparison purposes, shows the results of testing expanded clay granules of the JSC Expanded Clay Gravel Plant Novolukoml immediately after firing.
Table 1.
| Indicators\Granule size | 10-20 mm | 5-10 mm | 0.5 mm |
| Density, kg/m3 | 289-370 | 300-400 | 500-700 |
| Compressive strength mPa | 1,0-1,8 | 1,2-2,0 | 3,0-4,0 |
| Number of granules with a different size, % | 4 | 8 | 0 |
| Weight loss after 20 freezing cycles, % | 0,4-2,0 | 0,2-1,2 | Not regulated |
| Percentage of crushed granules, % | 3-10 | 3-10 | No |
| Thermal conductivity, W/(m×°K). | 0.0912 | 0.0912 | 0.11 |
Tiled floor in the sink of a wooden bathhouse
The technology, in fact, differs only at the very end - it is necessary to form a slope towards the ladder. And so, everything is the same. The bottom of the pit is compacted, crushed stone is laid out in layers, and compacted. Next, you can make a slab with a strength of M150 and a thickness of 3.5-4 cm, or pour crushed stone with lean concrete. The second option is more economical.
How to make a tiled floor in a washroom
We lay expanded polystyrene in two layers. The slabs of the second layer overlap the seams of the first. This is for better thermal insulation. The first layer slabs can be attached to the base with long nails with plastic heads. The sheets are glued together with tape, you can foam the seams with foam, cut off the excess and lay out the second layer.
The floor in the shower also needs to be insulated
Next, spread a layer of PVC film on the polystyrene foam. This, again, is to prevent the solution from flowing. We roll out a damper tape around the perimeter of the room, lay out reinforcement or reinforcing mesh, set up beacons (don’t forget to form a slight slope towards the ladder) and fill in the screed. Once the concrete has hardened sufficiently, the tiles can be laid.
Is it possible to lay tiles if the floor is made with joists? Quite. Again, there are options. You can lay plywood on the subfloor (don’t forget about the slope). Or maybe not plywood, but slate sheets. It is even preferable, since their thermal expansion with tiles is closer than with plywood. Then you can lay the tiles using a special tile adhesive. Special - this is for complex unstable foundations. It is expensive, but the cost of preparatory layers is less.
Still, in wet areas there is nothing better than tiles
You can also pour screed onto the plywood and lay tiles on it. But this makes sense if you are using water heating for the floor from heating or from a warm water tank. If it is electric, then it can be laid directly on plywood.
Required materials and tools
To insulate the ceiling with expanded clay you will need:
- expanded clay of different fractions;
- vapor barrier film (type B) or roofing felt;
- vapor barrier membrane (type A or AM);
- timber for laying logs for sealing the insulating layer (not required if the ceiling is hemmed to wooden beams from below);
- antiseptic for treating wooden structures;
- flame retardants - wood fire protection is increasingly used in private construction;
- tape or specialized adhesive tape for sealing seams;
- a thin metal rod for measuring the thickness of the backfill;
- board or rule for leveling expanded clay;
- construction knife;
- construction stapler;
- roulette;
- Chipboard, OSB, plywood for laying over beams or joists for the final floor covering when insulating the attic;
- glass wool or polyurethane foam for sealing cracks in the wall and at the junction of the ceiling and the wall.
Which expanded clay to choose for ceiling insulation
The best thermal insulation properties of coarse gravel granules. However, this does not mean at all that the insulating layer of expanded clay of this fraction has low thermal conductivity. This happens due to the fact that such backfill is not compacted. Therefore, it seems more rational to use smaller fractions of expanded clay.
Through observations and thermal measurements, it was established that the best result is obtained by a layer of expanded clay consisting of 60-70% granules of small (0.5-1.0 cm) and medium (1.0-2.0 cm) fractions with the addition of expanded clay sand with a diameter of 2-3 mm. In this case, the sand is poured in first - it forms a cushion for backfilling the main insulating layer. Some experts approach the problem differently: they believe that regardless of the percentage ratio between gravel and sand, the latter should form a bedding layer 3-4 cm thick.
Calculation of the required layer thickness
It will not be possible to independently calculate what layer of expanded clay is needed to insulate the ceiling. Very complex formulas. Finding an online calculator is difficult, but possible. One of them is presented here.
Builders with experience do not do calculations, but use experience proven over the years: for a wooden house with a ceiling made of pine or spruce, a layer of expanded clay is poured at least 40 cm, for buildings with walls made of another material and concrete floors - at least 30 cm. The figures are given for the regions of central Russia.
For the north of the country, a backfill of at least 50 cm is needed, for the southern regions - at least 20 cm. Let us note in passing that a layer of expanded clay less than 20 cm does not retain heat at all. This is about the same as going outside in 40oC frost in socks, shorts and a T-shirt.
Calculation of material quantity
The amount of expanded clay required is calculated by the formula: V = S x T x 1.2 , where:
- V is the required volume of expanded clay;
- S is the area of the insulated surface;
- T—backfill thickness:
- 1.2 - correction factor for material shrinkage.
Since expanded clay is sold in bags, the resulting volume of expanded clay is divided by the capacity of the bag and rounded up, as a result of which you can see how much ceramic granules to buy.
Laying features
Beginners are often lost in the question of what layer of expanded clay gravel is required to reliably insulate walls and ceilings, and what additional elements are needed to create a heat-insulating “cushion.”
It is recommended to pour a thick layer of large expanded clay for complete insulation, but taking into account the total load on the ceiling. In cold regions, the height of the buried gravel reaches half a meter, and, despite the insignificant mass of the granules, the insulation makes the structure heavier.
Gravel sand is poured under the main layer, and in addition, two types of insulation are laid under the bulk material and on top of it: steam and hydro. To reduce the cost of the project, polyethylene or roofing felt is used, but the vapor barrier is broken, since the film creates a greenhouse effect, and condensation accumulates if the room is poorly ventilated.
When planning to pour only one fraction, spread the membrane fabric, choose which optimal layer is needed, and scatter the expanded clay to the height required for insulation, evenly distributing it over the surface of the ceiling.
To enhance the insulation and sound insulation of a wooden or concrete ceiling, the material is compacted by mixing sand with expanded clay.
The same effect is achieved by combining gravel with smaller granules. You can increase the heat saving rate by filling the granular insulation with concrete. In this case, there is no need to place a vapor barrier under the screed.
Professionals do not recommend insulating the top floor if it is the ceiling of a flat roof without an attic. This applies to both bathhouses and residential buildings. Expanded clay is highly hygroscopic, which negatively affects the thermal insulation properties of granules.
Whatever fraction of clay expanded clay you take, during work and use as insulation the material emits dust, and therefore for a plank ceiling an additional layer to contain dust is required.
The optimal thickness is 10 cm, a thinner layer of expanded clay is ineffective for insulation, and in regions with low temperatures, the height of the embankment starts from 20-40 cm, subject to the appropriate ceiling height or the possibility of its reconstruction.
The different size fraction and lightness of expanded clay allows you to create an effective heat-saving “cushion”. All insulation work is simple and it is possible to install the ceiling yourself, without special construction experience. Consumers are also attracted by the low cost of the material, the lack of special equipment for installation, and the effectiveness.
Preparatory work
Ceiling insulation with expanded clay in a private house begins with preparatory work. These include:
- restoration of roof functionality. Nothing should drip or fall from there;
- since the attic is a low space, nothing should stick out from the sheathing and rafter system: nails and screws are either bent or cut flush with a grinder;
- old insulation (in most cases it is glass wool) and the remains of roofing material are removed if repair work is being carried out;
- the condition of the ceiling is inspected;
- all detected cracks and holes between the wall and the floor boards are foamed with polyurethane foam. If necessary, the wooden structure is additionally reinforced with timber;
If necessary, the wooden structure is reinforced.
- the base of the ceiling is first swept and then, preferably, vacuumed;
- the wood is treated, if this was not done during construction (can be seen by the color of the beams and boards - red or pinkish), first with antiseptics and then with fire retardants. Concrete is primed twice;
- steam and waterproofing of the entire insulated surface is carried out. Depending on what material is chosen for this, the type of work will depend. When using roofing felt - waterproofing, polyethylene film or special membranes - vapor barrier. But the main purpose of the film or roofing felt is still a little different - to prevent the smallest expanded clay dust from penetrating the ceiling finish.
The technology for laying vapor barrier films is discussed in the material “Laying a vapor barrier with your own hands.”
Important: when insulating a bathhouse ceiling with expanded clay, a foil film is required. It is laid with a metallized layer towards the room.
Installing roofing felt or vapor barrier film on the wall is mandatory.
Note that the films are laid correctly across the beams, and not along, in a boat, as some theorists advise. At the same time, the overlap is at least 15 cm, and not 3-5 cm, as can be found in the recommendations. The film or roofing felt on the walls should ideally extend to the height of the backfill. However, 12-15 cm will be enough if there is not enough roofing felt or film;
This is not the way to lay roofing felt on a wooden ceiling.
Important: the film or roofing felt must not be stretched. It should go around the beams freely. If this is not done, air pockets will be created in the corners of the junction of the beams and floor boards due to the tension of the insulation under the weight of the expanded clay.
- joining seams are taped;
Properly carried out vapor barrier.
- The vapor barrier is fastened with a stapler with a step between staples of 10-15 cm to the base at the junction with the beam. This operation is best carried out immediately, during the process of rolling out the film;
- It is advisable to seal the staples with tape;
- if an attic is planned in the attic space, then additional sheathing is installed. On a concrete base directly on a vapor barrier film with an edge height of 32 cm (30 cm for expanded clay, 2 cm for a ventilation gap), on a wooden ceiling along beams. The total height of the sheathing: beams and nailed beams is 42 cm (40 cm for backfill, 2 cm for the ventilation gap).
Attention: you can first install the sheathing on a concrete base, and then carry out hydro- or vapor barrier work.
Types of construction slag
Is it necessary to insulate floors? Thermal insulation plays the role of a buffer that prevents heat exchange between the room and the cold foundation or basement. Structures with good thermal insulators significantly increase the thermal resistance of the floor covering. This, in turn, allows you to retain heat inside the room and save on heating costs.
Is it possible to insulate the floor in a private house with slag? Slag is one of the most popular types of heat-insulating materials, which is used to insulate coatings in private homes and on the first floors of high-rise buildings. Bulk filler has very good consumer qualities, which is why it is still in demand.
What kind of slag is used for thermal insulation? There are several main types of thermal insulation filler that is used for floor insulation, namely:
- domain;
- metallurgical;
- fuel;
- coal.
Each of the heat insulators has its own disadvantages and advantages, so we will consider the technical features of slag fillers in more detail.
Blast Filler
Blast furnace slag is a bulk material that is obtained after smelting cast iron products. For a long time it has been used to create Portland cement, which can significantly improve the performance of the solution. The blast furnace filler includes the following components:
- sulfur;
- magnesium oxides;
- manganese;
- iron.
The composition of the material is very similar to a cement mixture. In addition, with rapid cooling it acquires hydraulic activity.
There are several types of domain fillers:
- Steelmaking. After cooling, the material acquires a crystalline structure, so it practically does not granulate;
- Martenovsky. The density of such slag can reach 140-150 MPa, which affects the frost resistance of the bulk heat insulator;
- Cast iron. It is obtained from cast iron, after which it is granulated using rapid cooling.
Metallurgical filler
Metallurgical slag is made from nickel and copper smelting compounds. This type of filler is used for floor insulation, although indirectly. Fibers are drawn from the durable material at high temperatures to produce mineral wool. Thermal insulators of the first grade have a quality coefficient of 1.65, the second - 1.45, and the third - 1.2.
Coal filler
Coal slag mixed with a binder forms a very strong and reliable block of slag concrete. It has better thermal insulation properties than brick, but at the same time costs several times less. In the process of manufacturing building blocks, fuel melts are used, which form a high-strength agglomerate during the combustion of anthracite.
The composition of slag concrete does not include various impurities such as clay, ash, sand and other materials. This provides slag concrete with excellent thermal insulation qualities. Coarse-grained blocks are used to insulate wall panels outside the building, and fine-grained blocks are used to insulate floors and walls inside the house.
Fuel filler
Bulk fuel material is actively used for insulating wooden floors in private houses and apartments.
In the process of selecting fuel slag, special attention is paid to quality, which depends on the percentage of impurities. The fewer impurities in the filler, the better it retains heat.
Why? Any impurities, such as unburned coal or ash, have high thermal conductivity, which negatively affects the thermal insulation characteristics of the slag filler.
The fuel heat insulator not only reduces heat loss in the room, but also significantly reduces the noise level. Using this material you can:
- provide thermal and sound insulation;
- level the floor base;
- slag concrete can replace brick in the construction of buildings.
It is worth noting that many developers use fresh slag to improve the thermal insulation of floors and wall panels. This material contains many impurities, so it practically does not prevent heat loss in the room, which is worth considering. First, fresh filler must be placed in grooves and kept in this condition for at least 3 months. Thanks to rain watering and long-term exposure, the heat insulator is freed from limestone impurities and sulfur.
Technology of ceiling insulation with expanded clay
Thermal insulation of the ceiling with expanded clay is carried out according to one scheme:
- between the beams or sheathing cells, a 3-5 cm thick layer of expanded clay sand is poured, after which it is leveled. It is better to carry out work in small areas, 1-2 m2 each;
- Expanded clay of the middle fraction is poured onto the sand in a layer of up to 10-15 cm, after which a section of the ceiling of 1-2 m2 is again covered with sand. And so on over the entire surface;
- the resulting layer is manually, without fanaticism, compacted, after which the expanded clay is filled to the required thickness. When filling without sheathing, the thickness of the layer is checked with a thin metal rod;
- expanded clay is covered with a vapor barrier membrane.
Thickness calculation
In all these cases, when backfilling, the thickness is selected approximately, the layer is assumed to be 15-20 cm. But if necessary, a simple calculation can be made. In this case, specialists use the Teremok program. It is very simple and freely available. You can calculate the layer online or offline by installing the software on your computer.
Bulk insulation is available in the database, you just need to find it. To build a house with your own hands, this program will be able to make professional thermal calculations for any floor structure: on the ground, on the ground floor, in the attic.
What's the best way to close it later?
The insulation layer is closed in different ways. Without sheathing, you can lay OSB boards on top and walk on them without fear of disturbing the insulation layer or flat slate. Some experts suggest pouring cement laitance onto the surface, which will strengthen the top layer of expanded clay. There are recommendations to cover the surface with cement mortar using reinforcing mesh. The specific choice is up to the owner's taste.
Scheme of flooring in the attic.
Sheets of plywood, gypsum fiber board or OSB are laid over the sheathing or joists, onto which the finishing floor covering in the attic is then installed. The ventilation gap allows you to avoid contact of the floor with expanded clay, which eliminates various squeaks while walking through the attic space.
Scheme of using cement screed for finishing flooring.
Useful tips
If there is a residential attic above the insulated floor, then there should be a ventilation air gap between the expanded clay layer and the floor covering. It will protect you from squeaking when walking on the floor, because grains of expanded clay will rub against the floor covering.
Important! Provided that the installation technology of expanded clay insulation is followed, it simultaneously performs sound insulation functions.
Self-leveling mixtures are not used to pour screed over expanded clay insulation. This is due to the fact that the liquid mass will easily flow between the granules and saturate the entire insulation. With a significant thickness of the insulator, the consumption of the mixture will be very high, which will entail high costs. If it is necessary to install poured floors, first make a concrete screed, and then apply a thin layer of self-leveling compounds.
How effective is this type of insulation?
This is how grandfathers, then fathers, and now grandchildren insulated themselves. It seems that according to tradition. But no one has tried to calculate how financially effective and safe it is in terms of TB.
1. Finance. To insulate a wooden house with an area of 35 m2 (this is the area of one log house, but not the house as a whole, since the size of the log is largely limited to 6 m - the standard for logging) you will need about 17 m3 of expanded clay (35 m2 x 0.4 m x 1.2). You will have to pay approximately 20.4 thousand rubles for them. And this is without delivery.
If you lay IZOVOL basalt wool with a thickness of 15 cm, which is more effective in terms of thermal insulation properties, you will have to pay 21.0 thousand rubles. There is a difference in favor of expanded clay, but it will be eaten up by the costs of delivery and purchase of timber for the sheathing, since for expanded clay backfill you will have to additionally purchase wooden beams in the amount of 0.5-1.0 m3. And this is another 3.0-8.0 thousand rubles. additional costs.
2. Weight load. The average density of expanded clay is about 600 kg/m3. With a volume of expanded clay of 17 m3, a mass of insulation weighing about 10 tons will press on the ceiling structure. Whether this is a lot or a little is up to the owners to decide.
Methods for installing insulation
Insulation from above (from the attic)
External insulation of the ceiling (in the absence of a concrete balcony) is a more preferable option, since it is simply easier to install from the attic area. Some people prefer to insulate the ceiling both from the attic and from the inside, believing that it will be better this way.
In fact, it is enough to carry out insulation only from above, everything else is unnecessary. And from a technical point of view, an additional layer of internal thermal insulation will not give anything: the level of thermal conductivity will be approximately the same. However, everything here is decided by the owner of the house. The work is carried out in several stages:
- The attic is completely cleared of all debris; its surface must be perfectly clean. It is better to use a vacuum cleaner for these purposes (not necessarily a construction one - the most ordinary one will do);
- The space is measured and insulation is purchased. For the attic, polystyrene foam is the best option. The foam sheets should not be very thin, the minimum thickness is 40 millimeters. It is also acceptable to use polystyrene, but its cost will be noticeably higher with relatively identical performance characteristics;
- The entire surface is laid with foam plastic slabs, the remaining “holes” are filled with construction foam - a fairly simple scheme;
- A screed is made on top of the foam, the maximum thickness of which is no more than 50 millimeters.
Insulation from outside
Internal ceiling insulation is a somewhat more complex task. You will have to do the following sequentially:
- make steam and hydrological insulation;
- sheathing under which thermal insulation material will need to be installed;
- install the insulation itself;
- re-vapor barrier;
- cover the ceiling with any covering material.
As an example, we can consider insulating the ceiling in a house with a wooden beam roof (such houses are most widespread in Russia). By default: climate – moderate, insulation – mineral wool.
Mineral wool for a wooden house is the best option for the simple reason that it does not interact chemically with wood. And even despite the fact that its structure itself is cellular and porous, insects certainly cannot get into it, which is very, very important for a house made of wood.
Scheme of ceiling insulation in frame private houses
You need to do the following to insulate:
- Using a stapler, you need to attach a plastic film to the beams to completely block the access of moisture. The overlap of the canvases is mandatory: it must be at least 10 centimeters.
- The sheathing is made (for sheathing with PVC panels). For such panels, small wooden slats (beams measuring 50*50 millimeters) are sufficient. They must be nailed in increments of 60 centimeters. A cut board may also work.
- The timber gap is filled with mineral wool (you can also use ecowool).
- A second layer of plastic film is laid (again, using a stapler).
- PVC panels are hemmed underneath.
What to do next?
Quality checking
Insulating the ceiling in a wooden house with expanded clay is an option that is distinguished by its simplicity and simultaneous effectiveness. However, after all the work has been carried out, you need to make sure that this work is carried out efficiently. You need to make sure that the thermal insulation layer you have laid will perform its functions properly.
This check is quite simple and does not require any additional devices. All you need is to warm the rooms to a certain temperature. Next, close all the windows in the house and lock all the entrance doors - you must prevent heat leakage.
After this, wait a while and look at the thermometer. If the temperature in the room has changed significantly, then this is a clear signal that heat is leaking through the roof. You need to check the installed thermal insulation layer for cracks through which heat escapes.
Proper ceiling insulation is the key to your comfort
After insulating the ceiling, you can insulate the loggia, as well as other places in your private home. Despite its popularity, expanded clay is not a universal method of insulation. For example, they will not be able to insulate plastic windows.

