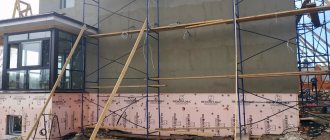
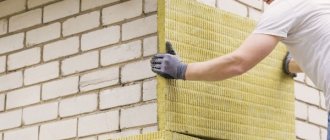
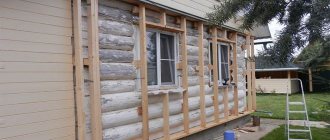
One of the most important stages in the construction of any building is thermal insulation, so the choice of material is very important. It should provide comfort in the home, be safe and energy efficient. The process of insulating walls with penoplex is simple, so you can do it yourself.
What is important to know about Penoplex
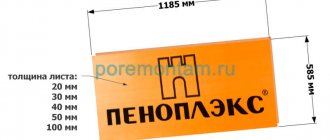
To choose the right insulation for walls, you need to consider the properties, advantages and disadvantages of the materials offered on the market. Penoplex is extruded polystyrene foam with high density and strength. During production, the initial granular raw material is melted and mixed with gasifiers. Next, the foamed mass is pressed through the nozzles of the extruder and hardens, turning into a long white tape of a given thickness.
After this, the material is cut into standard size pieces. As a result of a chemical reaction, air bubbles isolated from each other are formed inside the sheets. The material is used to insulate floors, walls, and ceilings. It has the following advantages:
- low thermal conductivity coefficient;
- resistance to moisture (its absorption is only 0.5% of the total volume);
- high level of mechanical strength (the product does not deform over time);
- simplicity of installation work and low cost;
- the ability to provide good insulating properties with minimal material thickness;
- fire resistance;
- long service life;
- no need to use expensive or bulky installation equipment;
- resistance to rotting, development of fungal pathologies and mold.
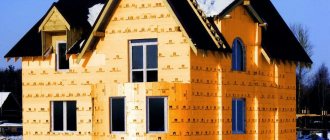
There are no restrictions for insulating the outside of a house with penoplex. It is even allowed to be installed in rooms characterized by high humidity. However, the product has disadvantages: it does not burn, but melts, emitting toxic smoke.
The slabs do not allow steam to pass through, so the insulation is suitable for finishing a brick house, and not a wooden one (from the inside) or a frame one. Moreover, it can be installed both under plaster and under siding.
Features of the procedure
Many users choose houses made of timber. The popularity of such buildings is explained by their attractive and natural appearance, the use of natural materials in construction, as well as the comfortable microclimate that is maintained in such environments. The timber itself is a warm material, so houses made from it are considered cozy and hospitable. They are not cold in winter, but not hot in summer either. However, such buildings still need to be additionally insulated, otherwise during the frosty seasons they will not be so comfortable.
Insulation is primarily required for timber houses in which the building material is not of sufficient thickness. If the section is incorrect, complete freezing can occur inside a wooden house. This fact suggests that the floors in such a structure are unable to retain heat efficiently and it is impossible to do without insulation. If the beam in the house has a cross-section of 150x150 mm, then it is not necessary to provide additional finishing, especially if the building is located in areas with a warm and temperate climate. Timber with a section of 180x180 mm is also popular - very warm and reliable houses are built from it, for which additional finishing is also optional. However, it is worth considering that if the cross-section of the beam of the house is correct, the building material will still dry out over time, and this will also cause significant heat loss.
If you decide to insulate a log house, then you should note that this can be done both outside and inside. The following features are typical for insulating a house from the inside:
The following features are typical for insulating a house from the inside:
- with such work, a certain part of the useful living space will inevitably be lost due to the installation of a frame structure under the insulation;
- a layer of thermal insulation material hides wooden floors underneath, which affects the design of the rooms in the house;
- Due to the inevitable winter cooling of wooden walls, the dew point moves directly into the internal insulation. After this, condensation and mold appear. It is worth considering that monitoring the condition of the timber in such circumstances is not an easy task.
Insulation of a log house from the outside is considered more common. It includes the following features:
- with such insulation, the useful area of the living space does not undergo major changes and does not become smaller;
- external work is good because it does not in any way affect the internal routine of the household;
- with this method of insulation, the facade of a wooden house is reliably protected from destructive temperature fluctuations, and this significantly extends the service life of the building;
- if you correctly select suitable and high-quality insulation, then the comfortable microclimate in the interior of the house will not be disturbed;
- most owners turn to this method of insulation to make the house cozy and “breathe”;
- with external insulation, you can update the facade if it naturally darkens;
- Using external insulation materials, you can protect the timber from damage.
At the moment, there are several main options for insulating walls in a house made of timber. A curtained ventilated façade is a technology developed as an additional decoration for the façade of a building.
It is worth considering in more detail what advantages are typical for this option for insulating a log house:
- ventilated facades have a long service life, which can reach 50 years;
- This insulation option is characterized by excellent heat and sound insulation, which is noted by many users;
- installation of a suspended ventilated facade is considered simple and affordable;
- This method of insulation allows the use of a variety of facing materials;
- with such insulation, the dew point moves outward, which avoids the accumulation of condensation in the material.
The technology for insulating a timber house under siding largely replicates a hinged ventilated façade. In this case, the insulation is also installed from the outside, and is supplemented with a decorative coating on top. Polyurethane technology will be clear to every craftsman who has at least once encountered work involving polyurethane foam. The main difference between this method lies only in the volume of materials required to form a thermal insulation cushion, because much more is needed. That is why, when choosing this technology, it is necessary to stock up on a high-quality spray gun.
How to choose penoplex?
Before insulating with penoplex, you should choose the right material. The following characteristics are taken into account:
- density and thickness of the product (to insulate a wooden house from the outside with penoplex, sheets with an index of PBS-15 are required, for a concrete house - PBS-25);
- weight and dimensions of sheets;
- coefficient of moisture absorption, thermal conductivity, compressive strength;
- climate zone;
- cost of the material ( prices depend on the manufacturing company, technical parameters ).
The manufacturer is also an important criterion for choosing penoplex. It is better to give preference to those companies that have earned positive user reviews and a good reputation.
Principles and rules for façade insulation with Penoplex
When insulating walls with penoplex, the technology provides for subsequent finishing with plaster. It performs two functions: decorative and protective. The mounting diagram for extruded polystyrene foam is as follows:
- The outer surface of the wall of a structure.
- A layer of special glue designed to fix the panels.
- Sheets of a given thickness.
- The outer layer of fiberglass mesh is thick with glue.
- Decorative coating.
Gluing panels is also characterized by some features. They need to be fixed not only with adhesive, but also with mechanical fasteners - dowels. In order to properly insulate houses with penoplex, any external corners are reinforced with special metal elements that protect the material from possible mechanical damage.
If there is glue at the joints between the sheets, it must be removed. The connecting seams should be offset, which increases the adhesion of the insulating material. When applying a decorative layer, all work should be completed in one approach. However, its thickness should not exceed the thickness of the slabs.
Famous manufacturers
The main well-known brands for plastering polystyrene foam are produced by the following companies:
- the Sto AG concern (Germany) offers a line of Stolit plaster mixtures;
- Henkel concern (Germany) produces Ceresit plaster mixtures;
- Ecomix company produces mixtures of the same name for Wet facades.
Line of materials from the Russian subsidiary of the German concern Sto AG:
- Sto-Baukleber (for gluing polystyrene foam);
- StolevellDuoplus or Uni (for gluing and reinforcement);
- StoPutzgrund or StoPrep Miral (intermediate priming);
- Sto-Strukturputz or StoMarlit (finishing plaster mixtures).
Ecomix offers:
- adhesive for mounting polystyrene foam – BS-113;
- plaster and adhesive composition for making a reinforced layer on top of slabs - BS-106;
- quartz primer – BS-707;
- for finishing – decorative mixture “bark beetle” BS 208 or pebble BS
The German company Knauf offers the “Warm Wall” line, including the following compositions:
- Sevener (plaster and adhesive);
- Decorgrund (primer);
- Diamond (decorative).
Required materials
To insulate the outside of a house with penoplex, you need to select the necessary consumables. In this case, the work will go smoothly. For insulation you need:
- Penoplex boards. Their number is calculated depending on the area of the base, as well as adding a 10% margin for cutting.
- Primer liquid. It improves the adhesion of sheets to the base. The type of substance depends on the material used to make the walls: for brick surfaces , plastered surfaces made of gas silicate blocks, a deep penetration primer (300 ml/sq.m.) is suitable, and for concrete surfaces, Concrete Contact containing quartz sand (400 ml/sq.m.).
- To insulate external walls with penoplex, a starting profile is required. It is needed for proper fastening of the first row of slabs. The element is installed around the perimeter of the entire building. Included with it are spacer washers that allow you to correct minor unevenness in the base. The number of profiles is calculated depending on the length of the walls, and fasteners - 1-2 per joint. To fasten the supporting elements, dowels are used, the distance between which is 30 cm.
- To insulate walls with extruded polystyrene foam, you need special glue. The average material consumption at the first stage is 5 kg/sq.m. An additional layer will be required to secure the layer of reinforcing mesh. In general, it will take up to 10 kg/sq.m. material.
- Dowels are “fungi”. They can be hammered or screwed. It is better to choose products with a thermal head or a plastic expansion nail. For each square meter of area you will need 6 elements.
- Reinforcing mesh. It is better to purchase fiberglass-based material. For finishing you will need up to 1.1 sq.m/sq.m.
For the decorative plaster layer, materials with different textures are used, so the consumption is calculated after external insulation.
Primary layer sketch
Penoplex is prepared for plastering by laying the primary layer. For this purpose, alkali-resistant PVC mesh should be used. By using PVC, you will insure yourself against the aggressive influence of cement on the exposed mesh. Cement is known to react with many materials.
Cut strips the length of which should be slightly greater than the height of the wall. Please note that installation is done from top to bottom. Apply the strip to the fiberglass with one hand, and apply the solution to the mesh exclusively along the top edge with the other. Thus, the mesh is, as it were, “welded” to the penoplex. As a result, the primary layer should be up to 5 mm thick.
Penoplex insulation scheme: 1 - penoplex slabs, 2 - glue, 3 - dowels, 4 - reinforcing mesh, 5 - primer, 6 - plaster coating
When the top edge is fixed to the plane, apply the solution to the mesh so that it is evenly distributed across the entire width. Every movement comes from top to bottom. Be sure to leave a vertical “tape” clean of the plaster mixture on the right side, because each subsequent strip will overlap the edge of the previous one by almost 1 cm.
As a result, it turns out that the wall will be strip by strip covered over the entire surface with a mesh. Look at all the places on the wall where the geometry of the plane changes (door openings, slopes, window openings) - this is where you should first start laying the mesh.
Reinforcing mesh for foam plastic
Prices for reinforcing mesh for foam plastic
Reinforcing mesh for foam plastic
Required thickness parameter
To insulate the outside of the house with penoplex with your own hands, you need to choose the appropriate thickness of the product. Here you should pay attention to the climate zone. When purchasing penoplex, insulation is carried out taking into account the fact that the insulating cake must provide a total heat transfer resistance of no less than that established in building codes and regulations.
For the calculation, the thermal conductivity coefficient of the insulation is additionally required. To find out the thickness of penoplex , you can use the following formula: P (thickness, m) = R (heat transfer resistance, which can be taken from official SNiP sources) * k (thermal conductivity index).
Technology of insulating facade walls with Penoplex
To properly insulate the facade with penoplex, compliance with the installation technology is required. The necessary tools are pre-selected and the base is prepared.
Preparatory stage
According to the technology of penoplex insulation, the preparation stage is the first, and this procedure concerns not only the surface of the wall, but also the insulator itself.
Preparation of materials
To insulate a house with penoplex, the material needs to be prepared. The surface of the slabs should be slightly rough. To do this, polystyrene foam is processed with a needle roller. If it is not available, a stationery knife is suitable, which makes small notches.
Preparing the walls
Before insulating a wall with penoplex, it also needs to be prepared. It is cleaned of dust, old finishes, grease stains, and weak areas of plaster. If there is fungus or mold on the surface, they must be removed and the base treated with fungicides and antibacterial agents. Protrusions on the wall or remnants of masonry material are knocked down to the general level.
Cracks of any size are cleaned, treated with a priming liquid, and then covered with a repair compound. As for wooden walls, it is necessary to completely eliminate damaged areas, which are treated with antiseptics. The cracks between the logs need to be caulked.
After cleaning, the vertical and horizontal level of the base is checked. If the differences are significant, the problem needs to be corrected. For this, a solution based on cement and sand is used. All metal structures are treated with a special anti-corrosion compound. You can begin attaching the thermal insulation a month after the preparatory procedures.
Marking the zero line and setting the starting profile
Before insulating walls with penoplex, you need to mark the location of the lowest row of sheets. For this, a laser or water level is used. The material must be attached so that it is 30 cm below the floor level of the first floor. This way you can avoid the appearance of dampness in the room. The markings are carried out in such a way that there are no even minimal errors that could lead to significant distortion of the slabs in the upper part of the wall.
The starting profile is attached along the perimeter of the building (below the highest point of the building foundation). The clamps are mounted every 30-50 cm. At the points of contact with the base, the elements must fit tightly to it. If there are even small gaps, they can be eliminated using spacer washers. To connect adjacent profile elements on a straight wall, special fasteners are used. In addition, there must be a gap of 3 mm between them.
Preparing and cutting penoplex boards
The insulation of the wall is carried out after adjusting the foam boards. At the corners, the sheets are mounted with a toothed lock. To do this, the fragments through the row are shifted outward at a distance slightly greater than the thickness of the material. All pieces that border the profile should not be narrower than 20 cm.
In the area of window and door openings, you need to use elements cut in the shape of the letter “L”. In this case, it is important to leave an allowance inward for proper joining with the slope insulation. For cutting slabs, heated wire (nichrome), a hacksaw with fine teeth, and a stationery knife are used.
Preparation of adhesive composition and installation of insulation boards
To insulate walls with penoplex from the outside, special glue is used, which is prepared immediately before starting work. Preparation of the mixture and fastening of the material is carried out according to the following instructions:
- The glue must be mixed in accordance with the proportions and in the sequence indicated on the package. The first stage lasts 5 minutes, after which the composition should stand for 10 minutes. Next, it is kneaded again for 5 minutes. The product must be used within 2 hours. The glue must be used at a temperature of at least +5 degrees.
- Glue is applied along the perimeter of the slabs in a strip of 10 cm. The maximum layer thickness is 2.5 cm. The sheet must be filled to 40% of the entire area.
- The first row is laid on the starting profile so that the edge of the material rests tightly against the limiting edge and does not extend beyond it.
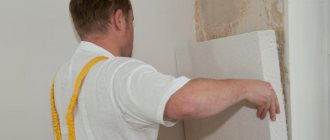
- After applying the glue, each fragment is pressed tightly to the base. Excess mixture is removed immediately. In this case, you need to constantly monitor the horizontal and vertical levels. You can adjust the position of the plates by tapping with a grater.
- 3 days after laying the panels, they are additionally secured with “fungi” dowels.
Since when using penoplex to insulate walls, gaps may remain between the slabs, which are filled with polyurethane foam-based polyurethane foam.
Creation of a reinforced protective plaster layer
After installing the insulation, it is covered with plaster reinforced with fiberglass reinforcing mesh. Its specific density is 140-160 g/m2. The insulated facade is plastered with the same compound on which the slabs were attached, but its consistency should be more liquid.
Strips of mesh, 30 cm wide and 1 m long, must be fastened starting from the corners and slopes. Next, an adhesive composition is applied to it. The layer thickness is 0.2 cm. After this, a metal corner is mounted. The mesh must be completely hidden in the plaster. There is no need to make the stripes too long. Adjacent elements must be overlapped by up to 10 cm.
After the solution has hardened, it is grouted. Next, a leveling layer of adhesive plaster is applied. Its thickness is 4-5 mm. After hardening, the surface is thoroughly rubbed.
Decorative finishing
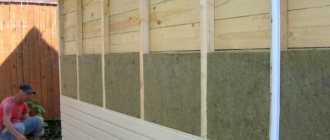
When insulating walls from the outside with penoplex with siding, you will have to make wooden or metal sheathing. It is attached directly to the insulation using dowels or long screws. The sheathing must be fixed firmly, but the insulation must not be allowed to crumple. Sometimes another method of forming a frame is used: fixing the brackets to the base before laying the insulation. It is on them that the sheathing will be fixed.
There must be a ventilation gap 2 cm wide between the siding and the penoplex. In this case, there is no need to use a vapor barrier. Another finishing method is decorative plaster.
Why cover insulation with plaster?
Now let’s take a closer look at what exactly a layer of plaster provides for insulation:
- Protection from physical impact. Plaster gives the surface additional strength and protects it from the appearance of random dents and cracks, which will lead to peeling of the material and deterioration of its heat-insulating properties.
- Overheat protection. The problem is that when exposed to high temperatures, the insulation releases styrene, which is a toxic substance. A layer of plaster will protect residents from this unpleasant side effect.
- Weather protection. Without a protective layer, penoplex can collapse in one season under the influence of temperature changes, humidity and direct sunlight.
- Additional thermal insulation. The joints between sheets of insulation can allow cold to pass through. A plaster coating will help avoid this.
Curtain facade
Insulation of the walls of a house can be done in the form of a curtain wall. First you need to prepare the base. All areas with crumbling finishing material are cleaned. The destroyed brickwork is being restored. Since the panels can be installed correctly only after marking, maximum attention is paid to this process. The distance between the brackets is taken into account: 40-60 cm horizontally and 80-140 cm vertically.
Frame installation and wall insulation
Before attaching the penoplex to the wall, you need to mount the sheathing. It is fixed with screws on the base. However, it is worth remembering that if the masonry was carried out with hollow bricks, then holes for fasteners should not be drilled using a hammer drill. After installation, the brackets need to be aligned so that they are in the same plane.
Next, you can insulate the base, but do not forget about waterproofing. Penoplex boards are attached with glue and additionally secured with dowels. They need to be laid from bottom to top in two layers with bandaging of the seams. A waterproofing film is attached over the material.
Finishing
Decorative panels imitating wood, porcelain stoneware, and brick are used as finishing materials. Natural stone is often used for cladding.
Building codes
Certification documents are issued for facade insulation systems in Russia - Technical Certificate of Rosstroy of the Russian Federation.
But so far, not a single technical certificate for a facade insulation system with a thin plaster layer specifies penoplex, technoplex or its analogues as the main wall insulation. That is why you will not find the facade of an administrative building insulated with extrusion, because not a single state inspection organization will approve the insulation project for such a facade (and the insulation of the facades of administrative buildings must be approved), unless it is a “squatter construction”.
Insulation of walls from the inside with penoplex
Insulating walls with penoplex from the inside is rarely done, since the material practically does not allow steam to pass through. But with the right approach, its installation becomes possible. In an apartment, this procedure is carried out only if there is no thermal insulation layer outside the building. The thickness of the penoplex will not be large. The work is carried out in the following sequence:
- Cleaning the base from dust and dirt. To insulate the walls from the inside of the room, they need to be leveled. There should be no cracks or crevices in them.
- To prevent condensation from collecting on the walls of the apartment, they are covered with a vapor barrier membrane before installing the penoplex. It should extend to the edges of the walls and floor. It can be secured using construction tape.
- Preparation of glue. To attach the internal insulation, you should use a composition intended specifically for such work. When stirring, there should be no lumps left in the mixture. It must be applied both to the slabs of material and to the base.
- Laying slabs. Insulation of walls from the inside with expanded polystyrene is carried out end-to-end. The seams between the rows should be offset. If there are gaps between the plates, they should be sealed.
- Additional fixation with dowels.
- Organization of the reinforcing layer using fiberglass mesh and adhesive solution.
After insulation from the inside of the room has been completed, you need to wait at least 20 days before finishing.
Results
Compliance with the installation process of penoplex insulation as wall insulation allows you to forget about the problems of maintaining heat in the house for a period of about 50 years. It is very important to ensure the safety of the material by laying protective reinforcement, as well as finishing cladding work.
One of the most important stages in the construction of any building is thermal insulation, so the choice of material is very important. It should provide comfort in the home, be safe and energy efficient. The process of insulating walls with penoplex is simple, so you can do it yourself.
Subtleties and advice from professionals
In order to insulate the outside or inside with your own hands correctly, you need to take into account some of the nuances of the work:
- instead of polyethylene film for waterproofing, it is better to use a multilayer membrane;
- to insulate a wooden house from the inside, it is better to choose vapor-permeable types of materials;
- polystyrene foam must be laid tightly against the wall;
- there should be good ventilation in the room.
Penoplex insulation has its own characteristics, but if all installation rules are followed, the material will provide high-quality protection against heat loss and will last a long time.

