How well the heat will be retained in the house largely depends on how well its foundation is made and insulated. A well-equipped foundation and the right material for floor insulation will reduce heat loss and help maintain a comfortable temperature in the room.
Floor screed with foam plastic
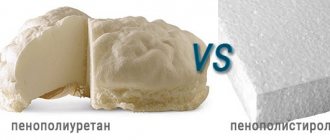
The issue of floor insulation is especially acute for residents of apartments on the lower floors, as well as private houses. Based on practical experience, we can say that in the case of creating a concrete screed, the most optimal solution would be to use polystyrene foam as a thermal insulation material. After all, it not only prevents heat loss, but also has a number of other advantages.
Styrofoam
Advantages of using polystyrene foam
Many experts consider foam plastic an ideal material for floor insulation. It is quite affordable and boasts many useful properties:
- high level of thermal insulation - polystyrene foam retains heat well, which is due to its structure consisting of round granules. There is an air cushion between them that prevents the leakage of warm air;
- excellent level of sound insulation - the foam layer in the floor screed will protect the neighbors below from various noises, primarily from the sounds of footsteps;
- fire resistance - this material is characterized by a short burning period and has the ability to self-extinguish. Even if during a strong fire the fire reaches the foam layer, no harmful compounds will be released when heated;
- long service life - foam plastic is not subject to shrinkage, rotting and can last for several decades without losing its characteristics.
Polystyrene foam is perfect for floor insulation
All these properties make this material an excellent solution for floor insulation. In addition to all of the above, it is easy to machine and is extremely simple to use.
Characteristics of foam plastic
| Brand of foam boards | PSB-S15 | PSB-S25 | PSB-S25F | PSB-S35 | PSB-S50 |
| Material density, kg/m3 | 10-11 | 15-16 | 16-17 | 25-27 | 35-37 |
| Compressive strength at 10% linear deformation, MPa, not less | 0,05 | 0,1 | 0,12 | 0,16 | 0,16 |
| Bending strength, MPa, not less | 0,07 | 0,18 | 0,2 | 0,25 | 0,3 |
| Thermal conductivity in dry condition at a temperature of 25 (+-5 degrees), W / (m * K), no more | 0,037 | 0,035 | 0,037 | 0,033 | 0,041 |
| Humidity of slabs, %, no more | 1 | 1 | 1 | 1 | 1 |
| Self-combustion time, sec, no more | 3 | 3 | 3 | 3 | 3 |
| Water absorption in 24 hours, %, no more | 1 | 1 | 1 | 1 | 1 |
| Service life, years (minimum-maximum) | 20-50 | 20-50 | 20-50 | 20-50 | 20-50 |
Advantages of expanded polystyrene concrete
In the production of polystyrene concrete, various additional components can be used, but it is the combination of concrete and polystyrene granules that gives the material valuable qualities for construction - strength, resistance to rotting, fire safety. Advantages of expanded polystyrene concrete:
- good heat and sound insulation properties;
- belongs to the group of low-flammable materials G1;
- plasticity sufficient for the manufacture of window and door lintels;
- high structural strength;
- light weight and ease of handling;
- frost resistance;
- wide scope of application.
An important advantage is the ability to independently prepare polystyrene concrete, for example, for insulating floors and roofs.
Necessary materials to create a screed
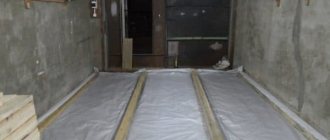
In the case when foam plastic or other heat insulators are used to insulate a concrete screed, it is called floating, since there is a layer between the base and the floor covering itself that does not allow the construction of a rigid structure.
To briefly describe the process of creating such a screed, a waterproofing material is laid on a leveled base to prevent moisture concentration. Then there is a foam layer, which is covered with a reinforcing frame and filled with cement-based mortar.
Before you begin, you should find out what tools and materials you will need.
Necessary tools for floor screed
Tools you should get:
- containers in which you can prepare a cement composition;
- a drill and a special mixing attachment;
- building level;
- trowel;
- spatula;
- rule.
You won't need a lot of materials:
- cement;
- sand;
- water;
- waterproofing agent;
- foam boards;
- mesh for reinforcement.
Polystyrene foam is available on the market in a wide range, but in any case remains an affordable material. When choosing slabs for screed, preference should be given to specimens no thicker than 5 cm. This thickness is quite enough for the resulting structure to cope with a load of up to 14 tons. For residential buildings, such characteristics are optimal, even taking into account that during operation, deformation of the foam up to 10% is possible.
foam sheet
Ruberoid
The role of waterproofing is usually performed by roofing felt, bitumen mastic or high-density polyethylene film. The choice of material depends on the needs of the home owner and his financial capabilities.
Preparation of the solution
You can use a concrete mixer
You can also use a construction mixer or a drill with an attachment
Particular attention should be paid to preparing the cement mortar for the screed. First, mix cement and sand in a ratio of 1:3, and then gradually begin to introduce water until the solution reaches the desired consistency. To avoid the appearance of lumps and speed up the process of preparing the mixture, use a drill with an attachment.
waterproofing
Cement mortar
Leveling the subfloor
If the subfloor is uneven, then it is recommended to somewhat complicate the process of preparing it for creating a screed. According to the standard, cement-sand or concrete mortar is used for this stage.
You can also resort to using self-leveling mixtures, but it is worth remembering that the screed will have to be done in the future, which means that twice as much money will be spent on purchasing materials.
The thickness of the poured leveling layer should be 3-5 centimeters, depending on the maximum height difference of the base. You can begin further stages of work only after the mixture has completely dried.
Preparatory work before pouring the screed
If the base is concrete, then it is enough to clean it, and it will be ready for further actions. All existing cracks and irregularities are eliminated using tile adhesive.
Repairing cracks and leveling the floor with tile adhesive
When a concrete slab cannot boast of a perfectly even laying, differences can be leveled out using a layer of sand or foam granules.
Foam granules
Before laying waterproofing, the evenness of the base must be checked with a building level.
Checking the levelness of the floor
Creating a screed on a ground surface is a slightly more difficult task in terms of preparation. First of all, the base must be leveled and compacted properly. A gravel or crushed stone layer about 10 cm thick is laid on top of the soil and compacted well. Then comes exactly the same layer of sand.
To get a level floor, you need to make markings on the walls. First, notches are made in the corners of the room using a water level, and then, using a cord, the markings are turned into a solid line. The resulting mark will serve as a guide, helping to maintain the desired level of the future surface.
Marking walls using a water level and painting thread
When the base and markings are prepared, it is time to lay the waterproofing layer. The material that protects against moisture accumulation should be placed on the walls and end slightly above the level of the finished screed. If piece material is used for the waterproofing layer, then its individual elements are overlapped and secured together with tape.
Waterproofing
The isolated base is filled with cement mortar on top. As a result, the layer thickness should be about 40 mm.
Preparing the base
If the screed is to be installed on the ground, then the first step is to level the surface. If the soils are loose enough, they are compacted. Then the site is covered with a layer of gravel or crushed stone. The layer thickness must be at least 10 cm. This gravel bed must also be thoroughly compacted. Then sand is poured on top of the gravel. The layer is made of the same thickness, after which the sand is compacted.
If the screed will be done on a concrete floor, then the surface should be clean, free of debris and dust. Then, on this basis, all defects and various irregularities are repaired. You can use tile adhesive for this. If at the construction stage the slab is not laid level, all unevenness is leveled with sand or foam chips. Before proceeding to laying waterproofing materials, the entire surface must be carefully checked with a level. Then, a waterproofing layer is laid.
In order to obtain a flat floor as a result, markings are made on the surface of the walls. Using a water level, marks are made in each corner and on the walls along the boundaries of the height of the future floor. Next, using upholstery cord and a special strip, all the marks are connected into a line. At the pouring stage, this mark will prevent the screed height from going beyond the permissible limits.
Afterwards a layer of waterproofing is laid out. Builders call it a “trough.” It must be completely continuous and extend onto the walls. The edges should be higher than the intended screed level. If it is impossible to use this layer as a whole, then the joints are glued together with tape. Cement-sand mortar is poured onto the finished surface. The layer thickness should be about 40 mm. It is necessary for the floor screed to dry well, and then you can continue further work on the foam.
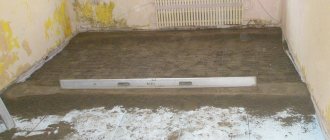
Foam layer and screed filling
The polystyrene foam is placed on the still wet rough screed; laying begins from the wall opposite the doorway. Arrange the insulation elements in a checkerboard pattern, securing them manually using rubbing movements. The seams are covered with construction tape, which prevents the penetration of the cement composition into the layer. Then work stops for several days until the heat-insulating layer dries completely.
Laying foam boards
Installation of foam plastic for flooring under screed
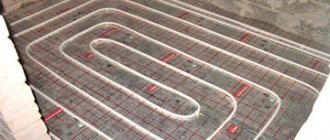
When the foam is securely fixed to the base, proceed to laying the reinforcing layer. As a rule, to create it, a metal mesh with cell dimensions of 10*10 cm is used. But it cannot be laid directly on polystyrene foam - this will lead to the loss of its functional purpose, which is to reduce the pressure on the insulation. Plastic supports are installed on the foam layer to hold the mesh suspended.
Reinforcing mesh laid
To ensure uniform distribution of the solution over the entire surface, beacons must be installed. They can be placed in any order, and the step between elements should not be greater than the length of the rule.
The cement mortar is prepared immediately before use; it covers the foam and mesh. When the reinforcing layer completely disappears under the cement mixture, it must be thoroughly compacted. Completion of work with the screed can be carried out in two ways:
- the floor is leveled along the beacons;
- lighthouses are equipped with profiles for gypsum boards, and alignment is already carried out using them.
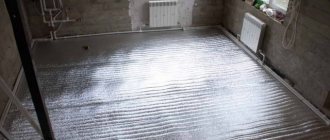
In any case, the final cement layer should be approximately 8 cm thick. After 3 days, you can safely walk on the screed, and resumption of repair work is possible within a week after it is poured. However, the surface will acquire the necessary strength only after 28 days, when it is completely dry. At this time, the screed is periodically sprayed with water, preventing it from drying out, which will lead to the appearance of cracks.
floor screed
Concreting
In general, complaints about cracking of cement screed can be heard quite often. Such a nuisance appears as a consequence of a violation of process technology. Especially in case of refusal to cut shrinkage seams when working in large rooms. Seams are created 12 hours after the completion of pouring the cement layer.
The depth of the seams should be approximately one third of the thickness of the screed. A special tool is used to cut them.
After the surface has completely hardened, they begin laying the floor covering, which can be absolutely anything. When thermal insulation is carried out correctly, and there are no cracks in the walls and ceiling that release heat, the floor temperature will remain at room temperature.
| Flooring | Prices, rub/m2 |
| Linoleum | 100-700 |
| Polyvinyl chloride coatings | On average from 1000 |
| Cork covering | On average from 1600 |
| Laminate | 170-1250 |
| Tile | 300-1500 |
| Carpets | 70-2000 |
| Parquet | 1000-2600 |
| Self-leveling floors | On average from 800-1000 |
Minimum thickness of polystyrene foam screed. Which penoplex to choose for floor screed
Any insulation, saturated with moisture, loses its thermal insulation characteristics. Penoplex is a slab thermal insulation material made from polystyrene granules using the extrusion method. Thanks to this technology, the structure of penoplex consists of many closed cells that practically do not absorb moisture.
Penoplex slabs are widely used for insulation of civil and industrial buildings, when laying highways and even runways at airfields. The range of products made from extruded polystyrene foam is quite large, but not all types of penoplex are suitable for insulating floors under screed:
- Penoplex Comfort is a universal material suitable for insulating walls and floors in private houses and apartments. The density of Comfort penoplex is 31 kg/m³, which is quite enough for a domestic space. Available in thicknesses from 20 mm to 100 mm.
- Penoplex Foundation - has increased strength, which does not decrease throughout the entire service life. Insulation density – 35 kg/m³. The thickness of the Penoplex Foundation slabs is 50 mm and 80 mm.
- Penoplex 45 is the most durable of all types, used for insulating surfaces subject to heavy loads - airfield runways and highways. The density of penoplex is 45 – 40-41 kg/m³. The thickness of the insulation is from 40 mm to 100 mm.
All of the listed varieties of penoplex are able to maintain their technical characteristics at temperatures from -100°C to +75°C, have zero water absorption and do not contain harmful chemicals.
The technology of penoplex insulation under screed has several options, the choice of which depends on the condition of the base surface.
Introducing foam granules into the solution
Introducing foam granules into the solution
To create a concrete screed with foam plastic, slab material is not always used, because the surface can be given additional performance properties by introducing granules into the cement mortar. Foam granules will create an air layer, thereby ensuring good thermal insulation performance of the screed. This process is carried out in several stages.
Foam chips with cement
- A solution is prepared consisting of a small amount of water and the volume of cement required to obtain a mixture of creamy consistency. The mixing process becomes much faster and more efficient when using a drill with a suitable attachment.
- Continuing mixing, foam granules are added to the mixture. The ratio of ingredients varies: one part of concrete can contain three, four or even six parts of granular material.
The higher the percentage of granules in the solution, the better the thermal insulation properties of the screed. However, at the same time, it will be less durable, and when pressed it may even crumble, therefore, it will lose the lion’s share of its performance characteristics.
Foam chips are a material that solves the most pressing problems, being an ideal insulation material that is resistant to fires, severe fires and other types of damage, and at the same time economical and high quality
The choice of the desired proportion largely depends on how durable and rigid the finishing floor covering will be. For example, if you plan to use linoleum, then the volume of granules in the solution should be minimal, parquet - vice versa.
foam granules
Video - Polystyrene foam granules. Mixing with cement
Some advice from professionals
Despite the fact that creating a screed with foam plastic is not a very complicated process and even an amateur who carries out all the technological steps can cope with it, there are several nuances that need to be remembered:
- The optimal thickness of the foam used in screeding is considered to be 5 cm, but this rule applies to apartments located above the second floor. If the apartment is on the ground floor or we are talking about renovating a private house, then the material should be taken with a greater thickness, for example 10 cm;
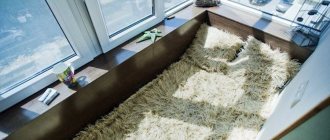
- As a rule, the foam layer is located between the waterproofing material and the floor screed, that is, as if “under the cement.” However, sometimes it is laid on a screed under the finishing floor covering; this approach is possible when using wood as the last layer;
- When choosing a reinforcing mesh, you definitely shouldn’t save money, because it will serve as a frame that takes the main load on the floor and protects the heat-insulating layer from deformation.
Screed diagram with foam plastic
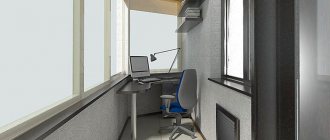
Taking into account the opinion of experts and following the stages of technology for arranging an insulated screed, you can make your home much more comfortable to live in. It is not for nothing that polystyrene foam is considered the optimal material for thermal insulation, because a 12 cm thick slab retains heat no worse than brickwork 2 meters thick. Foam boards are not afraid of high humidity, since they practically do not absorb water.
Speaking about the environmental friendliness and safety of polystyrene foam, it is worth noting that it is in boxes made of this material that donor organs are transported and food is packaged. In addition, it does not cause allergic reactions. There is no more effective material for insulating concrete floors yet, which explains the popularity of this design, which can last for many years, maintaining all its performance characteristics and providing a comfortable room temperature.