Read in this publication: Battery in a niche: advantages and disadvantages of such an installation Niche for a battery: important points in the manufacturing process How to make a niche for a battery under a window: step-by-step instructions A few more subtleties of installing a niche with your own hands
Aesthetics and once again aesthetics - this is precisely the goal that any person pursues when making home renovations. For this reason, it is very important to pay attention to the various little things that make up the overall perception of the room - even carefully laid heating pipes can ruin the appearance of the room. By and large, this is the main reason why a battery in a niche is found in almost every second modern apartment or house. As a matter of fact, we will talk about it in this article, in which, together with the site stroisovety.org, we will talk about how to make a battery in a niche with your own hands.
Niche for battery photo
Why is it better to finish the niche behind the battery?
By itself, the wall behind the central heating elements is not a very accessible place for finishing work, and when it is recessed into a niche, the situation is doubly aggravated. It becomes more difficult to reach such a surface; there are additional angles and transitions that are not always ideal.
For various reasons, niches do not deserve finishing at all:
- Removing radiators is a complex and time-consuming process;
- when working in uncomfortable, cramped conditions, the aesthetic quality of coatings in niches is worse than on other surfaces;
- usually, the batteries are located under the window sills, and this place can be easily covered with long curtains, decorative panels or screens;
- work in niches requires additional operations or the purchase of building materials that are not used in general repairs and entail additional financial costs.
Leaving the problem unresolved, you can encounter it at the most inopportune moment, when the furniture and floor coverings are in their places, and you need to spread the dirt and finish the corner that spoils the whole look. After all, you may need to change the layout, abandon curtains altogether or replace them with shorter ones, and remove bulky shields.
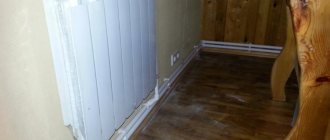
The niche for the battery is unfinished.
In addition, by covering radiators, apartment owners greatly reduce heating efficiency. What needs to be done is exactly the opposite - open the air flow freely for convection, and finish the battery niches with isofol, reducing heat leakage to the street.
Also, a plastered surface on which the final protective coating is not renewed begins to rapidly deteriorate. This entails additional financial expenses for its subsequent restoration.
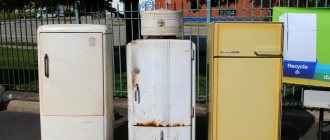
Dismantling (removing) the battery
It is most convenient to carry out repair work on the surface of the niche with the radiators removed, then unhindered access will be ensured for carrying out any operations. But not all types of batteries can be dismantled equally easily, and an attempt to unwind the old leads may be unsuccessful or lead to damage to the integrity of the heating elements. In this case, the need to purchase new radiators is added to the costs of repair work. Therefore, it is advisable to remove them only when the batteries need to be cleaned or completely replaced with new ones.
The complexity of dismantling work also depends on the type of fittings used, the time of work (during the heating season or off-season), the heating scheme and the type of radiators themselves.
Removing batteries of modern designs
It is most correct to carry out operations that will be associated with depressurization of the heating system in the summer, when hot water under pressure is no longer supplied and it does not need to be reliably shut off. In addition, this will not entail cooling of pipes in an entire apartment or throughout the riser of a multi-story building.
But situations are different and, sometimes, it is necessary to remove the batteries earlier. The easiest way to do this is in modern houses, where group or individual heating systems and new radiators are used. The general sequence of actions in this case is as follows:
- Turning off the boiler. Turn off the heating device and disconnect the system from the network, paying attention to the recommendations of the heating device manufacturer regarding its correct shutdown;
2. Shut off the water supply. Shut off the water supply that supplies the entire system. This can be a circulation pump if individual heating or ball valves are used on the direct or return risers;
3. Reduced pressure. Then, you should relieve the water pressure in the locked circuit. Thanks to this, the amount of liquid in the connected radiators will decrease. The drain valve is most often located on the drain near the boiler, in its lower part. All you need to do is connect a suitable hose to the tap and drain the water down the drain;
4. Battery cut . The thermostat valve in front of the heating element closes to the minus position - this ensures complete isolation of the battery from the entire system. Some radiators have a lockable drain valve. In such models, water can be removed on site using a hex wrench. If the outflow is not blocked, the entire system will have to be drained to avoid damage that water can cause;
5. Air exhaust. Using a special wrench or screwdriver, the bleed throttle is loosened to reduce the residual pressure. To be safe, you should hold a bowl, bucket, or other container under the vent valve to catch any escaping water. If heating fluid leaks from the air hole for a long time, the shut-off valves must be checked again. Then, repeat the air removal procedure again;
6. Drain . The plugs on the radiator are unscrewed with an open-end or adjustable wrench and a bowl for dirty water is supplied;
7. Analysis of threaded fasteners. The American ones (large nuts) at the radiator inlet are unscrewed. To do this, use a large adjustable pipe or cylinder wrench;
8. Removing the battery. Then, using a screwdriver, unscrew the bolts holding the aluminum radiator in the niche on the wall. If a bimetallic battery is used, then you just need to remove it from the hooks and carefully lower it.
Thanks to proper preparation, dismantling can be done very quickly. When removing an old radiator, it is best to use the help of a second person, since old threaded connections are very difficult to disassemble, and the scale accumulated in the heating sections gives the battery additional weight.
Removing obsolete heating elements
The most difficult thing to disassemble is the old type of pipe connections. The method of seating threaded connections on paint and their long service life mean that such structures cannot be disconnected. In addition, communal linking of risers involves systems located in neighboring apartments in this process.
1. Definition of risers. First of all, you need to find out whether the type of water supply and drainage system used is upper or lower, find the direct and return heating risers and close the valves (stop taps).
2. Then, you can open the drain plugs, which are located in the basement or basement, this will remove almost all the water from the system, and the liquid will not flood the apartment and neighbors.
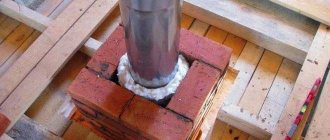
Drain plug in the basement.
3. Now is the time to start removing the batteries themselves. Most likely, it will not be possible to disassemble the old drives and couplings, but you can try. To do this, you need to heat them using some device, for example, an industrial hair dryer. You should try to unscrew the couplings in the direction of the drive with a large supply of threads.
A construction hair dryer is also a heat gun.
4. If it was possible to disassemble the connection, then you need to make sure the integrity of the pipes, the degree of their slagging with scale and check the condition of the threads. Even when everything turned out to be in order, you need to buy a new coupling, since it is the most emergency and vulnerable point of this connection;
If the battery cannot be disconnected, it is cut off.
5. If attempts are unsuccessful, the thread does not want to be dismantled at all, or through excessive physical effort it was possible to do this, but if the pipes are damaged, you will have to resort to the cutting procedure. This can be done using an angle saw (grinder), a hacksaw for metal and using gas welding. It is better to immediately resort to the services of a welder, since you will have to restore the joint, measure and extend the pipes. There is an alternative option: replace the risers with plastic ones, and install American ones at the entrance to the radiators;
6. To conveniently remove heavy cast iron heating elements, it is better to use the help of another person. There is still dirty water in the battery section, so you need to carefully lift one side of the radiator and drain the liquid into a low bowl, and then place it on prepared wooden stands.
Here is one of the clear examples of dismantling old cast iron batteries:
Preparing the surface of the niche behind the batteries for finishing
Regardless of how the niche under the battery is finished and insulated, its surface must be carefully prepared. Preparatory work will strengthen the wall, repair damage, remove the unpleasant smell of old coatings and create conditions for further finishing.
The wall in the niche is the thinnest in the entire room, as it is recessed to the thickness of the radiator, therefore, any cracks in it can have a through character. In addition, replacing window frames with new ones and installing a window sill contribute to the violation of the integrity of the surface, and it needs repair.
Carrying out preparatory actions in a niche is as follows:
You need to first assess the amount of work: if the surfaces are durable and well-preserved, then they should be slightly updated. If you haven’t looked here for years or want to carry out radical repairs, then you will need a full range of preparatory operations.
If you need to punch grooves (grooves) for outgoing pipes, then you need to mark the walls according to the dimensions of the radiator and make grooves using a hammer drill. Only after this can you begin to prepare the niche.
Layers of old coatings are removed: wallpaper, paint, peeling plaster. This can be done conveniently using a strong iron spatula or a hammer and chisel. To chip away particularly large and durable irregularities, you can use a hammer drill.
The cement apron under the heating elements is a relic of the Soviet era, which must be mercilessly removed during radical repairs. Its place will be taken by more decent flooring and baseboards.
The wall is completely dust-free and treated twice with a deep penetration primer - concrete contact. This treatment will strengthen the thickness of the surface and ensure adhesion to future plaster.
If the surface is intact and smooth, then plastering is not done, but is limited to simple puttying. If there are hidden or obvious defects, it is necessary to apply plaster.
Since the space behind the battery will not be particularly noticeable, beacons need not be placed under the plaster. If there is major damage, then you will have to use a reinforcing metal mesh and first repair the flaws.
Possible flaws in the wall in the niche.
In wide niches with a large area, it is advisable to install beacons under plaster. This will significantly reduce the consumption of dry mixture and achieve the effect of a perfectly flat surface;
Beacons indicate the leveling plane of the plaster.
To make the coating durable and moisture-resistant, it is better to use a cement-lime mixture rather than gypsum, which takes longer to dry and is less leveled, but is a strong and reliable base. For the best effect, use grade 500 cement, sifted fine sand and lime paste. Component ratio 1:6:1;
To plaster a medium-sized niche, seven liters of solution is enough. It is more convenient to apply it using a small trowel on a dampened wall. At the same time, the movements should be fast and splashing. It is easier to level the mixture with a large wide spatula.
After drying for 2-7 days (depending on the time of year), the plastered surface is covered with a thin layer of putty. This procedure will reduce the graininess of the surface and hide minor defects, and also paint the cement wall a pure white color. Particular care should be taken to putty the outer and inner corners of the niche and the lower edge for installing the plinth.
The dried, plastered wall is sanded to perfection. If this process is combined with major repairs throughout the house, then it is convenient to use a grinding machine with a P200 attachment. When a niche is being completed with a long delay and less dust needs to be produced, it is more convenient to level it with a sharp spatula.
A well-prepared surface is the key to the success of any finishing work and its long-term service subsequently.
The following video provides an example of preparing niches:
Options for finishing the niche behind the battery
The space behind the radiator should be in harmony with the overall design of the room. The methods used to finish heating niches are similar to the cladding of window slopes. Any type of coating can be used here. The main thing is that it can withstand temperatures of about 70 degrees. You cannot cladding OSB panels, plywood or PVC tiles - when heated, formaldehydes and toxins begin to be released abundantly from them. It is much better to use other decoration methods:
Painting the niche under the battery
Made with tinted acrylic paints in one layer. The main thing is not to forget to prime the surface with penetrating putty before starting the painting process. It is better to paint with a brush - it is not convenient to use a roller in the inner corners and to get around the protruding elements of the radiator fastening. You should try to apply the color in an even layer, quickly, without allowing it to dry out - this will help avoid the appearance of stains;
Decorative plaster.
Such cladding cannot replace preparatory plastering and puttying, because the technology of its application requires a perfectly flat and uniform base. After preliminary priming, you can apply any type of decorative plaster. Niches whose corners are decorated with stucco look especially advantageous.
Gluing wallpaper to below behind the battery
This traditional type of decoration can also be used in this case, but it is better to choose thick types of wallpaper that do not dry out or turn yellow from high temperatures. You should approach the choice of glue carefully - PVA and bustilate can change due to heating. Non-woven and vinyl adhesive compositions do not have such a drawback.
Application of liquid wallpaper.
Silk plaster, as liquid wallpaper is also called, does an excellent job of improving the appearance of the battery niche and is its durable protection. You can use a single color application, or create texture and highlighting with other colors. The uniqueness of liquid wallpaper is that it can be applied to the surface of the radiators themselves.
More information about applying liquid wallpaper can be found in a separate article: liquid wallpaper - types, application, designs with liquid wallpaper.
Decorating a niche with tiles and panels
If the room uses panel elements: MDF, tiles, decorative stone, plastic surfaces or laminate, then it is quite logical to continue using this style in the niches behind the radiators. This option is preferable to others, since it is created for a very long period and in the future you will not even need to look behind the radiators to update the coating.
White niches
The easiest way is to leave the space behind the radiators white. It is easy to maintain in this condition during routine repairs, especially with removable batteries. This option harmonizes perfectly with most other types of finishes.
By decorating these inconspicuous corners, you can significantly transform the overall appearance of the entire room, ennoble it and increase the space by removing masking curtains.
Insulation of the niche behind the heating elements
If you plan to subsequently cover the radiator with a decorative shield and the surface behind it will not be visible, then shielding insulation can be used, which will increase heat transfer and convective heating. Gluing a 5 mm layer of isofol over the entire area of the niche allows you to reduce heat losses for heating the outer wall. In cold apartments, with weak central heating, this measure is also desirable and necessary.
Some try to apply finishing layers on top of the insulator. However, isofol cannot be decorated. For example, if you cover it with wallpaper, the reflectivity of the foil decreases and all efforts become practically useless. By itself, this insulation looks like an independent type of finishing, which can be slightly improved by adding decorative strips around the perimeter and corners.
In northern regions, with severe frosts in winter, the lack of heating in a small section of the wall can cause the formation of cracks and slow destruction of the niche. In such conditions, it is not recommended to use insulation in confined spaces.
In order to secure the heat insulator, you need to carry out the usual preparatory work. A flat surface and well-marked corners are the key to ensuring that isofol will be accurately cut and fit snugly over the entire area. For a standard niche, you need to cut four pieces of insulation of different sizes - two for the side walls, one for the top and the last, largest piece, for the rear wall of the niche. It can be glued to liquid nails and vinyl glue. Then it will be evenly and quickly fixed throughout the entire space, will last for decades and will not require replacement.
You can hide isofol joints in the corners and along the perimeter by covering them with decorative plastic corners. The corners are fixed in the correct sequence: first, aluminum strips for the outer and inner corners are attached to self-tapping screws, and only then the plastic elements are glued directly to the metal.
Mounting features
On the rear surface of the Kermi radiator, fastening elements - linings - are welded at the factory. If the length of the radiator is less than 1800 mm, then there are 4 of them, if it exceeds - 6. The radiator can be aligned both vertically and horizontally.
To hide the radiator from prying eyes, special screens or grilles are used. They can be used both standard ones, manufactured in industrial conditions, and homemade ones. This is a matter of taste and capabilities of each user.
Insulation and finishing of the niche behind the battery without removing it
Heating radiators should only be removed if absolutely necessary. Systematic loosening of fastening threaded connections leads to an increased risk of accidents during the heating season. It is extremely irrational to dismantle radiators to replace wallpaper sheets. However, if you follow a certain work technology, without removing the battery, you can replace the wallpaper, stick ceiling tiles or isofol and apply liquid wallpaper using a mechanized method. But it is impossible to perform high-quality painting or plastering of the space behind the heating elements. If they will not be removed every time, then it is better not to use painting and decorative plaster at all.
To replace rolled wallpaper or insulation sheets, you need to stock up on tools with long handles (curved brushes, plastic scrapers). With this tool you can reach the entire surface behind the pipes, press the glued sheets and expel the air from under them. In addition, it is important to correctly cut the rolls, which will make it easier to work in a narrow place.
Putty knife.
Brush.
It is convenient to use wide-roll wallpaper, the width of which exceeds one meter. They can be installed from the side wall by covering the corner of the niche in a single piece and hiding part of the canvas behind the radiator. In paper sheets, you need to cut out grooves in advance for mounting radiators and insert them behind the pipes, folding them in half with the adhesive side out, and then level them with improvised tools. Isofol is applied in the same way.
The technology for applying silk plaster is even simpler. Using a special device (a pneumatic gun with a hope bucket), liquid wallpaper is sprayed throughout the entire space behind the battery. The remaining splashes of silk plaster on the heating elements are easily washed off with water, but you can not remove them, but cover all the pipes with them.
Connection diagrams
There are several radiator connection diagrams that comply with the requirements and standards of GOST and SNiP. They are represented by the following varieties:
- Lateral connection. Characterized by maximum heat transfer. With this connection, the input is made from the top of the battery, and the output is from the bottom on the same side. This is the most popular connection diagram.
- Diagonal connection. Produced with significant system dimensions. Water enters the radiator through the top and is discharged from the bottom on the opposite side.
- Lower connection or “Leningradka”. It is produced in small one- and two-story houses, as well as when installing pipes hidden under the floor. The efficiency of such a system is 5-15% lower than with a lateral connection.
When pipes are in a rough screed, heat loss increases due to contact with concrete and the ceiling covering of the lower floor.
Installation of skirting boards
Any repair will be incomplete if joints and sharp transitions from one coating to another are left uncovered. The use of skirting boards has a positive visual effect and significantly improves any finish. Removing old cement aprons, half-decayed wooden baseboards and replacing them with new plastic ones is an important component in upgrading heating niches.
It is preferable to use plastic rather than wooden skirting boards; they have many advantages:
- low price;
- great elasticity, which allows you to go around all the irregularities on the walls;
- availability of cable channels;
- very easy to install;
- easy to join in corners.
Three methods have been developed to secure skirting board elements:
- using glue;
- using fastening fasteners;
- using hardware.
The adhesive option is the fastest and easiest, but the requirements for the wall increase - it must be perfectly flat. If you use oil tape to protect against accidental contact with glue, the appearance of the finish and the baseboard itself will not be affected at all. The main disadvantage of this method of fixation is the impossibility of reusing skirting boards.
It is better to use fastening brackets in conjunction with perfectly flat floors and walls, since the baseboards will not be fixed tightly and there is a risk of large gaps forming. In addition, it is very difficult to repeatedly remove and reinstall elements on such fasteners.
The most inexpensive way to fix skirting boards is to use hardware and dowels. The fastening is rigid and quickly removable. This option is good if there are cable channels, when the caps of the fastening elements will be hidden under the latch.
Installation of the plinth should begin from the inner corner of the niche, having previously installed the connecting corner element. It is better to make holes in the plastic strip in advance using a hot nail. The wall is marked along these holes, and then sockets for hardware are drilled using an impact drill.
It is more convenient to screw in the self-tapping screws last, having previously cut the plinth to the size of the niche and joined it in the corner fasteners. After completing all these operations, the covers of the cable channels are inserted and latched.
What are you working on now?
Julia, the example of our neighbors is, of course, a convincing argument. But this is all amateur work. Your house is built according to the project. And it was done by professionals. I don’t know the design of your “balcony-loggia”. Perhaps the parapet under the window that you are about to demolish holds something, being an element of the external load-bearing structure of the building. Maybe after its demolition nothing will happen. Maybe not. As far as I know, it is prohibited to take heating appliances outside. You are about to insulate the perimeter of the loggia. How? How thick is the insulation? Steam and waterproofing? Are there any calculations? What will be the heating power of the “warm floor”? Change the glazing. Will regulatory authorities have any questions about changing the appearance of the building façade? Do it if you want. Responsibility for the consequences still lies with the owner of the premises. You can “lay down straws”. At least discuss your plans with the management company engineer. The correct option is to order a project for refurbishing the premises from the design organization that designed your house. You decide.
It is prohibited to move the heating system onto the loggia. Only electric heated floors and electric convectors.
When I look at our projects I am surprised. Have they even seen anything other than this wretchedness? This is not possible, then under no circumstances. Then you open photos of designers from Europe and think, why is it possible for them!! They say that other laws of physics and strength of materials work. When our people start thinking about people.
“>
How to make a niche for a heating battery
If there is initially no niche provided for a heating radiator, but you need to recess it into the wall, then you should approach this comprehensively, having thoroughly studied this issue:
When it is decided to make a deepening by reducing the wall, it is necessary to coordinate this point with the housing inspection. Reducing the thickness of the load-bearing wall may run counter to the requirements of the apartment passport. Housing with violations cannot be sold, mortgaged or left as an inheritance without restoring its original appearance. Failure of load-bearing supports can lead to the collapse of the building.
In addition, the remaining part of the wall may be too thin to support the weight of a multi-section cast iron radiator.
It is much easier to provide the required recess by recessing the radiator in a plasterboard box. Then you can make a niche of any size and hide the outgoing pipes under the sheets.
When thinking about the size of a niche, you need to know the dimensions of the radiator that will be installed in it and the permissible size of convective air gaps. If the battery has not yet been purchased, then it is better to calculate the required number of sections, buy a suitable heating element, and only then start making a box for it.
The minimum gaps around the perimeter of the radiator should not be less than 50 mm, but it all depends on the size of the window sill, the depth of the niche, the design of the battery, and its installation location.
Do not forget about insulating the inner surface of the niche, especially if it had to be done by reducing the thickness of the walls. It is recommended to stick polystyrene foam boards over the entire area of the resulting recess.
The following video shows how to hide a battery in a plasterboard niche:
Radiator - where to install?
In the vast majority of cases, radiators are installed under windows. To understand why this is the only correct solution, you need to understand how cold and warm air flows circulate indoors.
As you know from school physics courses, cold air is heavier than warm air, so it rushes down. Warm, on the contrary, tends upward, since it is lighter.
The coldest place in any house or apartment is under the windows. It does not matter whether double-glazed windows with several air chambers or ordinary windows with wooden frames are installed. If we take into account the resistance to heat transfer, then windows are twice as cold as walls.
Considering the above, it becomes obvious that installing heating radiators under the windows is the right decision.
If the radiators are selected or placed incorrectly, cold air will move parallel to the floor, causing a lot of inconvenience. Especially if there is a dining table, a children's bed, or a sofa on his way.
Installation of the battery in a niche.
When the repair is complete, all that remains is to hang the battery in the niche. If a used radiator returns to its permanent place, then there is no need to think too much about hooking it onto the old mounts. However, it is worth worrying about replacing clogged iron pipes and threaded fittings with American connecting pipes and plastic pipes.
If a new radiator has been prepared for a niche, then you need to start trying it on even before starting all the work and prepare everything else based on its dimensions: the exact supply of hot water and the placement of the return pipeline, the dimensions of the convective gaps, the installation of fasteners for hanging:
- First of all, places for fastenings are marked. Depending on the length of the radiator, there may be two or three clamps;
2. Using a tape measure, measure its height and place it on the wall from the bottom edge of the niche. An increase is made for the convective gap and the amount of the reserve is subtracted, which is equal to the elevation of the battery above the mounting hook. A horizontal line is drawn along the level at this height.
3. The resulting line is divided in half and holes for future clamps (two or three) are marked on it. The main thing is that the holes are located symmetrically and coincide with the gaps between the sections. Now the heating element is pre-hung on the clamps;
4. The paths of outgoing pipe connections are marked. If repairs are being carried out throughout the entire room, then it is better to hide the pipes in a groove and wall them up, having previously put a heat-insulating cover on them;
5. When constructing a niche from plasterboard, you first need to make communications, and only then fix the guide strips and hem the plasterboard sheets;
6. When everything is ready and you no longer need to remove the battery from the wall, you can finally assemble the threaded connections. The American ones need to be twisted tightly to compress the rubberized gasket. In this case, there is no need to use fum tape, but it is better to additionally cover the threads with silicone.
Taking into account all these points, you can turn the eyesores of the room into its harmonious components, without losing the performance qualities of the heating elements.
If there is no niche in the wall behind the radiators, that is, it is flat, then you can use other methods to decorate it. You can find out about them in the article: finishing the walls behind the radiators.
The appearance of the battery often does not match the design of the room. In this case, they simply hide it. You can find out how to do this correctly and beautifully in the article: how to hide radiators.
What to consider when masking
Before performing battery masking, you need to pay attention to some points:
- it is necessary to understand that in any case there will be a loss of heat;
- there should be no barriers to convection air flows; this is the only way to maintain uniform heating of the room;
- it is necessary to think through everything correctly so that there is open access to the batteries in the event of an emergency;
- The faucet, thermal head and other components of the heating system must be accessible to carry out repairs.
These points must be taken into account; this is the only way to create an original accent in the room and ensure proper operation of the batteries.