With rising energy prices, more and more people are seeking to obtain as much energy as possible from sources previously considered waste. In this case, used oil, household waste, and old car tires are considered as fuel.
Today we will talk about how to build a sawdust stove inexpensively and with your own hands, and it will be a unit that works on the principle of long-term combustion.
After all, it will not be a secret to anyone that in our country there are regions where wood chips and sawdust can be used for heating for practically nothing, except for the cost of their delivery.
Smaller area – less heat
There are long-burning stoves with connected water and air circuits. Thanks to this, a sawdust stove can heat a fairly large area.
In the article about heating stoves for greenhouses, we have already considered a do-it-yourself version of a sawdust stove, but this version of the stove is capable of heating a relatively small area, and this is not due to the lack of a water or air circuit, but to the small area where hot gases are used.
The figure shows drawings of this furnace.
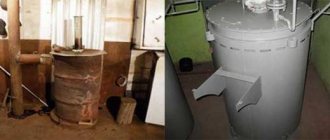
Sawdust stove from a 200 liter barrel
Furnace heating area
As you can see, when fully loaded, the thermal area of the furnace is approximately 1/3 of the total area . In the figure, this area is highlighted with red shading.
With this arrangement, there is a loss of thermal energy escaping through the chimney. Of course, you can try to get as much heat as possible by increasing the length of the chimney through the heated room. But this is not entirely rational, and in some cases it is simply impossible due to the design features of the room and its area.
This long-burning sawdust stove is good for its simplicity, because by and large it can be made within a few hours from scrap materials.
Principle of operation
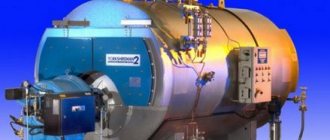
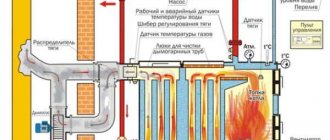
Fuel is supplied to the combustion chamber via a transport auger from a special container designed for storing pellets. The device does not have a direct source to provide natural draft, so it is equipped with a burner. Thanks to the presence of a special fan, it pumps air and ignites the fuel the moment the device turns on.
Thermal energy is transferred to the coolant through a heat exchanger. Flue gases are removed through a chimney pipe. Due to the presence of a small amount of mineral elements in the pellets, a small amount of ash is formed.
Through the grate, the ash is removed into a special ash pan chamber. As soon as the pellets in the combustion chamber burn out, the temperature drops. This is recorded by a special sensor. After this, using an auger, the pellets are automatically fed from the loading tank into the combustion chamber.
Pellet boilers must be installed in compliance with certain requirements for the installation site.
Choosing a place
It is better to install the unit in a separate room due to its impressive dimensions. The best option is a room with a temperature of at least +10 °C.
Installation outside the building is not recommended. However, when placing equipment outdoors or in a garage, pipes should be located underground below the freezing level to reduce heat loss.
Preparing the floor and walls
It is necessary to level the floor in the place where the equipment will be installed. The platform must be strong enough to support the weight of the device itself and the pellet hopper. Non-flammable plates should be fixed to the walls and floor. There must be a place for pellets near the device.
Ventilation and chimney
We install ventilation and a chimney made of non-combustible material. The latter, as a rule, is displayed on the roof, protruding above its surface by at least half a meter. It should be protected from precipitation and insulated.
The cross-section of the chimney pipes must be larger than the diameter of the hole intended for removing exhaust gases from the equipment.
Care should be taken to maintain the chimney by providing a special tightly closing opening for cleaning it.
Installing equipment
Having prepared the site, we install the device itself. We install and connect the burner, hopper, auger and automatic control panel. Communications are connected to the equipment through ball valves.
This will make the system easier to maintain. It is advisable to install filters. After connecting all the elements, a test run of the heating system is performed.
Solving the problem - circuit design
But today we are interested in a long-burning sawdust stove, which can be used to heat rooms as large as possible.
Of course, you will need to install a water or air circuit, but first let’s solve the question: is it possible to increase the thermal area in a stove of this type without increasing the length of the chimney?
External circuit device
The first one shows a long-burning stove with an external smoke circuit. The device completely replicates the previously presented sawdust stove. The only changes are the circuit through which the hot flue gases pass and the lower position of the chimney.
The first one shows a stove with an external smoke circuit. The device is completely identical to the previously presented oven. The only changes are the circuit through which the hot flue gases pass and the lower position of the chimney.
As you can see, the changes made it possible to significantly increase the thermal area of the long-burning furnace without increasing the length of the chimney. The volume of the firebox remained unchanged.
As you can see, the changes made it possible to significantly increase the thermal area of the furnace without increasing the length of the chimney. The volume of the firebox remained unchanged.
Internal contour of a sawdust stove
In the second case, the internal circuit is installed inside an existing furnace. The thermal area has also increased. The only drawback of this installation is the reduction in sawdust loading volume.
But there is also an advantage: setting up such a circuit will not be difficult; the only thing required is installing a 200-liter barrel of a smaller diameter inside and rearranging the chimney.
As you can see, a small modification will significantly increase the efficiency of using such a seemingly simple stove.
Equipment advantages
This type of furnace equipment has certain advantages. It is thanks to them that it is still in demand.
Its main advantages are:
In this video you will learn how to make a long-burning stove:
If we talk about the disadvantages, then long-burning stoves do not have any serious disadvantages. However, there are conditions in which they are not the best choice. Such devices are not suitable for large houses. Their main purpose is to create a warm atmosphere in small buildings.
New system on old principles
Sawdust boiler with a register for connecting to a radiator heating system
But that's not all. A homemade sawdust stove allows you to create even more efficient designs.
The picture shows a long-burning boiler with the ability to connect to a water heating system. What’s remarkable is that the boiler can be made with your own hands; it works on sawdust, small wood chips and various household waste. But of course, first of all, it is designed to work on sawdust.
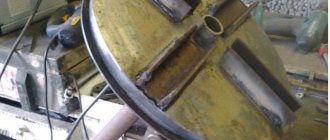
Cover with blower
Upon closer examination, our readers will notice some similarities between this boiler and the Bubafonya stove. But it is not so.
The pipe passing through the lid, although it is a blower, does not have the shape of a piston and is completely motionless when the boiler is operating. This picture shows a fully charged boiler. As you can see, the pipe is recessed almost completely inside; in a “bubafoni” it would protrude significantly from the boiler.
Types of pellet burners
Despite the common structure, pellet burners differ in the method of fuel supply and design features (flare and retort).
According to the method of fuel supply, burners with forced and gravity feed are distinguished. In the latter, the hopper is mounted directly above the burner, and the fuel is simply poured onto it under the influence of gravity. This design is quite simple, but does not make it possible to regulate the rate of fuel flow.
Forced-feed burners, on the other hand, are well controlled. Allows you to dose pellets in accordance with the current combustion mode. A pneumatic lift or auger mechanism is used.
With pneumatic supply, fuel is dosed by a metering device installed in the hopper. Then it is directed through the supply pipe to the burner. In this case, the possibility of reverse combustion (and, as a consequence, fuel ignition in the fuel tank) is excluded, since there is no continuous flow of pellets in the supply pipe. In addition, the air blows from the direction of the bunker, that is, towards the possible path of the fire.
In systems with auger feeding, two units are used: an auger that lifts pellets in the hopper and pushes them into the feed pipe, and an auger that feeds them into the combustion zone. At the same time, the risk of fire entering the bunker cannot be excluded, since there is a continuous flow of pellets through which the fire can spread to the fuel storage tank. To avoid this, the supply pipe is made of low-melting material. It melts in a matter of seconds and interrupts the path of fire into the bunker, guaranteeing a fairly high level of fire safety.
The design of a pellet burner, be it a torch or a retort, may differ from one manufacturer to another, although not significantly
Therefore, it is worth paying attention not only to the price, but also to what determines this price. In any case, inexpensive pellet burners are a utopia, because this equipment often costs more than a solid fuel boiler. Essentially, a boiler is simply reliably welded sheets of metal within which water circulates
The burner design is much more complex, especially the flare burner
Essentially, a boiler is simply reliably welded sheets of metal within which water circulates. The burner design is much more complex, especially the flare burner.
Materials for the device
Let's look at how to make such a sawdust stove with your own hands.
To make it, without a register, you will need:
- Pipe with a diameter of 400 mm, wall thickness 10 mm . You can, of course, use a thinner wall, but then the service life of the boiler will be significantly reduced.
- Blower pipe with a diameter of 76 mm . If it burns out, it can always be replaced, so the wall thickness does not matter much.
- Metal for the lid with a thickness of at least 10 mm . In this case, the lid must be strengthened at the edges. Otherwise, she will suffer from high temperature.
- Chimney pipe with a diameter of 100 mm .
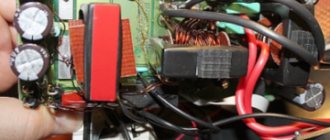
Burner electronics.
As I already wrote, all electronics are powered by a separate power supply. Therefore, all burner control circuits are isolated from CPU signals by optocouplers. . Source wiring to be adjusted The upper part of the circuit is the flame sensor. A photoresistor is used as a sensor (I will indicate the brand later). The lower part of the diagram is the control of the boost turbine. Control is carried out by two low level signals. If both inputs are ones, then the turbine is turned off. When a low level (compared to +12 CPU) is applied to the “low speed” input, the full supply voltage is supplied to the turbine through a field-effect transistor. This mode is used when purging combustion residues in the burner before the next loading and ignition.
We build a boiler on sawdust
How to make such a boiler yourself?
A plug is welded to a pipe with a diameter of 400 mm on one side. This will be the bottom of the boiler. The height of the boiler depends on your needs. Calculate in this way that during normal operation one bag of sawdust is enough for 8-10 hours.
Our advice: a 1500 mm high boiler with a full charge can operate for up to 40 hours without recharging.
- A cover is cut out of metal 10 mm thick.
- In the picture above you can see that it is made in the form of a polygon, this is not important, it’s just that it’s much easier to cut thick metal if you use a guillotine.
- Exactly in the middle of the lid, it is necessary to cut a hole of such a diameter that a pipe with a diameter of 76 mm can be freely inserted into it. The gap should not be too large.
Our advice! Cutting a completely even hole in thick metal at home is quite difficult. Therefore, use a lathe to make a thick washer. It should fit freely onto the 76th pipe and at the same time cover the irregularities in the cover hole. By electric welding the washer to the lid, you will get a completely even hole into which the 76th pipe fits perfectly.
- On the side of the upper part of the boiler body it is necessary to weld a chimney outlet from a 100 mm pipe.
DIY pellet burner: varieties
Devices that are used for processing granular raw materials are divided into two types depending on the principle of operation - with forced intake and gravitational. The choice of one type of equipment or another depends primarily on individual operating conditions.
At the moment, pneumatic pellet burners from Obshchemmash are popular
Devices of this type include several mechanisms through which granules are delivered. The first of them operates using a pneumatic system. The second mechanism is equipped with a special tool - a screw. Safety in the system is ensured by the design of the channel, installed from the bottom up, through which the granules are supplied.
Automatic devices have one serious advantage - fire safety. Such devices are used in equipment from different manufacturers. For example, they are integrated into Teplodar boilers. Pellet burners, reviews of which are mostly positive, are quite expensive. The price of some models exceeds 150 thousand rubles. More budget options can be purchased for 60-80 thousand rubles.
The pneumatic type design is characterized by maximum safety. This is because the pellet delivery system delivers fuel in small portions. Thus, it is not delayed in the communication channel. For such a burner, it is possible to install a large hopper that does not require frequent loading. If desired, a device of this type can be purchased. Currently, pneumatic pellet burners from Obshchemmash are very popular.
Screw-type feed mechanisms include two main units. Using the first auger, granulated fuel is taken from the bunker. The operation of this device allows you to transport pellets to another receiver. After this, the second screw sends the raw material directly to the burner.
Automatic pellet burners are characterized by high fire safety
The disadvantage of devices in which fuel supply is forced is their dependence on energy. In the event of a power outage, the burner stops operating.
Gravity pellet burner: design features
Devices of this type, operating on pellet fuel, have a different operating principle for supplying pellets. It should be said right away that such units are more convenient to use. The main advantage of the gravitational mechanism is that it does not require a connection to the electrical network.
In this case, the pellets are located in a bunker and can enter the connected channel under the influence of their own weight. There are several popular domestic companies producing such units (Pelletron, Behemoth). A pellet burner of this type is started very simply - by changing the position of the damper
It is important to remember that there is a draft regulator installed on the chimney, which can also be adjusted
Gravity pellet burners can be used without an electrical connection
The efficiency of gravitational devices is slightly lower than that of analogues that operate through the forced supply of granular fuel. Installing this type of pellet burner is not a difficult task. Its complete connection can be completed in just a few hours.
In order to increase the fire safety performance of this device, many manufacturers install special dampers on it. They are equipped with thermal sensors, which, if a flame enters the channel connecting to the bunker, are activated and block the passage.
Making a blower
Blower installation
The boiler is basically ready. All that remains is to make a blower.
The picture shows how it is arranged.
- A piece with a length equal to the height of the boiler is cut from a pipe with a diameter of 76 mm.
- In the lower part, 3 or 4 pieces of reinforcement or steel rod are welded so that the blower increases in length by 100-150 mm. This is exactly the distance by which it rises above the lid.
- Using a grinding machine, holes 100 mm long and 5-7 mm thick are cut in the blower. The quantity directly depends on the diameter of the housing pipe and its height. They are located on 1/3 of the blower.
How to load fuel correctly?
Firebox and chimney
The illustration shows an empty firebox. How does the stove work and how to use it?
Unlike, for example, “bubafoni”, the blower pipe is inserted directly into the firebox with the pins down. They should rest against the bottom, with the blower located in the center.
- Fuel loading begins.
- Fuel is loaded up to the chimney level.
- Sawdust must be compacted.
- The better the sawdust is compacted, the more efficiently the stove operates, and this significantly affects the operating time.
- In this case, as the fuel is compacted and loaded, the blower must be slightly rocked to the sides so that a small gap is formed between the blower and the compacted fuel.
- Otherwise, the ignition process will be significantly delayed.
Video material
Independent processing of wood waste using a screw press of your own production will be rational only if you have free time and affordable raw materials. Therefore, carefully weigh the pros and cons of such a decision before embarking on the process of creating equipment.
Fuel loaded - start
Boiler ready for operation
- You can ignite the fuel.
- You can set fire without the lid installed, but it is better to install the lid right away, and pour a little waste with kerosene or gasoline into the ash pit, 50 g is enough.
Our advice: to regulate the draft on the blower, you can install a damper in the chimney.
- After the fuel ignites, it is necessary to close the damper to ¾ of the hole.
- After 2-3 minutes, the damper must be slightly opened and the required air supply adjusted.
- When the oven reaches operating mode, you can hear a steady hum. Using the damper, the operating mode of the oven is regulated.
Installing a coolant register
Installed register
Now you can think about connecting the boiler to the heating system. To do this, you will need to install a register at the chimney outlet of the boiler.
The figure clearly shows the installed register with the connected supply and return connected to the central heating system. This is one option, you can use a completely different one. The main thing is that it corresponds to the thermal parameters of the boiler you have manufactured and fully satisfies the volume of the installed radiator heating system.
We will not dwell in detail on the structure of the register. Let's say one thing: the closer to the boiler it is installed, the more efficiently it works.
Pipelines connected to the register
Basic rules of thermal insulation
But that is not all. You can significantly increase the efficiency of the boiler if you insulate it.
We have talked many times on our pages about the thermal conductivity of materials. In the article Iron stove for a bath with your own hands - knowledge is power there is a video that clearly talks about such an effect as thermal radiation.
Let us briefly note that during the operation of any furnace, thermal radiation is generated that freely passes through the metal. If our boiler worked without a register, it would be great; it would easily heat the room in which it is installed.
- But our boiler is mainly aimed at heating the coolant passing through a register installed on the chimney.
- This means that we absolutely do not need heat losses escaping through its walls; they must be directed into the chimney.
Thermal radiation without loss
The above article and video discuss this issue in detail. It becomes clear that lining the boiler with bricks close to its walls will create an excess of thermal radiation in the boiler firebox, which, together with the exhaust hot gases, will rush into the chimney. That’s what we need, and a damper installed in the chimney after the register will allow us to well regulate the operation of the boiler and the heating of the coolant.
You can line the boiler and register with basalt wool, and make a casing of tin on top.
Boiler installation on a permanent basis
“Underground” installation of a boiler with thermal insulation
If there are no problems with sawdust in your region, and this heating method is the most profitable, you can install this boiler more rationally and conveniently.
The figure shows the boiler installation diagram:
- A pit of the appropriate size was dug for its installation.
- A foundation is laid at the bottom of the pit.
- The walls of the pit must be strengthened against crumbling.
- The boiler is installed in a pit.
- Thermal insulation is installed around the boiler, inside the pit.
- The boiler cover is thermally insulated separately so that it can be removed.
- Coolant pipelines are connected.
- The register is also insulated.
- The chimney is connected.
- The boiler is ready for operation.
Is it necessary to insulate?
Foamed concrete has low thermal conductivity. But it’s still a stone material that needs additional insulation. It is always carried out strictly outside. If the width of the belt is less than the width of the wall, it is usually possible to still cladding the structure flush with the wall cladding. It is not very wise to use simple polystyrene foam - it is much more correct to use EPS; if you use mineral wool, be sure to leave a ventilation gap. Sometimes another situation arises:
- the width of the belt and wall is identical;
- finishing is completed;
- There is no gap between hardening and cladding.
Then the thermal protection is increased along the entire perimeter to the required height. If the house has 2 floors, and the reinforced belt is located at the interfloor level and after the second floor on the mauerlat, you will have to make 2 lines of insulation.
In the next video you will see the filling of an armored belt for a house made of aerated blocks.
Service? No problem!
As can be seen from the figure, excellent thermal insulation of the boiler is achieved and maintenance is much easier. With a fairly high boiler, loading fuel is not entirely convenient, but in this option it is not difficult.
- It is enough to open the lid, located almost at floor level, and you can load fuel.
Many people may have a question: how to clean a boiler? We dare to assure you that there will be no problems.
- During operation of the boiler, the fuel burns completely.
- At the end there remains a small handful of ash that fits into one scoop.
- It seems that for a person who makes sawdust stoves himself, it will not be difficult to make a brush and dustpan with a long handle.
Is it possible to install the boiler outside?
What else is worth noting is that you can install the boiler in this way outside the heated room. You just need to install a box on top and insulate the pipelines well. In this option, the boiler will not cause any trouble at all and will not take up extra space in the room.
Having considered the issue of constructing a sawdust boiler assembled with your own hands, it becomes clear that with certain skills and knowledge, a simple unit can turn out to be quite a decent heating boiler.
Malfunctions and their elimination
To ensure trouble-free operation of a pellet boiler, it is first necessary to correctly position and install the heating equipment.
The installation area must be strong, capable of supporting not only the weight of the equipment itself, but also the weight of the bunker filled with pellets. Walls and floors must be insulated with non-combustible materials. Installation of ventilation and smoke exhaust is carried out only from non-flammable, durable and high-quality materials.
There are several relatively simple malfunctions in the operation of pellet equipment, which can easily be corrected independently:
- an increased level of fuel consumption can be caused by low-quality pellets, or a sharp drop in temperature outside;
- the appearance of sparks from the chimney pipe is most often caused by clogging of the ash pans with combustion products;
- the appearance of smoke and popping noises when opening the door of the heating boiler is usually the result of clogged fire and chimney pipes;
- Insufficient heating of the room is observed when the boiler power is incorrectly selected, the number of heating radiators is insufficient, or there is an air lock in the system.
As practice shows, it is advisable to purchase the most complex components and elements in ready-made form. A burner, firebox, oven doors, sensors and programmers, a fan and a factory-assembled electric motor are always preferable to do-it-yourself equipment.
