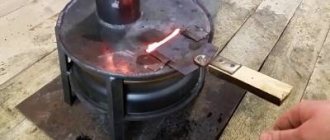
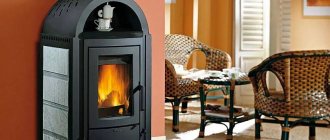
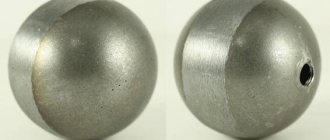
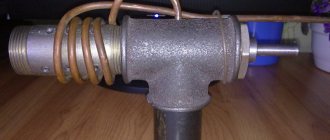
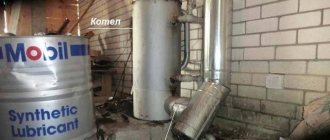
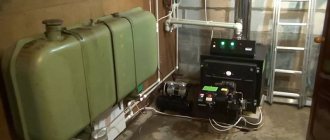
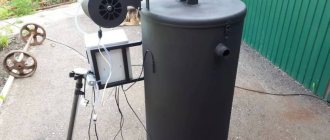
I recently built a waste oil stove myself. It took a little time, as well as money. Don't judge me by the photo - I took it hastily, so there was no time to be particularly careful. This stove can also be heated with wood - a large chamber is well suited for this.
Here's a stove being worked on
Working off
Safety precautions
I'll start right away with warnings and moralizing. Before starting work, soberly assess your capabilities. Remember: this oven is a potentially dangerous piece of equipment. Any mistakes can lead to tragic consequences. But if you do everything correctly, a finished homemade stove during testing will be in no way inferior to a certified factory-made heater.
I made the stove myself. I am not a specialist in the field of heating systems and do not count on such a title, I am providing the instructions as they are, you can use them strictly at your own responsibility.
The only thing I can advise from my experience: under no circumstances assemble a non-drip type oil stove. For such units, the waste tank is located at the bottom of the main part of the structure. This is not recommended for the reason that when heated, the oil becomes flammable and generally unpredictable.
Also, I would not advise you to assemble a stove with an open burner and flame.
Also, I would not advise you to assemble a stove with an open burner and flame
Equipment parameters
Potbelly stoves operating in mining have the following positive characteristics:
- size and other parameters can be selected by future users, so it is possible to obtain equipment that will be suitable for a specific structure that needs heating;
- oil-based products are cheap to operate;
- making them with your own hands is not difficult, and for this you must first draw a competent and up-to-date design diagram , and it is also advisable to watch a training video ;
- processing equipment heats up very quickly, so heated rooms quickly warm up ;
- The efficiency is high;
- the heat received from the operation of the stove is distributed evenly throughout the room;
- If you create a stove with your own hands, then you can create a hob in it, which will allow you to use the equipment not only for heating the room, but also for cooking and heating food.
However, products for which it is necessary to use processing have not only advantages, but also some disadvantages. These include:
- the room will be warm only if the potbelly stove is constantly running ;
- the working material must be constantly kept in the required quantity to warm up the equipment;
- It is imperative to install a chimney , which must be periodically maintained and cleaned of accumulated soot and dirt .
The principle of operation of a homemade stove during testing
My working stove works on a very simple principle. Ignition is in progress. The fuel begins to burn on the surface of the body and heats up the stove. As the process progresses, oil vapors are removed through the chimney under the influence of draft.
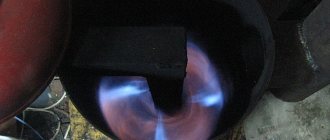
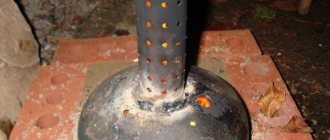
The stove design includes a part of the chimney with many holes (usually up to 50). This part of the unit is called the burner. In such a burner, oil vapors are mixed with oxygen entering the smoke exhaust pipe under the influence of draft. As a result of their mixing, the combustion process begins to be much cleaner and more intense, releasing a huge amount of heat.
The principle of operation of a homemade stove during testing
Main design features
Products using oil are, first of all, attractive because this type of fuel is incredibly accessible and cheap. It accumulates in large quantities in the garage of almost every car owner .
Therefore, it is often possible to obtain the required amount of fuel completely free of charge. A potbelly stove can be purchased or created independently. Most often, people who already have this wood-burning stove want to improve it with their own hands, as a result of which the waste itself will act as fuel, or the joint use of these types of fuel is allowed.
In an oil stove, you can regulate the combustion intensity , for which you use the neck cover located in the lower part of the structure. If there is a need to quickly warm up a cold room, this lid must be opened completely . To maintain the optimal temperature in the room, the lid must be opened a few millimeters.
A product operating in mining requires a specialized chimney, which has quite a lot of requirements . This is due to the fact that its height should be approximately 4 meters , and its diameter cannot be less than 10 cm. It is advisable that the pipe be completely free of horizontal parts. To get good draft and prevent condensation from forming on the chimney, you need to insulate it outdoors with your own hands.
What to assemble the stove from?
To assemble such a stove, I prepared the following:
- 50 liter gas cylinder;
- steel pipe. It is best to use a pipe with a diameter of 10 cm. Two meters of the product was enough for the body, burner and chimney;
- steel corner. In total, it took me a little more than a meter of 5 cm corner. From it I made a stand for the stove, various internal parts of the heat exchanger and door handles;
- sheet of steel. About 50 cm2 of 4 mm sheet was used for the plugs and the bottom of the upper chamber;
- brake disk. I used a cast iron disk from a machine. The main thing is that it fits freely into the cylinder;
- empty freon bottle. A standard bottle will do. The main thing is that the needle valve works. I used it to make a fuel tank;
- a piece of fuel supply hose;
- a pair of clamps;
- a piece of half-inch pipe. Oil will be supplied to the stove through it;
- half-inch valve;
- loops.
Case manufacturing
I will make a stove from this cylinder
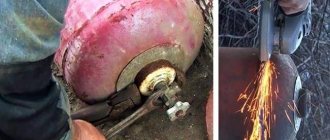
I used a used cylinder. There was no more gas in it, but just in case, I opened the valve and left the cylinder outside overnight.
Then I carefully and slowly drilled a hole into the bottom of the cylinder. To prevent sparks from appearing, I pre-moistened the drill with oil.
Hole
Then I filled the bottle with water and drained it - this removed the remaining gas. Work carefully, try not to spill gas condensate, as... It stinks very strongly and for a very long time.
Then I cut out a couple of openings. In the upper opening I will make a combustion chamber and install a heat exchanger, in the lower opening there will be a burner with a tray. The chamber at the top is specially made so large that, if necessary, it can be heated with wood, pressed briquettes, etc.
Shown how to cut a balloon
Shown how to cut a balloon
Shown how to cut a balloon
Shown how to cut a balloon
In the end this is what happened
Then I once again washed the opened gas cylinder from gas condensate.
Bottom of the firebox chamber and burner
Then I made the bottom for the top compartment of the stove. For this, I used a sheet of steel 4 mm thick.
The bottom was cut out of steel
I'm trying on the bottom. Everything is cut neatly and fits together with almost no gaps.
Dontse is in place
I decided to make the burner 20 cm long - that would be enough.
This will be the burner
Drilling holes
Sanded
I made many holes around the circumference so that air could easily get to the fuel. Once all the holes were done, I sanded down the inside of the burner. You should definitely do this too, because... soot will begin to actively accumulate on the protrusions and other defects.
First, I welded the burner into the bottom of the upper chamber, and then installed them in their proper place. You can safely lay wood on such a shelf of the stove. Relevant for cases when it is not possible to replenish mining reserves.
First I welded the burner into the bottom of the upper chamber
Installed the burner
Making a pallet for mining
The tray was made from a cast iron automobile brake disc. Cast iron has good heat resistance, so I decided to use it.
I will make a pallet from this disk
I welded the bottom underneath.
The steel circle is the bottom
Welded the bottom
I welded the lid on top. In it you can see the counterpart of the burner and the opening. Air enters the stove through the opening. I made it wide - it's better that way. With a narrow opening, the air draft may not be strong enough, which is why the oil will not be able to get into the pan.
Next I made a coupling. In my stove it connects the pan and the burner. With a coupling it will be much easier to maintain the stove. If necessary, I can take out the tray and clean the burner from below.
Next I made a coupling
coupling
I put the clutch in place
I put the clutch in place
The coupling was made from a 10-centimeter pipe, simply cutting it along the longitudinal edge. I did not weld the opening in the coupling - there is no need for this.
Underground spaces
In addition to indoor air exchange, ventilation of underground spaces is necessary. Due to its incorrect operation or absence, the following problems appear:
- Fungus and mold, due to its close location to the soil.
- Unpleasant musty smell.
- Excessive dampness.
Ventilation of the underground space is divided into natural and forced.
If the house is close to the ground, then the ventilation ducts between the finished and subfloors are equipped with fans. At the outlet, the channels are protected with nets. The nets will help prevent rodents from entering the house, and the ceramic plates will retain heat.
Ensuring oil supply
I'll insert a tube into the hole
Waste will drip through the tube
The tube was caught by welding
I cut the pipe
Next I worked on the oil supply system. To do this, I took a piece of pipe and welded it to the pallet through a previously prepared hole. I cut the pipe in advance so that the waste stream could pass normally through the opening in the pan.
This is an emergency valve and a tube that leads to the tank
I ran the tube to the tank and installed the valve.
Chimney installation
I'm making a chimney
I made the smoke exhaust structure from a 10-centimeter pipe. Nothing supernatural - I simply welded the pipe to the hole in the center of the top of the body.
The chimney led to the street through the wall to the roof. A piece of metal sheet was attached to the wall for fire protection. It is better to pass the pipe itself through the wall in a special fireproof glass.
Here you can see how the pipe goes through the wall
Chimney, view from the street
Heat exchanger assembly
I made the stove to heat the garage. I don’t have hot water heaters in my garage, so I decided it would be better to have it immediately heated and circulate the air. If you have water batteries, then you can abandon the air heat exchanger and simply run 4-5 water coils through the upper chamber, connecting them in parallel. In this case, the design must be supplemented with a circulation pump and fan. Such equipment will allow you to heat the entire house with a stove; you just need to allocate a room for installing the stove.
Heat exchanger assembly
Let's go back to my heat exchanger. I installed it between the smoke exhaust pipe and the stove burner - this is where the heat is greatest. I welded an iron plate to the heat exchanger. Thanks to it, the flame will be held better. It will also help distribute the fire inside the stove body.
An air swirler was installed inside the heat exchanger. There are no engineering delights in such a swirler, but it copes with its task one hundred percent. When operating at maximum power, the metal of the case heats up to a scarlet color, and the heated outgoing air even penetrates the glove. You can see the swirler itself in the photo.
I'm making a swirl
I'm making a swirl
I'm making a swirl
Installed a swirler
Next, I took a duct fan and placed it on one side of the heat exchanger. By the way, you can connect a thermal relay to the fan for automation. This will allow you to set the temperature yourself and save resources. For example, I decided to use a thermal relay from Autonics - I just had it lying around idle. But you can also take some budget model, for example, Vemer KLIMA. I tried it too, it works great.
Supercharged
This is what happens
Heat is concentrated in the firebox compartment.
Oil tank
Oil tank
To make the tank, I took a freon cylinder. You can buy it for pennies at any service station or metal collection point. The main thing is that the needle valve of this cylinder is in good condition. With its help, in the future you will be able to accurately control the amount of fuel supplied.
Oil tank
The tank was connected to the stove using a hose. The hose was connected to the valve. The tank itself was secured in an inverted position.
To fill the waste, I cut a hole in the tank.
Ventilation.
Ventilation holes for exhausting the atmosphere should not be blocked by anything. Or there will be an increase in carbon monoxide in the room, which can cause poisoning. Stoves burn in the absence of soot and smoke, there is no aroma, and are in many ways more efficient than a wooden stove. The heat of the oven is up to 900 degrees - rapid heating. Acceptable auxiliary equipment is a fan, automatic oil supply, water tank, boiler, heater. The bent chimney increases the warm air supply. Operating rules Any oil, artificial or mineral, is suitable for using the stove. It is possible to pour no more than half of its size into the tank, because there must be room for the formation of vapors. When you have poured the oil, you need to take time for the vapors to become enriched with oxygen, after which they are ignited using long matches. As soon as the vapors ignite, the damper must be closed halfway; after heating the furnace, place the damper in this position so that the gases burn moderately in the central chamber.
Arrangement of doors
The stove is almost ready. The finishing touches remain. I cut an opening in the door of the lower chamber through which air can freely flow to the pan and the stove burner.
Gap
The opening in the upper door was equipped with thrust plates for additional sealing.
Riveted the thrust plates
I assembled a simple lock for the top door. During the heating process, the stove body “leads”. To ensure that the combustion chamber remains airtight, the top door must close as securely as possible. That's why I made the castle.
Simple castle
I screwed several pieces of metal corner to the wall.
I installed the stove on the screwed corner. This is both convenient (if necessary, it will be much easier to carry out an inspection) and functional (heat loss into the ground is reduced).
Installed the stove
Improvement options
The model presented above is a basic base, onto which additional elements can be attached at the request of the master. For example:
- To increase the efficiency of the stove, a heat exchanger can be built in its upper part. Passing through the labyrinths, hot air heats it, and therefore the air in the room. Then, to the method of heating with infrared radiation, air is also added.
- Sometimes a reflector is made consisting of two pipes. One of them forces cold air in; hot air will come out of the other. This option is good because the heat from this pipe can be transferred to the next room.
- You can “dress” the stove in a brick coat. When warming up, the brickwork retains heat for some time.
- You can also build a permanent water tank in the upper part and use the stove as a boiler.
- A metal tube and any container (even a plastic bottle) is suitable for making automatic oil supply, based on the principle of communicating vessels.
How to paint the stove? To make paint, you need to mix liquid glass (500 g), aluminum powder (200 g) and chalk (20 g). Mix everything. Ready!
How to light and stop the stove?
After many experiments, I found the simplest and most effective way to ignite such a stove. First I pour oil into the pan. There shouldn't be too much of it. It is enough for the oil to cover the bottom of the pan.
Then I take a piece of foam rubber and thoroughly moisten it with gasoline or solvent. I place the soaked foam rubber in a tray so that the lower part of the piece is immersed in oil.
Then I set the foam on fire. It burns steadily even when the draft gets too strong. As a result, the surface of the pan is heated to the required temperature.
Then I carefully open the valve of the fuel tank until it begins to flow in a very thin stream. Adjust the feed rate as carefully and slowly as possible.
The stove will gradually enter operating mode. Periodically monitor the waste level in the pan.
To stop such a stove, it is enough to simply close the valve on the oil tank, and then, when the oil stops flowing, close the emergency valve. The oven will go out completely within 3-5 minutes and the housing will begin to cool.
Simple rectangular stove
A simple rectangular do-it-yourself potbelly stove, a drawing that we provided, is a little more complicated to make than a stove made from a cylinder. For this option, as for the manufacture of a sauna stove, sheet material is used. The basis should be metal three millimeters thick. The thickness of the metal will be enough to use the unit for five years.
This homemade model effectively heats a room of up to twenty square meters, the ceiling height of which is three meters. Please note that we will be producing a model that is not equipped with an ash pan. In our case, the stove will have a throttle damper.
How to make this potbelly stove with your own hands for a country house:
- We draw up a drawing of the unit. We indicate in the drawing the dimensions you need for the height and width of the oven. The drawing shows the location on the throttle door.
- Having drawn up the diagram, we proceed to marking the material. We measure the parts of the body according to the dimensions indicated in the drawing. In one of the sides you need to mark a hole for the door, and draw a circle in the door.
- Having carried out such manipulations, we arm ourselves with a grinder and saw the metal into pieces. Using a magnetic square, we expose two parts of the material, and grab them with a few drops. Let's check the evenness of the diagonal and vertical. If all the parts are installed, as required, we weld the joint with a continuous seam.
- Thus, we weld the shape of the furnace. It is advisable to make seams from the outside of the body. We cut out the side walls to the dimensions of the resulting structure.
- We weld one part. In another part we cut out a part for the door; you can choose any door size. Cook the side sides on the cut piece. We weld strips around the perimeter on the body.
- We fix the resulting workpiece on the hinges. We find a piece of rectangular pipe; you can also use a round one. We apply the segment to the door and outline it with a marker. Cut a piece from the door.
- We weld a piece of pipe. We drill two holes in it. We select a round timber of suitable diameter for the holes and cut it into two parts. We insert one round piece of wood on one side and weld it to our cut-out plate on the back side. We put the spring on the outside and secure it with a nut or washer. We do the same with the other side, but when the spring is fixed here, you need to weld the lever. We will use it to regulate the air supply to the firebox.
- Now, fix the hook on the body. We make a latch on the door. Next, we weld the legs to the bottom of the stove. They are made from corners of the height you need. We apply a section of the chimney pipe to the upper part and trace it along the contour. We cut out a piece of metal, attach a pipe and scald it in a circle. If a pipe needs to be bent at a certain angle and you need a pipe bender, then read our article on how to make one.
The rectangular potbelly stove is ready. We don’t have a blower, since the ash will gradually accumulate in the firebox and this will prevent the bottom from quickly burning out.
How to clean the oven?
First cleaning
As work progresses, soot will accumulate in the burner, flue pipe and oven tray. Naturally, the stove can be cleaned only after it has cooled down.
When cleaning, I usually follow the following sequence:
- I take a couple of handfuls of clean sand or small gravel and throw them one by one into the exit of the smoke exhaust pipe from the street side;
- I remove sand or gravel with soot from the chimney through the upper chamber;
- Using a rod, I brush away the fumes from the walls of the stove burner into the lower pan;
- I take out the tray itself and empty out the waste.
I hope my experience will be useful to you, and you can assemble a stove using waste oil as easily as I did.
Good luck!
Method 3. “Heavy Artillery”
And now, let's look at a more radical way to clean the oven from old grease and fumes using special products from Amway, Faberlic or Bagi Shumanit spray.
What you need:
Gel for cleaning ovens. Briefly about popular oven cleaning products:
What we need:
- Water;
- Rubber gloves (required!);
- Sponge, rag, brush for treating hard-to-reach places;
- ...Fresh air from an open window (especially if you use Schumanite and other products with a strong odor).
Instructions:
- Remove everything unnecessary from the oven: remove and set aside the rack, baking sheets and all other oven contents.
- Lubricate all surfaces of the chamber and the door with gel: this is very convenient to do with a brush or a toothbrush (for example, a toothbrush). Before you start processing, open the window and put on gloves!
- Let the product “work”: leave the oven for 15-30 minutes, depending on the degree of contamination.
- Clean the oven from burning and grease: after this “soaking”, old grease and burnt-on food stains will be washed off quickly enough.
- Remove any remaining product: When you have cleaned all surfaces of dirt, thoroughly rinse off any remaining gel. A spray of water will help clean the camera in hard-to-reach places.
- Put the pans and rack back in place: well, that's it. All that remains is to wipe the outside of the door.
