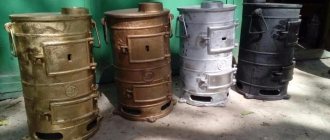
Many people know and have heard about potbelly stoves - these heating devices appeared at the beginning of the twentieth century, and by the 50s they had already become widespread throughout the USSR. There is still debate about what the name “Pobelbelly stove” is associated with. Some argue that this name is associated with gluttony, and at one time only aristocrats, who were called bourgeois, could afford such luxury. Others are of the opinion that the secret lies in the period during which these stoves appeared - the Bourgeois Revolution of 1917.
What is a potbelly stove?
At first glance, a potbelly stove type POV-57 looks like a large cast iron barrel, but in reality everything is somewhat more complicated, and the best minds of that time worked on its creation. The diameter of the chimney, the location of the air intake door, the thickness of the walls - all this determines its operational properties. One such stove can heat up to 20-25 square meters, depending on the height of the ceilings.
Areas and features of application
This heating device is suitable for heating:
- Field tents and tents: army, medical, culinary, etc.;
- Carriages, cabins, small temporary living quarters;
- Garages, boxes, mini-hangars, warehouses;
- Greenhouses and greenhouses.
The use of POV-57 stoves in apartments and houses without a special supply ventilation system and a full-fledged chimney is not allowed.
Features of potbelly stoves POV-57
The heating device runs on solid fuel: wood, coal, lumber waste, briquettes. It is absolutely unpretentious, but requires compliance with safety rules and constant monitoring. The average burning and smoldering time of one stack of firewood is 3-5 hours, coal - 4-8 hours. Due to the high heat capacity of cast iron, after the fuel has completely died out, the stove releases heat for another hour.
POV-57 is used not only as a heating device, but also as a cooking stove. You can not only warm up tea on it, but also cook a full meal. Aluminum army or camping utensils are especially suitable for this. It quickly imparts heat to the contents of the pot.
How to use?
The potbelly stove, although it requires constant monitoring, is very easy to use. In the upper compartment - the firebox, you need to load any ignition (paper and rags, wood chips or shavings), torches, and then, opening the ash door, light the fire. As soon as the flame starts, you need to load the firebox with good fuel: logs of hard wood and top with coal, briquettes, etc. Then the upper door is closed tightly, and the ash pan is covered so that a gap of about half a centimeter remains.
If the chimney is equipped correctly, the draft will ensure even burning of the fuel and uniform heating of the walls of the stove. This will take about 20 minutes, so after half an hour the room will be warm, and you can cook food on the oven lid.
Installation features
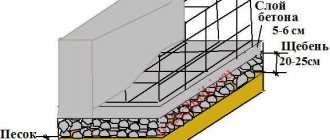
The stove must be installed on a non-flammable surface; the nearest flammable and combustible materials must be at least 1 meter away. The chimney must have no more than one bend with an angle of up to 90 degrees, and its height must be at least 0.3 meters above the roof ridge when used indoors. For stationary use, it is better to firmly fix the stove on a concrete base. Keep in mind that the top cover does not fit hermetically to the walls of the stove, so you cannot light the stove at night and go to bed - a person on duty must be assigned to it.
Why modernize?
The potbelly stove is a very simple heating device, although today it is deeply modernized. Such a stove, which has become a favorite solution for heating small country houses, can have not only a single-chamber, but also a two-chamber design. A modernized potbelly stove can provide heat even to houses where residents live permanently.
The simplicity of design and manufacture makes it accessible to purchase and use. In addition, a significant advantage for the construction of such a structure is the absence of a foundation. But, despite so many positive properties, the potbelly stove also has significant disadvantages:
- Its efficiency is quite small, the simplicity of the design carries with it an inherent drawback - a huge part of the heat from the potbelly stove “flies into the chimney”.
- To work with such a stove, strict safety requirements must be observed, since falling combustion elements can damage nearby premises and even lead to a fire.
- To heat a room with a potbelly stove, it is necessary to consume a significant amount of fuel elements, which is due to the fact that this type of heating is used only for short-term operation.
But this is not a reason to be discouraged; over the years, our “Kulibins” have found several simple but effective ways to increase the efficiency of a potbelly stove. In this article we will look at the modernization of the stove design itself.
Stove installation
The installation rules are based on protecting surrounding objects and walls from the hot walls of the potbelly stove:
- Base. It must be non-flammable. Of course, a concrete slab is ideal, but few people can afford such a high-quality foundation at their dacha. A section of ceramic tiles and a brick base are suitable. Models with legs are not so demanding on the base, since the legs, although they heat up, are to a lesser extent. Here you can use a sheet of tin.
- Distance to walls. If the walls are wooden or lined with flammable materials, the distance to them should be at least 70 cm, if plastic, even more. The same principle applies to furniture.
- Chimney. Pipe diameter from 85 to 150 mm. If possible, you should avoid joining pipes, especially in a residential area, but if you have to join, the joint must be completely airtight. The joints should not coincide with the place where the pipe passes through the floors and roof. In these areas, a fireproof barrier is made of brick, ceramics or concrete, which will protect the floor materials from fire. Often the stove pipe is placed out the window, and the stove itself is placed in the middle of the room. In this case, the section of pipe extending from the furnace (horizontal or inclined) will act as an afterburning chamber and transfer heat to the room.
- Ventilation. The potbelly stove burns with an open principle. This means that it will take the necessary oxygen from the room in which it is located. Therefore, according to the standards, it needs to provide a sufficient amount of fresh air: for 1 kW - 10 m3 per hour. Few country houses can boast of good supply and exhaust ventilation, so the problem is usually solved by ventilation. Otherwise, people will experience unpleasant symptoms of oxygen starvation.
Stove after installation
To make the potbelly stove mobile, that is, to be able to move it from place to place, part of the chimney can be made from fireproof corrugation. You just have to pay more attention to cleaning, because the corrugated area will become a place where soot accumulates.
Modernization methods
The design features of the stove do not allow for major changes, of course, unless you decide to make a small home nuclear reactor out of it, but all the proposed improvements are aimed at only one thing - heat preservation. During operation, the stove easily loses heat through the pipe; the thinness of the walls quickly transfers it, but does not allow it to be stored for a long time. The direct-flow furnace consumes a large amount of fuel, and its properties are aimed at consuming charcoal raw materials.
To modernize and increase efficiency, it is to obtain the greatest amount of heat with the same fuel combustion.
There are four main and simple methods for upgrading a potbelly stove, the use of which will significantly reduce heat loss:
- Attaching 2 tanks welded together from a washing machine.
- Making an ash pit.
- Grid with stones.
- Increasing the number of pipe bends
Let's take a closer look at them.
What types of stoves are there?
To make the case, one of two metals is used:
- Cast iron.
- Steel.
Wood-burning cast iron stoves for a summer residence will have an impressive mass. Its heating takes a little longer than steel.
But inertia pays off when decay occurs. The steel walls are hot while the combustion process is going on, and then they cool down just as quickly. Cast iron retains heat for some time after extinguishing.
In addition, cast iron has a longer service life; such a stove will not burn out for a long time. But at the same time, it can be damaged, for example, by dropping it or hitting it with a heavy object - there is a possibility of cracks appearing and the device will become unusable.
Other differences in models. Potbelly stoves can be:
- With legs.
- Without legs, on a flat base.
The former look more elegant and are safer to use.
- rectangular;
- barrel-shaped.
Barrel-shaped potbelly stove
The latter are most often made with your own hands, for example, from a piece of pipe.
Washing machine tubs
Many have noticed that when the stove is burning, sheaves of sparks often fly out of the chimney. This means that the fuel did not burn out completely and left the working chamber, taking with it most of the thermal energy. So, one of the first ways to improve a potbelly stove is to create a working chamber where small coals will burn out and heat will be retained.
A common method of such an improvement is to install two washing machine tanks welded together, which will act as a kind of car muffler.
Materials and tools
To make this structure we will need:
- first of all, two whole tubs from old washing machines,
Washing machine tubs
Instructions
To properly attach 2 tanks from a washing machine welded together, you must follow a simple guide:
- First, you need to weld two washing machine tanks together so that after welding they form a single container resembling a large cylinder.
- After welding, clean the weld seams and bring the single tank to a marketable condition.
- The next step is to make one hole at opposite ends of the tank, the size matching the diameter of the furnace outlet pipes. Carefully clean out the holes made.
- Insert the outlet pipe elbow into these holes, but so that the pipes inside the tank are at different levels, as if overlapping each other.
- Seal one connection between the pipe and the tank and clean it. Make the second hole in such a way that it fits tightly around the pipe, which will be directly inserted into the potbelly stove. There is no need to weld the second hole, as it will later be useful for removing carbon deposits inside the tank.
Upgrade with washing machine tanks
This simple improvement will allow you to retain a large amount of heat, which previously simply flew away into the chimney.
User manual
The most important condition for operation is good welding quality. Using chalk coating and kerosene, check for fistulas and defects. Be especially careful with the chimney seams. Load firewood into the combustion chamber, light the fire, close the door and regulate the process using the blower. To reduce the intensity of combustion, you need to screw on the blower; to put out the fire, just screw it on completely.
Heat emanating from metal at a temperature higher than that from brick or stone
To adjust the blower, always use a thick potholder, do it carefully and quickly. Clean the oven after it has cooled completely
If there are welding defects, operation is stopped and the defects are corrected. Carbon monoxide can cause death.
According to some reviews, this stove can smoke when the firebox door is opened. This occurs due to decreased cravings. The defect can be eliminated if you increase the diameter of the chimney pipe to 150mm and reduce its length
Slow burning stoves are popular among fishermen and tourists. By replacing a thick sheet of metal with light and thin stainless steel chimney pipes, they successfully use the Loginov scheme for winter fishing and tourism
Welding is rarely used for such furnaces.
Making an ash pit
An ash pan is a grate near a potbelly stove, on which fuel will subsequently be placed to heat the room.
A good ash pan provides the combustion chamber with a sufficient amount of air (that is, oxygen), and also provides good draft, thereby ensuring better combustion. In most cases, ash pans in potbelly stoves leave “much to be desired,” so upgrading the ash pan will help improve the performance of the potbelly stove.
An effective ash pit should be made of heat-resistant material and have a door, thanks to which you can avoid smoke in the room. Improving the ash pan will help turn an ordinary potbelly stove into something like a fireplace.
Materials and tools
- a metal sheet,
- fittings,
- welding machine,
- metal working tool,
- ash door.
Instructions
Making an ash pan yourself will require certain skills from you, and the production must be in accordance with the instructions:
- First you need to weld the box to the size of the potbelly stove, without the top wall and leave a rectangular cutout in the end wall. Steel is most often used in production. The dimensions must correspond to the width and length of the potbelly stove itself.
- Make holes in the bottom of the stove. The diameter of the holes should be about 20 mm.
How does a potbelly stove work?
The firebox consists of a combustion chamber, where wood is burned, and a chamber for the ash pan, separated from the combustion chamber by a grate. In the upper part of the firebox there is a flue channel and a hole for connecting the chimney.
The ash pan box is designed to collect ash that pours into it from the firebox. In modern stove models, the ash pan door is equipped with a seal and plays the role of a combustion mode regulator.
The oven door is a box with a window made of heat-resistant glass, a seal and a latch. The simplest models may not have a window.
The chimney consists of steel pipes, single-walled or double-walled (so-called sandwich). In the space between the pipes of the sandwich chimney there is a heat-insulating material (for example, expanded vermiculite). This technology increases the fire safety of the chimney by reducing the temperature in the places where it comes into contact with the structure of the house. The inner pipe of sandwich modules is made of stainless high-alloy steel, the outer pipe is made of mirror stainless or galvanized steel. The chimney is equipped with a special rotary damper - a damper for manual draft adjustment.
The furnace body is assembled from heat-resistant steel and covered with heat-resistant silicone enamel or other decorative materials that can withstand high temperatures. Modern stove models may have a special convector casing: cold air, entering it from below, is warmed by the walls of the stove and exits from above through special openings. This simple technology can significantly increase the efficiency of the furnace.
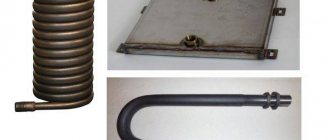
Optional equipment. A hob for cooking can be mounted on the top cover of the oven. There are models with a built-in electric heat gun, as well as with the ability to install heat sinks to supply warm air to adjacent rooms.
Stove for a summer residence (potbelly stove): device
Grid with stones
Modernizing a potbelly stove with a mesh with stones is quite one of the most common improvements. Almost everyone had a bath and steamed in the steam room. There you saw a set of stones that warm the air in the steam room.
The principle of this modernization method is similar. It is necessary to line the potbelly stove with stones, which continue to retain heat for a long time. It is worth remembering that you should not use galvanized material for manufacturing, since when heated, toxic fumes are released into the air.
Materials and tools
For this event we will need:
- a set of good stones (you can use high-quality clay bricks), preferably of medium size, similar to those you came across in the steam room.
- dense metal net, you can use a chain-link net.
- if you plan to do it like an adult, then you will need fittings and a welding machine.
Instructions
Making this improvement is simple:
- It is necessary to make a frame of metal mesh (or reinforcement) near the stove, which will not block access to the technological openings of the potbelly stove.
Precautionary measures
It is strictly forbidden to use flammable materials and metals with low melting points to create this improvement. Also, this structure should ensure free maintenance of the potbelly stove, not block access to the firebox, to the ash pan, and not interfere with the removal and replacement of outlet pipes.
How to properly install a stove in a dacha?
Attention: installation and first firing of the furnace is carried out only with the participation of a specialist from the manufacturer or supplier!
The stove can be installed on a foundation or directly on the floor. When installing the stove on a wooden floor, lay out a platform at least ¼ brick thick; its size should be such that the distance from the stove to the edges is at least 250 mm. A cement screed or metal sheet is laid on top of the brick. It is necessary to have a metal sheet under the combustion door. It is strictly forbidden to install fences around the stove that impede air exchange.
Distance to flammable materials:
- From the back and sides of the stove: at least 500 mm
- Door side: 1250 mm
- Top: 1200 mm.
The distance on one of the sides can be reduced provided that the flammable material is protected by brickwork ½ brick thick with a gap of at least 30 cm from the combustible surface. In this case, the distance from the other side of the stove to flammable materials should be 1 m or more. It is not permissible to reduce the safety distances behind, above or at the front of the oven!
Chimney. It is recommended to use thermally insulated sandwich modules in combination with single-wall pipes. The internal pipes of the sandwich are connected by inserting the upper element into the lower one, the external ones - vice versa: the upper segment is pushed onto the lower one. Remember: sandwich modules are under no circumstances installed at the base of the chimney, where it comes into contact with the stove; a single-wall pipe is installed in this place.
Where the chimney passes through the ceilings, a steel ceiling trim must be installed. The cutting thickness should be 70 mm greater than the thickness of the overlap. The gaps between the grooves and the floor structures are insulated with stone wool, expanded clay or other non-combustible materials. A special roofing passage unit is installed in the roof. When venting a chimney onto a roof made of flammable materials, it is necessary to install a spark arrester on the pipe.
The height of the chimney from the grate is at least 5 m.
The distance to flammable structures from the inner surface of the pipe is at least 500 mm. It is allowed to reduce the distance to 380 mm, provided that combustible structures are protected with a metal sheet on asbestos cardboard (8 mm) or plaster (25 mm) on a metal mesh.
The height of the chimney depends on its location and roof configuration.
- At a distance of less than 1.5 m from the ridge or parapet - at least 500 mm from the top point of the ridge or parapet.
- At a distance of 1.5 - 3 m from the ridge or parapet - not lower than the ridge or parapet.
- At a distance of more than 3 m from the ridge or parapet - not lower than a line drawn from the ridge downwards at an angle of 10° to the horizon.
- Above a flat roof - 500 mm.
We will allow the chimney to exit not through the roof, but through a wall made of non-combustible materials, subject to all installation rules. In this case, for normal removal of combustion products, the chimney pipe must be installed at an angle of at least 45° upward; horizontal placement of the chimney is unacceptable.
It is possible to heat the second floor by using heat from the chimney pipe. To do this, sandwich modules are installed only in places where they pass through the ceilings, and a single-wall pipe is installed in the heated room.
Potbelly stove in a country house
Increasing the number of pipe bends
Increasing the bends of the potbelly stove chimney
The tank at the outlet of washing machines will retain a certain amount of heat, but it will not be able to retain all the heat. A large amount of heat will continue to escape into the chimney.
Therefore, one of the improvements that provides additional heat retention is to increase the length of the outlet pipe. A long pipe running through the room, but with good exhaust, ensures the transfer of heat from its surface, which was previously lost.
Materials and tools
- several elbows that can be easily placed in the room after the potbelly stove,
- brackets for fastening pipe elbows,
- welding machine and metal processing tools.
Instructions
- First you need to mark the location of the pipe. It can pass with a large number of bends and zigzags, thereby ensuring maximum heat retention, without forgetting about the loss of exhaust draft.
- After marking the pipe laying location, it is necessary to install the pipe mounting brackets. Particular attention should be paid to the joints of pipe elbows and corners. Brackets must be made of heat-resistant materials.
- Lay the pipes to ensure a tight, hermetically sealed connection, and, if necessary, modify the elbows to ensure the pipe is laid along the marked route.
- Firmly secure the elbows in the brackets, check the working draft (burn newspaper in front of the pipe), check the tightness of the connections, connect the inlet elbow to the stove.
Design and principle of operation
What is the difference between the Loginov Potbelly stove and other metal stoves? The point is the L-shaped blower. The ash pan door is replaced with pipes welded perpendicularly. The edge of the horizontal pipe is tightly welded, and the edge of the vertical pipe has a thread for a plug. There are holes made on the thread - by screwing the plug you can reduce the air flow, thereby regulating the combustion process.
Loginov's original potbelly stove
It is important to make a plug with a slight play, so that expansion of the metal when heated will not cause problems. A screen is welded to the sides and back on the stiffeners to increase efficiency
Without such screens, it is extremely uncomfortable to be near the stove - the temperature is too high and can cause burns. The firebox door is also threaded. A 200mm pipe serves as the firebox opening, and a plug with a handle 220mm in diameter is screwed onto this pipe.
12918027525f238194e21c71fdf01c56.jpe
You can see more details about Loginov’s potbelly stove in this video:
Modification
N. Pyankov’s model is distinguished by the presence of an additional combustion chamber. Unlike more complex designs of slow combustion stoves, the Pyankov potbelly stove is manufactured even faster, the model proposed by Loginov. It is enough to weld steel sheets 140-160 mm long to the back and front walls of the furnace at different distances from the top. The distance between the sheets should be 80mm. The grate is installed 80mm from the bottom. Pyankov moved Loginov’s firebox door to the top of the stove and began using it as a hob.
It will not be difficult for a good master to evaluate all the advantages and disadvantages of the two drawings. If desired, you can make a new model of a potbelly stove using only these two developments, changing the rectangular shape to a round one.
An example of a homemade design (in this photo there is a modernized Pyankov stove), but there is practically no difference in the manufacturing process.
Conclusion
A potbelly stove is one of the most reliable and common helpers for both summer residents and owners of garages or utility rooms and change houses. Moreover, you can not only purchase it, but also make it yourself. Manufacturing does not require any complex and hard-to-find materials, as well as very specific skills.
To improve the potbelly stove, we considered several types of modifications: attaching 2 tanks from a washing machine welded together; making an ash pan; mesh with stones; increasing the number of pipe bends. These improvements will increase heat retention and improve the operation of the stove.
Operating a potbelly stove
Using a potbelly stove involves alternating cycles of its kindling, which include:
- fuel loading;
- ignition of loaded fuel in the stove;
- heating the stove (its beneficial use for heating people and premises);
- cleaning ash from the ash pit and combustion chamber.
The most important stage is the loading of fuel, which must be placed in an order that facilitates its ignition. First, paper and thin dry branches are laid, with larger dry chopped logs on top of them. Coal is loaded, as a rule, from above onto already well-lit firewood. To restore draft, quite often you will have to disassemble the chimney and clean its pipes and elbows of accumulated soot. Also, the draft in the stove must be regulated by a damper damper, or by changing the length and position of the chimney pipes.
Thus, powered by solid fuel, which can be found almost everywhere, a hand-made mobile potbelly stove made of metal will become a reliable help to the zealous owner in many difficult life situations.
Prices
A USSR cast-iron potbelly stove can be purchased for around 5 thousand rubles (in a state of preservation). You can easily find a used stove online. Their cost starts from 1.8 thousand. An old potbelly stove will not be inferior to a new one if you approach the choice thoroughly. The main thing is to inspect it before purchasing for burnt parts or surfaces. Making a potbelly stove yourself will cost approximately the same amount.
Used stove
Where can I buy it?
Today it is unlikely that there will be a problem with finding the right product. There is a wide selection of bourgeois stoves on the Internet. There are websites that specialize in selling such equipment. You can use the well-known trading platforms Avito and Yandex.Market. You can buy such stoves or their modifications in large stores of household goods and home equipment, for example, at Leroy Merlin.
