When building a home, the heating system has always been one of the most expensive expenses. The comfort and costs of residents for electricity and other types of fuel during the cold season largely depend on how correctly the heating system is installed. Outdated heating systems are being replaced by increasingly newer and more efficient systems that have better heat transfer, thereby saving on fuel. These systems are of the beam type, and they require competent design and installation. This article will discuss the radiant heating system and its features. Here we will also consider important points that you should pay attention to when installing the wiring of a radiant heating system.
Differences from a two-pipe system
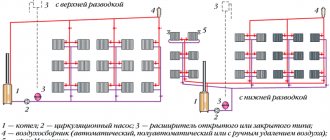
Two-pipe heating system
Autonomous heating systems are becoming increasingly popular among people. They have a lot of different wiring options. Until recently, conventional autonomous heating systems were used, but more recently they have been replaced by radiant heating systems. They are also popularly called collectors. The name speaks for itself, since individually each radiator is connected directly to the collector, which distributes the coolant. With this connection of radiators, they are completely independent of each other. In a radiant heating system, other heating devices can be used, which also do not depend on radiators in this system. The radiators here are connected in parallel to the collector. As a rule, the collector is mounted somewhere in a remote part of the room, or hidden in a wall, or in a special cabinet. The collector is sometimes quite large. It all depends on the area of the heated room. The beam system allows you to easily repair a failed radiator without stopping the entire system. A radiator in need of repair should simply be disconnected from the heating system and dismantled.
A conventional heating system uses a two-pipe circuit. It is also called tee. To install this autonomous heating scheme, much fewer pipes are required than for radial heating. But the additional costs for pipes in the beam system are more than recouped due to energy savings. The radiant heating system most clearly reveals its economic effect in residential premises with a large area, especially in multi-storey private buildings.
Design features
Radiant heating, unlike tee heating, which all owners of city apartments and old houses are familiar with, does not provide for serial, but parallel connection of batteries to the heating boiler.
In this case, a special manifold cabinet is installed in which all the necessary control equipment and pumps are carefully installed. pressure gauges, taps and so on.
The differences between the two installation schemes mentioned above are as follows:
- Tee wiring requires a much smaller number of pipes themselves, but during its installation you need to use a lot of fittings: tees, bends, couplings, and so on. This complicates the installation procedure. In addition, the sequential method of arranging a heating system is considered less reliable, since in this case there is a high probability of errors that will lead to depressurization, the formation of areas with different fluid pressures, and so on.
Tee pipe connection method
- Radiant heating wiring, despite the need to purchase a much larger number of pipes, uses only two connections for each radiator: at the junction with the collector and at the battery pipe.
As a result, you can safely wall up each “beam” of the heating network into the floor, without fear that it will leak at some junction. In addition, if a breakdown is detected, you can easily turn off the problem area without disrupting the circulation of coolant through heat exchange equipment installed in other rooms.
Radial diagram of heating pipelines layout
It should be noted that one of the main disadvantages of radiant heating is its price. This is especially true for systems equipped with electrical equipment.
Note! As in the case of a tee system, the radial system provides for the organization of natural (gravitational) and forced (using pumps) coolant flow. Let's look at both types in more detail.
Let's look at both types in more detail.
Pros and cons of the beam system
It is best to weigh all the pros and cons before installing a heating system and decide in advance which system will suit you best. Of course, the beam system has its own characteristics, which also need to be taken into account. Let's start with the negative points.
Disadvantages of the beam system
- This system has, perhaps, only one drawback - it is a larger number of elements in its design. In particular - pipes. It also uses more fittings;
- A large number of elements in a given system can increase repair costs. A conventional heating system has a lower estimated cost and is cheaper to repair.
A radiant heating system for a private home requires a more correct approach when connecting all heating devices, since violation of the connection rules is fraught with frequent breakdowns of the system as a whole.
Pros of the beam system
But all of the above loses its significance against the background of the general advantages of a radiant heating system. In a very short period of time, a properly designed and installed beam system:
- It will more than pay for itself. It also has a lot of useful and convenient features;
- When using a radiant heating system, you can have a differentiated approach to heating in each room. This approach allows you to more efficiently distribute heat in your home, which entails very large energy savings;
- This system is also convenient in that during its repair you can get unhindered access to pipe connections, which speeds up the identification of problems and their elimination;
- In a traditional heating system, hiding pipes is not very easy. The radial system allows pipes to be hidden from view either in the walls or under the floor. If this system is installed correctly, then no components or wiring will be noticeable;
- The correct radial distribution scheme allows you to effectively distribute heat throughout the entire area of your home.
Scheme development
At the initial stage, heating engineers work on the development of a heating scheme, carry out a series of calculations and achieve the same efficiency indicators of the heating system on all floors of the building. They draw up an axonometric diagram of the heating system, which is subsequently used by installers. Calculations carried out correctly by specialists guarantee that the designed heating system will be characterized by optimal coolant pressure, which will not lead to water hammer and interruptions in operation.
Inclusion of an elevator unit in the heating scheme
The central heating scheme for an apartment building, prepared by heating engineers, assumes that the radiators located in the apartment will receive coolant at an acceptable temperature. However, at the exit from the boiler room, the water temperature can exceed 100 degrees. To achieve cooling of the coolant by mixing cold water, the return and supply lines are connected by an elevator unit.
A reasonable heating elevator design allows the unit to perform a number of functions. The main function of the unit is direct participation in the heat exchange process, since the hot coolant entering it is dosed and mixed with the injected coolant from the return. As a result, the unit allows you to achieve optimal results in matters of mixing hot coolant from the boiler room and cooled water from the return. After this, the prepared coolant at the optimal temperature is supplied to the apartments.
Design features of the circuit
An effective heating system in an apartment building, the design of which requires competent calculations, also implies the use of many other structural elements. Immediately after the elevator unit, special valves are integrated into the heating system to regulate the supply of coolant. They help control the heating process of the entire house and individual entrances, but only employees of service utility companies have access to these devices.
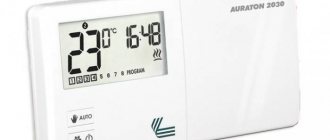
In the heating circuit, in addition to thermal valves, more sensitive devices are used to regulate and adjust the heating.
We are talking about devices that increase the performance of the heating system and allow for maximum automation of the home heating process. These are devices such as collectors, thermostats, automation, heat meters, etc.
Components for the collector system
The set of elements of a radiant heating system is similar to that of a conventional tee system. For both of these systems, the main element is the heating boiler. In order for the radiant system to be effective, you need to carefully approach the issue of selecting the power of the heating boiler. When choosing a boiler, you need to take into account the area of the heated room, but it is also important to take into account heat loss.
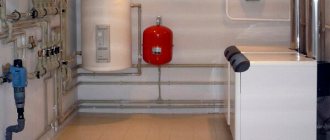
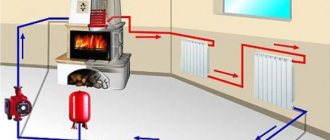
The wiring of the radiant heating system also includes a pump that circulates the coolant. The radiant heating system does not work by gravity. Therefore, the vast majority of radiant heating systems have a circulation pump in their design. The pump must also be located in the correct location. Let's move on to the second very important element of the radiant heating system - the collector.
This element is nothing more than a distribution device. With the help of a collector, coolant is supplied to all segments of the heating system. The Collector includes numerous elements of shut-off equipment that allow you to differentially regulate the temperature of the living space, right down to individual radiators in the rooms. As a rule, the collector is mounted in a separate panel or in a cabinet, which fits perfectly into the interior and is not an eyesore. Now separately about circulation.
Characteristics of Leningradka
When choosing an installation, you should pay attention that it differs in the method of coolant circulation:
- Water is forced to move. Leningradka with a pump increases circulation, but at the same time consumes electricity.
- Water moves by gravity. The process is carried out thanks to physical laws. Cyclicity is ensured by temperature differences and gravity.
The technical characteristics of Leningradka without a pump are inferior to forced ones in terms of the speed of movement of the coolant and the speed of heating.
To improve the properties of the equipment, it is equipped with various devices:
- Ball valves - thanks to them you can regulate the temperature level to heat the room.
- Thermostats direct the coolant to the desired zones.
- Valves are used to regulate water circulation.
The listed additions allow you to upgrade even a previously installed system.
Advantages and disadvantages
The advantages of use include:
- Cost-effective – the cost of the elements is low, installation can be done independently. During operation, energy is saved.
- Availability - parts for assembly are available in any hardware store.
- The heating system of a private house in Leningradka can be easily repaired if it breaks down.
Among the shortcomings are noted:
- Installation features. To equalize heat transfer, it is necessary to add several sections to each radiator located far from the boiler.
- Inability to connect to horizontal installation of heated floors or heated towel rails.
- Since pipes with a large cross-section are used when forming an external network, the equipment looks unaesthetic.
How to install correctly?
Installing Leningradka is quite feasible with your own hands; for this, choose one of the methods:
1. Horizontal. A prerequisite is the installation of a floor covering in the structure or on top of it; this must be chosen at the design stage.
The supply network is installed at a slope to ensure free movement of water. All radiators must be located at the same level.
2. Vertical is used when using forced-type equipment. The advantage of this method is the rapid heating of the coolant, even when installing pipes with a small cross-section. Operation occurs due to the installation of a circulation pump. If you want to do without it, then you should purchase pipes with a large diameter and place them at an angle. The Leningradka vertical water heating system is installed with bypasses, allowing repair of individual equipment elements without shutting it down. The length should not exceed 30 m.
Features of installing the Leningradka heating system come down to following the sequence of work:
- Install the boiler and connect it to the common line. The pipeline must run along the entire perimeter of the building.
- The expansion tank is a mandatory element. To connect it, a vertical pipe is cut in. It should be located close to the heating boiler. The tank is installed above all other elements.
- Radiators are installed into the supply network. They are equipped with bypasses and ball valves.
- The equipment is connected to the heating boiler.
A video review of the Leningradka heating distribution system will help you understand the order of work and follow their sequence.
“Several years ago we moved to live outside the city. We have a single-pipe heating system installed in a two-story house similar to Leningradka. For normal circulation, I connected the equipment to the pump. There is enough pressure to heat the 2nd floor, it is not cold. All rooms are well heated. Easy to install, no expensive materials required.”
Grigory Astapov, Moscow.
“When choosing heating, I studied a lot of information. According to reviews, Leningradka suited us due to the savings in materials. We chose bimetallic radiators. It works uninterruptedly, completely copes with heating a two-story house, but the equipment should be cleaned periodically. After 3 years, our radiators stopped working at full capacity. It turns out that there was debris on the approaches to them. After cleaning, operation resumed.”
Oleg Egorov, St. Petersburg.
“The Leningradka heating distribution system has been working with us for several years now. Overall satisfied, easy installation and easy maintenance. The pipes were polypropylene, 32 mm in diameter, the boiler runs on solid fuel. We use antifreeze diluted with water as a coolant. The equipment completely copes with heating a house of 120 m2.”
Alexey Chizhov, Ekaterinburg.
Heating circulation methods
The heating system can have several types of coolant circulation. These include:
- Forced circulation method;
- And natural.
With the natural type of circulation, the coolant is spontaneously distributed through convection throughout all elements of the heating system. To ensure the best circulation in a natural way, large diameter pipes are used in the heating system. The natural method of coolant circulation, due to its lower efficiency, has some limitations on the area of the heated room. Typically this method is used in small private homes.
The forced circulation method has long proven itself very well. Today on the market you can find a huge number of circulation pumps that are very compact and very efficient. These pumps have a fairly long service life. When installing a radiant system, it is important to correctly adjust the coolant circulation speed. The pump can be installed both on the supply and return side. Using a circulation pump, you can supply coolant to a fairly decent height. When selecting a pump, this parameter must also be taken into account.
Today, forced circulation, due to its undeniable advantages, is undoubtedly the most popular method of transferring coolant. The advantages also include the very affordable cost of circulation pumps.
Types of radiator connections
The main methods of connecting heating system devices are several types:
- Lateral (standard) connection;
- Diagonal connection;
- Bottom (saddle) connection.
Side connection
Lateral radiator connection.
Connection from the end of the device - supply and return are located on one side of the radiator. This is the most common and effective connection method; it allows you to remove the maximum amount of heat and use the entire heat transfer of the radiator. As a rule, the supply is at the top and the return is at the bottom. When using a special headset, it is possible to connect from bottom to bottom, this allows you to hide the pipelines as much as possible, but reduces the heat transfer of the radiator by 20 - 30%.
Diagonal connection
Diagonal radiator connection.
Connection diagonally to the radiator - the supply is on one side of the device from the top, the return is on the other side from the bottom. This type of connection is used in cases where the length of a sectional radiator exceeds 12 sections, and a panel radiator is 1200 mm. When installing long radiators with side connections, there is uneven heating of the radiator surface in the part furthest from the pipelines. To ensure that the radiator heats up evenly, a diagonal connection is used.
Where to start installation?
Typically, all construction activities begin with thoughtful design. Typically, a drawing is created first. To design a radiant heating system, it is necessary to make a similar drawing with all elements and dimensions. If this drawing cannot be made by hand, then it can be ordered from a design organization.
The beginning of the design always begins with an assessment of the room in which the radiant heating system will be installed. It is advisable to do this in the early stages of construction, before finishing work has yet been carried out on the premises. It is better to immediately hide the elements of the heating system in the walls or under the screed. The drawing must detail all elements of the heating system and where they will be located. It is also advisable to provide more detailed information about the heating devices, since the system as a whole will be designed on the basis of this data. It is advisable to indicate the exact volume of heating devices and what materials they are made of. Using this information, you can accurately calculate how much coolant will be used in the heating system.
A very important point to pay attention to is additional heat loss. In a radiant heating system, the length of the pipes is slightly higher than in a conventional two-pipe system, and this factor is also important to take into account when designing and calculating a radiant heating system.
The drawing must also include a plan for laying communications for the heating system. It must also indicate all measuring instruments, as well as adjusting and locking elements. The drawing also indicates all additional elements that can be used in the installation of the heating system. Detailed information about this additional equipment and its installation is also described step by step.
Main design elements
The most important component of beam distribution are collectors. When designing a radiant heating system for a two-story (or multi-story) house, a collector cabinet will need to be placed on each floor. Manifolds and control valves (manual or automated) are mounted in cabinets, where they are easily accessible during operation and periodic or emergency maintenance.
The small number of connections compared to tee wiring ensures greater hydrodynamic stability of the entire heating system.
The second component is a circulation pump; it creates pressure in the system to supply heated coolant through pipes to the radiators and collect the return.
Selection and installation of a circular pump
For a radiant heating system, the option most often chosen is the bottom supply of hot liquid to the radiators. To ensure its forced circulation, a circulation pump is used. Its power should be enough to provide pressure that allows the coolant to reach the most distant heat exchangers, including heated floors.
Forced circulation accelerates the circulation of coolant through the rings of the system. This allows you to reduce the difference between the incoming and outgoing temperatures of the heating circuit. This increase in heating efficiency allows you to either reduce the boiler power or have a larger power reserve in case of extreme weather.
When selecting a device, two main parameters are taken into account that determine its power and speed:
- productivity, cubic meters per hour;
- pressure, in meters;
- noise level.
When choosing a circular pump, take into account the performance and pressure.
For correct selection, you will need to take into account the diameter and total length of the distribution pipes, the maximum height difference in relation to the installation height of the pump. When carrying out engineering and plumbing calculations, special tables offered by manufacturers are used.
Experts recommend adhering to the following rules for installing the pump:
- devices with a wet rotor are mounted so that the shaft is positioned horizontally;
- devices with a built-in thermostat are mounted closer than 70 cm from the heating boiler to avoid erroneous operations;
- the circulation pump is mounted on the return section of the pipeline system, since its temperature is lower and the device will last longer;
- modern heat-resistant pumps can also be placed on the supply line;
- the heating circuit should be equipped with a device for releasing air pockets; it can be replaced by a pump with a built-in air valve;
- the device should be placed as close as possible to the expansion tank;
- Before installing the pump, the system is flushed from mechanical contaminants.
If the electrical parameters at the installation site are not stable, it is recommended to connect the pump and boiler control system through a voltage stabilizer of sufficient power. If there are frequent power outages, an uninterruptible power supply device should be provided - either battery-powered or with an automatically started electric generator.
Often when optimizing the cost of a system, there is a temptation to do without a circulation pump. This option is, in principle, acceptable for one-story buildings of a small area. This will reduce heating efficiency. When using natural circulation, larger cross-section pipes should be used. In addition, the expansion tank should be placed at the highest point of the building
Selection and role of the distribution manifold
This most important element of the system distributes the flow of hot coolant supplied by the boiler into separate distribution lines. The second collector collects the liquid that has given up its heat and returns it to the heat exchanger for subsequent heating. The return valve can bypass part of the return flow into the main circuit if it is necessary to lower the temperature of the coolant without changing the operating mode of the boiler.
Collectors are available on the market that support from 2 to 18 beams. The manifolds are equipped with shut-off or control valves, or automatic thermostatic valves. With their help, the required temperature regime is set for each beam.
Selecting a distribution manifold
The collector is also popularly called a “comb”, because this element of the heating system looks like a hair comb. The base of the collector uses a pipe to which numerous pipes are connected. A radiant heating system uses two collectors. One manifold is installed on the supply, and the other on the return. The circulation pump is usually installed on the inlet manifold. A multi-way valve is also installed here, which is equipped with a thermometer. Depending on the set temperature, the thermometer interacts with a valve, which increases or decreases the flow of heated coolant into the general heating circuit.
After the coolant has transferred heat to the heating devices, it returns through the pipeline to the outlet manifold. Accordingly, after this the coolant rushes to the heating boiler, where it is again saturated with heat. Balancing elements are also installed on the input manifold. These elements regulate the amount of coolant that can pass through the collector. In general, these two collectors are responsible for proper heating of the room and optimal heating balance.
Pipeline layout
While heating engineers are discussing the optimal heating scheme for a central heating house, the issue of proper piping in the house is raised. In modern multi-storey buildings, the heating layout can be implemented according to one of two possible patterns.
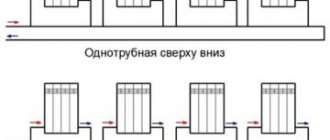
Single pipe connection
The first template provides for a single-pipe connection with upper or lower wiring and is the most used option when equipping heating appliances in multi-storey buildings. At the same time, the location of the return and supply is not strictly regulated and can vary depending on external conditions - the region in which the house is built, its layout, number of floors and design. The direct direction of movement of the coolant along the risers can also change. There is an option for the heated water to move in the direction from bottom to top or from top to bottom.
The single-pipe connection is characterized by simple installation, affordable cost, reliability and long service life, but it also has a number of disadvantages. Among them are the loss of coolant temperature while moving along the circuit and low efficiency indicators.
In practice, various devices can be used to compensate for the shortcomings that characterize a single-pipe heating scheme; a radial system can be an effective solution to the problem. It is designed to use a collector that helps regulate temperature conditions.
Two-pipe connection
A two-pipe connection is the second version of the template. A two-pipe heating scheme for a five-story building (as an example) is devoid of the disadvantages described above and has a completely different design than a single-pipe one. When implementing this scheme, the heated water from the radiator does not move to the next heating device in the circuit, but immediately enters the check valve and is sent to the boiler room for heating. Thus, it is possible to avoid loss of temperature of the coolant circulating along the contour of a multi-story building.
The complexity of the connection, which is implied by the two-pipe scheme for connecting a heating battery in an apartment, makes the implementation of this type of heating a long and labor-intensive process, requiring large material and physical costs. Maintenance of the system is also not cheap, but the high cost is offset by high-quality and uniform heating of the house on all floors.
Among the advantages that the two-pipe heating radiator connection scheme provides, it is worth highlighting the possibility of installing a special device - a heat meter - on each radiator in the circuit. It allows you to control the temperature of the coolant in the battery, and by using it in the apartment, the owner will achieve significant results in terms of saving money on utility bills, because he will be able to independently regulate the heating if necessary.
Which pipes to choose?
The correct choice of pipes is a very important point when designing and installing any heating system. But for a system that is based on the ray principle, this point is doubly important. For this system, it is better to choose pipes that do not have increased rigidity. This is because a radiant heating system uses a large number of connections. And each connection is a fitting. Accordingly, the fluid resistance in a system with many fitting connections increases significantly. So that the system has fewer connections and more flexible pipes are used. Seamless polyethylene and metal-plastic pipes have proven themselves very well in these systems. These pipes, like a hose, are sold in coils.
Polyethylene and metal-plastic pipes have a special layer that prevents air from entering the heating system. When installing a radiant heating system, special attention must be paid to the correct size of pipes in different areas.
Materials for insulating the walls of a timber house
To insulate the walls of a log house, you can use various modern thermal insulation materials. A house made of timber is insulated:
- fiberglass
- Mineral wool slabs
- Basalt mats
- Expanded polystyrene and other materials
Each of these insulation materials has its own distinctive properties.
But when choosing a material for a thermal insulation system for a wooden house, you need to pay attention to whether this type of thermal insulator meets the basic requirements
Insulation materials for external insulation of timber houses must have:
- High heat-shielding properties.
- Non-flammability.
- Moisture resistant.
- Non-hygroscopic.
- The ability to prevent heat exchange between the room and the external environment.
- Environmental safety.
Excellent conditions for insulation and will not allow condensation to accumulate
How and how to insulate a house made of timber
The most popular material for insulating timber houses is mineral wool. This material is light enough not to create additional load on the structural elements of the building
The cost of mineral wool is not high, it keeps the house warm well, but, what is especially important, mineral wool is not a flammable insulation. Due to its softness and elasticity, mineral wool is easy to install and does not form cold bridges
In addition, it is resistant to thermal deformations of walls.
Insulation can be done for a block house, or the outside of the house can be covered with plastic siding. Installation of a thermal insulation system using mineral wool consists of several stages:
Vapor barrier
Installation of a thermal insulation system for a wooden house begins with a vapor barrier. To do this, you can use aluminum foil, plastic film, a special vapor barrier film and roofing felt. Vapor barrier provides ventilation of the facade under the film.
Vertical slats 2.5 cm thick are placed on the walls, at a distance of 1 meter from one another. Next, a vapor barrier layer is applied to the placed slats over the entire surface of the wall. Between the base slats at the top and bottom, holes are made (20 mm in diameter) for ventilation. The presence of a ventilated layer between the vapor barrier and the wall will prevent moisture from accumulating under the film, which could lead to rotting of the wooden wall. The vapor barrier is secured with nails or staples, and the fastening points are sealed with tape to protect them from water ingress.
Installation of frame for thermal insulation
For the frame, take boards 100 mm wide and 40-50 mm thick. The boards are placed vertically on the edge on the wall. The distance between the boards should be one or two centimeters less than the width of the insulation.
The beam is attached to the facade of the house with self-tapping screws. When installing the beam, you need to control its position with a level or plumb line. If the lathing is installed unevenly, the installation of the facing material at the final stage of thermal insulation work will be of poor quality.
To install the thermal insulation system of a timber house, it is necessary to install a frame
Laying thermal insulation
Between the boards of the frame, mineral wool slabs are installed as closely as possible to each other so that there are no gaps. Mineral wool 50 mm thick is laid in two layers. Semi-rigid, elastic slabs with a density of 80–120 kg/m3 are used; they are easily held between the frame boards without slipping without additional fastening.
Laying insulation between frame bars
Waterproofing
Having finished laying the thermal insulation, you need to lay a waterproofing film, which should allow steam to pass through, but at the same time retain water. The film is laid on the thermal insulation, nailed with staples or frame nails. When joining the film, an overlap of 5-10 cm is left, and the joints are sealed with self-adhesive tape.
Second layer of frame
On the thermal insulation frame, slats (50 mm wide and 2.5 - 3 cm thick) are stuffed over the waterproofing. This is necessary in order to ensure free circulation of air between the sheathing and the vapor barrier, which will dry out the condensation that appears on the waterproofing layer. The resulting space from below is covered with a thick metal mesh to prevent insects and rodents from entering it.
External cladding
The outer cladding serves mainly a decorative function. Therefore, what the facing material will be does not matter much. This can be wooden lining, plastic siding or any other material.
Radiant system with heated floor
As many may have noticed, a radiant heating system is installed on the same principle as a water heated floor. In theory, you can connect a warm floor to radiators through one comb. This method will be especially in demand by those who want to install heated floors in some rooms and radiators in others.
If you make a radial system together with heated floors, it will work. But keep in mind that heated floors are a low-temperature system, and radiators are a high-temperature system.
If you don’t think about adjusting the temperature, then in one case with heated floors in the room you will be hot, in another case with radiators it will be cold. Keep this in mind.
There is another positive side property of the collector heating system. Namely, a comfortable heated floor. The fact is that when radiant heating systems are installed, the distributor is mounted closer to the risers or the center of the room. In this case, pipelines from the distributor to the radiator in 99 percent of cases pass through corridors and enter rooms through doorways.
Yes, the pipes in this case are insulated with pipe insulation in one layer. But many installers know that 6-9 mm thick insulation allows up to 30 percent of heat to pass through.
That is why, where the pipes of the radiant heating system of the house pass, the floors are not cold, but comfortably warm. With one heating system we catch two birds with one stone. We get a reliable heating system without joints in building structures and comfortable heated floors.
Important installation points
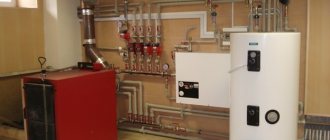
As a rule, in a private house, a corresponding room is allocated for the boiler room, in which all the main elements of the heating system are located. The first stage of system installation is the installation of a heating boiler. After the boiler is installed, the inlet and outlet manifolds are installed. These system elements must be easily accessible. It is also necessary to install a Mayevsky tap on the output manifold.
In a radiant heating system, it is not recommended to combine a “warm floor” with a heating circuit on the same collector, since they have different operating temperature conditions.
Answers to frequently asked questions about the beam system
What pipe diameter should I choose?
Most often, when installing a beam system, 16-diameter pipes are enough. In rare cases, a larger diameter is used. Now we are talking about the diameter of the pipes from the collector.
How to do it in a two-story house?
Many people wonder how to make a beam system in a two-story house. We can make a beam system even in a skyscraper. The main thing is to use your own heating collector on each floor.
Is it possible to make a radiation system in an apartment?
Yes, you can. It is unlikely that this can be done directly from the thermal power plant. But if you have your own heating system or connect to a thermal power plant through a heat exchanger, then everything will work.
Is it better to have a two-pipe system or a beam system?
