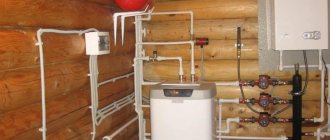
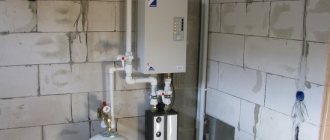
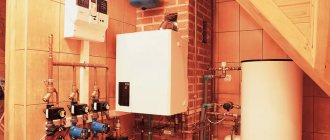
Gas equipment of the boiler + water heater type is a suitable solution for owners of apartments and private houses: heat is provided, hot water is available, and it is economical. And connecting a double-circuit gas boiler to the heating system is not as complicated as it seems. But before embarking on the implementation of such a project, it would be a good idea to familiarize yourself with the theory, don’t you agree?
In this publication, we will talk about the features of the connection process: what requirements of service organizations need to be taken into account and what technical nuances of installing wall and floor models should be paid special attention to. We will supplement the presented material with visual photos and videos, which will help you complete all the work as quickly as possible and without errors.
Stages of connecting gas boilers
The scheme for connecting a gas boiler to a heating system is quite complex, time-consuming and requires certain knowledge and experience. Gas boilers become more and more efficient and safe with each generation; automation and regulation become more complicated. Universal boilers are widely used, which not only heat the room, but also heat water.
Manufacturers develop leaflets and instructions that explain how to correctly connect a double-circuit gas boiler to the heating system. Despite the difficulties, you can figure out the installation stages yourself. This is much more economically profitable, because installation work is very expensive.
To figure out how to connect a gas boiler, you should break down all the steps into several stages:
- installation of the unit (or wall mounting if it is a wall-mounted option);
- work on connecting a water heating circuit;
- connection to water supply (double-circuit heating units);
- connection to the gas pipeline;
- commissioning works.
In order for the boiler to operate safely and efficiently, you need to understand the features of each stage.
Before you begin installation, you need to purchase all the necessary consumables, decide which pipes to connect the gas boiler and find out what type it is:
- Single-circuit boiler. It has one heat exchanger and is intended for heating only.
- Double-circuit boiler. Serves two heat exchangers: one circulates the coolant for the water heating circuit, the second is designed to solve the problem of hot water supply. In summer, the main circuit is turned off. Connecting a double-circuit boiler with your own hands requires care.
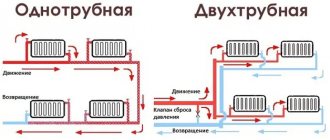
Heating systems are also different: closed or open types. The coolant can circulate forcibly or by gravity. However, the principles for connecting boilers to heating systems are the same.
Wall-mounted gas appliances are very easy to install. They are small in size and come complete with all the necessary equipment that will later be needed during installation. For safe operation, many modern gas units are equipped with special sensors that signal problems in the system. This allows you to eliminate minor breakdowns in a timely manner and thereby avoid serious and costly repairs of the entire system. Therefore, boilers that at first glance seem difficult to maintain, in fact, significantly save money on their repair.
Selection of coolant
If you fill the circuit with low-quality coolant, the equipment will not last as long as it could. Therefore, before filling the heating system in a private home, you need to select a coolant suitable for your situation. There are only two options - water or non-freezing liquid. In a house where you live constantly, it is better to give preference to water, since there are fewer problems with it, especially if it is distilled. Such water contains almost no impurities of salts and metals, which negatively affect all elements of the heating circuit.
Stage one: boiler installation
Installing a gas appliance is usually not difficult. This is the simplest stage of installation of a heating system. Manufacturers have developed detailed installation instructions for each type of boiler.
It is easier to install a floor-standing one, despite the fact that it is heavier in weight and larger in size. For wall mounting you need special brackets. They come included with the device. The diagram for connecting a wall-mounted boiler to the heating system is indicated in the instructions for the device. The most important thing is to choose the right location for installing the boiler, while also considering how the pipes will be connected to the boiler.
When choosing the location of the unit, not only ease of maintenance is taken into account. It is necessary to comply with the standards and requirements that apply to gas appliances. Their implementation guarantees the efficiency and safety of using the heating unit.
Two basic rules to follow:
- The room where the boiler will be installed must be provided with a window or window that can be easily opened if necessary.
- No devices or objects should be placed near the gas unit.
The connection diagram for a floor-standing boiler requires careful preparation of the base. The wall-mounted boiler is placed at a height of 80 cm from the floor, no closer than half a meter from the walls. These are standard operating safety requirements.
Advice. It is more convenient to mount wall-mounted gas units with an assistant to prevent distortions and facilitate installation work.
To know how to properly connect a double-circuit boiler, you need to become familiar with the conditions required for the installation of a chimney and ventilation system.
Turbo boilers greatly simplify the task because they do not require the installation of bulky chimneys and exhaust systems. This type of boiler is becoming increasingly popular today. The peculiarity of turbo boilers is the device for the forced removal of exhaust gases and the simultaneous influx of street air, like a “pipe in a pipe”. This is the safest system, as it allows you to install gas units in almost any room.
There is another type: floor-mounted parapet boilers. These are chimneyless, energy-independent units. They are used where it is impossible to build a large chimney. Parapet boilers have a closed combustion chamber, it is completely isolated from the room. In such boilers, the coolant circulates by gravity, without an electric pump. This is their main difference from turbocharged boilers with a coaxial chimney.
What documents must be prepared and who issues them?
After completing the project, it will be necessary to obtain approvals from the gas service and utility companies.
First you need to decide on the documentation. Photo source: az.all.biz
Documentation preparation process:
- Obtaining technical specifications (TU). You need to head to the local gas workers. To complete the application, you need the hourly fuel consumption of the boiler, which is determined by the design solution. Specifications are issued in 1-2 weeks.
- According to the technical specifications, a project for installing gas equipment is carried out; usually it is included in the “Gas facilities” section of the general project for the boiler.
- The developed project is submitted for approval to the gas distribution company that issued the specifications.
At the same time, the application is submitted to the same organization with a technical passport of the boiler unit, factory instructions, certificates and an examination of the boiler’s compliance with state standards.
Coordination can take place from 10 days to 3 months, everything will depend on the complexity of the material. In case of refusal, the inspection must issue a list of corrections to eliminate the deficiencies.
If all amendments have been made, the design is stamped and the installation of the boiler can begin. Unauthorized connection to the gas main entails the imposition of huge penalties on the boiler owner.
Second stage: connection to the heating water circuit
To find out how to connect a gas boiler to heating, you need to figure out where its pipes are located, from which there is an exit to the heating circuit. Almost all models are designed identically. At the bottom of the unit (usually in the center), there is a pipe for the gas pipeline, and to the right and left of it there are pipes for connecting to the water supply network. Closer to the end part there are outlets for connecting the water circuit: return and supply of coolant to the radiators.
When connecting a wall-mounted boiler to a heating system, it is important to make the connection with maximum tightness. There are various sealants on sale for reliable insulation against possible leaks. To connect water, as a rule, traditional “proven” tow, paint and modern seals are used. They are inexpensive in price, but allow you to assemble a trouble-free heating system.
Manufacturers of gas boilers warn about the danger of small debris getting into the system. This can happen when the water in the system is contaminated. If this is allowed, the gas unit may become operational. There is a simple solution: install a coarse filter on the return water pipe. It will significantly increase the “life” of the boiler and increase its productivity. When the coarse filter is already installed in front of the water meter, there is no need to place it in front of the gas boiler.
Therefore, before connecting a double-circuit gas boiler to heating, you need to purchase the necessary filters in advance.
Advice. A prerequisite for installing the filter: the direction of movement of the coolant must coincide with the direction of the arrow on the filter housing.
When installing the boiler, it is necessary to install shut-off valves. Plumbing fittings are installed on the water supply pipes to the system and on the return pipes. Without these devices, repair work will be very difficult. If shut-off valves are not provided, then when a malfunction in the system is eliminated, the air remaining in the pipes will block the circulation of the coolant. As a result, the radiators heat up poorly and fail. That is, saving on valves is not advisable.
How to connect a boiler
There are different options for installing a boiler, depending on its design.
Can be used:
- Indirect heating boiler with heat exchanger.
- Layer heating boiler.
- Electric storage boiler.
The most accessible and inexpensive option is an external stratified heating boiler. It is not equipped with its own heat exchanger, so it is inexpensive and easy to operate.
Any type of connection is made according to the user instructions. The process is not difficult at all, you just need to connect the boiler inlet and outlet to the corresponding boiler pipes, and also connect the hot water collection line to its outlet.
Depending on the design, a connection to a break in the heating circuit supply line, or a direct DHW outlet from the boiler can be used to accumulate hot water in a container.
Third stage: connecting the gas boiler to the water supply
Modern double-circuit gas boilers are connected to the water supply system. Fundamentally, these works do not differ from connecting to a heating circuit. Differences in pipe diameters and taps. In places where cold water is supplied, special filters are installed to prevent dirt and debris from entering the unit. There are many examples of boilers failing due to poor quality water. To simplify installation and ensure quick replacement of shut-off valves, special detachable connections are used - “American ones”.
In gas units, cold water is supplied to the left, hot water to the right (relative to the center). When connecting single-circuit gas boilers to the heating system, water supply networks will only be needed to pump water into the water circuit.
Installing a coaxial pipe step by step
The coaxial chimney is installed in close proximity to the boiler, along the axis of the chimney outlet. A hole must be made in the outer wall, 5-10 mm larger in diameter than the external size of the chimney.
This is done using a special diamond crown, or with a conventional hammer drill (which takes a long time and will require additional plastering and finishing work).
After that:
- The base of the coaxial pipe is connected to the boiler chimney outlet.
- The first chimney segment is installed. Immediately securely fixed with all appropriate fasteners.
- After it, the second section of the chimney is connected, the whole procedure is repeated. All pipe sections required by installation conditions are connected in a similar way.
- The joints of the pipe and the gap between the chimney and the wall are carefully sealed.
- The performance of the chimney is tested.
A through hole in the wall is made with a slight inward slope so that condensate can drain into a special container. If this is not done, the chimney outlet will freeze in the winter.
Stage four: connecting the unit to the gas pipeline
Connecting to a gas pipeline is an extremely important matter. The slightest mistake can be very costly. If installation work is not performed properly, serious emergency situations may arise that can lead to gas poisoning or explosion. There should be no small details when connecting the boiler to the gas pipeline.
The first step is to connect the pipe from the boiler to the gas pipe branch. There must be a shut-off valve on the gas pipe. A special filter for heating is also installed on it.
Important. Filters for the gas pipeline must be reliable and of high quality; you should not skimp on them, since their wear can lead to the gas unit becoming unusable.
When connecting the gas pipeline to the boiler, you need to carefully ensure that all joints are airtight. Here, for sealing, you cannot use FUM tape or sealing thread, which do not provide high-quality insulation. The use of tow and paint is recommended.
Rubber hoses for connecting gas boilers to the gas pipeline are prohibited. Rubber may lose its performance properties (crack), this will inevitably lead to a dangerous gas leak. The hoses are attached to the unit nozzle using union nuts and paronite sealing gaskets. Seals are mandatory here, because they are the ones who will ensure sufficient sealing of the connection.
As for connecting the Baksi boiler to the heating system, you cannot do without the help of specialists. In this case, you can only complete the initial stages of its installation yourself. The boiler will work for a long time and efficiently when its connection is done professionally.
Main characteristics
To heat ten square meters of a home with a ceiling height of no more than 3 m, one kilowatt of heat is required (approximate calculation). Thus, a private house with an area of 200 sq. m. will help to heat a gas boiler, the power of which is at least 20 - 24 kW. Information about the power indicator can be found in the technical passport of the purchased gas equipment; the data is also indicated on the packaging. As for the rate of heating water in a device with a declared power of 20-24 kW, it will be about 12-14 liters per minute. This volume is quite enough for taking a shower or washing dishes. Although simultaneous reproduction of both procedures may cause some inconvenience.
Some tips for connecting gas units to the electrical network
Many modern gas units require connection to an electrical outlet (a cable with a plug for connecting to a socket or a three-core insulated wire). In any option, the rule applies: connect the gas unit only through an individual circuit breaker directly to the panel. In addition, grounding must be done. It is unacceptable to use gas or water pipes for grounding. In the event of a power outage, backup sources are provided.
Filling closed heating with a pump
If the circuit is not connected to the water supply, the only option left to fill the heating system is a pressure test pump. This is a small rectangular metal reservoir into which liquid is collected. From the reservoir, the coolant is supplied to the pipes thanks to a pump-action hand pump on which a pressure gauge is installed.
Hand pump for pressure testing.
There is nothing complicated about how to fill a closed heating system. Work algorithm:
- connect the hose from the pump to the circuit;
- pour coolant into the pump reservoir;
- manually pump fluid into the system.
If there is no pipe for draining water from the circuit, then you can connect the pump hose to one of the ends of the battery. To do this, you need to unscrew the plug and put the adapter in its place. Before starting work, be sure to open all air vents so that air can leave the circuit.
There is no point in gluing roll insulation under the wallpaper. A thin layer of thermal insulation will not give the desired result.
When working with thermal insulation in sheets and rolls, you need to use an insulation dowel or nail to fix the material.
Watch the pressure gauge reading carefully. Using such a pump, pressure testing of the heating system is carried out. They can pump up pressure to 10 atmospheres (if you have enough strength). When filling the system, such pressure is not necessary, otherwise the boiler will break.
Final stage: connection revision
After all the stages of connecting a gas boiler have been completed, there is no rush to start it up. It is necessary to check the correctness of all stages of installation work. You can start operating the gas unit only after you are 100% sure that everything has been done flawlessly.
Be sure to check the connection of the water circuit and identify possible leaks. There is nothing complicated about this, since water leakage appears immediately. But you can’t just see the shortcomings associated with the gas pipeline. Proceed as follows: moisten the gas pipe generously with soapy water and watch for the appearance of air bubbles. If everything is in order, there will be no bubbles.
Important. All, even the slightest violations identified during the inspection must be urgently eliminated. The gas unit can be operated only after all defects have been corrected.
The first test run of the gas unit is recommended to be carried out under the supervision of specialists from the gas supply organization. To do this yourself, you need to have special permission. However, only professionals can accurately determine whether a gas boiler is connected correctly or not. Experts will advise you on how to connect heating to a gas boiler and help you avoid possible mistakes. You shouldn’t ignore their advice, since we are talking about people’s health and lives.
Launch
The installation of a double-circuit boiler has been carried out, after checking its condition, the system is filled, there is no need to rush, if you open the liquid supply minimally, then the accumulation of air masses will be insignificant, which will facilitate further adjustment.
Before starting up gas equipment, you need to look at the pressure in the system; individual indicators are provided for each model. Experts advise draining some of the water from the pump; to do this, you will need to remove the front panel; if you are not confident in your own abilities, it is better to turn to professionals. After which you can ignite and monitor performance by setting special programs for the user.
Tying wall models
From the bottom of the gas double-circuit boiler there are 5 fittings with external threads, designed to connect the following lines (from left to right):
The location of the pipes on all suspended units is the same. If you are interested in knowing the reason for installing the fittings in this order, we suggest watching a video about the operating principle of a double-circuit wall-mounted heat generator:
To connect a gas unit to the heating and electrical lines of a private home with your own hands, prepare the following set of products and materials:
- ball valves with American size ½" – 3 pcs.;
- the same, with a diameter of ¾” – 4 pcs.;
- mesh filter for water and coolant (also known as a mud filter) – 2 pcs.;
- gas filter;
- expansion tank;
- pipeline fittings – tees and elbows;
- three-core electric cable brand VVG with a cross-section of 2.5 mm²;
- automatic two-pole switch with a rating of 20 amperes.
This list is recommended for wall-mounted boilers of the poorest configuration, equipped with an open combustion chamber. Products of the middle and highest price categories, which are mini-boiler rooms, are equipped with their own gas filter and expansion tank.
It is recommended to compare the dimensions of the standard capacity of the heat generator with the amount of coolant in the heating system, guided by. In a situation where the pipeline network is too large and the tank volume is insufficient, an additional membrane tank must be installed.
Connection diagram to the heating system
In reality, wiring a dual-circuit heater is not a problem; there are only a couple of nuances, which we will consider further. You need to understand one thing: a gas boiler is a reliable product; during its entire period of operation it is unlikely to need to be removed and turned off for repairs. Such situations happen 1-2 times during the service life.
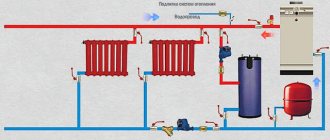
Above is a standard connection diagram for a wall-mounted double-circuit boiler, found in every technical data sheet for the product. We expanded it by depicting the wiring and possible consumers. Based on the diagram, perform the tying taking into account the recommendations:
- Place taps with a diameter of ½" (DN15) on the fittings for gas, cold and hot water.
- Mount valves of size ¾” (DN20) on pipes with coolant. The third tap is for draining/recharging the system.
- The fittings are screwed down with the American ones.
- Install mud traps at the inlet from the water supply and heating networks in a horizontal position with their nose down, this makes them easier to clean.
- Connect the external expansion tank to the return pipeline using additional fittings to isolate and empty the tank, as illustrated in the diagram.
- Place the drain/fill pipe with a tap at the lowest point of the system.
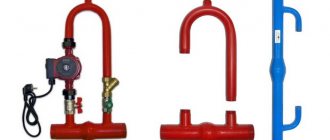
For homeowners who fill the system with non-freezing coolant and want to play it safe, an alternative piping scheme for a double-circuit heater is recommended. Thanks to a pair of taps installed on the supply and return, you can dismantle the boiler and service the system without draining the antifreeze.
The scheme is relevant for two- or three-story buildings with water-heated floors and a radiator network, where an additional expansion tank is indispensable. Our expert Vladimir Sukhorukov will reveal the essence of the issue in more detail in a training video:
Connection to the home electrical network
The requirements for connecting electricity are quite simple - you need line protection in the form of a circuit breaker and grounding. If there is no powerful equipment in the furnace room, for example, an electric boiler, then it is not necessary to run a separate cable to the switchboard. Briefly, the requirements are:
- Place the switch in a safe place where water or coolant will not enter in the event of a breakthrough.
- The presence of a wire connected to the ground loop is mandatory. If the cord included with the boiler does not have a third core, connect the conductor to the steel body of the heat generator.
- It is not allowed to use metal heating and water pipes as grounding conductors.
- Lay the cable in a protective corrugated sleeve.
In areas with unstable mains voltage, it is better to power the unit through a stabilizer that protects the electronics from burnout. Frequent interruptions in the power supply are a reason to purchase and install an uninterruptible power supply unit, otherwise if there is a shutdown you risk being left without heat.
Calculation of heat consumption for ventilation
To obtain an overall indicator of heat loss at home, the losses of each room separately are summed up. To complete the picture, it is also necessary to take into account the heating of ventilation air. The simplest formula for calculating this parameter is Qair = cm (tв – tн), where:
- Qair – calculated amount of heat for ventilation, W;
- m – amount of air by mass, defined as the internal volume of the building multiplied by the density of the air mixture, kg;
- (tв – tн) – as in the previous formula;
- с – heat capacity of air masses, is taken equal to 0.28 W / (kg ºС).
To determine how much heat is needed for the entire house, add the value of QTP for the house as a whole with the value of Qair. The boiler power must be taken taking into account the reserve for the optimal level of operation (a coefficient of 1.3 is used). In the case when the boiler will provide not only heating of the coolant for the heating system, but also water for the hot water supply, the safety margin will need to be increased. It is necessary to ensure efficient operation of the boiler on 2 circuits at once, which implies the use of a safety factor of 1.5.
Equipment with a closed system with forced circulation
When the heating system does not communicate with the surrounding air and operates under pressure, such circuits are only closed.
In this case, the following equipment is required to piping the boiler:
- a 100-200 watt pump, which should be installed for supply;
- membrane-type expansion tank to provide the coolant with additional volume during expansion;
- safety valve for releasing coolant if the permissible pressure is exceeded;
- an automatic air vent that will help the emerging air plug to leave the system on its own so that the coolant circulates freely throughout the circuit;
- pressure gauge - to control pressure.
These are required elements. The following options may also be included in the scheme:
- filter for gas unit;
- filter at the inlet of the heat exchanger to protect against debris;
- heat accumulator, which is advantageous to pair with solid fuel or electric boilers to save energy resources.
How to do it yourself in a private house. Rules and scheme of actions
According to the PUE, in order to make grounding through an outlet directly yourself, it must be connected according to the diagram not to the panel board, but directly to the circuit.
One of the main requirements for the grounding loop is that the resistance of the system as a whole should not exceed 4 ohms. To do this, you need to correctly connect the circuit to the power panel using a conductor made of copper. One side of it is attached to the base of the house, and the other to the zero on the shield.
Photo 2. Ready-made kit for grounding a wall-mounted gas boiler with all the necessary components.
To independently implement a grounding device, you can use the following methods:
- Buy a ready-made kit for grounding a gas boiler. It includes all the necessary components. Installation is quite quick and does not take much time. You will need a small area of 0.5x0.5 m2. Grounding can be carried out in the basement or a few meters from the house itself.
- Make your own ground electrode. To do this you will need a welding machine and a steel angle. The created structure, in the form of a triangle or an inverted letter Ш, is dug into the ground to a depth of more than 1 meter.
Reference! Before starting work, it is necessary to install an independent external grounding loop near the house.
Tools and materials
The process is done thanks to the following tools:
- According to the markings made, a trench is dug with a shovel.
- Grounding conductors are driven into the drilled holes with a hammer.
- Using a motor drill, deep holes are drilled in the upper part of the trench.
- To connect the corners between the horizontal elements of the ground loop, a metal tape is used. Electric welding is required for connection.
- At the end of the conductor entering the room, an M6 or M8 bolt is welded. A wire ring is placed on it, which is responsible for the internal grounding of a private house.
Materials used:
- Metal corner (size 50x50x5 mm). The house grounding loop is an equilateral triangle, into the corners of which metal grounding conductors are driven.
- Steel strip 40 mm wide and 4 mm thick. In order to join the corners together, a metal tape is used.
- Metal wire rod with a diameter of 8–10 mm. It is laid in a trench and raised above the level of the blind area by 50 centimeters.
How to ground a circuit: work process
To properly and effectively ground a gas boiler, it is necessary to create an external circuit.
Contour manufacturing process:
- Markings are made at a distance of one meter from the house. An equilateral triangle with sides of 2 m is drawn.
- A trench 50 cm deep and 40 cm wide is dug along the drawn lines.
- Next comes the connection to the house using a trench of the same size.
- Deep holes are made with a drill.
- Grounding conductors are inserted into the pits. The distance to the bottom of the trench should be about 15 cm.
- The ground electrodes are connected to each other using metal strips 40x4 mm.
- They place a metal strip in the trench leading to the house.
- Weld a strip of metal to the base using a metal rod.
Attention! Such equipment of a grounding system is possible only if there is a sufficient amount of land near the house. If it is impossible to ground the boiler using a triangular circuit, linear grounding is used

