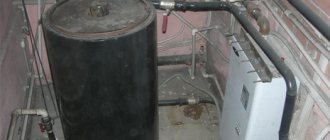
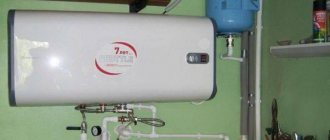
So, after reflection and careful analysis of possible options, a decision was made to solve the problem of autonomous supply of hot water to the apartment by installing a storage electric boiler. In the store, the required model was selected and purchased, the most suitable in terms of volume, level of automation, layout, and external design.
Connection diagram of the boiler to the water supply
Now it remains to solve the problem of how to connect the boiler to the water supply and power supply. You can, of course, use the services of craftsmen, advertisements for which can be found in abundance in any local newspaper. Why not try it yourself? If you have certain skills in locksmith work, then this seems to be a completely feasible task.
Issues of connecting to the power supply network require separate consideration. In this article, the emphasis will be on the correctness and safety of connecting the boiler “over water”.
Principle of operation
Let's look at how an electric storage water heater works.
Electric storage water heating equipment is distinguished by a special operating principle based on the movement of the hottest water layers upward and the shift of cold water, which has a high density, to the lower part of the tank with heating elements. The initial connection of a water heating device to the electrical network is accompanied by turning on the heating element and heating the water to a temperature condition at which the thermostat contacts provoke the opening of the electrical circuit.
Operating principle of a water heater
The process of inversion of water heated to the specified parameters into the supply main system is prevented by the installed non-return valve device. It is thanks to the presence of such fittings that the water flow moves in only one direction.
Opening the supply tap at the water point causes hot water to flow to consumers through a special pipe, which is accompanied by a decrease in pressure inside the storage tank. As a result, the water heating tank is filled with cold water from the water supply system.
The presence of a functional divider at the inlet pipe does not allow hot water to mix with the cold water flows entering the water heating tank. The dissecting device distributes the jet and at the same time reduces the speed of its movement. It is for this reason that the flow of cold water is evenly distributed over the very bottom of the water heating device, which allows the installed heating element to carry out effective heating.
In normal mode, a decrease in the temperature of the water in the tank causes the contacts of the thermostat to close and subsequently connect to the electrical network.
Indirect heating containers
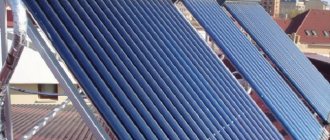
If we compare the designs of different water heaters, then an indirect boiler is the simplest and most reliable option for a storage tank for hot water. The unit does not produce heat on its own, but receives energy from the outside, from any hot water boiler. To do this, a heat exchanger is installed inside the insulated tank - a coil, into which hot coolant is supplied.
Clarification. Inexpensive versions of water heaters are equipped with a single heat exchanger that heats the water in the tank. Bivalent models are equipped with 2 coils to connect the unit to several heat sources, such as a boiler and solar collectors.
The structure of the boiler repeats the previous designs, only without burners and heating elements. The main heat exchanger is located in the lower zone of the barrel, the secondary one is in the upper zone. All pipes are arranged accordingly; the tank is protected from corrosion by a magnesium anode. How does the “indirect” function:
- From the boiler, a coolant heated to 80-90 degrees (minimum 60 ° C) enters the coil. Circulation through the heat exchanger is ensured by the boiler circuit pump.
- The water in the tank warms up to 60-70 °C. The speed at which the temperature rises depends on the power of the heat generator and the initial temperature of the cold water.
- Water is drawn from the upper zone of the tank, and supply from the main goes to the lower zone.
- The increase in water volume when heated is absorbed by an expansion tank installed on the “cold” side and withstanding a pressure of 7 bar. Its useful volume is calculated as 1/5 of the tank’s capacity, minimum 1/10.
- An air vent, safety valve and check valve must be installed next to the tank.
- The housing contains a sleeve for the temperature sensor of the thermostat. The latter controls a three-way valve that switches coolant flows between heating and hot water branches.
Important point. The coolant moves along the coil from the upper to the lower pipe, ensuring layer-by-layer loading of the water heater.
The water pipes of the tank are not shown
Typical wiring diagram
Indirect boilers are produced in horizontal and vertical versions, capacity - from 75 to 1000 liters. There are combined models with an additional heating source - a heating element, which maintains the temperature in case the heat generator stops or the wood burns out in the firebox of the TT boiler. How to properly connect an indirect heater to a wall heater is shown in the diagram above.
The heat exchange circuit pump is turned on by a command from a contact thermostat installed in the heating tank
Not all wood and gas boilers are equipped with “brains” - electronics that control heating and the operation of the circulation pump. Then you need to install a separate pumping unit and connect it to the boiler according to the scheme proposed by our expert in the training video:
Positive and negative points
Compared to gas models of boilers, “indirect” boilers are inexpensive. For example, a wall-mounted unit from the Hungarian manufacturer Hajdu AQ IND FC 100 l costs 290 USD. e. But don’t forget: the water heating tank is not able to work independently, without a heat source. It is necessary to take into account the costs of piping - the purchase of valves, a thermostat, a circulation pump and pipes with fittings.
Comment. If you want to assemble a circuit with DHW recirculation, you will need an additional pump, thermostat and check valve.
What is good about an indirect heating boiler:
- heating water from any thermal power equipment, solar collectors and electric heating elements;
- large capacity reserve for hot water supply;
- reliability in operation, minimum maintenance (once a month, warming up to the maximum against legionella and timely replacement of the anode);
- The boiler loading time can be adjusted, for example, moved to the night.
The main condition for proper operation of the unit is sufficient power of the thermal installation. If the boiler is selected purely for the heating system without a reserve, the attached boiler will not allow you to warm up your home or you will be left without hot water.
In order for hot water to flow immediately from the faucets, it is worth installing a return recirculation line with a separate pump
The disadvantages of an indirect heating tank are its decent size (small ones are installed less often) and the need to heat the boiler in the summer to provide hot water. These disadvantages cannot be called critical, especially against the backdrop of the high performance and versatility of such equipment.
Electrical connection diagram
How to connect a instantaneous water heater to the electrical network? Despite certain similarities, the electrical circuit for connecting different types of water heating equipment may have significant differences, which directly depend on the main design features of such a device.
Flow-type water heaters are characterized by instant heating, while storage boilers are characterized by heating a certain volume of water over a certain period of time. It should be noted that the second version of the equipment has less power.
Electrical diagram for connecting a water heater
Installation of such equipment is carried out in strict accordance with the device labeling and only in rooms with high-quality waterproofing.
Water heaters are most often fixed with special brackets, after which the device is connected to the water supply system with plastic pipes.
Installation of a storage water heater
Depending on the installation method, storage type water heating equipment can be represented by the following models:
- wall;
- built-in;
- floor
Wall-mounted devices are mounted at a certain distance from water taps, in accordance with the diagram suggested in the instructions supplied with the boiler.
Connecting taps to the boiler
Floor-standing models are installed using a special stand, to which the device is fixed using a special bolt connection:
- drilling holes in the supporting structure for anchor fasteners in accordance with preliminary markings made using a paper template;
- fixing anchor bolts through the eyes in the mount of the water heater;
- final tightening of anchor fasteners;
- insertion of water heating equipment into the water supply system;
- connecting a wall-mounted water heater to the electrical network.
At the final stage, a standard test check of the functionality of the installed storage water heater is mandatory.
The vertical arrangement of a heater with a volume of no more than 100 liters requires the use of two bracket supports, and oversized models and horizontal-type structures are hung using four supports.
Installation of instantaneous water heater
Among other things, this type of water heater is usually characterized by very compact, small dimensions.
And this greatly facilitates its phased placement almost anywhere:
- drilling several holes in the wall;
- fixing the device on brackets;
- connection to the water supply in accordance with the diagram in the accompanying instructions;
- flexible or rigid wiring of the device to the water supply system;
- mandatory sealing of connections;
- testing the connection made.
Installation of instantaneous boiler
A detailed description diagram, with all the necessary marks for holes and connections, as well as fastenings, is usually included in the package of the instantaneous water heating device being sold.
Network connection
If you plan to connect an electric water heater through an outlet, first make a recess in the wall with a special nozzle. The remains of brick or concrete are carefully chiselled and removed. The cable groove must be at least 30 mm deep. The strobe will connect the junction box to the socket.
Next, the socket box is inserted into the prepared hole and fixed with plaster mixture. After the plaster has completely dried, the cable (three-core copper) is connected. It is recommended to secure the wire with plastic clips along the entire length of the cable.
We connect the following to the socket terminals in series:
- phase conductor,
- contact "0"
- grounding
After this, the lid is screwed with a bolt in the center of the product. The groove is closed with a putty compound.
For rooms with high humidity, the use of closed type sockets with a degree of protection IP44 is required.
After installation of the equipment, it is recommended to once again check the correctness of the work performed.
Pay special attention to the quality of installed sockets. The plug with two side grounding clamps must comply with the technical specifications of the boiler.
How to use water heater taps (close and open)
The taps indicated in the diagram by the numbers “1” and “2”
will be needed to turn off the water when the electric heater is not in use. For example, if we needed to remove the last one.
The taps indicated in the diagram by the numbers “3” and “4”
are available in any apartment connected to the central water supply, located after the risers, because we sometimes have to turn off the water for various reasons.
Let's pay attention to tap “4” - it shuts off the circulation of hot water between the apartment and the riser while the device is operating. If the tap is not turned off, then all residents of the entrance will be able to use hot water from our water heater - the water will go into the riser
The main rule of use
- if hot water is supplied by the city boiler house, the water heater is in the off mode - “1” and “2” taps are closed, and “3” and “4” are open, respectively. If the boiler room “stands up” for maintenance and the hot water is turned off, we connect our device to the 220V network, open taps “1” and “2”, and close tap “4”.
Connecting a heating element with a thermostat
Let's consider the principle of operation and the connection diagram.
They are used for boilers and heating boilers. We take a universal one for 220V and 2-4.5 kW, a regular one, with a sensitive element in the form of a tube, it is placed inside the heating element, in which there is a special hole.
Here we see 3 pairs of heating elements, six in total, you need to connect as follows: set zero to three and phase to the other 3. We insert our device into the open circuit. It has three contacts, in the photo below you can see one in the center at the top and two at the bottom. The upper one is used to switch to zero, and which of the lower ones to phase should be checked with a tester.
Therefore, the power of the 1st heating element may not correspond to the parameters for heating the vessel and may be more or less. In such cases, to obtain the required heating power, you can use several heating elements connected in series or series-parallel. By switching various combinations of connecting heating elements, a switch from a household electric. plates, you can get different power. For example, having eight embedded heating elements, 1.25 kW each, depending on the switching combination, you can get the following power.
- 625 W
- 933 W
- 1.25 kW
- 1.6 kW
- 1.8 kW
- 2.5 kW
This range is quite enough to adjust and maintain the desired temperature. But you can get other power by adding the number of switching modes and using different switching combinations.
A series connection of 2 heating elements of 1.25 kW each and connecting them to a 220V network gives a total of 625 W. A parallel connection gives a total of 2.5 kW.
We know the current voltage in the network, it is 220V. Next, we also know the power of the heating element, knocked out on its surface, let’s say it’s 1.25 kW, which means we need to know the current flowing in this circuit. Knowing the voltage and power, we find out the current strength from the following formula.
Current = power divided by line voltage.
It is written like this: I = P / U.
Where I is the current strength in amperes.
P is power in watts.
U is voltage in volts.
When calculating, you need to convert the power indicated on the heating element body in kW into watts.
1.25 kW = 1250W. We substitute the known values into this formula and get the current strength.
I = 1250W / 220 = 5.681 A
R = U / I, where
R - resistance in Ohms
U - voltage in volts
I - current in amperes
We substitute the known values into the formula and find out the resistance of 1 heating element.
R = 220 / 5.681 = 38.725 Ohms.
Rtotal = R1+ R2 + R3, etc.
Thus, two series-connected heating elements have a resistance of 77.45 Ohms. Now it is easy to calculate the power released by these two heating elements.
P = U2 / R where,
P - power in watts
R is the total resistance of all lines. conn. heating elements
P = 624.919 W, rounded to 625 W.
Table 1.1 shows the values for series connection of heating elements.
Table 1.1
| Number of heating elements | Power, W) | Resistance (Ohm) | Voltage (V) | Current (A) |
| Serial connection | ||||
| 2 heating elements = 77.45 | ||||
| 3 heating element =1 16.175 | ||||
| 5 heating element = 193.625 | ||||
| 7 heating element=271.075 |
Table 1.2 shows the values for parallel connection of heating elements.
Table 1.2
| Number of heating elements | Power, W) | Resistance (Ohm) | Voltage (V) | Current (A) |
| Parallel connection | ||||
| 2 heating element = 19.3625 | ||||
| 3 heating element = 12.9083 | ||||
| 4 heating element=9.68125 | ||||
| 6 heating element = 6.45415 |
From the point of view of electrical engineering, this is an active resistance that generates heat when an electric current passes through it.
In appearance, a single heating element looks like a bent or curled tube. Spirals can be of very different shapes, but the connection principle is the same; a single heating element has two contacts for connection.
When connecting a single heating element to the supply voltage, we simply need to connect its terminals to the power supply. If the heating element is designed for 220 Volts, then we connect it to the phase and working zero. If the heating element is 380 Volt, then connect the heating element to two phases.
But this is a single heating element, which we can see in an electric kettle, but not in an electric boiler. The heating element of a heating boiler is three single heating elements mounted on a single platform (flange) with contacts located on it.
The most common boiler heating element consists of three single heating elements mounted on a common flange. On the flange there are 6 (six) contacts of the electric heating element of the boiler for connection. There are boilers with a large number of single heating elements, for example, like this:
How to connect a boiler, diagram of connecting a boiler through an electrical outlet
Industrial models of small power up to 1.5 ÷ 2 kilowatts are created, as a rule, for such a connection. With this method, long-term safe operation is ensured by:
Features of connecting the boiler to the electrical network via an outlet
The power contacts of a detachable switching device are designed for a specific type of load, for example, 6, 10 or 16 amperes. Its size is indicated on the body. If the socket is of less power, overheating and destruction of contacts occurs. For this reason, you cannot connect the boiler to a random outlet that does not correspond to its load.
Another requirement for the safe operation of such a circuit is the need to have an automatic switch in it, through which you can break the power supply circuit of the heating element under load. The socket and plug contacts are not designed to extinguish the electric arc that occurs in this case.
Wiring condition
The household network wires connecting the socket for the boiler to the apartment panel will fully carry the load of the heating element. They should not overheat. Their material and thickness must be taken into account correctly, otherwise a fire may occur.
A heating element cannot be connected to a socket with aluminum wiring, as well as to a copper one thinner than 2.5 mm2. It is better to use a 4 or 6 square section. It must first be calculated based on heat release and analyzed based on installation methods.
Protective devices
The boiler is designed to operate at the nominal characteristics of the electrical network, taking into account the occurrence of random faults in it. To prevent accidents, protection from:
If the equipment manufacturer has not provided such protections in the internal design, then they should be mounted in the housing panel.
Emergency mode with excess pressure inside the boiler
A mandatory safety condition is the presence of a device that prevents the boiling of water and the release of dissolved gases from it, because this process creates increased pressure that can rupture the housing.
A similar situation may arise:
To prevent such an accident, use a second stage of protection, set to a higher temperature setpoint than for the operating mode. Its value is selected close to the boiling point, and shutdown is carried out by another, backup contact.
Such an open circuit is called a thermal fuse. The use of a separate temperature sensor for it or the use of an autonomous mechanical design operating on the principles of bimetallic releases increases the overall reliability of the system.
Emergency mode with leakage currents
The metal casing of the boiler may be at phase potential if the insulation of the heating element or connecting wires to the casing breaks down. This situation is a direct prerequisite for a person to receive an electrical injury. It can be corrected by an RCD built into the electrical circuit. Industrial samples of boilers may be produced with a built-in protective shutdown device or not have it.
For proper operation of the RCD, it is necessary to ensure a reliable connection of the boiler body with the main grounding bus through a protective PE conductor.
We care about protection
In order to make the operation of the boiler as safe as possible, it is necessary to install an RCD. This device will turn off the power supply at the moment when a phase current leak occurs along the main connection line of the boiler. The RCD is connected in the following sequence:
It is necessary to install the device as close as possible to the electric meter, then install a circuit breaker that will protect the electrical circuit and cut off the voltage in the event of a short circuit.
Then the grounding, phase wire and “0” are connected to the RCD. At the output, the device is connected to wires coming from the electric meter. This provides reliable protection not only against fire in the event of a short circuit, but also protection against electric shock.
Preparing the device for operation
To prepare the water heater for operation, it is necessary to remove the air accumulated in it from the secondary circuit, otherwise, when heated, air bubbles will move through the coolant and cause unpleasant noise.
To do this, you need to fill the water heating circuit to capacity with water. At the same time, the hot water tap remains open until the container is completely filled.
Upon completion of installation work and connecting the device, we once again check the quality of connections of all components and conduct a test run of the device
A storage electric heater is a practical solution for providing your home with hot water. Different types of devices can be connected both to the water supply and to a water storage tank or pump.
Installation of equipment can be done independently, especially if the home handyman has experience in plumbing work
It is important to strictly follow the manufacturer’s instructions and correctly install and connect the heater
Only then will the device serve its owner for a long time and without interruption.
The most popular connection errors
- Installing not a safety valve, but a regular check valve. As a result, the excess pressure does not decrease, which leads to damage to the water heater. The water-containing container becomes deformed, the protective anti-corrosion enamel peels off, and the rubber gasket is squeezed out. The seal of the tank is broken, causing water to seep out.
- No safety valve. A typical installation error that leads to increased pressure inside the boiler and damage to it. The heater may burn out.
Safety valve, tee, ball valve - all this must be connected to the water heater. If you follow the basic rules for operating the boiler, the device will last a long time and will not break.
How to connect a boiler, boiler connection diagram taking into account the limitation of allocated power
Any wiring is designed and installed for specific loads. They are appointed by the electricity supply organization. In a modern apartment, the owner of the living space operates a large number of electrical appliances. They can easily exceed the power limit that is allocated to them. Operating home wiring in this way is dangerous: it can overheat and create a fire.
To prevent this, it is necessary to turn off powerful consumers when creating critical loads. Considering that the heating element of the boiler is turned on periodically to heat water, the temperature of which does not decrease quickly, its heating is usually suspended, ensuring the operation of other appliances, for example, a refrigerator, washing machine or dishwasher.
For this purpose, an electronic device is used that has the following functions:
As such a device, you can use the factory power limiter OM-110.
How to connect a boiler, power limiter connection diagram
It will prevent frequent network shutdowns due to overloads by the circuit breaker and create a normal mode of electricity consumption for all connected electrical appliances. The OM-110 power limiter is designed to operate with loads up to:
Design features of an electric boiler
Inside a hermetically sealed boiler with coolant - water circulating through hydraulic lines from pipelines and radiators located indoors, an electrical circuit is mounted, including:
- water heater, which is most often served by an ordinary resistive heating element
- coolant temperature meter - a sensor of a special design, the readings of which are processed by a logic circuit to supply voltage to the heating element or turn off its power
- switching device in double-pole or single-pole design - thermal switch
- protective thermal fuse
- heating indication circuit, which can be an ordinary incandescent light bulb or an LED with a current-limiting resistor connected in parallel to the contacts of the heating element
Manufacturers of electrical measuring and switching equipment produce ready-made kits that include temperature measurement sensors, switching devices and a logic unit that ensures their mutual connection to regulate the temperature of the coolant.
How to connect a boiler, mechanical thermostat
They are usually called thermostats or thermostats. The temperature sensor is mounted inside the boiler body, and the control unit and current switching contacts are located on the outside.
Thermostats can be made on an analog basis or use microprocessor technology. The designs of the latter have:
- greater adjustment possibilities
- easy-to-use setpoint settings
- user-friendly interface
- information board
- additional operational functions
An example is the model of an electronic thermostat TK-5 with a microcontroller, a display, and two temperature sensors mounted at the inlet and outlet of the coolant into the boiler. It allows you to take into account temperature changes within 0÷120 degrees with an error of 0.5 O C, which is more than enough for domestic purposes.
How to connect a boiler, electronic thermostat
The power contacts of the TK-5 thermostat are capable of switching rated currents of 6 amperes. When the heating element creates a larger load, the connection circuit of the boiler to the electrical network requires modernization - the inclusion of an additional magnetic starter that repeats the operation of the output circuits of the thermostat with high-power contacts.
Storage-type equipment: device and principle of operation
The device is a thermally insulated tank of arbitrary shape. A heating element is built into it, which heats the water to the temperature set by the owner.
Electric water heaters are a practical solution for uninterrupted hot water production
It is only important to correctly determine the volume of the device. It varies from 35 to 85C
In a thermally insulated container, the heated liquid maintains its temperature for 2-3 hours. After the water has cooled by 0.5C, the automation is triggered and the heater is turned on to heat the liquid
It varies from 35 to 85C. In a thermally insulated container, the heated liquid maintains its temperature for 2-3 hours. After the water has cooled by 0.5C, the automation is triggered and the heater is turned on to heat the liquid.
When the set temperature is reached, the device turns off. This mode of operation allows the device to save energy.
Heaters built into the tank can be tubular or spiral. The first option is more reliable, it is not afraid of air locks, but over time it will definitely become covered with scale.
Spiral devices are not afraid of scale and they heat up an order of magnitude faster. The tank can be steel or plastic. Its internal surface is covered with enamel or glass ceramics.
To prevent the welds of the steel container from rusting, special anode rods are inserted into the tank to prevent the iron from oxidizing. They need to be changed every 5-8 years.
The standard design of the water heater includes a thermostat, which is responsible for maintaining the set temperature. The device control system can be either manual or automated.
The device can be equipped with an additional function for quickly heating water. Storage water heaters differ in volume, which, in turn, affects the rate of water heating.
The larger the volume, the longer the equipment will warm up the liquid. It is advisable to accurately calculate the need for hot water so as not to force the device to run idle and at the same time not experience a shortage of it.
The diagram shows the general structure of an electric storage water heater
Varieties
The Russian market offers potential buyers two main types of electric water heaters:
- Flow-through, that is, heating water as it flows;
- Cumulative . Such a device is capable of preparing a sufficiently large volume of hot water and maintaining its temperature for an unlimited time.
The operating principle of an electric heater determines its performance, so I will dwell in detail on the design of both devices.
Self-installation of the boiler
If you decide to install a water heater yourself, you will have to put in a lot of effort. In this case, three options are possible:
- By purchasing a boiler, the seller allows the equipment to be installed on its own. At the same time, the warranty on the water heater remains valid. In this case, the home owner must, when performing installation, be guided by the connection diagrams and carry out the installation in accordance with it. Then the installation of the unit will be carried out efficiently, and during operation the installation will work reliably. In addition, the safety of its work will be ensured;
- When purchasing a water heater, either the manufacturer or the seller himself prohibits the buyer from independently installing an electric water heater. This situation is not very uncommon. In this case, you need to understand that if you decide to install it yourself, the warranty on the device will be lost. If this is not critical, then you can do the installation of the unit yourself. However, all installation conditions must be fully observed;
- There are no instructions or installation diagram for the boiler. In this case, you should not try to do the work yourself. The best solution is to contact specialists who will connect the boiler correctly and provide its further maintenance, and, if necessary, repairs.
In most cases, you can connect the boiler yourself without any difficulty. If you are determined to do this job yourself, you need to prepare. First of all, you will need certain tools and materials to complete the installation work:
- hammer drill. If it is not there, then you can use a hammer drill;
- drill, construction level;
- pliers, wrench;
- hammer;
- screwdriver;
- soldering iron for plastic pipes.
When purchasing a boiler, the consumer may find the following fasteners included with it:
- First, a metal strip is attached to the wall, on which the unit will later be fixed;
- then a metal strip is attached to the water heater, which will then be installed on the wall surface using bolts.
When performing this work, you cannot do without using a building level, since one of the installation requirements is that the boiler must be in a strictly horizontal or vertical position.
When the installation of the boiler is completed, it is necessary to carry out equally important work on connecting it to the water supply and electrical network.
Grounding
Water heaters of any type are in constant contact with water, which is a good conductor of electric current. Any, even minor, violation of insulation can provoke a very painful or fatal electric shock. Among other things, metal parts of water heating equipment contribute to the occurrence of stray currents, which can cause corrosive and destructive changes.
In private households, grounding is also mandatory and helps prevent lightning strikes during a thunderstorm. It is optimal to carry out grounding through a wire that connects the housing and a metal part buried in the ground. For this purpose, a regular water riser or heating system can also be used.
Recommendations for arranging grounding:
- installing an outlet with grounding wiring at a distance of 0.8 m from the floor level and about half a meter from the installation site of the water heating device;
- replacing the old two-core wiring with three-core copper cables laid from the grounded panel to the outlet;
- laying the cable in a special plastic box or pre-arranged grooves.
The most modern and high-quality electrical appliances are characterized by the presence of special grounding contacts on the body, the location of which can be determined by inspecting the water heating equipment.
When connecting a water heater, it is very important to remember the need to install a special socket equipped with three terminals.
The difference between a boiler and a water heater
Water heater safety group.
The operating principle of both devices is almost the same. And often a boiler is called a water heater, and a storage water heater is called a boiler.
There are differences between the devices:
- in design: the storage water heater has only an electric heating element inside the body, and inside the boiler there is a heat exchanger for supplying coolant from the boiler;
- in the heat source: in a water heater, the water is heated by a heating element; in a boiler, the heat source is natural or liquefied gas, electricity, various types of solid fuel, diesel fuel;
- by power: boilers are used to heat large volumes of water in houses with large water intake; water heaters heat a maximum of 120 liters and are intended for installation in apartments.
Two main types of boilers
The industry produces numerous designs of water heating units, which differ in design, performance, and operating conditions.
An indirect type boiler operates due to a heating source located outside its body, when the temperature is transferred to the coolant circulating through the coil built inside. Such models require constant combustion of fuel.
A direct boiler uses an internal heat source. For domestic purposes, electrical structures that operate according to one of the principles are widely used:
- resistive heating with heating elements
- heating by induction currents
In both cases, control of the operation and connection of the boiler to electrical energy is carried out according to the same schemes, based on the flow of current through the heating element to heat it or turn it off for cooling.
Connecting the boiler to the water supply
The boiler has at least one inlet for cold water and one outlet for hot water. You need to connect the boiler to the water supply according to a special diagram.
Please note that we are considering the installation and connection of a storage, not instantaneous, water heater. A storage water heater, also known as a boiler, is installed permanently, with the installation of “correct” water supply pipes, and not flexible, temporary hoses. In the photo, the water supply wiring is made of cross-linked polyethylene pipes
It is possible to install pipes made of metal-plastic, copper and steel.
The general principle of connecting a boiler to a water supply
Water enters the boiler from a separate cold water supply line with a collector distribution or from a tee with a tee distribution of water supply. In the boiler, the water is heated and supplied to the INPUT of the hot water supply system of the apartment's common water intake unit.
- To disconnect the boiler from the water supply, shut-off valves are installed (ball valve 7 in the figure).
- To purify the incoming water, a coarse mechanical filter (5 micron mesh) is installed.
- For emergency or technical drainage (when cleaning the boiler) of water from the boiler, a drain outlet with separate shut-off valves (7b) is made on the cold water side.
- On the hot water side, a ball valve (7a) is also installed to create the necessary air pressure in the boiler to drain water from the boiler. That is, if there is no tap (7a) on the hot side, then when tap (7b) on the cold side is opened, water will not drain.
- To protect the cold water supply from emergency inflow (at excess pressure of more than 7 atmospheres in the boiler) of hot water from the boiler, boiler safety systems are installed on the cold inlet side. The boiler safety system has its own drainage into the sewer.
Note: The boiler design may have a factory outlet for draining water from the boiler. In this case, there is no need to install a drain outlet with a tap on the cold water side.
It is also possible not to install the ball shut-off valve (7) for hot water if it is already installed at the hot water inlet going from the boiler to the apartment water supply.
Important! If there is high pressure in the apartment’s water supply system (more than 6 atmospheres), a pressure reducer must be installed to enter water into the boiler, after the water purification filter. If pressure reducers are already installed in your apartment water intake unit, there is no need to duplicate them
How water moves from an apartment’s water supply when the boiler is running
- Before turning on the boiler, prepare your plumbing system. Turn off the apartment-wide hot water shut-off valve.
- Open the drain valve (7a) at the hot water outlet to control the filling of the boiler;
- Open the inlet valve (7) for cold water flowing into the boiler;
- Fill the boiler completely with water - water should start flowing out from the open tap (7a) in point 1. Close this tap (7a);
- Connect the boiler to the mains and open the ball valve on the hot water outlet side (7) to the water supply.
Scope of application of the water heater
People very rarely talk about using an electric boiler for heating, but such an option still exists. It is recommended to use it if the room does not have a complex heating system, and the power of the unit is sufficient for normal operation (usually 1 kW can serve 10 sq.m.). In order for it to heat a small house, it is necessary to additionally install a circulation pump, otherwise hot water will not be able to effectively distribute through the radiators (there will not be enough pressure).
Please note that there are storage and flow-type devices. The first version of the electric boiler consumes less electricity for heating, but requires a certain place to place the container. The second option is more compact, but due to its increased power it consumes an order of magnitude more electricity.
