Polystyrene foam is considered one of the most popular insulation materials. Today it is used for thermal insulation of walls, foundations, ceilings and roofs. Insulating a building with it not only reduces heat leakage, but also reduces the load on the entire building. Insulating the roof with foam plastic increases the service life of the roof structure.
During operation, the roof is subjected to various mechanical loads, as well as weather conditions and precipitation. And significant heat loss from the building occurs precisely on the roof. Its insulation allows you to reduce the negative impact of external factors and significantly reduce thermal energy losses. Therefore, thermal insulation of the roof is an important stage in the construction and renovation of any home.
Features of the material
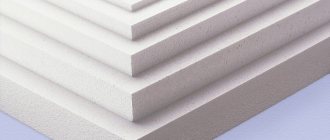
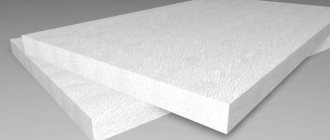
Polystyrene foam is foamed polystyrene - a lightweight material, 98% consisting of air bubbles glued together, which are enclosed in a polystyrene shell. The advantages of polystyrene foam include
:
- minimum weight (insulation does not add serious loads to the roof structure);
- low thermal conductivity coefficient due to the high air content, which is an excellent heat insulator;
- resistance to moisture (can be used in a humid environment without loss of thermal insulation properties);
- resistance to temperature changes;
- fire safety (the material does not ignite, but upon contact with an open fire it begins to melt);
- environmental safety and hypoallergenicity;
- resistance to biological damage (fungus does not develop, is not damaged by rodents);
- ease of processing with tools and installation;
- lack of tendency to deformation;
- long service life (25-80 years);
- affordable price.
Foam plastic is one of the materials sensitive to external influences
It must be transported with care. The material should be protected from mechanical damage and exposure to direct sunlight
When choosing polystyrene foam for insulating roofs and building structures, it is important to take into account the technical characteristics of the various grades of material. Manufacturers recommend using foam:
- PSB-15 (density 15 kg/m 3 ) 50-100 mm thick for thermal insulation of pitched roofs, including attic roofs, as well as ceilings;
- PSB-25 (density 25 kg/m3) 50-100 mm thick for wall insulation;
- PSB-35 (density 35 kg/m3), or extruded polystyrene foam - for thermal insulation of flat roofs, attic floors, floors. This material can withstand high mechanical loads.
Polystyrene foam as insulation
Most often, polystyrene foam (expanded polystyrene foam) is used to carry out thermal protection work independently.
Its popularity is due to the following advantages of the material:
- low cost;
- good resistance to moisture;
- high thermal insulation characteristics;
- light weight, so there is no heavy load on the insulated surface;
- environmental Safety;
- does not cause allergies;
- fire safety, polystyrene foam is a self-extinguishing material;
- ease of operation and installation;
- good sound insulation properties;
- durability;
- availability.
Is it possible to insulate a roof with foam plastic?
Doubts about the choice arise due to the fact that when ignited, polystyrene foam can release toxic substances. But houses are insulated with self-extinguishing polystyrene foam, which is a fireproof material. It melts, but does not support combustion.
Types of polystyrene foam insulation technical characteristics
- Styrofoam. The technology for manufacturing polystyrene foam is quite simple, and this cannot but affect its cost. Today this is perhaps the most inexpensive insulation. It consists of glued cells filled with air bubbles, which are enclosed in a polystyrene shell.
Thanks to this composition, the material acquires hydrophobic qualities. The fact that it is able to repel moisture means you don’t have to look for an answer to the question of whether a vapor barrier is needed when insulating with polystyrene foam. There is no special need to lay a hydro- and vapor barrier layer.
Among the advantages of polystyrene foam are:
- its lightness; very low thermal conductivity; easy installation; good sound insulation properties; fire safety.
Polystyrene foam that goes on sale has different density coefficients.
- cellular polystyrene foam with a low specific gravity has low strength, so it is mainly used for thermal insulation under cladding; medium-density material is mainly used for insulating facades with expanded polystyrene followed by plastering; with a specific gravity of 35 kg/cu.m. m. polystyrene foam can be used for thermal insulation of surfaces under fairly large loads, for example, for insulating the outside of a flat roof.
- Extruded polystyrene foam (EPS) is a melt of polyethylene saturated with gases. It is produced by the extrusion method: polystyrene foam is extruded by pressing a viscous melt of raw materials through molding holes of the same size no more than 100–200 microns.
Penoplex comes on sale in the form of sheets. They can also have different densities and differ in color. The thickness of polystyrene foam is 3–7 cm.
- Penoplex is stronger than regular foam; its thermal conductivity coefficient is even lower - we can say that it has the lowest rate of all available insulation materials; it does not crumble, but is easy to cut and process in other ways; the density and water-repellent ability of penoplex is higher than the same indicators of foam; not of interest to rodents, insects or microorganisms; the tongue-and-groove system along the edges makes installation extremely easy, and there is no need to fill the joints; EPS boards are more expensive, which is why it is more often used where polystyrene foam is not suitable for one reason or another.
How is insulation done from the inside and outside with polystyrene foam?
Comparisons and tips for choosing foam insulation
There are great similarities between all these materials, but there are also striking differences. Let's take a closer look at them.
Styrofoam
Polystyrene foam is foamed polystyrene (and polystyrene is a product of the polymerization of styrene), slabs of sintered granules, between which there are millions of voids and air bubbles. Due to this, polystyrene foam has its luxurious thermal insulation properties, since air is the best thermal insulator. The denser the granules are sintered, the greater the density of the material, and the less permeable it is to steam and water.
Polystyrene foam consists of many polymer granules, between which there is air - the best heat insulator
Polystyrene foam is one of the most popular insulation materials. True, it has always been believed that it is harmful in residential areas, both under normal operating conditions and when heated, because it emits toxic gas. But this is outdated information. Nowadays, PSB foam plastic is used for insulation - a fireproof and resistant to temperature changes material, which, when ignited, has the property of self-extinguishing. It is used in any climate zone and is produced in sheets up to 20 centimeters thick.
Advantages of foam plastic insulation:
- weighs little due to its bubble structure - a key advantage of polystyrene foam;
- has extremely good thermal insulation properties;
- resistant to sub-zero and high positive temperatures, as well as sudden weather changes;
- does not heat up in summer;
- almost never gets wet;
- when wet, it does not freeze;
- environmentally neutral;
- does not deform;
- easy to process (cut) and easy to install, often simply using special tile adhesive;
- durable;
- has excellent soundproofing properties;
- hypoallergenic.
Flaws:
- for insulating “loud” - and therefore flexible - metal roofs, it is poorly suited, since it is rigid and does not bend;
- for the same reason, it may not fit well, creating voids - “cold bridges” in which condensation forms;
- it can harbor fungi and mold;
- it crumbles a lot, so rodents make holes in it;
- In case of a strong fire, the foam still burns - and then the fire becomes even stronger.
Penoplex
Penoplex is a new generation of lightweight insulation, also in the form of slabs, and also made of expanded polystyrene. But they are made by extrusion at high pressure and temperature. The slabs have a uniform structure with tiny air bubbles, they are homogeneous and very mechanically strong. A five-centimeter layer of penoplex in terms of thermal insulation is not inferior to a fifteen-centimeter thick brick wall. It is used in any climate zone.
Penoplex is a new generation of lightweight insulation with a structure similar to polystyrene foam.
Its advantages:
- almost never gets wet;
- resistant to sub-zero and high positive temperatures, as well as sudden weather fluctuations;
- environmentally neutral;
- resistant to fire and high temperatures;
- has very good heat-insulating and sound-proofing properties;
- durable;
- It is simply processed (cut) and easily installed, often simply using special tile adhesive.
The disadvantages are the same as those of polystyrene foam.
Let's try to roughly compare penoplex and polystyrene foam according to key indicators.
Table: comparison of penoplex and polystyrene foam according to key indicators:
| Position | Characteristic | Styrofoam | Penoplex | Note |
| 1 | Thermal conductivity | 0.04 W/mK | 0.032 W/mK | A 20 mm polystyrene foam board corresponds to a 25 mm polystyrene foam board. |
| 2 | Water absorption | 0,4 % | 2% | This means that penoplex can be laid without vapor barrier, but polystyrene foam is undesirable. |
| 3 | Compressive strength | 0.5 MPa | 0.2 MPa | Penoplex is possible even for insulating floors and any structures with high loads, but polystyrene foam is not. |
| 4 | Price | The price of penoplex is approximately one and a half times higher than the price of polystyrene foam. |
The microgranules in the penoplex structure are much closer to each other, so this material is stronger.
Penoplex brands indicate its purpose:
- “Comfort” (Penoplex 31c) is very frost-resistant, used for insulating apartments, loggias and foundations.
- “Wall” (Penoplex 31) has the highest thermal insulation properties of all brands, therefore it is used for insulating leeward walls and in harsh climatic conditions.
- “Foundation” has the highest compressive strength and is used to insulate floors and foundations.
- Penoplex 45 has the highest density and is used for railways and runways.
- And finally, “Roof” (Penoplex 35) has the highest fire resistance. This is what is used to insulate all types of roofs.
Polyurethane foam
It also belongs to the type of gas-filled plastic, but the principle of insulation is completely different. Liquid polyol and polyisocyanate are mixed at high pressure and temperature and form a quickly hardening elastic foam at the exit.
Polyurethane foam is a thickening product of liquid chemicals that are mixed when sprayed under high pressure.
Depending on the density, it is divided into types:
- rigid polyurethane foam (from 30 to 85 kg/m3 with poor vapor permeability) - can serve as a waterproofing agent, more often used for flat roofs;
- semi-rigid polyurethane foam (below 30 kg/m3) - requires additional layers of vapor and waterproofing, used for roofing;
- liquid (below 20 kg/m3) - used for filling voids.
Apparatus for applying polyurethane foam (foam generator)
Its advantages:
- very good heat insulating and sound insulating properties;
- good waterproofing qualities;
- can ideally adhere to any materials to which it is applied, and they do not need to be pre-treated;
- Easy to apply, no need to cut and glue;
- very light;
- gives the structure strength;
- applied without gaps or seams;
- does not rot and is not susceptible to infection by fungi and mold;
- does not attract mice;
- environmentally friendly (after hardening);
- withstands temperatures from -150 to +150 oC.
Flaws:
- poor vapor permeability;
- sensitivity to ultraviolet radiation, needs protection from light (lining) immediately after hardening;
- expensive spraying equipment.
To summarize: all the materials under consideration are excellent for roof insulation. The choice depends on your preferences and skills, functionality and features of the insulation object and your financial capabilities. We must remember that:
- for pitched roofs, you can take foam plastic 50–100 millimeters thick;
- for flat roofs under load, penoplex is needed;
- polyurethane foam is suitable for any application.
Insulation methods depend on the type of roof - flat or pitched. If it’s flat, then you need to know how it will be used from above (summer garden, penthouse terrace). Nothing depends on the roof material.
Thermal insulation made of polystyrene foam
The technology for installing polystyrene foam and extruded polystyrene foam is practically the same, because in both cases we are dealing with foamed polymer insulation in slabs. The only difference is that they have different performance characteristics.
Polystyrene foam is made by repeatedly exposing polystyrene to steam. As a result, the granules significantly increase in volume and interconnect. And yet, polystyrene foam has low fracture strength, and due to significant mechanical stress it crumbles into granules.
The extrusion method involves first melting the granules and then exposing them to freon and carbon dioxide. As a result, extruded polystyrene foam acquires strength and a solid structure in which the gas cells have a closed shape. Extruded polystyrene foam is the latest technological material with a long service life, and its functional properties are much better than those of polystyrene foam.
This is worth paying attention to when making roof insulation from polystyrene.
Today, penoplex is a common noun; it is often indicated when designating expanded polystyrene.
Are polystyrene foam and polystyrene foam the same thing?
Expanded polystyrene is superior to polystyrene in all respects and is therefore more expensive
Both materials are produced from polystyrene using different technologies. The classic foam plastic we are familiar with is obtained by steaming in the form of microgranules, which increase from high temperature and fill the volume of the block mold. The result is a lightweight material from polystyrene shells sintered together and filled with air.
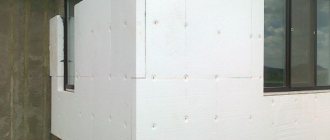
Expanded polystyrene, produced by extrusion, is a material with a solid structure, including small gas-filled cells. Thanks to the technology, a more dense, waterproof, durable material is obtained. Insulating a roof with expanded polystyrene will cost more, but will allow you to get a thinner layer of thermal insulation with good sound absorption, better fire resistance and a longer service life. This material is practically irreplaceable when thermal insulation of a flat roof and floors is being used. Expanded polystyrene is good not only for roofing, but also for insulating the gables of a gable roof without large losses of useful living space.
The operating technology is the same for both materials. In the future, insulation of building roofs with foam plastic will be considered.
Extruded polystyrene foam for roofing is suitable
Even a perfectly functioning heating system cannot cope with the load created by small living spaces if the roof of the house is not insulated. It has been established that at least 10% of heat loss occurs in the attic space and roofing of the building if the thermal insulation system is absent or poorly functioning. Modern techniques make it possible, using extruded polystyrene foam for roofing, to quickly create thermal protection for the roof shell during construction or during repairs carried out in a building and to correctly attach extruded polystyrene foam to wood.
Closed truss structure
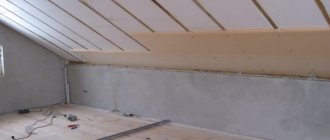
Insulating a roof with foam plastic over closed rafters is not much different from insulating a roof over open rafters. The difference lies in the sheathing of the insulating layer. It is installed under the rafter system. The sheathing is made of wooden boards, lining, plastic or plasterboard.
Often, roof insulation is carried out for the purpose of arranging the attic floor. In this case, the choice of polystyrene foam as insulation is primarily due to its light weight and ease of installation. Installing rolled or heavy materials on inclined surfaces is problematic.
Surface preparation
Thermal protection of an attic roof from the inside begins with treating wooden surfaces with an antiseptic. Next, if there is no roof waterproofing, it must be installed between the roof and the insulation. In this case, it is imperative to leave a ventilation gap between the insulation material and the waterproofing.
Laying insulation
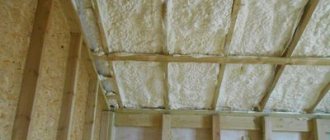
The next stage of insulating the attic floor is the installation of foam boards between the rafters. In this case, you need to remember about the required gap between the slabs and the waterproofing of 20-50 mm. The sheets are installed carefully, without empty spaces between them and the rafters. The resulting gaps are eliminated using polyurethane foam and small pieces of polystyrene foam.
Vapor barrier
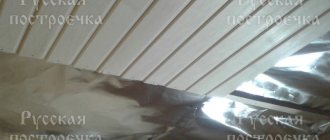
Next, a vapor barrier layer is laid. This can be a foil material, which additionally has heat-reflecting properties, or special perforated films or membranes. The vapor barrier is secured using a furniture stapler. In this case, the material does not need to be stretched too much; it should sag slightly. The seams are sealed with special tape.
At the last stage, the attic floor is finished. Lining, plywood, plasterboard, plastic, fiberboard, and chipboard are used as finishing cladding. It is installed either directly on the vapor barrier or on a thin sheathing. At the end, the surface can be varnished or covered with wallpaper.
Insulation of the attic floor
Next, I would like to tell you about insulating the attic floor. For this option, the best insulation material would be polystyrene foam.
The first step is to clean the floor from old backfill and debris. Then steam and waterproofing should be done. After the preparatory work, it is necessary to lay out the foam boards on the floor. The joints formed as a result of the layout should be treated with polyurethane foam, insulating the roof with foam. It is worth noting that in places where the roof meets the walls, be sure to leave a gap of 3-5 mm for ventilation.
If desired, you can lay a layer of roofing material on top of the foam or make a cement-sand screed with reinforcement. This is due to the purpose of the attic space. If you want to turn the attic into a living space, then you should lay a coating on top of the insulation that can withstand the weight of people, furniture, necessary plumbing or other equipment (parquet, laminate, boards).
Technology
Pitched roof ↑
External polystyrene foam insulation
External thermal insulation is carried out parallel to the roof structure. Here, as a rule, insulation is used with extruded polystyrene foam or high-density polystyrene foam.
The process of insulation with polystyrene foam is performed in the following sequence:
- install a rafter system; Next, a counter-lattice is installed. To do this, wooden slats are placed on the rafter legs from below; penoplex is laid on them, placing the sheets between the rafters, flush with their upper edge; then comes the turn of the windproof vapor barrier film; install roofing material.
Insulation of the attic with extruded polystyrene foam ↑
- Penoplex sheets are laid in the space between the rafters and fixed with staples or corners. Additionally, the insulation can be supported with thin slats, placing them across the rafters. The laid and secured sheets of thermal insulation material together with the mounting rails must form a flat surface. It is necessary to provide a gap of approximately 200–500 mm between the waterproofing layer and the thermal insulation material. It is necessary for ventilation of the roofing pie. Penoplex sheets should be cut slightly wider than the pitch of the rafters so that there are no gaps between them. If there is still a gap between the rafter beams and the insulation, it is filled with either pieces of EPS or polyurethane foam, preferably polyurethane. Its excess can be cut off with a sharp knife immediately after hardening.
- Then a vapor barrier film is installed. It is fixed to the rafters with staplers. The canvases are laid with an overlap of 100-150 mm and taped with a special tape. The final stage is finishing. A counter-lattice is placed on top of the vapor barrier layer, which will become the frame for the attic cladding.
Work with a flat roof ↑
When choosing penoplex for thermal insulation of a flat roof, they are guided by its strength and absolute hydrophobicity. A multi-layer cake is formed, the bottom layer of which is penoplex.
For an exploited roof it has the following form:
- The reinforced concrete floor slab is filled with cement-sand screed and waterproofing material is laid; Penoplex sheets are laid on the base. Thanks to the slot locks, the surface is quite dense. For greater reliability, the joints are taped with special tape. When laying the second layer, the slabs are laid “in a staggered manner.” Eps boards are covered with filtering geotextiles. It allows water to pass freely, but retains solid particles; Pour gravel or pebbles without sand; As an option, paving slabs are laid as the last layer.
In the case of an unused roof, the roofing pie has a different look:
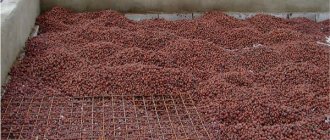
- a vapor barrier material is laid on the reinforced concrete slab and fixed with glue; lay EPS boards; a layer of expanded clay is poured with a slight slope; pour a cement-sand screed approximately 4 cm high and install a reinforcing mesh; lay a layer of waterproofing; they fuse a soft roof.
The roof of a high-rise building, if it is not insulated from the outside (especially for old buildings), freezes in winter and gets hot in summer. And the residents of the upper floors suffer from this.
You can cope with this situation by insulating the roof from the inside.
- The easiest way is to glue penoplex to a reinforced concrete slab. The insulation sheets are additionally secured with special dowels and covered with finishing layers. It is also recommended to use reinforcing mesh. For insulation, you can also use lightweight foam. In this option, it is preferable to install a sheathing and lay thermal insulation material between its elements. The sheathing is then sheathed with plasterboard or other finishing material, say, plastic panels.
How to properly insulate the ceiling in a house with sawdust
When the ceiling is insulated with sawdust, the house turns out to be warm and environmentally friendly. For this process, well-dried clean sawdust of medium or large size is purchased. Sheet or rolled parchment is used on the bottom. Lime and copper sulfate are used as an antiseptic and protection against rodents. The average insulation layer for a wooden house, bathhouse or cottage is 25 cm.
To prepare insulation with your own hands, take:
- 10 buckets of sawdust;
- bucket of lime,
- 250 grams of copper sulfate;
- bucket of cement;
- 10 liters of water.
Lime and copper sulfate are mixed with dry cement. The mixture is poured into sawdust and kneaded, then water is slowly poured in. The resulting mixture should form a homogeneous dense structure.
The chimney is insulated with fire-resistant material, and the wiring is covered with a metal pipe. The parchment is spread out, then the sawdust mixture is filled in and compacted. Afterwards this flooring is left to dry for 2 weeks.
How to insulate the ceiling in a wooden house with expanded clay
Expanded clay is environmentally friendly, fireproof, does not rot and is not exposed to various temperatures.
Expanded clay does not harbor rodents, which is important for owners of wooden houses. Steam and waterproofing are spread in the upper part of the ceiling. The pipe and wiring are insulated with fireproof materials (sheet metal or iron pipes)
The pipe and wiring are insulated with fireproof materials (sheet metal or iron pipes).
Waterproofing or parchment is spread, and the width of the material should be 10 centimeters greater than the distance between the beams of the house. Laying is done with an overlap on beams and walls. The roofing material is fixed with rubber-based mastic. When using simple adhesive tape at the joints, aluminum plates are additionally installed.
There is a vapor barrier with an overlap of 15 cm, and the exit to the walls after filling with expanded clay is also 15 cm. A 50 mm layer of clay is laid out, then there is a layer of expanded clay. The minimum thickness is about 15 cm. A screed of sand and cement is poured onto it. To use the attic, chipboard or boards are laid on top.
Insulating the ceiling in a house with mineral wool
Basalt and mineral wool reduce the thermal conductivity of the ceiling. These types of insulation are easy to install and environmentally friendly. They are a little more expensive than previous analogues, but allow for insulation of the outside and inside of the ceiling. Slabs are used externally.
When insulating the ceiling in a wooden house, the vapor barrier is laid out with an overlap of 15 cm. The overlap is laid on the walls, the beams are secured, and mineral wool is laid between the beams. When using rolls, keep in mind that they must fit the openings. Rolling is done along the location of the beams. The mats are tightly packed. Another layer of insulation is laid across the top.
Beams and joints are hidden, and gaps are sealed with foam for installation. A vapor barrier is laid with an overlap of 15 cm. The seams are taped. On top there is a screed made of cement and sand. In a residential attic, boards or laminate are laid on the screed.
Insulation in a wooden house with foam plastic
The most reliable type of insulation for a home is the use of polyurethane foam or polystyrene foam boards. These materials are the most expensive. Installation, in comparison with the previous type, is more labor-intensive from the inside, but at the same time, the least amount of attic space is lost in this option. The insulation fits more tightly than others when insulating the ceiling in a wooden house.
A roll vapor barrier is installed on the inside of the ceiling of the house. Polystyrene foam is tightly inserted between the beams. To do this, it is measured and cut to size. Then there is another layer of vapor barrier material with an overlap of 15 cm. The seams are closed. A sheathing of wooden or iron bars with a section of 5 by 5 centimeters is installed on the beams. A ceiling made of gypsum plasterboard or gypsum fiber board is attached to it.
All these materials can be used for insulation in a private house, bathhouse or cottage. Knowing how to insulate a ceiling in a wooden house with your own hands, you will be able to complete repair or construction work in a short time without involving specialists. Insulation not only allows you to keep the house warm, but also becomes a good option for sound insulation.
We insulate the inside of a flat roof
There are situations when, during the operation of a finished roof, it is necessary to install additional insulation. Therefore, if you asked yourself the question whether it is possible to insulate the roof with foam plastic from the inside, so as not to disassemble the roofing pie, then in this case the answer will be positive. You just need to decide on the thickness of the insulation.
Insulating a roof with polystyrene foam from the inside involves fixing the sheets to the ceiling with glue or dowels. The main thing is to properly treat the base before this to ensure the best adhesion of the material.
Pay special attention to the tight fit of the sheets to each other. To eliminate voids formed at the joints during mating, use sealant
For subsequent finishing of the ceiling, you can install a tension or suspension system. If you plan to use plasterboard or other materials, then before this the ceiling is sheathed with a wooden frame, the slats of which must have a thickness exceeding the thickness of the insulation.
Sometimes the technology of roof insulation with polystyrene foam is violated.
Most often, experts make the following mistakes:
- Damaged sheets are laid or damaged after installation. As a result, depressions appear in which cold bridges form over time.
- The wrong width of the heat insulator is used, as a result of which the quality of the seal decreases.
- Instead of a vapor barrier membrane, a polyethylene film is laid, which is why condensation subsequently accumulates on it.
- Obviously low-quality material is purchased, and there is also a failure to comply with the general rules of roofing work.
To visualize how to properly insulate a roof with foam plastic, you can study the step-by-step video instructions.
Is it worth using
The main question remains the danger of this insulation to humans. Here you need to clearly understand that the risk of poisoning will be the most significant factor than the ease of installation or the low cost of thermal insulation. Therefore, it is impossible to recommend insulating the roof with foam plastic from the inside, since it will release harmful chemical compounds into the air and you will have to breathe it.
However, when using this heat insulator on the outside of residential premises, it will not cause harm to health. Therefore, for external insulation it will be difficult to find a cheaper and simpler insulation option. When laying on the street side, it can be safely used.
Likewise, it is suitable for creating a thermal insulation layer in unheated attics. However, in this case, ventilation of the room in which the insulated structure is located will be required, since substances released by polystyrene can concentrate in the air and cause harm to health when a person appears there.
The only option in which it will be possible to insulate the roof with foam plastic even from the inside is a design in which the heat insulator will be completely covered with special films and other materials that do not allow evaporation into the room. However, it is better to choose another, even possibly more expensive, insulation option, since the work to create a protective layer and the materials required for this will reduce the apparent savings to nothing.
Basic principles for installing foam insulation
The foam should be laid on a clean and dry surface. In principle, this material can only be installed in conjunction with waterproofing, but in order to ensure long-term operation of the roof, it is advisable to add a vapor barrier layer, otherwise condensation will begin to accumulate on the insulation from the inside. The foam itself will not suffer from it, but wooden structures may begin to rot and become moldy.
Roof insulation with polystyrene foam can be done in various ways, including
:
- gluing (on liquid nails, facade frost-resistant adhesives, mastics);
- mechanical fastening (anchors, wooden slats, umbrella nails);
- flooring;
- investment in the sheathing.
If necessary, fastening methods can be combined
. For example, sheet insulation is inserted into the sheathing and additionally secured with a dowel with a thermal head (umbrella nail). Or the material is glued to the surface and secured with screws.
Methods for fastening foam boards
The set of necessary materials, devices and tools that will be required for the work depends on the chosen method of installing insulation sheets.
Fastening polystyrene foam using regular polyurethane foam
- glue with special frost-resistant glue, liquid nails, mastic;
- lay - when insulating an attic floor or flat roof from the outside;
- put battens into the niche;
- secure mechanically using wooden slats, umbrella nails or anchors.
For greater reliability, ease of operation, or if necessary, it is possible to combine the proposed fastening methods.
Required materials and tools
To work you need to prepare:
- waterproofing material;
- polystyrene foam of the selected brand with the required thickness and size of the plate;
- vapor barrier film or membrane;
- self-adhesive tape for gluing joints or overlaps of vapor and waterproofing fabrics;
- polyurethane foam;
- construction stapler;
- scissors, knife;
- wooden blocks;
- hammer;
- material for finishing insulation areas.
Now you can start insulating the roof with foam plastic.
Insulation of a flat roof
Insulating a flat roof with foam plastic and bypassing communications
- The waterproofing film is first laid on the previously prepared, clean and dried surface of the flat roof.
- Then the foam plastic slabs are tightly laid (for a roof that will be loaded during operation, it is advisable to choose polystyrene foam) and the joints are taped with special tape. If there is a second layer of insulation, its slabs must overlap the joints of the lower layer during installation.
- The insulation is covered with geotextile, on which a layer of gravel, expanded clay or crushed stone (at least five centimeters) is poured.
- A screed is being made on which the finishing roof covering will be laid.
If you plan to lay out a lawn or flower bed on a used flat roof, then another layer of geotextile is laid on top of the gravel. Now a layer of soil is poured onto it (within 20 cm) and grass or other plant crops are planted.
Roof insulation with foam plastic can also be done from the inside. Most often, foam plastic is glued to the ceiling, so the surface of the latter must be prepared for good adhesion. After fixing the slabs, fill the voids at their joints with sealant. The finishing of the insulated ceiling can be systems of suspended or suspended ceilings. If the foam will be covered with sheets of plasterboard or other materials, a lathing is attached to the ceiling in advance.
Insulation of a pitched roof
- Carry out the necessary preparation and inspection of the roof structure frame and the roof itself:
Scheme for insulating a pitched roof with foam plastic
Roof insulation with foam plastic
- Laying prepared foam boards between the rafters and securing them using the chosen method.
- Small gaps between sheets of foam plastic are filled with polyurethane foam or other sealant. This operation should be performed carefully and efficiently. Otherwise, there is a high probability of cold bridges occurring with the obligatory formation of unwanted condensation.
For additional insulation, a layer of mineral wool can be installed on the foam.
- If additional sound insulation is provided, it is laid on foam plastic. Otherwise, move on to the next point.
- The insulation is separated from the internal attic or attic space by a vapor barrier film, the sheets of which are also taped with special tape at the joints. The vapor barrier is secured to the rafters with staplers and wooden guides for future cladding. The thickness of these guides or profiles will provide the necessary ventilation gap between the vapor barrier and the final finish. When stretching the film, leave a slight sag to avoid tearing due to temperature changes.
- The work is completed by covering the inside of the insulated attic space with selected finishing materials.
Mistakes when insulating with foam plastic
- The use of low-quality slabs - with manufacturing defects or damage during installation.
- Violation of technology and work order.
- Using ordinary polyethylene film as a vapor barrier.
- Incorrectly selected width of the installed slabs - this leads to a violation of the tightness of the insulation layer.
Knowing how to insulate a roof with foam plastic, it would be useful to study technologies using other materials. After comparing all the pros and cons, you can make an informed choice.
Technology of insulation of roofs with an inclined surface with foamed polystyrene
Insulation of roofs with an inclined surface of EPS is carried out internally or externally. The first option is used for outdated covered and broken gable roofs.
Insulation of a covered roof with an inclined surface inside
The technology for insulating a roof with an inclined surface with foamed polystyrene from the inside of the roof takes into account the following actions:
- Covering the entire interior of the roof with sheathing and rafter systems with waterproofing material. To do this, roll sheets are used, which are laid with an overlap. All joints are sealed with sealing tape.
- EPS sheets are fixed. They are secured using glue or nails with large caps. Joints are sealed with specialized foam adhesive for foam plastic (without white spirit, kerosene, acetone, etc.). Thermal insulation can be laid in one or two layers (depending on climate conditions and the purpose of the roof). For any EPS layer, sealing is required.
- A layer of vapor barrier is placed on top of the insulation material, and the joints are sealed with tape for construction work.
- The penultimate layer is cladding using fiberboard, multi-layer plywood, green plasterboard and other materials.
- The roofs used are covered with cladding. To do this, wood lining and other materials with low thermal conductivity are used.
Important! During the process of thermal insulation, it is necessary to remove direct contact of the EPS with the chimney system. Insulation of the edges of the chimney (minimum 20 cm) is carried out using non-combustible materials for thermal insulation
External thermal insulation of the roof with an inclined surface using penoplex
External roof insulation technology with a sloped surface stands out somewhat. Before you begin to insulate, a support is placed. This is done using bars or slats to fix the initial row. In this case, the height of the J-profile should be equal to the thickness of the insulation material. The support is installed parallel to the roof eaves along the entire length of the slope and is located next to the thermal circuit. It prevents the slabs from moving.
If we are talking about thermal insulation of the roof of a wooden building, then grooves are cut out in the flooring at the junction of the walls and the roof, which are filled with a soft heat insulator (polyester fiber or other similar material can be used). This is done to eliminate cracks that appear due to seasonal deformations of the tree.
The second stage involves laying EPS slabs. You need to start from the supporting element in the direction from the overhangs to the ridge. At the places of structural connections for precise joining, the heat insulator is cut at the required angle. A specialized adhesive composition is applied at all joints between plates. For good reliability, fastening is carried out using disc-shaped dowels. When using 2 layers of artificial latex, the slabs are installed with the joints shifted.
EPS is a flammable material, strong heating is critical for it
Therefore, it is important to provide a ventilated circuit between the roof covering (especially when metal tiles are used) and the heat insulator. To do this, after laying the slabs, a frame frame is installed on top parallel to the rafter systems
Frame frame above the heat insulator to equip a ventilated circuit
This is done using planks with a thickness of at least 30 mm. As a result, there is a gap sufficient to ventilate the under-roof space and prevent overheating of the insulation. To avoid cracks during installation on the slats, holes are drilled in advance at 50 cm intervals.
Next comes protection from the negative effects of moisture; the material is selected taking into account the type of final roof covering. A counter-lattice is installed on the waterproofing layer, and a final covering is installed above it.
Sandwich panel structure
In general, the material is a three-layer element consisting of a heat-insulating layer covered with metal, PVC, OSB boards, and the like. Not all types of products are used for the construction of pavilions.
Thermal insulator - the filler of the slab can be mineral wool - basalt or glass, as well as polystyrene foam and polyurethane foam. It is recommended to build a pavilion from sandwich panels containing polymers. This is due to two factors. Mineral wool is quite heavy and not very resistant to moisture, and for kiosks that are constantly exposed to rain and snow, moisture resistance means a lot. Polyurethane foam or expanded polystyrene have no less thermal insulation properties, but are much more resistant to moisture, and products made from them have less weight.
When constructing a trade pavilion, you should pay attention to the fact that the filler belongs to the category of self-extinguishing or non-flammable polymers, as indicated by the corresponding marking. Unfortunately, kiosks often become victims of hooliganism, and therefore their fire safety must be maintained at a high level
Covering – steel is recommended – galvanized, polymer coated, or aluminum. Metal provides products, and therefore the trade pavilion, with greater strength and durability. And the coating plays the role of protecting the metal from corrosion and gives the building a pleasant appearance.
Construction of a trade kiosk
Due to the lightness of the material - from 30 to 80 kg, and ease of installation, work on the project can be carried out with your own hands. Small pavilions do not even require a foundation - just a flat concrete platform, and do not require the use of heavy construction equipment.
- A pavilion project made from sandwich panels can be ordered, found on the relevant websites, and even calculated independently if you have the appropriate experience. As a rule, calculations are carried out based on the parameters of the selected panels, since this product, due to its structure, is difficult to adjust, and therefore it is desirable that the project allows the use of standard slabs.
- At the second stage, the foundation is built. Since pavilions made of sandwich panels have a very small mass, a lightweight foundation is constructed - shallow strip, strip-column, etc., or a ready-made concrete platform is used.
- A metal frame is being constructed. First, the structure of the walls and roof is assembled separately - the width of the profile should be clarified in the reference book based on the load on the building. It should be remembered that the frame structure has a fairly large windage, which increases the load. The walls and roof are then tied together.
- Do-it-yourself wall installation begins with corner elements. When joining the panels, heat-insulating gaskets are placed between them, and the resulting seams are foamed. The plates are secured with self-tapping screws. The photo shows the working moment.
- The roof cladding is done in the same way, but roofing sandwich panels are used for cladding.
The video explains in more detail how to build a trade pavilion with your own hands.
How to insulate a metal pavilion? Here is a general diagram of the complex finishing of such a room:
A moisture-resistant protective film is attached to metal surfaces.
- The entire perimeter of the retail pavilion is equipped with a frame made of coniferous timber so that the thickness of the timber is equal to the thickness of the material with which you plan to insulate the room.
- Insulation is placed in the cells of the sheathing (Isover mineral wool 100 mm, polystyrene foam, etc.).
- The insulation layer and frame are covered with a vapor barrier film.
- The inside of the trade pavilion (walls and ceiling) is lined with laminated chipboard sheets 16 mm thick or PVC panels.
- The floor can be insulated with multilayer flooring, including such components as coniferous wood with a thickness of at least 25 mm, sheets of roofing felt, furniture chipboards and linoleum.
- The final stage is the installation of electrics: double Euro-standard sockets, a switch, an electrical panel with an RCD, fluorescent lamps LPO 2x40.
Insulating a flat roof from the inside
During operation, it may become clear that a flat roof needs additional insulation. In order not to dismantle the roofing pie, it is recommended to insulate the roof with foam plastic from the inside. You should select insulation of the required thickness.
Foamed polystyrene sheets can be attached to reinforced concrete ceilings using glue and dowels
It is important to prepare the base surface to ensure high adhesive adhesion. When laying slabs, the elements should fit tightly together
It is advisable to use a sealant during the process so that there are no voids at the joints between the sheets and at the points where they meet the walls.
To finish such a ceiling, you can use a tension or hanging system. If it is planned to cover it with plasterboard or other materials, a wooden sheathing is first attached to the ceiling, the thickness of which should be no less than the thickness of the insulation.
The most common mistakes when insulating with polystyrene foam
- Installation of sheets with defects or damage to mounted slabs - depressions and cavities contribute to the formation of cold bridges.
- An incorrectly selected width of the heat insulator also causes a leak.
- The use of polyethylene film instead of a vapor barrier membrane provokes the formation of condensation.
- Use of low-quality materials, violation of work technology.
You can learn in detail how to insulate a roof with foam plastic by watching a thematic video with step-by-step instructions.
Advantages and disadvantages of ceiling insulation with penoplex
There are a number of specific advantages that penoplex and a ceiling insulated with this heat insulator can boast:
- Thanks to its unique porous structure, the material has low water absorption and vapor permeability.
- Available in the form of L-shaped plates, which greatly facilitates installation on ceilings.
- The special surface roughness ensures a high-quality connection with the finishing material.
- Penoplex is considered a completely environmentally friendly insulation material.
- Features a long service life.
- Resistant to damage by fungal and mold microorganisms.
- Penoplex is famous for its ease of installation, because it can be easily cut and cut with any sharp knife.
- It is absolutely immune to air humidity, and therefore work with it can be carried out in any weather.
- The material remains unchanged in shape and size up to a temperature of 80-100 degrees.
- The slabs are easily glued simply to the ceiling if the thermal insulation is carried out from the inside of the building.
The main disadvantage of this material is related to its properties during the combustion process. Like its analogue, polystyrene foam, it is capable of releasing caustic and even toxic combustion products, which have a suffocating effect. On the other hand, if the heat insulator is securely closed on each side, this danger is practically reduced to a minimum.
Nuances of performing work
1. The roof thermal insulation scheme using foam plastic involves a preliminary calculation of the number of blocks. To do this, you need to measure the roof area from the inside and outside, the pitch between the rafters, and the size of one slab. It is recommended to purchase material with a reserve of 8-10 pieces, since during the cutting process there is a risk of deformation and loss of polystyrene foam.
2. There are several mounting methods. This includes installation using an adhesive or mastic mixture, fixation using anchors with wooden slats, laying between sheathing elements and flooring technology. There is a manual for each scheme, and the method of working with foam plastic depends on the design features of the roof.
3. To prevent condensation from forming on wooden beams, it is recommended to use a vapor barrier and a waterproof membrane on top.
4. Expanded polystyrene slabs for roof insulation have a smooth surface, so it is necessary to create a slight roughness for better adhesion. To do this, use a knife, a needle roller or a stiff brush. If the products are embossed, such measures are not necessary.
Before starting work, you need to prepare the following consumables and tools:
- Calculated amount of foam.
- Vapor barrier film.
- Stapler.
- Knife and scissors.
- Wooden slats and bars.
- Fasteners.
- Moisture-proof membrane.
- Glue, foam.
Is it possible to insulate an attic with polystyrene foam?
To insulate an attic with your own hands, the choice of building materials is based on the environmental component. Expanded polystyrene is a product of synthetic origin. When the plates are heated (+25-+30 degrees Celsius), phenol, acetophenone, and methyl alcohol are released. Inspecting authorities claim that the amount of substances complies with acceptable standards. Today, manufacturers are using new technologies for the production of synthetic insulation aimed at reducing the content of residual harmful products. To simplify the choice of polystyrene foam for the buyer, finished products are divided into 2 groups:
- Technical expanded polystyrene is used for work on facades, non-residential buildings, and in road construction.
- Household insulation can be installed with your own hands inside a residential or social facility.
However, there are restrictions on the use of polystyrene foam regarding the type of structure. The addition of fire retardants reduces the melting and combustion temperatures, but it is impossible to completely eliminate this property of the thermal insulation material. When using polystyrene foam to insulate an attic roof, experts recommend using non-combustible roofing and decorative finishing. And the electrical wiring must additionally be insulated with a corrugated plastic pipe or hidden wiring should be eliminated altogether.
Flat roof insulation
Expanded polystyrene boards are a popular option for external insulation of flat roofs. The roof base should be thoroughly cleaned and covered with waterproofing film. Expanded polystyrene slabs can simply be laid as a flooring, glued, or secured with dowels
It is very important to lay the slabs without gaps, as tightly as possible
The vapor barrier membrane can be laid under the heat insulator on a concrete base, then polystyrene foam slabs are mounted, covered with a layer of expanded clay, on top of which a cement-sand reinforced screed is laid. Expanded polystyrene as insulation can also be included in such a roofing pie
:
- reinforced concrete base;
- bitumen-polymer waterproofing;
- slab heat insulator;
- geotextiles;
- gravel backfill.
This allows you to create a serviceable roof designed for high loads.
There are also more complex versions of the roofing pie, the top layer of which is the soil for planting. Roof insulation with penoplex is widely used to create such inversion roofs.
Insulating the roof from the inside with foam plastic
When insulating the roof from the inside with polystyrene foam, the panels are laid between the rafters. The high density of the sheets allows them to be fastened to the frame using improvised means, which does not increase the load on the structure.
The building can be thermally insulated if the following conditions are met:
- The drainage system is installed taking into account the slope of the structure.
The height of the attic roof allows you to close the roof racks from the inside.
After installation, there remains a guaranteed ventilation gap between the waterproofing and the roof cladding.
Installation of the protective shell occurs as follows:
Apply antiseptic to all beams and slats. The work is easier if the outer roof cladding has not yet been installed.
Cover the rafters on the street side with waterproofing film and secure them to the beams in any way. The membrane is necessary so that water does not enter the room from outside, and moist air from the insulating “pie” freely escapes outside. Do not pull the panel, leave a slight sag. Lay the cuts with an overlap of 15-20 cm on adjacent pieces and on the walls. Connect the joints with reinforced adhesive tape.
If an existing house is being renovated, lay the film from the inside of the attic, while monitoring the gap of 50-60 mm between it and the roofing material.
When covering the roof with soft bitumen shingles, it is allowed not to lay waterproofing tape, because the cladding itself is waterproof. Only corners and cornices are covered. In the case of insulating a soft roof with foam plastic, the membrane is laid directly under the cladding. If the roof is made of metal tiles, the protective coating should include soundproofing elements to muffle the noise from the rain.
Attach the sheathing to the rafters and install the outer cladding. Make sure that there is a ventilation gap of 50-60 mm under it to the film, which is necessary to remove moisture. Through it, the moisture remaining in the roofing “pie” is evaporated. To organize air flow, special holes are made in the eaves and upper part of the roof. You can also forcefully ventilate the space using special devices.
Measure the distances between the rafters, add 0.5 cm and cut the blocks from the blanks. Increasing the size will allow the panels to self-adhere between the beams, making installation easier.
Place the panels in a position that leaves a gap of 10-15 mm between them and the outer film. It is necessary so that the insulation does not close the pores of the diaphragm.
To ensure the required thickness of the coating, the panels can be laid in two rows, with the lower one covering the joints of the upper one.
The method of fastening depends on the roof structure. You can fix the products in this position with thin slats or special corners, which are sold in the store. Manufacturers also allow gluing and mechanical fixation using wide-headed dowels, anchors, etc. Options can be combined.
Seal the gaps between the panels, as well as near the rafters, with scraps. It is allowed to eliminate defects with polyurethane foam.
Cover the beams from the attic side with waterproofing film and secure them to the battens with a construction stapler. The canvas should sag slightly. The membrane will prevent the rafters from getting wet from moist air rising from the lower rooms. Lay the pieces of canvas overlapping each other and on the walls. Seal the joints with reinforced adhesive tape. If desired, you can trim the rafters with boards.
For vapor barrier, it is advisable to use a special three-layer membrane reinforced with a polymer frame. Modifications with foil coating have also proven themselves well.
Thermal protection of pitched roofs over exposed rafters
Pitched roofing is the most common type of roof for residential buildings. When insulating it, one should take into account the impact of weather conditions and the weight of the roof structure on the insulating material. The heat-protective layer needs to be strong and it should not be interrupted so that cold bridges do not appear.
When laying the insulation system on top of the rafters, the wooden structure remains visible inside the room and additionally performs a decorative function. Plywood or boards are mounted on top of the rafter system. Then the surface is covered with a layer of waterproofing. For this, polymer-bitumen materials are usually used. The result will be both an underlying waterproofing layer and a vapor-tight layer. The waterproofing material should be placed under the thermal insulation layer on the warm side.
Sometimes diffusion waterproofing membranes are used. They are mounted on top of the insulation. For additional reliability and tightness, a vapor barrier can be laid under the insulating material.
Expanded polystyrene boards must be laid with a layer bandage like brickwork.
The process begins from the cornices. Here the slabs rest against a wooden strip of the same thickness as the insulation. All gaps that appear are filled with polyurethane foam.
Secrets of mastery
After installing insulating boards, cracks and gaps must be carefully sealed with foam. For additional reliability, polystyrene foam can be attached to the surface using both glue and dowels or nails.
When insulating the attic from the inside, the finishing can be done in the form of a construction kit. To do this, a special frame is built into which slabs with a finishing layer are inserted. If necessary, they can be removed from the grooves to provide access to the thermal insulation.
We insulate the roof with polystyrene foam - a step-by-step method
The issue of roof insulation is very relevant today for owners of private houses and residents of high-rise buildings, because approximately a third of all heat escapes through this part of the room.
Accordingly, you need to think about how to reduce such a significant loss. This can be done, for example, using materials such as polystyrene foam, penoplex or expanded polystyrene. However, many have doubts as to whether these materials can be used for roof insulation. Indeed, in addition to such undeniable advantages as lightness, good ability to retain heat and hydrophobicity, they also have a number of disadvantages - poor heat resistance and fire hazard. In fact, these materials are here
For example, in the production of polystyrene foam, pre-foamed granules of raw materials are only sintered with each other during the cooling process. Because of this, its cell size is much larger than that of expanded polystyrene. The thing is that during the manufacture of the latter, the raw materials are foamed not with hot steam, but by extrusion. Thanks to this technology, expanded polystyrene is virtually a monolithic material. It has a large number of sealed cells, the inside of which is filled with carbon dioxide.
In addition, it should be borne in mind that polystyrene foam is a less dense material, and it can absorb moisture. Expanded polystyrene is completely devoid of this disadvantage.
Pros, cons
Despite the fact that this insulation has some disadvantages, it also has a lot of advantages. The most significant and significant will be:
- Low cost – it’s difficult to find a cheaper option on the market
- Sufficient strength
- Ease of installation and ease of processing of slabs
- One of the lowest thermal conductivities
- Long service life while providing adequate UV protection
By all indicators, this is a very profitable type of insulation. However, in order to make an informed choice, you need to know about the disadvantages characteristic of it:
- Low bending strength
- Fire hazard
- Ability to release harmful substances when heated and burning
- Not very good soundproofing ability
- Styrene, which is the basis of the material, is toxic to the human body and can accumulate in the body
At the same time, the main danger of the substances released by this heat insulator is that they are not removed from the body by the liver. This means that after some time their concentration will reach a certain limit, after which there will be a danger to human life.
Insulation of a pitched roof
It is recommended to select a thermal insulator at the roof design stage so that the pitch of the rafters matches the width of the sheet material. If we insulate the roof with foam plastic, then this approach can significantly reduce material consumption. The construction market offers sheet polystyrene foam insulation, which can be laid without gaps between rafters with a step width of up to 2 meters.
In addition, it is important to perform a thermal calculation taking into account the climatic characteristics of the area in order to determine the required thickness of the thermal insulation layer. The minimum recommended parameter is 100 mm
Foam boards are laid along the sheathing between the rafters. To secure the fastening, you can use glue and dowels. There are often small gaps between the slabs and rafters. They should be properly blown out with polyurethane foam or filled with sealant, otherwise cold bridges will form in these places, where condensation will accumulate and have a detrimental effect on the wood of the elements of the rafter system
. At the next stage, it is recommended to lay a vapor barrier, and then finish it with plasterboard, clapboard or wood board.
