Warm floors are used to heat rooms for a long time. Modern projects for finishing and insulating residential buildings suggest using combined heating options, fixing the heating system not only to the floor, but also to the walls. Such heating can be used both in combination and separately, it all depends on the financial capabilities and preferences of the home owner.
Photo of the heating design “warm walls”
Can underfloor heating be mounted on a wall?
You can install a heated floor on any plane, including on a wall or ceiling, but to do this, the structure must be securely fastened and a channel for the power cable must be laid. At the same time, the heat transfer efficiency does not decrease depending on its location.
This placement option is suitable if it is not possible to install heating radiators, and installation of a heating electric or water floor is not possible. An example of such a room is a flight of stairs.
In addition, heating installed in this way will cut off cold air, which is especially important if the wall is outdoor. But it is worth noting that some of the heat will still be wasted, heating the street. Therefore, it is necessary to make a good thermal insulation layer to reduce heat loss.
Features of installation of a rod-based IR heating system
Rod heating elements are installed similarly to film ones. Due to higher surface temperatures, the distance between adjacent rods should not be less than 100-150 mm. The difference in the installation of rod and film heating elements is that the sheet with rod heaters is more rigid. However, the rods themselves make it possible to increase the electrical power passed through them, so such systems are suitable for installation in large rooms. Their use is limited by the power of thermal safety automatics installed in the house. Rod IR elements do not need to be turned on for a long time, so it is advisable to install thermostats for them.
Advantages of this type of heating
Insulating walls with “warm electric floors,” like any heating, has its pros and cons.
Disadvantages of electric heating:
- It is not possible to place furniture near heating walls. It will prevent the spread of heat, in addition, hot air will have a negative effect on the products, which will ultimately shorten the service life.
- You cannot hang a picture or TV on such a surface, as this could damage the heating elements.
- Large heat losses occur. After all, the wall is heated, on the other side of which there is a street, resulting in unnecessary consumption of thermal energy.
- Shifting the dew point deeper into the wall. In winter, condensation will accumulate, which will lead to freezing, and this will accelerate the process of destruction of the walls.
- Increased electricity consumption.
- Destruction of the finishing - the service life of wall coverings will be significantly less than on walls without heating.
As you can see, there are many disadvantages, although one cannot help but mention the positive aspects of such heating:
- located vertically, so dust will not spread throughout the room;
- will free up space in the room that is occupied by standard radiators;
- cost-effectiveness in terms of installation - installation is inexpensive compared to installing another heating device;
- creates an excellent thermal effect;
- fights fungus and mold;
- does not dry out the air, since there are no open elements that burn oxygen;
- heating of the room occurs more evenly;
- does not spoil the interior of the room.
Since, with electric wall heating, the heating method is radiant, you can save money by setting the temperature level in the room 2 degrees lower, which will not affect the level of comfort.
Another important point is that if a wall separates two rooms in an apartment, then if there is heating on it, both rooms will be heated.
Advantages and disadvantages of film material
Among the positive aspects that happy owners of film floor systems can enjoy, the following are most often noted:
- Extremely simple and convenient installation, in which there is no need for a concrete screed.
- The short time required for installation work is only a few hours.
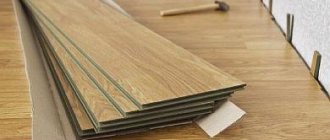
- The ability to combine the system with almost any floor covering: ceramic tiles, laminate, carpet, parquet, etc.
- Small film thickness (less than half a millimeter), which will not in any way change the calculated thickness of the floor finish.
- Low heating inertia, at which the element quickly heats up and just as quickly stops heating.
- Ability to withstand increased loads on the finishing surface (for example, in gyms, public buildings, offices, etc.).
- Uniform heating of the room, no difference in air temperature from floor to ceiling.
- Relatively low cost of installation work.
- The ability to reduce energy consumption for heating the room by approximately 25-30% (compared to similar floor heating systems).
- Possibility to introduce room heating into the “smart home” system.
- Low intensity of the electromagnetic field that is generated during the operation of infrared heating systems.
- No negative impact on people's health.
- The ability to remove unpleasant odors from a room.
- The air in the room does not dry out, maintaining an optimal level of humidity, while it is ionized.
- It is believed that film systems can have an antiallergic effect.
Film flooring is easy not only to install, but also to dismantle. If desired, owners can remove the floor covering, remove the underfloor heating foam and reinstall it in a new location.
Manufacturers do not often mention the shortcomings of their product, in addition, the positive characteristics of film floor systems sometimes turn out to be somewhat overestimated. To avoid unpleasant surprises during film installation, you should consider the following points:
- Installation of a film floor may take longer than the manufacturer claims, even if it is carried out by an experienced professional in strict accordance with the recommended technology.
- Cutting the film and laying it out indoors usually does not cause any big problems; the difficulties are associated with the correct connection of the silver contacts.
- An incorrectly executed clamp leads to a weak connection of the floor elements, and to redo it you will need to take a new contact.
- Although laying such a floor does not require a concrete screed, the surface of the base must be almost perfectly flat; a noticeable curvature of the base can cause breaks in the film after laying the floor covering.
- The thickness of the film floor is less than one millimeter, but for its installation you may need a “pie” 20-35 mm thick (base made of plywood or chipboard, substrate, layer of polyethylene film, floor covering, etc.).
- The system demonstrates high reliability only if all installation instructions are strictly followed and the work is carried out professionally, and any amateur performance or low level of quality can lead to rapid breakdowns.
- The opportunity to save about 20% of heating costs compared to other electric floor heating systems is indeed observed, but only in houses with good central heating and with high-quality insulation of the room.
- The presence of a film floor does not dry the air, however, it does not humidify it; when using traditional centralized heating, the problem of humidity levels will have to be solved somehow.
As for air ionization and removal of unpleasant odors, this effect is indeed present, according to reviews from film floor owners. Ions have the ability to block molecules of substances that emit unpleasant odors; this effect is widely used in industry, for example, for cleaning clothes, upholstered furniture, etc.
But there is no direct anti-allergic effect, although people prone to allergies feel better in an ionized and humidified room than in a dry, dusty and smoky room.
Types of wall-mounted systems
Electric heating floors come in cable and infrared types. In them, temperature regulation and control is carried out using a thermostat.
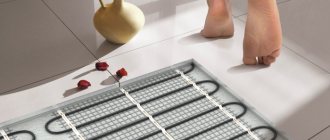
Heating mat on the wall
Cable
Cable systems are ordinary wire, which can be single-core or double-core. When laying a cable floor on a wall, the wire is laid in a “snail” or “snake” pattern.
One of the types of cable heating is mats, this is the same single- or two-core heating cable, which is fixed on a special sheet. Therefore, the mats are easier to install; they can simply be rolled out on the surface.
The service life of cable-type heating devices is quite long. In terms of electricity consumption, they are comparable to conventional electrical appliances. But cable heating has a significant drawback - electromagnetic radiation .
Infrared
In infrared systems, heating is carried out due to long-wave infrared radiation that comes from carbon elements. This heating is environmentally friendly, as it does not emit electromagnetic waves.
The infrared heating method is:
- Film. Carbon plates sealed in polyester. The film is light and has a small thickness, so installing this system is quite easy.
- Rod. Carbon rods fixed on a special mesh. Rod systems are also called intelligent, so they have a high cost.
It is important to note the following point: foil insulation cannot be installed with electric infrared floors.
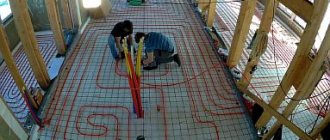
Laying technology
The installation technology for each type of heating system is different, but there are general requirements that apply to any of them:
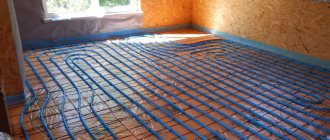
- Carrying out wall insulation with foamed polyethylene or other insulation, with laying a foil base. This will reduce the consumption of thermal energy, preventing it from escaping outside.
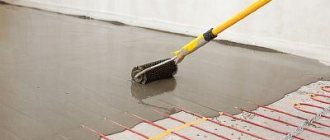
- Creation of a two-layer plaster layer. Layers are applied in stages. The second - only after the first has dried.
- It is recommended to apply elastic similar paper or Strobe mesh to the finishing layer of plaster. Compliance with this requirement will prevent cracking of the last leveling layer.
- When laying water heating, the cement-lime mortar layer above the pipe should be 20–30 mm.
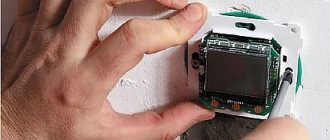
- Before starting installation, it is necessary to pre-install installation and distribution boxes for electrical and low-current wiring. The electrical wiring itself is stretched after finishing plastering, in the last layer of plaster.
Installation of the junction box
- When using water heating, the coolant is supplied to the pipes after the plaster layers have completely dried.
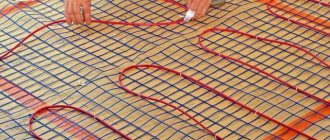
- When laying cable electric heating, the installation of the mesh can be done using dowels or mounting tape.
- Electrical equipment can be turned on after four weeks of settling. This is how long it takes for the plaster layers to dry completely.
- To install the film heater, it is necessary to make a frame for finishing.
- When installing an electrical circuit, you need to take care of fire safety; for this, appropriate finishing mixtures are selected.
The heating system can be laid on any surface. When installing a heating element on a wall, it is recommended to follow certain requirements that will ensure long-term and safe operation.
Average score of ratings is more than 0
Share link
Comments There are no comments yet, but you could be the first...
What to choose?
When choosing a wall-mounted electric heating system, you should take into account its power, operating conditions and installation features. The height of the walls and the weight of the structure are also important. It is necessary to calculate the costs not only of purchasing the device, but also of its installation and further operation.
This have not happened before!!! Warm floor in the wall.
The most suitable for installation on walls is infrared film. It is lightweight and thin, so it does not thicken the walls and does not take up useful space. And with proper installation, it heats the surface efficiently and evenly.
In addition, it is not difficult to install a film infrared heated floor on a wall with your own hands, and it will only take a few hours. It is enough to roll it out over the surface and fix it to the insulation with special glue or clamps.
The environmental safety of infrared models is also important, since they do not emit electromagnetic waves like cable models.
Infrared floor and safety
There are a wide variety of reviews about film systems on the Internet. Some claim that the infrared floor emits electromagnetic radiation that is extremely dangerous to human health.
Others assure that this very radiation has an extremely beneficial effect on the body and copes with many common diseases.
In fact, neither one nor the other is right. The intensity of electromagnetic radiation from such a device is negligible, so it simply cannot have any negative effect on the human body. Cable electric floors demonstrate higher levels of electromagnetic radiation intensity and are considered completely safe for health.
Due to the low intensity values, the positive effects of radiation on the human body are also small. The fact is that electromagnetic fields can have a positive effect on health only if the temperature of the infrared wave matches the temperature of the human body.
Providing this option at home is quite difficult. Owners of film flooring get a much more positive impact from staying in a uniformly heated room with acceptable air humidity.
Another myth: infrared film cannot be placed under linoleum or laminate, since such materials simply do not transmit radiation. That's right, infrared rays do not pass through a layer of such coating, but this does not mean that the room will not warm up. In this case, the laminate (or linoleum) is first heated and only after that the thermal energy is transferred to the air in the room.
When using other coatings, the air warms up immediately over the entire height of the room. The maximum heating temperature of laminate or linoleum is quite moderate - about 40 degrees. Therefore, the temperature in the room will be quite acceptable, but overheating of the air or the floor surface will not occur.
Application area
Warm electric walls can be used not only in houses and apartments, but also in garages, offices and warehouses. Their installation is allowed even in wooden houses, but a “dry” installation method is recommended.
In the garage, installing a wall heating system becomes especially important. This is due to the impossibility of installation on the floor, due to the entry and further placement of the machine on the structure, which will lead to failure of sections of the cable or film.
In addition, if you plan electric heating at the stage of building a private house, you can save on heating. For example, if you install heating in a wall that is a partition between two rooms, you can provide heating for both rooms at once.
And if we compare the electrical system with the water one, then to equip the second one, additional costs will be required for installation work and the purchase of additional components and products, such as a heating boiler, pump, pipes, etc.
Wall heating is suitable for small rooms (bedroom, bathroom), where it is quite difficult to install a warm floor due to clutter with furniture or plumbing fixtures. Warm walls will be more effective than underfloor heating in rooms with high humidity (bathtub or swimming pool), since there is no energy consumption for water evaporation.
Warm floor on walls and ceiling
In addition, electric cable or infrared heated floors in the bathtub on the wall can be laid directly on the tiles.
An infrared system is ideal for heating a loggia or balcony decorated with clapboard or plasterboard sheets.
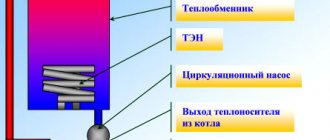
Steam concrete heating Jachimovich
The disadvantage of steam concrete heating was the labor-intensive and costly repairs that would have to be made in the event of the slightest damage to the pipes inside the walls. Also, such a heating system in Russia at that time was ineffective, since the walls of buildings in Russia did not have a thermal insulation layer.
However, in the late 70s, buildings appeared in the USSR that used the steam concrete method of heating the premises. In such buildings, cast iron pipes were installed around the perimeter of the floor, which were covered with a layer of concrete in the form of a plinth.
In European countries, such a heating system has also become quite widespread. Only instead of ordinary pipes, pipes with special plate fins were used. This design of the heating system increased heat transfer by 60%.
In the project V.A. Yachimovich used pipes installed in the wall and then covered with concrete or plaster, through which hot steam was supplied. This heating system heated not the air, but the walls. Thermal infrared radiation was projected from the warm walls into the room.
Installing heated floors on the wall
Let's look at the installation of heating devices using infrared film as an example, since this is the most suitable and easy-to-install model of electric heating for walls.
Heating warm wall DIY infrared heater
It should be taken into account that when installing the film on the wall, the strips are attached not horizontally, but vertically. In addition, the wires are connected from above.
You need to start building a heating system by preparing all the components and tools that will be needed for the job.
Then you should develop a layout diagram for the heater. According to technology and standard standards, you need to make an indent of 1 - 4 cm from the edge of the wall. One strip should not be allowed to overlap another.
Work on installing wall-mounted infrared heating is carried out in the following sequence:
- The wall surface is cleaned and leveled. It should be smooth, without deep depressions or cracks. If the wall has large differences, then it is better to putty it, applying a thin layer of mortar.
- A heat-reflecting coating is installed. For this, you can use any heat-reflecting material, but it should not have a foil layer. A heat-reflecting layer is necessary to direct heat flows inside the room and prevent them from escaping outside.
- A frame is being constructed to install the finishing touches. A sheathing is made on which sheets of plasterboard or chipboard will be attached to the wall.
- The film is laid. It is fixed to the wall with dowels. For this purpose, there are special places on the film where conductive elements do not pass. There should be gaps of no more than 5 cm between the rows of strips, this will ensure uniform heating of the room, without the formation of cold zones. If you need to cut a film of a certain size, then this must be done along special lines that are on the canvas.
Another way to fix the film is to glue it to the insulation using special glue.
- A temperature sensor and thermostat are installed. The regulator should be placed in a convenient place, preferably close to the power source. The temperature sensor is installed between the heating elements and connected to the thermostat.
- The system is connected - this should be done according to the instructions that came with the device. The film strips are connected in parallel using clips, all contacts are insulated with bitumen tape. The power wires are connected to the thermostat.
- Functionality is checked. Each strip of film should heat evenly. If this does not happen, then you should check the quality of the contacts; sometimes it is necessary to replace a separate defective section of the film.
Only after you are sure that the heating device is functioning well can you proceed to installing the finishing material.
Rolled insulation materials for wallpaper
It is easier to work with rolled products; it is a dry process that does not require much effort. Even beginners can cope with the task. Previously, when the construction market was not so diverse, ordinary newspapers were used as insulation for walls inside an apartment under wallpaper. They were simply glued to the wall before installing the trellises.
Nowadays there is no need to do this. Modern heat insulators are many times more effective. Here is their list:
- Expanded polystyrene thermal insulation. The properties are almost identical to plaster with polystyrene foam. Only this insulation option is better, as it is sold in rolls. The backing is fixed to the walls under the wallpaper with a specially created glue. As an option, use glue for heavy canvases, supplementing it with a small part of gypsum-based finishing plaster.
- Foamed polyethylene foam, as insulation under wallpaper. It is also called polyph. One of the most popular options. Thanks to its cellular and airy structure, the wallpaper backing retains heat well and soundproofs the room. It is covered with paper on the front and back sides, so it somewhat resembles wallpaper. This makes it easier to fix the insulation to the wall. The same applies to subsequent wallpapering. The main thing is to remove all defects and irregularities from the walls.
- Balsa wood or roll insulation for walls under wallpaper. Environmentally friendly and excellent insulation in all aspects. Reduces noise from the yard. Externally attractive, not afraid of moisture and breathable. It will not absorb unpleasant odors. Cork roll material allows you to hide the imperfections of the walls and create a high-quality insulating layer. Hypoallergenic.
- Special insulating wallpaper. They are made of spandbond, fibers and aluminum foil. Thanks to this, heat will not leave the walls, and the gluing process is simplified. This is the best option if the room does not need enhanced thermal insulation.
Whatever insulating material you choose for wallpaper, roll or plaster, the main thing is to perform the installation correctly. Moreover, in such cases, savings can also be disastrous. It’s better to save up some money and buy a high-quality heat insulator. This is a guarantee that repair work will not need to be repeated for decades.
Cosmetic finishing
Undoubtedly, walls with a built-in heating system need finishing. When choosing a finish, you need to understand that placement on a heating surface reduces its service life. Therefore, when purchasing material, you should make sure that it is compatible with heating devices.
For example, wallpaper or laminate of the wrong type installed on such a surface may fall off after a few months. If ceramic tiles are used as finishing in the bathroom, then it is important to choose the right adhesive composition so that the tiles do not crumble.
If it is cable heating or rod mats, then after checking the heated floor is covered with two layers of concrete plaster. Only when it dries - after 4 weeks - can wallpaper or tiles be glued to the surface.
It is important to remember that tile adhesive cannot be applied to infrared film, so plasterboard finishing is recommended. In addition, this is practically the only type of finish that can withstand heat.
To summarize, we can say that the “warm walls” system can be mounted on any surface. But this will require serious investments, technical knowledge and skills. When installing such heating on the wall, the main thing is to follow the instructions, and then the device will serve you for a long time.
Where and how are film systems used?
In order for the decision to use an infrared film floor to be well-founded, it would not hurt to get acquainted with its approximate technical characteristics:
- film width – 0.5-1 m;
- film roll length – 50 m;
- material thickness – 0.2-0.4 mm;
- power consumption per square meter of material – 25-80 W/h;
- operating temperature of the surface of the heating element is 30-50 degrees.
Film flooring can be successfully used as the main heating of an apartment or house, but it is necessary that at least 70% of the floor be covered with this material. Unfortunately, in areas with cold winters, this heating method cannot cope with the increased load.
Here, the infrared floor can only be used as an additional method of heating the room.
Another interesting application for infrared heated floors is emergency heating. Pipe ruptures in frosty weather are not too rare.
If the central heating system for some reason fails, but electrical energy is supplied to the house, with the help of heated floors it will be possible to maintain, if not a comfortable temperature in the living quarters, then an acceptable temperature for normal life and protection from hypothermia.
A profitable area of application for infrared heating systems is heating office premises and outbuildings. The system will have virtually no effect on the size of the room, and it can only be turned on when necessary. This is also one of the best options for installing bathroom heating.
The tiled floor will always be warm, and the air in the bathroom will warm up to the desired temperature, which will make water procedures as pleasant as possible. Infrared flooring can be laid not only under the floor covering, but even in open areas, but in this case special protection will be required.
What should you consider during installation?
Sellers and manufacturers recommend entrusting the installation of infrared floors to specialists, but some specialists quite successfully cope with this task on their own. To properly install film flooring, you must follow these steps:
- Step # 1: Draw up a plan for laying out the film, choose a location for the temperature sensor and thermostat.
- Step #2: Install the thermostat in a suitable location.
- Step #3: Prepare the base, which should not only be level, but also dry and clean.
- Step #4: If the base is uneven, you may need to lay plywood (recommended thickness 10mm or higher) or chipboard on the floor.
- Step # 5: Lay a protective waterproofing coating, the role of which is successfully performed by a film with a thickness of 50 microns or more.
- Step # 6: Lay a thermal insulation layer of lavsan film; both metallized and polypropylene varieties of this material are suitable.
- Step #7: Cut the film into strips of the desired length along special lines.
- Step #8: Lay out the film according to the diagram with the tires facing down and secure it with tape.
- Step #9: Connect the elements with special contacts.
- Step #10: Install the temperature sensor.
- Step #11: Connect the system to power and thermostat.
- Step #12: Install the flooring.
You should not use materials with a base made of aluminum foil as a thermal insulation layer. It is strictly forbidden to lay strips of film overlapping.
After the film has been laid out, you must move along it with great care so as not to damage the heating elements. You should also not drop construction tools on its surface.
Sometimes a combined option is a good choice: the home owner carries out the preparatory work and laying the flooring himself, and entrusts the installation and connection of the actual film to professionals.
The layout of a warm film floor should be carefully considered and an appropriate diagram drawn up. It is necessary to indicate on it the installation locations of stationary pieces of furniture, since placing them on a floor with film heating is not recommended.
For furniture that fits tightly to the floor, it is necessary to choose a permanent installation, and place everything else on legs or hang it on the walls. Failure to comply with this instruction may result in overheating of the floor, damage to the film, furniture and floor covering.
It is important to install the temperature sensor correctly so that its readings are correct. In this regard, there are also clear recommendations from the manufacturer that must be followed.
The film should only be laid on a flat and clean floor, especially if laminate is chosen as the floor covering, one of the most capricious flooring options in combination with floor heating systems.
After laying the laminate, you should not immediately turn on the heated floor. You need to wait some time for the flooring to warm up to the room temperature. Only then can you safely turn on the heating. Compliance with this rule will not hurt when working with other types of flooring.
Warm walls are a less common, but no less effective way of heating a house than warm floors. Such a system can be implemented in several versions, including as an addition to heated floors. Extending the heated floor to the wall, if there is a reserve thermal power of the boiler, is realistic and advisable, especially for cold and windy winters. In the absence of a boiler, such heating can be arranged using electric wall heating systems.
How to insulate a wall in an apartment: options with photos and prices
Residents of apartment buildings who are dissatisfied with the fact that their apartments are constantly cold even during the heating season often insulate the walls outside. Usually this is a collective decision of several residents. For such work, you need to hire professionals, whose services are quite expensive.
But you can insulate your apartment with your own hands. In fact, it is quite simple if you follow the recommendations and select the appropriate materials. Many people choose floor insulation. But most often the optimal solution is to increase the thermal insulation of the walls. This is especially true for premises located on the upper floors of a panel house, in a corner apartment. Such rooms, due to the small thickness of the walls and location, strong winds at altitude, require maximum insulation.
Baseboard heating for Mold and mildew
How to get rid of mold and mildew on walls - quickly, easily and forever
Who is to blame: the appearance of fungus and mold on the ceiling and walls
Black mold on the walls of an apartment is a direct consequence of humidity, insufficient ventilation and uneven heating. If the heating power is insufficient, the moisture contained in the air condenses on the coldest walls, and conventional convection batteries are simply not able to dry them. On the contrary, they form a “thermal cushion” under the ceiling, which only promotes the development of fungus. This is how a mold breeding ground appears in a completely prosperous apartment.
| Many of us believe that mold and mildew on walls are found only in shabby, unkempt apartments or damp basements, and are extremely surprised when faced with these unpleasant phenomena in our own home. |
| Naturally, a house affected by mold looks repulsive, but this is not the main reason why mold on the walls is dangerous. It has a detrimental effect on the health of people, and especially children. Mold spores inhaled along with the air settle in the lungs, causing allergies, asthma, severe diseases of the internal organs and even infections. | |
| Removing mold from walls and ceilings requires a lot of time and effort. First, you need to clean the affected surface to the ground, then treat it with antiseptics and restore the finish. But these are only temporary measures. First of all, you need to eliminate the cause of the problem. So the main question is not how to remove fungus and mold from walls, but how to prevent its reappearance. | |
What to do: effective control of mold on walls
| The only measure that can rid your home of fungal organisms is the destruction of the environment in which they live so freely. Therefore, before removing mold from the walls, it is necessary to: dry all corners; warm up the external walls, floor, ceiling; create a uniform temperature throughout the room; remove excess moisture. | |
| All these tasks are easily handled by the heating system “warm baseboard “Mr.Tektum”. This unique technology, developed by a Russian manufacturing company, heats rooms not locally, but along the entire perimeter where it is installed. Radiant heat, passing from the baseboard to the walls and floor, radiates from their surfaces and warms up all objects in the room, including furniture and the human body. The walls covered with such a heat shield dry, warm up and begin to radiate heat themselves, and the entire room is constantly maintained at an optimal temperature. In such conditions, mold simply has no chance! | |
Warm baseboard as a weapon against fungus