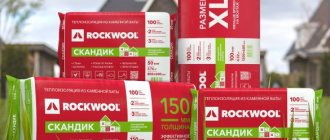
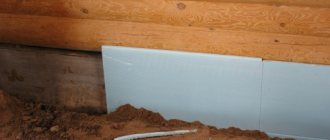
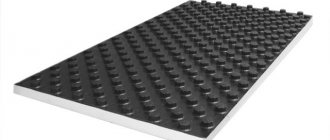
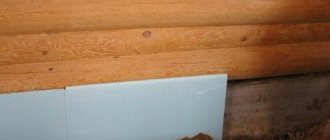
During construction, it is necessary to provide for insulation of not only the walls, roof, basement, but also the foundation.
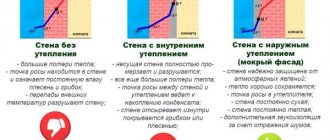
Thus, a closed thermal insulation circuit is created. This allows you to completely isolate the interior from the penetration of cold. Thermal insulation is a guarantee that the heat will remain inside the house, and heating costs will be significantly lower.
Selection and properties of insulation
When choosing a thermal insulation material, you must understand that the lower part of the house is constantly exposed to aggressive external influences. In winter, water and capillary moisture that is in the soil freezes and changes its structure, forming crystals and increasing in volume.
Due to this, swelling of the soil occurs, which puts pressure on the lower elements of the structure. This can lead to cracks, deformation and structural failure.
Sand allows water to pass through well, so during construction it is usually used as backfill. However, moisture remains to one degree or another.
Note! If the base is not insulated, some of the heat will escape through the building elements into the ground, causing it to swell. As a result of repeated freeze-thaw cycles, the load-bearing properties of the lower structural elements may suffer.
In total, building structures are capable of losing 1/5 of the heat through the basement. One cannot ignore the influence of groundwater, which leads to the appearance of mold, mildew, and dampness.
Thermal insulation will allow:
- prevent the destruction of house structures;
- protect the basement from dampness;
- ensure high energy efficiency of the building, retaining heat inside the house.
Therefore, for the lower part of the building, insulation that can withstand the aggressive action of water, negative temperatures and heavy loads is suitable. Extruded polystyrene foam (EPS), a type of foam plastic: Penoplex, TechnoNIKOL, Technoplex, etc., has these properties.
This is an environmentally friendly polymer material filled with foaming gas; it contains CO2 and a mixture of alcohols. It is produced in slabs and has a dense closed-porous structure with a very small cell size (0.05 - 0.08 mm). EPS does not absorb water, which means it will retain its properties throughout its entire service life and provide an additional waterproof layer.
The thermal conductivity coefficient of XPS does not change over time. For comparison: 20 mm of high-tech foam is equal in thermal insulation properties to 420 mm of brickwork. Extruded polypropylene foam is capable of withstanding heavy loads; in some cases it is used as a construction option. At the same time, it is very light, has high biological resistance: it does not rot, is not susceptible to mold, and is too tough for the ubiquitous rodents.
The slabs have a size of 1200x600 mm, thickness - from 20 to 200 mm. Penoplex is available with a locking fastening, which allows you to block cold bridges.
Characteristics of extruded polystyrene foam:
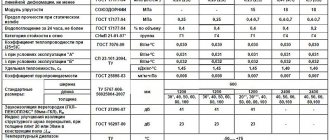
- high compressive strength 10-100 t/m² (depending on brand);
- the lowest thermal conductivity coefficient - 0.029–0.034 ˚С, W/(m*K);
- almost zero water absorption - 0.2%;
- does not contain harmful substances;
- chemically and bioresistant;
- durability (will last at least 50 years).
Reference. extrusion EPS with nanographite (CARBON) has been developed. The structure of its cells has a special shape and orientation, and the walls are more dense. All this affects strength.
Recommendations for using polystyrene foam
Modern manufacturers produce slabs of extruded polystyrene foam with a thickness of 3 to 12 centimeters. The required thickness of the thermal insulation layer is determined at the building design stage and depends on the following factors: the thickness of the walls and the material used and the geographical area where the building is being built. When building in the middle zone of the CIS, it is preferable to use slabs with a thickness of at least 5 cm, however, the corners that are most susceptible to the negative effects of low temperatures should be covered with slabs with a thickness of 6 to 10 centimeters.
When designing a building, it is best to plan the so-called. sinking base . This form of construction will allow you to hide the hydro- and thermal insulation under the overlying walls of the building. Since the base is underground, it is exposed to the harmful effects of groundwater and frost, which can lead to damage to the integrity of the base.
If the integrity of the building's foundation is compromised, the floor temperature in the house may drop and drafts may appear along it. Most often, during construction, much attention is paid to insulating only the walls of the house, but not the base. This oversight will lead to heat loss in the future and increased costs for fuel to heat the house. By insulating the base with expanded polystyrene during the construction stage, you can avoid significant financial losses in the future.
Cost of work per m² and material
Installation of expanded polystyrene by professional builders will cost 250–700 rubles/m² (depending on the type of fastening, brand and thickness of the EPS).
If you need to apply a reinforcing or waterproofing layer, apply decorative plaster or paint surfaces, the cost of the work will increase (from 400 rubles per 1 m² and more).
In addition to paying for the services of the craftsmen, you need to take into account the price of the material. Penoplex and TechnoNIKOL (10 cm) cost 1300-1700 rubles per package (4 slabs, 2.7 m²) or 450-600 rubles. for 1 m². There are cheaper options - from 250 rubles. Together with all materials, installation of 1 m² can cost 1,800 rubles or more.
Preparing for insulation of the base
Insulation of the base with penoplex or expanded polystyrene can be carried out only in the autumn or summer, because at a positively high temperature there will be the highest quality adhesion between the insulation and the adhesive composition.
Installation of insulation is carried out on a previously prepared surface.
It is necessary to prepare in advance the surface of the base that is supposed to be insulated. All defects that exist on the surface (pits, crevices, cracks, smudges, etc.) must be completely eliminated and coated with plaster. After this work, the plaster should be given a little time to dry, then it should be cleaned and the surface covered with an additional layer of primer.
Calculation rules
The size of the insulation layer will depend on the type of building (residential, non-residential, heated or not), type of foundation, climate zone, and thermal insulation system used. The calculation is carried out according to the method “Thermal protection of buildings” SP50.13330.2012.
There are many options for determining the thickness of foam plastic, but they are very complex. It is better to use the online calculator offered by construction sites. You can use the formula:
R= df/λ b +dу/λ p , where:
- df - foundation thickness;
- dу is the thickness of the insulation;
- λb is the thermal conductivity coefficient of the foundation material (concrete or others);
- λп — coefficient. thermal conductivity of the insulation (indicated on the packaging);
- R - heat transfer resistance (value from the table).
The values of R, λ p, λ b are taken from the tables, the value of df is known, it remains to determine dу by substituting all the numbers into the formula:
dу = (R - dф/λb) x λп
The result is rounded. You can independently calculate both the thickness and width by substituting data from the tables (the values are determined for each value).
By dividing the areas of insulation and slabs, determine how many pieces are needed. In this case, 10-15% is added for adjustment. To protect the basement from the inside, use polystyrene foam no thicker than 3 cm.
Protecting the foundation from moisture
The next step will be to protect the foundation from moisture. Precipitation, groundwater - all this leads to the fact that with constant contact with wet soil, concrete will absorb moisture. As mentioned above, this can cause rapid destruction of the foundation. To prevent this from happening, you need high-quality waterproofing.
Some experts recommend using mastic - it reliably closes the pores of concrete, preventing moisture from entering. But working with it is not very convenient - you need to constantly heat the container, and application takes quite a lot of time.
Therefore, many prefer to use waterproofing or construction polyethylene
The first is carefully melted with a gas burner, after which it is glued to a flat surface. The second is fixed using reliable solvent-free glue
In any case, waterproofing work should be carried out carefully. It is advisable to make an overlap of at least 10-15 centimeters. The edges of roofing felt are fused, while those of polyethylene are glued with wide tape.
How to insulate with your own hands?
There are two types of thermal insulation: vertical and horizontal (along the perimeter at the level of the sole or above the soil freezing zone). In unheated buildings, only the horizontal layer is used.
From the video you will learn about insulating the foundation from the outside with extruded polystyrene foam:
Preparation
The surfaces are cleaned of dirt, they must be smooth, without chips or potholes. If there are depressions, they are eliminated with plaster mortar, all irregularities are eliminated.
Waterproofing
Water in any form negatively affects the concrete from which the lower part of the building is usually made.
Capillary penetration of liquid leads to oxidation of reinforcement, the formation of cracks, erosions, and internal cavities. All this leads to a decrease in the strength of the structure.
If the site is located in a swampy area with high groundwater levels, not only waterproofing will be required, but also drainage system equipment. Otherwise, water pressure will cause hydrodynamic loads that are dangerous for the building. The role of drainage is played to a small extent by the sand and gravel cushion, but this is not enough.
To protect against water use:
- bitumen-polymer surfacing composition (what is the established consumption of bitumen per 1 m2 of waterproofing?);
- self-adhesive roll material;
- coating waterproofing.
A protective layer is not applied over the thermal insulation.
On a note. TechnoNIKOL produces nanoplates with drainage grooves and protective membranes with geotextiles, which are laid on top of extruded foam to drain atmospheric water.
We talked more about how to properly waterproof a foundation with your own hands in a separate article.
Fastening
For a strip foundation, the slabs are mounted vertically (read more about how to properly make a strip foundation with your own hands here). Installation is carried out starting from the sole, from the outside or inside (when insulating the basement). Fastening from the inside is possible during the reconstruction of already constructed buildings. PPS can be easily cut with a jigsaw or hacksaw, and they are easy to adjust.
Solvent-free compounds are used for installation:
- glue foam;
- mastic;
- polymer-cement mixtures.
Outdoor option:
- If the waterproofing layer is built-up, it is slightly heated at several points and the foam is pressed against it.
- The foam is applied in strips around the perimeter and in the center (with an indentation of 2 cm from the edge) or dotted.
- The slab is glued using the offset method, initially placing it 2 cm further than required. The gaps are filled with adhesive.
Internal option:
- In the basement, EPS is fastened with dowels (3-4 pcs/m²).
- The edges are coated with sealant based on acrylic, silicone, bitumen.
- Near window openings, cracks are sealed with sealant or polystyrene foam.
A vapor barrier is fixed on top and a decorative finish is applied (plasterboard, gypsum plasterboard, wet plaster, plywood, PVC) and secured to a load-bearing wall or sheathing.
Plastering
Above ground level, in the basement part, the surface is plastered using reinforcing mesh. Then you need to wait until it dries completely and only then proceed to the next stage.
Note. There is no need to plaster the bottom layer located in the ground.
Backfill
When all parts of the insulation are glued, the soil is backfilled, which will serve as an additional fastening for the extruded EPS. The soil is compacted with a tamper. Leave 500-600 mm on top to create a blind area.
Manufacturing and thermal insulation of blind area
The blind area serves to protect the end parts from precipitation and frost heaving, and helps reduce the depth of seasonal freezing.
The thickness of the sand cushion should be about 15 cm. Form a slope of 5% to drain water. PPS (40-100 mm) is laid on top of compacted sand.
Then they install roll waterproofing with overlapping and gluing the seams. The canvas should cover the base by 15 cm, on the other side it is folded down. Next, they fill it with crushed stone, gravel, or make formwork, followed by pouring concrete.
Exterior finishing of the base
The stages of work in this case are almost no different, except that in a day mechanical fixation of polystyrene foam with dowels (4 pieces per 1 square meter) will be required. There is no need for such fastening underground, since the extruded PPS is pressed against the back ground.
A finishing decorative coating (tile, stone) is placed on top of the insulation; siding or wet plaster can be used (pre-mill the PPS surface with a hacksaw to improve adhesion). Heavy finishing is not used.
Is it possible to install slabs in two layers?
Some experts are still deciding whether it is possible to fix polystyrene foam boards in two layers to achieve the desired thickness. Some claim that the high adhesion of glue and mastic makes it possible to obtain a monolithic double layer. To prevent the formation of cold bridges, it is necessary to ensure that the seams do not overlap during installation. Others argue that with vertical displacements of the soil, the thermal insulation may delaminate. As a result, moisture penetrates between the layers, which causes increased heat loss.
The bottom row must be mounted, focusing on the base. The best option would be the existing foundation overhang, which is formed at the pouring stage. But quite often, thermal insulation is installed on a gravel backfill where the foundation is installed. Wild stone, brick, tiles or decorative plaster, as well as facade paint are laid on top of the insulation. Each of these materials can become a decorative finish. But sand-lime brick or decorative tiles cannot be called the best choice, since at sub-zero temperatures chips may form on the edges of these materials.
Are there differences for different types of bases?
When installing a slab version of the USHP type construction, thermal insulation is laid under the foundation in 2-3 layers of 100 mm each (you can learn about the construction technology of installing a slab foundation with your own hands here). The formwork is also assembled from extruded PPS slabs. USHP is suitable for houses made of timber, aerated concrete and frame structures.
Characteristics
To understand the main nuances of penoplex finishing, you first need to study the characteristics. Expanded polystyrene is the correct name, penoplex remains popular among people by the name of the manufacturer.
The basis of EPS is ordinary polystyrene foam (foam). Processed at high temperatures. Acquires the following properties:
- strength;
- homogeneous structure;
- vapor permeability;
- moisture absorption equal to 0;
- reduced thermal conductivity compared to polystyrene foam.
Often, manufacturers can add fire retardant additives to EPS. Receives flammability class G1. But these are the most expensive brands.
Thanks to the listed characteristics, the attractiveness of expanded polystyrene increases. Moisture absorption becomes zero, the surface is smooth, and the adhesion of the material deteriorates. This means that EPS is not suitable for insulation when the facade is wet.
The main mistake is working with penoplex in the same way as with polystyrene foam. The reinforced mesh at the base comes off along with the glue immediately after hardening.
The nuances of working with EPS
Before insulating the basement of a building with polystyrene foam, you need to consult with a specialist to correctly calculate the thickness of the insulation layer. The characteristics of expanded polystyrene, heat losses, parameters of the material from which the walls are made, and the properties of decorative finishing are taken into account.
Only craftsmen can make accurate calculations; they measure the thickness of the walls, take into account the material and other properties.
After receiving a conclusion with the recommended type of insulation and thickness, you can begin work on fastening and finishing with your own hands. Follow the instructions and installation sequence.
Working with EPS
It is necessary to pay enough attention to the insulation of the blind area around the perimeter of the base. Without this stage, the process will not bring the desired result. It is better to simultaneously insulate the blind area with the basement part - this will allow you to get good results. It is better to clarify the characteristics of materials for insulation and blind areas:
- waterproofing - what coating to use;
- compositions for bedding;
- insulation data;
- materials of the upper enclosing layer.
Installation should begin with preparation, but some builders from dubious teams deliberately ignore this stage, believing that polystyrene foam will hide flaws. It visually hides, but after a few years, moisture accumulates in unsealed cracks and niches, causing critical destruction of the walls.
We insulate from the outside
Before you begin to insulate the base, thoroughly clean its surfaces of cement, knocking off dirt with a hammer and brushing it off with a brush. Identified surface defects or cracks are sealed with cement mortar. After which it needs to be allowed to dry, and only then do they begin to perform thermal insulation.
Next, the base surfaces are coated with a primer to ensure reliable connection of the adhesive composition to the walls. The base structure of the foundation usually has a height of 0.30-0.50 m, while Penoplex is produced in larger sheets. Therefore, it will need to be adjusted to the base.
For this purpose, measure the height of the structure and mark the insulation sheets accordingly, cutting them with a hacksaw.
Consumables and tools
To thermally protect the base with penoplex, the master must prepare the following tools and accessories:
- metal brush for cleaning the surface,
- pick,
- shovel,
- buckets,
- trolley for excavating soil near the basement structure.
Basic building materials needed to perform thermal insulation work:
- extruded polystyrene foam, usually comes in bags of 4 to 10 sheets;
- waterproofing film;
- fiberglass reinforced mesh;
- adhesive composition for securing insulation sheets;
- dowels;
- putty;
- bitumen mastic.
Finishing technology
Waterproofing is applied on top of the treated and cleaned base surfaces. An indispensable requirement is the deep drying of its cover. Otherwise, the slabs will creep to the sides.
Insulation installation technology:
- The sticker starts from the bottom, the insulation sheets are placed horizontally in one row.
- The next layer of sheets is installed end-to-end and secured to the plane of the previous cover.
- Thermal protection boards must be of equal thickness.
- The next row is made with offset joints, placing the slabs in a checkerboard pattern; the seams between the tiles should be 5 mm.
- Fit the edges of the sheets tightly.
- The glue is applied at a number of points.
Having completed the stages of insulation and external decoration of the base, you will also need to insulate and equip the blind area.
