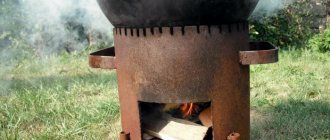
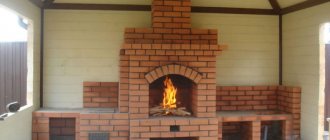
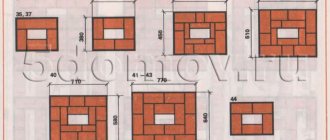
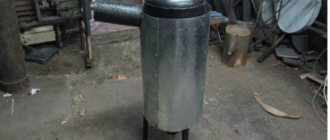
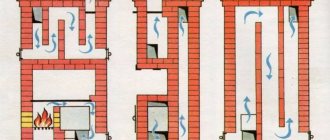
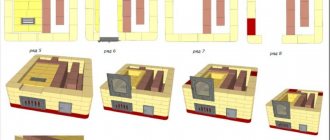
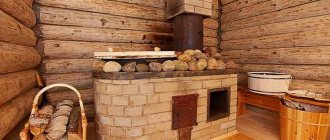
The key to the pleasure you get in a bathhouse is always thoroughly warming it up to the desired temperature. Otherwise, the procedure itself loses all meaning, wouldn’t you agree? The entire load for this part falls on the oven, which must be properly prepared. You can, of course, save yourself the headache about this and turn to specialists. Or you can put in a minimum of effort, but as a reward you will receive a well-prepared oven and a significant amount of savings. How to make a sauna stove from a pipe with your own hands? In fact, using such material as a source allows you to reduce time costs to a minimum - and not at all to the detriment of the final result. The main thing is the availability of the necessary materials and a drawing, according to which you can successfully implement the plan and avoid mistakes that undermine safety.
Vertical or horizontal format?
One of the key issues that you will have to decide if you intend to make a sauna stove from a pipe. Of course, it directly depends on the size of the steam room.
Vertical - ideal for small spaces. The grate bars and the direct firebox are placed in steps, one above the other, which ultimately allows you to save useful space around. The use of this format has recently become noticeably more frequent, especially among professionals. It is better to avoid disputes about which stove is best suited for a bath: make a decision based on your specific situation.
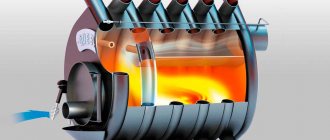
Horizontal is a solution that fits well into the format of spacious bath rooms. At the same time, this is the classic version that is used almost everywhere. Characterized by a slightly enlarged firebox compartment. Often, for practicality, part of it goes into the dressing room, which allows you to speed up the sometimes rather tedious process of kindling.
Agree that it is much more convenient to regulate the temperature from it without wasting time moving from one room to another. In addition, during such “raids” the air actively circulates throughout the bathhouse and prevents its full heating.
What metal is suitable
When selecting and inspecting metal pipes for a future furnace, it is important to pay attention to the following details:
- strength of the metal workpiece;
- pipe thickness;
- no defects or severe metal corrosion.
To eliminate defects, you need to weld patches of a suitable size in problem areas with a small margin.
As for the composition of the metal, it is not recommended to use alloy steel or steel with a high carbon content. The permissible carbon content in steel should not exceed 2%.
You can determine whether a metal is high-carbon or not by the appearance of sparks when grinding with sandpaper or an attachment on a grinder or drill. A high carbon content is indicated by white sparks like stars that pour in different directions. Low carbon content is indicated by yellow sparks that fall in a straight line. Alloy steel produces orange, bright red sparks.
The stove can be made either from a round pipe for a bath or from sheet metal. If in the first case the shape will be close to cylindrical, then in the second the furnace unit will be rectangular.
By choosing a round pipe as a blank, bathhouse owners receive a number of advantages:
- The pipe is easier to work with. Essentially, you have a ready-made firebox at your disposal that does not need to be cut.
- Economical material consumption allows you to reduce money expenses.
- In a round oven, the process of heat and air exchange is many times more efficient.
- The service life of a round stove is longer than a rectangular one made of sheet metal.
In addition to selecting the material, it is important to develop a drawing, a diagram of the future product, indicate the location and method of fastening all structural elements. This will simplify the assembly process of the unit.
Preparing the foundation
- in the place where you plan to place the stove, make a hole 0.5 meters deep, the length and width can be increased to 0.7 meters;
- approximately 0.3 meters high, fill the prepared hole with very fine crushed stone and carry out thorough compaction;
- prepare a cement composition based on cement-sand in a ratio of 1 to 4, dilute the mixture with water and pour it onto the crushed stone;
- within 24 hours the base will dry and become hard - place several sheets of roofing material on top for reliable protection from moisture;
- prepare a concrete composition of cement, sand, fine gravel and water in a ratio of 1:2:4 and pour it onto the roofing material;
- carefully level the base using a building level;
- after drying, make a brick platform approximately 0.7 meters in width and height;
- also arrange a protective brick screen up to 1.2 meters high - in the future the stove will be located in close proximity to it, approximately at a distance of 0.2 meters.
What we need - tools and materials
Before you start making your own sauna stove from a 530 pipe, you should prepare a place to work and stock up on the necessary tools:
- welding machine;
- grinder with different attachments;
- electric drill;
- metalworking tools;
- door handles;
- mortise tap;
- asbestos cord.
In addition to tools, you will need the following material:
- Thick-walled metal pipes for fireboxes and water tanks, having a diameter of 500 to 650, a wall thickness of 8-16 mm, and a length of 1.2 to 1.5 meters. Also the pipe through which carbon monoxide will escape, its diameter is 120 - 150, and the wall thickness is 2 - 4 mm.
- A steel pipe where the stones will be placed. The thickness of its walls is 5-8 mm, and the diameter is 350.
- Sheet metal, size 600 by 800 mm, having a thickness of 8 - 12.
- Hinged steel hinges.
- Water pipe - a small piece, suitable diameter ½ or ¾ inch, length 50 - 80 mm, and a ball valve with a similar thread.
- Metal reinforcing bars - 500 mm, diameter 12 - 18.
- Cement.
- Brick.
- Sand.
Horizontal oven - step by step
- prepare a working piece of pipe 0.7-0.9 meters long;
- thoroughly clean all edges;
- cut a fragment measuring 0.8 by 0.4 meters from the prepared metal sheet;
- Weld rods horizontally to the opening in the middle, and a grate in the lower part of the pipe;
- make a remote-type firebox from a metal sheet and make cutouts;
- weld this facade to the base pipe;
- to decorate the back wall, cut out a circle equal to the diameter of the pipe and weld it to the main structure;
- You can make a hole for the chimney in the upper part - a small size, approximately 0.16x0.16 meters, will be enough;
- weld the main vault and the pipe that will be used as a chimney;
- all that remains is to install the doors for the combustion chamber and the blower;
- finishing comes down to careful sanding of the entire body, and then treating it with durable polymer-based paint.
Here are some drawings and pictures that will help you in making a horizontal type oven.
Chimney installation
The chimney is an important component for removing combustion products.
They come in three types:
- Ceramic. A ceramic chimney has the longest shelf life. Maximum resistance to high temperatures.
- Brick. Due to its rough surface, a brick chimney quickly accumulates soot and slows down air draft.
- Steel. A steel chimney is most suitable for a bathhouse due to its affordable price. Also, due to the rapid heating of the metal, a tank is installed and then used for procedures. A stainless steel chimney is the most current. This material is not afraid of water, high temperatures, is not susceptible to corrosion, is lightweight, durable and cheap.
Build process:
- Before installation, you need to mark the location for making the hole.
- A galvanized steel casing is installed on the pipe, after which rings are put on and fixed to the ceiling. The lower pipe is secured with self-tapping screws. The clamps securely fix the chimney.
- The second part is installed on the roof. The holes between the roof and the chimney are filled with expanded clay, clay or asbestos.
Drawings and photos of a horizontal stove made of pipe 530
Very often, a 530 diameter pipe is used to make a sauna stove. It allows for longer combustion of wood, significantly increases the performance of the stove, and is generally more convenient to work with. Therefore, photos and drawings of a stove for a bathhouse made of pipe 530 in horizontal format will be useful to you if you decide to build this type of building. Below we offer you popular options that have been tested in practice.
Important Tips
- To prevent heat from leaving the stove container, an opening valve is installed on the edge of the chimney.
- A fire can be caused by a huge accumulation of soot. To do this, two holes are drilled in the pipe. Steel tubes are inserted into them and turned towards the pipe. This prevents the appearance of soot. The fuel will burn completely, and soot accumulation will be minimal.
- After completing the construction, it must be checked for holes, gaps and cracks.
- There should be no objects around the stove that are susceptible to fire: synthetics, wood and fabric.
- All cut edges of pipes and metal sheets must be cleaned of sharp edges to avoid cuts. If you do not have experience in correctly installing a chimney, then it is better to contact specialists.
- The installation of this furnace should be done on a finished concrete foundation, its height is 250-300 mm. Brickwork with clay mortar is laid on it in one or two rows. A brick screen will protect the walls from overheating.
Vertical oven - step by step
- prepare the base - a pipe fragment up to approximately 0.9 meters;
- Weld a circle of metal sheet to the bottom of the pipe - it should be equal to the diameter of the pipe;
- cut a hole for the ash pan, its maximum width is no more than 0.2 meters;
- weld a round plate with a pipe diameter, cut out the middle and weld rods onto the hole - this will be the grate;
- decorate the combustion chamber by cutting out a small rectangle above the grate and seal it with a metal door;
- Again, cut a hole above the firebox, weld rods for the grate and hang the door;
- weld the body with a round piece of metal, do not forget about the holes for the chimney and ash pan;
- The traditional finale is sequential sanding of the entire body and painting.
To help you, there are drawings and photos that will help you make your own stove for a bathhouse from a pipe in full compliance with all safety standards. By the way, don’t forget to do the first warm-up in the fresh air - this way you will avoid fumes from the paint you used getting into your respiratory tract. After all, many polymer compounds are frankly harmful to your health. Remember that an iron stove made of pipe is best lined with brick. This way it will be better to retain heat in the steam room, and the air will be protected from those substances that are released into it when the iron warms up.
Decorative finishing
A stove in a bathhouse is not only a source of heat, steam, and increased danger, it can also be a decoration for the room.
If you only care about the safety of the stove, then it is enough to paint it with modern paint to protect the metal from corrosion. The use of heat-resistant enamel based on silicone paints is no different from conventional enamels, but protects metal at temperatures up to +800 degrees. The metal is degreased and then paint is applied. After the first layer has dried, the next layer is applied. It is recommended to paint those metal elements that will be covered with brick and insulation.
The decoration of the stove in the bathhouse can perform a purely decorative function in the form of forged decorations and additional decorative elements of the stove itself. You can use heat-resistant paints of various colors with an antique effect. Decoration can also be used to eliminate the increased danger of a sauna stove.
The stove can be lined with red brick masonry (we have already considered this method), but the masonry on the sides can be decorative, in the form of a grid. On the firebox side, the stove can be covered with a screen made of forged elements or simply with a beautiful mesh fixed in the frame.
It can be covered with a beautiful casing, also covered with heat-resistant paint, in the color you like.
A stove lined with heat-resistant stone will look impressive; this will not only give a noble look to your product, but will also improve the quality of the stove itself.
The decorative decoration of your bathhouse stove depends only on your desire, taste and wallet size.
Drawings and photos of a vertical stove made of pipe 530
As with the horizontal format, the 530-diameter labor is ideal for use if you are making the oven yourself rather than enlisting the help of a professional. A stove for a bathhouse made from pipe 530 vertically will help you make drawings with all the necessary markings. Needless to say, this makes your work much easier, because the most difficult thing is to make the necessary markings. Of course, the proposed options are not an axiom. You are also free to make necessary changes to them. With one condition - if you really know what you are doing!
Possible errors during the manufacturing process
If the finished design does not work as desired, most likely an error was made during the manufacturing and installation of the stove.
If there is a rapid removal of heat from the stove, a movable valve must be installed inside the chimney pipe.
A large accumulation of soot inside a horizontal oven can cause it to catch fire. An afterburner in the form of two metal tubes bent towards the pipe and installed on one of the walls of the structure will help solve the problem. As a result, the amount of soot will be reduced, and the firebox will be better saturated with oxygen, resulting in complete combustion of the wood.
Recommendations
In order for the stove to work for a long time, you need to follow some recommendations:
- Do not forget to regularly clean the chimney, the inner walls of the pipe, and the ash box from soot and ash. It is recommended to sometimes heat the stove with aspen wood. They effectively clean the chimney.
- Do not use fuel with various impurities.
- Cover the stove unit with a layer of brick. It will protect against infrared radiation and improve heat transfer.
- To install a tank for heating water on the stove, you need to make a built-in heater. For it you need to cut a separate hole with a door.
- You can assemble a wooden fence to avoid getting burns when accidentally touching hot metal surfaces.
When painting the stove, it is recommended to add anti-corrosion additives to the paint composition. They will protect the metal from rust formation.
Not everyone can afford to buy a ready-made sauna stove or assemble a brick structure. If desired, you can make metal furnace equipment from large diameter pipes. By following simple recommendations, you can make a homemade design that will allow you to obtain high temperatures and high-quality steam.
How to build a stove with an open heater in a bathhouse
The design of a stove with an open type of heater is simple to implement.
Its dimensions are 102 by 62 cm. This is enough to obtain a functional family steam room with steam and heat in nine square meters of bathhouse. In this embodiment, lining is not performed, so the stove is built from high-quality M150 brick, achieving very thin seams.
This option is not expensive, but also short-lived - the seams are restored every two years, lubricating them with fresh mortar. The stones are placed on a slab located above the furnace firebox. The stove can be metal or cast iron.
This furnace has two design options:
- with a remote container or located at the top;
- with water heating from a pipe laid through the firebox.
Each construction process begins with preparatory work.
Since a brick stove weighs more than 500 kilograms, and during its operation the bathhouse floor may sag, it is necessary to build a foundation for the device.
Foundation
Step-by-step instructions for constructing a foundation for a furnace:
- Knowing the dimensions of the oven, they draw markings on the ground with a margin of half a brick.
- Dig a pit with a depth of 0.5 to one meter.
- Avoid being too close to the base of the bathhouse itself. If the ground moves, friction will become a destructive force for the stove and the bathhouse itself. A distance of 5 centimeters is allowed. Upon completion of the work, the gaps are sealed with river sand.
- The bottom of the pit is leveled and compacted.
- The choice of binding solution is dictated by the quality of the soil: if it is dry, then prepare a lime-cement mortar (6:1) with a certain amount of river sand. To prepare a lime binder mixture, sand and lime are mixed (2:1). Cement mortar is made by mixing sand and cement (3:1).
- 10 centimeters of sand and crushed stone are placed alternately at the bottom of the pit. Then they are compacted.
- Waterproofing material is placed on top, placing the film higher on the walls.
- Pour the mixture into the pit and leave until completely hardened. This will take about a week.
- After the surface has hardened, a freshly prepared liquid solution is poured onto it, which will spread strictly horizontally.
The stage of laying the furnace begins after 14 days, when the base of the furnace is completely dry. The solution is prepared from lime, clay and sand (1:1:4).
Building a brick oven with your own hands
The fuel part is lined with refractory bricks and equipped with a grate, the rest is made of ordinary red brick.
The masonry of all sauna stoves has the same technology, but in each case the seams are made responsibly. The tightness of the seams is the key to preventing harmful carbon monoxide from entering the room.
Work order:
- Before laying the furnace, a waterproofing sheet made of roofing material is placed on the prepared base in two layers measuring 5 centimeters larger than the dimensions of the foundation.
- To prevent the brick from drawing moisture out of the binder mixture, it is saturated with water before use, immersed in it for 1-3 minutes.
- Prepare a homogeneous and viscous masonry mortar from sand and clay, taken in equal quantities.
- The mortar is placed on the entire plane of the brick in a thin layer to create a sealed, filled joint of no more than 3 mm. Three-millimeter wire guides between the planes will ensure a high-quality seam. After pressing, the wire is removed and excess mixture is removed from both sides.
- When completing each row of the furnace, check the angle values.
- Bandaging (displacement) of bricks in the next new row is required.
Important! You cannot use heat-resistant and ordinary bricks next to each other, since the different heat capacities of these materials threaten the rapid destruction of the furnace.
Recommendations
Important points:
- Constantly monitor dressing rules.
- The thickness of the solution layer is about 10 mm.
- Seal the seams of the oven to ensure tightness.
- Check the horizontal and vertical levels every two rows.
- It is permissible to use a cement mixture when laying the bottom line; the temperature below is not too high, and the cement will strengthen the structure itself and protect the furnace from moisture.
- After laying two lines, install a blower and continue continuous laying.
- After erecting the walls of the blower, install the door and cover it with a grate, which will be the bottom of the firebox.
- Provide an ash pit (mobile or stationary).
- Build a combustion chamber 0.6 meters high. This is enough to create the highest possible temperature at the top of the flame.
- The required furnace firing depth is 80 cm.
- The dimensions of the space for stone backfill for the bathhouse are determined at the rate of 60 kg for each square meter of the steam room.
At the next stage, the fittings are installed: hinges, grilles, doors. When installing the doors, pieces of two-millimeter wire are placed in the seams. Continue laying from the door.
Advantages
When comparing furnaces with different housing arrangements, several distinctive features can be identified that affect the efficiency of air heating:
- Flows of flame and heated gases are directed to the chimney along the shortest path. At the same time, they have less contact with the walls of the structure. The flame flow is located in the very center of the horizontal furnace.
- In horizontal furnaces, flows of heated gases rush to the top of the body. Only then are they thrown out into the chimney due to rarefaction of the air.
- The heat from the heated walls goes normal to them, which means 90% of the heat is radiated in the horizontal direction. Due to this, the walls of the bathhouse quickly warm up. However, the floor receives little heat.
- A stove located horizontally is capable of thoroughly heating all areas of the sauna room, except those adjacent to the floor.
The weight of the structure can be 60-180 kg. For this reason, the horizontal structure is installed in the center of the steam room on a fairly simple frame. If you make 20 mm insulation, the structure can be installed even on a regular 8 mm sheet of steel.
Preparation
Of course, a home-made stove will not have an elegant appearance or originality, but it performs its function no worse than a factory one and perfectly heats a steam room with an area of up to 20 m2.
First of all, the pipe must provide its basic functions, namely, absorb and release heat evenly and at the same time have thick enough walls so that the stove is not afraid of high temperatures and lasts a long time. When talking about the basic characteristics of pipes, you need to take into account not only the cross-sectional diameter and wall thickness, but also the grade of steel. It is clear that when using scraps, such information is not always available.
Speaking about a standard bath, the following sizes are considered optimal:
- cross-section diameter – 0.5-0.55 m;
- wall thickness – 8-12 mm.
Pay close attention to the quality of the material: only steel pipes are suitable for making a bathhouse stove, and the steel you need is not high-carbon. It is not suitable for profile work because its seams can easily lose shape or even come apart. High-carbon steel can be identified by the sparks that appear when the metal and the sanding ring interact - white sparks will scatter in all directions
Low-carbon steel, in turn, produces yellowish sparks that have a straight trajectory; stainless steel parts are not suitable either. The best option is steel with a carbon content of about 2%. Also, when choosing a metal, it is better to avoid alloy steel - it is also easy to calculate using an emery machine: sparks from interaction with the metal will be orange, red or bright white
High-carbon steel can be identified by the sparks that appear when the metal and the sanding ring interact - white sparks will scatter in all directions. Low-carbon steel, in turn, produces yellowish sparks that have a straight trajectory; stainless steel parts are not suitable either. The best option is steel with a carbon content of about 2%. Also, when choosing a metal, it is better to avoid alloy steel - it is also easy to calculate using an emery machine: sparks from interaction with the metal will be orange, red or bright white.
Cast iron should never be used, as it becomes unusable upon contact with water.
Other advantages of steel pipes:
- resistance to mechanical damage, high heat transfer and low expansion coefficient when heated;
- retaining heat even after complete combustion of wood.
The pipes have their own characteristics according to the specification. Let's look at this information in more detail.
Round pipes are classified by internal diameter size. The second number indicates the wall thickness, the subsequent ones provide information about its type and other characteristics. It is customary to take the millimeter as the unit of measurement. If the pipes are profiled, the first two signs indicate the maximum section size, the third number indicates the wall thickness. The instructions “530 by 10” mean that the diameter of the pipe along the inner wall is 530 mm, the thickness is 10 mm, the outer diameter is 550 mm with an error of +/- 5 mm taking into account the transverse tolerance, which is 10%. Primarily the tolerance consumption applies to ellipticity.
The thickness of the pipe wall will also vary.
Water supply pipes are divided into the following subtypes:
- lightweight;
- ordinary;
- fortified.
One way or another, the most popular pipes have a cross-sectional diameter of 530 mm, their thickness is 6-12 mm, and their nominal value is 6, 8 or 10 mm.
Pipes are one of the most frequently demanded products, so it makes no sense to regulate them too scrupulously. Pipes with standard sizes from 250 to 400 mm have a wide range of options. If possible, for the manufacture of a sauna stove, give preference to scraps of spiral pipes (their designation is GOST 20295 85). Comparing them with straight-seam pipes (GOST 10704–91), they have lower ellipticity, are more accurate and sell them at the same price as scrap metal. Solid pipes without seams are an even better option, but are only suitable for the manufacture of small parts, since their diameter is no more than 250 mm.
When preparing for work, equip yourself a workplace - it can be either a garage or a home workshop.
conclusions
The level of tilt of the body does not affect the operation of the stove. Therefore, you can install it arbitrarily. It is possible to treat the chimney with a high-temperature compound. This will help eliminate the metallic smell. After several fires, the pipe burns out and turns red. No further oxidation of the metal occurs.
As you can see, you can build a horizontal stove for a bathhouse yourself, if you get acquainted with the main stages of work and the features of preparation. It is important to choose the right materials and find all the necessary tools. If you have basic welding skills, you can make an effective structure that will last for decades.
Recommended Posts
DIY cellar
Wall mounted metal shelves
How to make a birdhouse with your own hands
How to make a swing nest with your own hands
How to make a cellar lid with your own hands
How to make a fountain in your country house
General information
The peculiarity of a sauna stove is that it performs several functions at once:
- Warms the air in the rooms;
- Heats water, which is needed for hygiene procedures;
- Warms up the stones.
It must be said that according to the principle of operation, do-it-yourself sauna stoves made from pipes and factory designs are no different. Of course, factory-made products may have more features and a more attractive design.
However, if the work is done carefully, a homemade stove will adequately cope with the tasks assigned to it, and will not disappoint its owners.
Factory stove-heater
Basic safety rules
Solving the problem of how to weld a metal stove for a bathhouse is not difficult. The main thing is to comply with fire safety rules when carrying out all work:
- the finished stove can be installed indoors only after repeated preliminary heating in the open air;
- all seams must be welded tightly;
- only high-quality material can be used in compliance with all specified dimensions;
- the stove is positioned so that the firebox opening is opposite the front door;
- there should be no wooden floors, walls, etc. near the stove;
- around the stove, the floor and walls of the room must be covered with sheet steel and heat insulation;
- the chimney pipe is led outside, the minimum height is 70 cm above the roof ridge;
- around the passage of the smoke exhaust pipe through the roof you need to apply a layer of plaster, then whitewash it with lime;
- Small tubes should be installed in all technological openings in the direction of the chimney - this will prevent soot from accumulating;
- a damper must be installed in the smoke exhaust pipe to regulate draft;
- Chimney pipes must be cleaned periodically to avoid accidental combustion of accumulated soot.
The walls near the sauna stove must be insulated for fire safety
We make a long-burning stove with our own hands
The first step is to decide what the stove body will be made of. It is advisable to choose thick metal so that it does not burn out longer. Most often, such a potbelly stove is made from a gas cylinder with a volume of 50 liters. You can use a large-diameter thick-walled pipe or a 200-liter steel barrel, but its walls are thinner.
You will also need
:
- steel pipes;
- metal profile;
- tool for cutting metal (grinder, gas cutter, etc.);
- welding machine with electrodes;
- Sheet steel.
Let's take a closer look at how to make a potbelly stove with your own hands. It is first recommended to sketch out a design diagram and determine the dimensions of the elements.
Frame
. When making a body from a gas cylinder, it is necessary to carefully cut off the upper part (cut line 1 cm below the weld). If desired, the body can be extended by welding the cut-off part of another cylinder. The top part with the lid is also cut off from the barrel. And if a pipe is chosen for the body, a round or square bottom made of thick sheet metal should be welded to it.
Housing options
Lid. In the cut off top of the gas cylinder or in the lid of the barrel, a hole should be cut in the center, corresponding in size to the pipe from which the piston will be made
The lid is scalded with a steel strip - it is important that it fits tightly onto the body. For a pipe body, the lid will have to be specially made from sheet metal. Chimney pipe
On the side of the stove, a couple of centimeters below the lid, a hole is cut and the chimney pipe is welded
Chimney pipe. On the side of the stove, a couple of centimeters below the lid, a hole is cut and the chimney pipe is welded
It is important that the removable chimney elbow fits tightly, without gap
Chimney. The lower, horizontal section of the chimney should be longer than the diameter of the stove. The chimney pipe can be made broken to increase the surface area that transfers heat to the room
It is important that there are no angles less than 45°. A pipe with a diameter of 10-15 cm is suitable for installing a chimney.
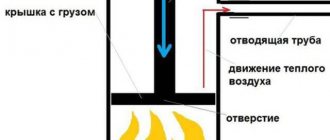
Piston
.
The length of the air duct must exceed the height of the housing by 100-150 mm. It is necessary to weld a steel circle with a hole in the center to its lower part and equip it with five to six blades on the lower side (arranged in a circle, with rays from the center). The blades can be
:
- pieces of steel angle;
- U-shaped sections;
- wave-curved strips of metal (welded edgewise).
In the middle, a small steel circle with a hole in the center is welded onto the blade. If the platform with the blades is made of steel less than 6 mm thick, it will deform over time due to overheating. To prevent this from happening, stiffening ribs are welded on top - a triangle made up of angle segments. Attach a steel plate to the upper section of the pipe with a bolt to adjust the combustion intensity.
Assembly
. Install a top-burning stove, check the tightness of the chimney connection. Insert the piston into the stove, put on and close the lid. Make sure that the cap fits tightly and that the gap between the piston and the hole in the cap is minimal.
Commissioning
. Homemade long-burning potbelly stoves can be placed on an earthen or concrete floor. If the floor in the room is wooden, lay out a brick platform using stove mortar and cover it with a steel sheet. Instead of brick, you can lay a sheet of refractory material and also cover it with sheet metal. It is advisable to line the walls next to a self-made stove with bricks, which will accumulate heat and transfer it to the room.
Firewood is placed into the installed stove, filling the firebox approximately 2/3 or a little more. Place paper on top and set it on fire. After making sure that the firewood is occupied, you can install the piston and put on the lid. The next addition of firewood is possible only after all the fuel has burned out and the stove has cooled down.
Conclusion
“Bubafonya” is not the most effective long-lasting homemade stove. Craftsmen are developing various versions of a wood-burning “rocket” stove, but its manufacture requires precise calculations, hand-made drawings and good skills in working with various tools.
“Bubafonya” can also be modernized, for example, by installing a device that simplifies the unloading of ash.
Video on the topic
:
About the design
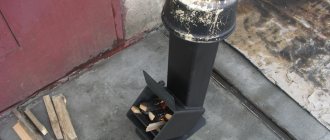
The Robinson rocket stove consists of the following elements:
- Firebox.
- Pipe for removing generated smoke.
The design feature is that the fuel bunker is located not only vertically, but also horizontally, at an angle. The method of placement depends on the desire of the person, the features of the structure in which the finished stove will be installed.
This is what a rocket stove made from a pipe looks like
An option can also be used in which the fuel bunker will be located between the chimney and two elements of a horizontal pipe section. This is done in order to lengthen the surface heated during fuel combustion, thereby increasing the efficiency and time of warming up the room.
Conventional schemes for creating furnaces have:
- A firebox located vertically and connected to the chimney by a piece of pipe (its length can be different). The area connecting the elements is used for cooking (hob).
- A firebox located directly next to the pipe (the diagram is used in the case when the stove must perform the function of a heating unit).
- A firebox fixed at an angle to the pipe (for ease of loading fuel into a special compartment).
The stove can have two fireboxes at once. A special feature is their location on the sides of the structure in a vertical position. Pipes must have a large cross-sectional size. The purpose of the oven is to heat a container with liquid, which is placed on a special stand (this option is used to supply hot water).
Design options
Modern style in the interior of a Khrushchev living room: options and methods of implementation
What should the modern style of Khrushchev's living room be like? Design specialists are responsible for multifunctional, stylish, attractive, cozy and comfortable.
This can be achieved by following a few simple rules. Ceiling design rule - modern trends 2022 advise abandoning multi-level ceilings in favor of simple leveling with plaster or creating original patterns on the ceiling, for example, using suspended ceilings or plasterboard structures.
We decorate the ceiling
Here are some examples of how to decorate the ceiling in a Khrushchev-era living room:
- Laconic white coating;
- Smooth or glossy ceiling;
- Suspended structures;
- Decorating the ceiling with beams is a hit for 2022.
If the living room has low ceilings, you can use floor-length curtains or soft diffused lighting - this will visually increase the height of the ceilings.
