Today we will tell you about the stage at which the turnkey construction of a one-story house was on the 34th day. The main goal is to answer one of the most frequently asked questions - “what is a warm circuit in a house?”
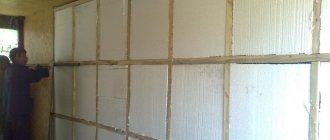
Photo of a finished one-story frame house
Since the project itself was closed three years ago, in this article we will also talk about the changes in our approach to construction technology that have occurred during this time.
Warm contour of a frame one-story house - video review
Main aspects
There are three main aspects that require special control during construction. This:
- Construction of load-bearing structures.
- Organization of the thermal circuit.
- Organization of roofing and gutters.
All other parts of the building can be modernized and remodeled during operation.
The thermal circuit is the basis of the internal climate of the room. To put it simply, a thermal circuit is a sealed box made of materials with low or zero thermal conductivity.
That is, along the entire perimeter of the walls, ceiling, floor and openings, holes in the insulation or the absence of a heat-resistant insert are excluded. And installed doors with windows tend to retain heat.
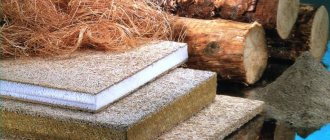
Only fibrous materials will be considered. The so-called "glass wool". These insulation materials have several types of density: soft, medium and hard. The material must be laid with overlapping seams of the previous layer.
For insulation, steam and wind insulation is used.
A special film that allows moisture to pass through in one direction and retains it in the other. The film also saves the cotton wool from being blown away by the wind.
The walls are insulated from the outside or from the inside. Inside, it is customary to use softer insulation from the middle density segment. The vapor barrier is attached on top and inside, respectively, with the moisture-resistant side facing out.
Special attention must be paid to the corners and junctions with the openings of windows and doors where the insulation in a full layer is brought close to the opening and connected to the door or window frame.
External insulation is made with denser medium-density insulation. The vapor barrier is placed only on top, the moisture-resistant side facing out. The situation is similar for windows and doors.
The ceiling can be insulated both from the inside and from the attic. The insulation here is soft and two layers of vapor barrier with the membrane facing out. The guide beams, depending on the material of manufacture, are wrapped only in film (wood), a thinner layer of insulation (concrete) and the same layer as the entire ceiling (iron).
The floor is insulated with dense grades of glass wool. The joists are wrapped or partially wrapped depending on the material. And the film is laid on top, with the moisture-resistant side facing out.
The most important aspect! Always ensure tightness! Along the entire perimeter and openings, the insulation is connected to the thickness of the entire blanket!
Building foundation (ground floor)
Heat loss through the foundation can reach 20% of the total heat loss, so its insulation is of great importance. By using thermal insulation, you can protect walls from freezing, prevent the formation of condensation, and reduce the influence of frost heaving forces.
And most importantly, it is possible to ensure a positive temperature inside the basement premises in winter, even in the absence of heating there.
House walls
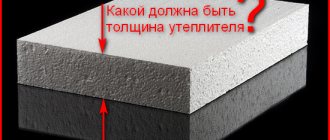
The thickness of the walls is determined on the basis of thermal engineering calculations, which take into account the material, climatic conditions, integrity of the walls, the required humidity inside the room, the purpose of the building and the features of its design (number of floors, type of floors, etc.);
Doors
For this element, the quality of installation is of paramount importance; there should be no large gaps or cracks between the box and the canvas. And the gaps between the frame and the walls must be insulated. The door material is selected based on safety considerations, climatic conditions and aesthetic requirements.
Interfloor ceilings and internal partitions
Interfloor ceilings and internal partitions create additional thermal insulation between warm and cool rooms, retaining heat.
Roof
When constructing a roof, the “pie” principle must be observed, i.e. The following layers must be present: roofing material, counter-lattice, waterproofing, insulation, vapor barrier.
Window
Modern technologies using double-glazed windows can significantly reduce heat loss through these components of the thermal circuit of the house. True, this does not negate the use of traditional wooden windows with ordinary glass; in this case, you just need to pay decent attention to their quality and insulation in the cold season.
Vulnerable unfinished
To begin with, we note: the term “thermal circuit” is not fixed in regulatory documentation; it is a concept from construction practice. But the concept is very comprehensive, which is why experienced builders of individual houses use it.
In the initial stages of construction, the foundation of the building is constructed and load-bearing walls are erected, forming the basis of the so-called thermal loop, which then needs to be “closed” to preserve what has already been built. Any unfinished building is vulnerable to external influences: a freshly built wall can begin to rot, crumble, absorb moisture and ultimately lose its properties. And the foundation may gradually lose its load-bearing capacity, and in this case it is unsafe to live in the house.
We recommend reading: Sewerage diagram in an apartment: wiring arrangement with examples
The biggest threat to an unfinished house is our unkind climate. In summer (if you're lucky with
weather), the box can still stand without much damage, but in the fall or winter such a standstill entails a number of negative consequences. And all wall materials behave differently. Trees are more afraid than others of atmospheric moisture, under the influence of which they can rot and lose strength. Brickwork and concrete monolith are more resistant to rain and snow, but aerated concrete also does not like moisture. An unprotected wall made of aerated concrete absorbs it intensively and is partially destroyed and loses some of its mechanical properties when water freezes in the pores.
However, any building should not remain open to all weather conditions during the autumn-winter period. It should be protected - a set of works should be performed to close the circuit.
Complex of works
To protect from rain and snow you need a reliable roof. That is why, after erecting the walls, you should, without delay, install a rafter system, and lay the selected roofing material on it. Moreover, it is necessary not only to lay the roof, but also to close all technological holes in it.
Many engineering systems, without which a modern house cannot be imagined, require chimneys, ventilation risers, antennas, etc. to be brought to the roof. When a riser or chimney is installed, the sealing of the roof outlet is ensured by the installation technology itself - what if the house is unfinished? In this case, at the stage of closing the circuit, it is necessary to carefully seal the technological holes in the roof, since both moisture and cold wind easily penetrate through them.
Uncontrolled flows of water on the roof are also not the best option. And if the roof is already installed, then it is advisable to install a drainage system. In this case, prolonged autumn rains, which are not uncommon in our region, will not harm the building.
It is also better to install door and window units before the onset of slush and cold weather. If double-glazed windows are not inserted, then reliable sealing of the openings is necessary. For this, thick plywood, OSB boards or other materials are used. Sometimes protective roller shutters are also installed, but they are not included in the mandatory list.
Plastering, painting and tiling work on the facade requires a separate discussion. Here the need for one or another is dictated by the choice of building material. For example, it is advisable to cover the facade of a box made of aerated concrete before the building is mothballed. In extreme cases, the surface can be treated with a hydrophobic solution to protect it from moisture.
If it is possible to protect a brick wall with plaster, it is worth doing this before the onset of cold weather. Although the brick, we note, survives the cold months without much damage. Wooden wall materials with natural humidity also tolerate winter well. Moreover, log houses made of such materials even have to stand for several months for the shrinkage processes to complete. During this period, wood can be treated with antiseptics and water repellents.
The thermal circuit includes a finished foundation and walls, installed windows and doors and an airtight roof. Some builders include internal walls and partitions in it, others believe that the filling of the house is arranged at the next stage of construction. The same can be said about insulation. Some people believe that closing the thermal circuit involves insulating the external walls, while others are postponing this operation.
Thermal contours of houses made of different materials may differ. For example, in a house made of chopped logs, when closing the thermal circuit, you will have to lay a rough wooden floor. But for a brick or aerated concrete box this is not necessary. One of the subtleties is that you should not completely seal the building (oddly enough) for the winter. Ventilation of the internal space must be organized to prevent the accumulation of moisture and the formation of ice with its subsequent melting. Such ventilation should not be spontaneous so that the winds can flow freely inside, but air exchange with the environment must be established.
When the contour is closed correctly and the interior space of an unfinished house is reliably protected from atmospheric influences, the building will stand until the next season with virtually no damage. The main goal of these measures is to eliminate or at least minimize damage to the load-bearing structures of the house.
Separately about communications
At the stage of general construction work, internal communications, as a rule, are not installed. Only external communications are provided and, in some cases, brought inside the building. However, it is necessary to take into account the presence of utility networks in the house, including during circuit closure.
The outlets of chimneys and ventilation risers to the roof have already been mentioned. However, there is also running water and sewerage. In an unfinished box, these communications do not function, but the entries of external pipelines are usually already made. A main water supply pipe can be inserted and temporarily plugged, as well as a sewer pipe laid to the septic tank on the site. And all these inputs should be carefully sealed. The septic tank also needs to be protected from external influences. Then in the new season the installation of water supply and sewerage systems will take place without problems.
We recommend reading: Plumbing adjustable wrench - types and selection rules
Communications
Typically, communications are not carried out at the stage of general construction work. Only external communications are installed and sometimes lead into the interior of the room. But we also shouldn’t forget about the presence of utility networks. Including when the circuit is closing.
The intricacies of protecting technological openings for chimneys and risers on the roof have already been discussed above. But you also need to take care of the water supply and sewerage. They are not yet operational in an unfinished building, but the connections for external pipelines have already been laid. The main water supply pipe has probably already been installed and temporarily plugged. It may be that the sewer pipe outlet is also ready and led to the septic tank in the area near the house. All terminals must be thoroughly sealed. The septic tank also needs such protection from external factors. If you carry out this work, then next season it will be easy to install sewerage and water supply.
What is a home heating circuit?
The thermal circuit of a house made of laminated veneer lumber must be installed taking into account all the features of the difficult Russian climate - dampness, cold winter, wind. Every builder, if he is a professional, will say that the thermal circuit must be given great importance. If technology was not followed or material of dubious quality was used, no matter how good the walls were, such a structure will bring you many problems.
Agree that you don’t want your log house to be drafty and cold; no one wants high humidity at home. Of course, when you contact us, you don’t have to worry about this. Our wooden houses are not afraid of such problems.
What is actually included in the thermal circuit?
Firstly, this is the foundation, including the ground floor.
Secondly, these are the walls. Glued laminated timber is one of the best building materials; the walls of houses made from it do not crack or blow out.
Thirdly, these are windows. Windows can be either wooden or plastic. The most important thing is that the windows are reliable. It should also be noted that laminated timber has an important mission here. After all, laminated veneer lumber is subject to minimal shrinkage. Deformation of windows in houses made of laminated veneer lumber does not occur. They retain heat reliably and are an important part of the thermal circuit.
Fourthly, these are doors. As with windows, doors can be installed as tightly and correctly as possible.
The final component is the roof, as well as interfloor ceilings and internal partitions.
The concept of a thermal circuit does not include a terrace, veranda, garage, porch, carport and balcony.
Remember that the thermal circuit is the basis of the entire timber house.
Construction and cost of a warm circuit
Construction of the warm contour of the house is the main stage of construction. At the end of this stage, you already have a House in the generally accepted concept of this word. It has a roof, walls, windows, a door - a sealed outline of the house . Why is it called warm? Because now the building retains heat, it can be heated. Before proceeding to this stage, you need to clearly understand that you cannot leave the construction of a warm circuit unfinished. Therefore, you must correctly calculate your finances and agree in advance on the supply of necessary materials. So, at the input we have a project for the future house and the foundation. We begin the construction of walls.
The photo shows the first day of construction of the warm circuit . A team of builders lays out the first crown of the frame on the foundation.
Walls
But first the wall kit needs to be produced. The wall kit is prepared by the manufacturer within approximately 1-2 months. To begin production, it is necessary to conclude an agreement and make an advance payment. The walls of wooden houses can be made of the following materials: laminated veneer lumber, simple timber, dry profiled timber, chopped and rounded logs. Detailed information about each type of material is available at these links on our website. There is also information about methods for assembling walls of each material. About their pros and cons.
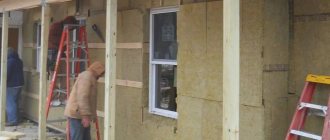
The photo shows the construction of a warm circuit in full swing. This house is made of laminated veneer lumber. Wall thickness 200 mm. The assembly of the walls took three weeks.
Roof of a wooden house
After assembling the walls of the house, it's time to start making the roof . This must be done without delay, so you need to take care of the materials in advance. You will need lumber with a thickness of 50 mm, 25 mm; waterproofing, vapor barrier, insulation, fasteners, roofing material, etc. All this will be in your estimate of materials. the roofing and roofing pie still be done by experienced professionals, because there are many nuances, pitfalls and tricks in this matter. The choice of roof type and insulation type depends on you.
The photo shows a roofing pie prepared for pumping ecowool insulation. The roof sheathing is made to resemble metal tiles with a pattern pitch of 350 mm. In general, the roof manufacturing technology is as follows: Rafter system. Waterproofing, vapor barrier. Counter-lattice. Lathing. Hemming the cornices. Roofing. Drainage system.
Windows and doors
Windows and external doors can be installed immediately after roofing work is completed. It is clear that you need to order them in advance. There are some nuances to installing windows and doors in a wooden house. A competent installer must take into account the process of wall shrinkage. For a wooden house, both wooden and plastic windows are suitable
The photo shows the facade of a house made of laminated veneer lumber , made according to our project “Bagaevo”.
We recommend reading: Calculation options for communal heating meters
Floors
The ceilings between the first and second floors in a wooden house are also made of wood. For logs, lumber is usually used with a height of 150-200 mm and a thickness of 50-200 mm, depending on the span of the premises.
The ceiling
is insulated to the height of the log. Waterproofing is placed on top of the insulation, and vapor barrier is placed below. After this, the rough ceiling and floor are installed. The ceiling of the first floor can be made either wooden or monolithic. Many people use the “warm floor” system. Read more about floors and floors in wooden houses in the article “Installation of floors in wooden houses.”
Single-circuit gas boiler for heating system
Single-circuit gas boilers provide uniform heating of the room.
If we draw an analogy with dual-circuit ones, then the former will be much more economical. It is also worth noting the ease of installation and assembly of the device. This type of boiler is classified according to different parameters:
- According to the installation method - wall and floor. More advanced and powerful are floor-standing boilers, which also have autonomous operation.
- Based on the principle of using thermal energy. They are divided into condensation and convection. In the first type, an additional heat exchanger will be responsible for thermal energy. In the second, heat is released when the air-gas mixture is burned.
The main characteristics of boilers are:
- Power. The most important parameter for choosing a boiler. Typically 12-45 kW. The area of the heated room depends on the power. If you take a boiler of maximum power, the area can reach 250 sq.m. The rate of heating of the rooms also depends on this parameter.
- Combustion chamber type. There are open and closed types. In boilers with an open combustion chamber, a vertical chimney is installed. In this case, combustion products are removed naturally. In a closed one, it’s the other way around; exhaust gases are forced out. An additional turbine removes waste, and a coaxial chimney helps air circulation.
- Heat exchanger type. Based on the type of heat exchanger, they are divided into bithermal and monothermic. The first type contains two circuits, one inside the other. Such boilers are much cheaper, but less durable. Monothermal ones have two circuits that are located at some distance from each other, which increases service life.
How to choose a boiler?
The first thing you need to pay attention to is the boiler manufacturer. If we consider the best options, then these are German manufacturers. It’s true that their price is the most expensive, which corresponds to their quality. Floor-standing boilers are much more powerful than wall-mounted ones. Boilers with a closed combustion chamber will cost more. You also need to pay attention to accessibility for use, whether the device can operate normally.
Important stage
Closing the thermal loop is a critical step in building a house. We can say that in this case, enclosing structures are built using energy-saving technology. Some developers say upon completion: if you install a boiler or stove, you can already live in the house. And this is a completely fair statement. After the thermal circuit is closed, we can consider that not even half the job is done, but more. In such conditions, it is much more convenient to do both interior decoration and installation of home engineering.
Connecting a single-circuit boiler to the heating system
The boiler is connected to the system using several circuit diagrams. Which of them will be used depends directly on the type of system itself - open or closed, natural or forced, the presence of heated floors, and so on. The type of single-circuit boiler also plays a significant role.
The peculiarity of connecting this type of boiler to the system is that only two pipes can be connected to it. One will serve to supply coolant to the boiler, the other will serve to exit the already heated liquid.
House made of timber for finishing - cold circuit
This is the name given to a building installed on a foundation and under a roof. The package includes:
- log house made of timber (natural moisture, dry or glued);
- rough floor;
- ceilings – interfloor, attic;
- rafter system and roofing.
After completing this stage of work, the building can be mothballed, postponing the final operations for the required period.
Stopping construction at the moment of completion of the cold circuit is typical for the construction of buildings made of timber with natural moisture. In any case, this lumber needs time to shrink. If you do not wait the proper time, deformation and reduction in the volume of the beams will lead to damage to door and window frames and finishing materials.
Scheme of a single-circuit heating system
The operating diagram of this system is very simple:
- The coolant is heated by the boiler and enters the distribution system
- The heated liquid flows through the pipe to the first radiator
- Then, having passed through the first radiator, the coolant enters the next ones in turn.
- After passing the outer radiator, the liquid enters the boiler. The cycle repeats.
Diagram of a single-circuit heating system
This operating scheme operates on a forced or gravitational principle. In the first case, the pressure in the system is provided by a circulation pump. It is installed between the outer radiator and the boiler. The pump builds up pressure in the pipes, so no additional slopes or cuts are needed. Systems with bottom wiring are assembled using this principle. The pipe stretches almost to the floor along the entire perimeter of the heated premises. This system is very easy to assemble. In addition, the interior does not suffer from the presence of this system.
Thermal circuit - how does it differ from turnkey construction?
We have already figured out what a cold circuit is. How is thermal different from it? This is just the next stage of readiness. The warm circuit, in addition to the elements listed in the previous list, includes:
- installed door and window units;
- insulation provided for by the project;
- overhang trim;
- facing of gables.
The set of options may vary, but the essence remains the same. What is the difference between a ready-made heating circuit and a turnkey house? The latter option also involves carrying out all stages of finishing work inside and outside, in some cases - carrying out communications and even installing built-in furniture.
The operating principle of single-pipe heating
The principle of single-circuit (single-pipe) heating consists of a serial (linear) connection of radiators, the coolant (water) moves through one pipe. The inlet of the single-circuit heating radiator pipe is located in the upper part, the outlet in the lower part. The pipe passing under the radiator has a smaller diameter than the main one and is called a bypass.
We list all the elements that make up a single-pipe or single-circuit heating system:
- boiler;
- radiators;
- pipes;
- expansion tank (the main purpose of this element is to compensate for the expansion of water when heated);
- bypasses;
- shut-off valves;
It is thanks to the presence of bypasses that the presence of a second main pipe, through which water flows in the opposite direction at a different temperature, is not necessary. The presence of bypasses makes it easier to repair the installation. But here it is important to take into account when using a two-pipe system, the coolant approaches each radiator at the same temperature, the lower outlet from each radiator is connected to the lower coolant pipe going to the boiler.
When choosing a single-circuit heating system, water approaches each subsequent radiator with temperature losses. This should be kept in mind, lay the line in such a way that the radiators of the rooms where the air should be heated as much as possible are connected first, and the very last radiator is located in the room where the least heat is required.
This disadvantage can be compensated for by certain manipulations, for example:
- increase the heat capacity of the latest radiators;
- increase the temperature on the boiler itself.
The disadvantage of the latter option is that the temperature in the nearby room will be too high. Compensation will be quite expensive for the owners of a country cottage, and energy losses will increase.
Lateral or one-sided connection
Lateral, or one-sided, connection allows for uniform heating of all sections of the device.
For connection, the supply and discharge pipelines are connected on one side. Most often, this connection is used for heating installations with overhead wiring.
Heating heat transfer when radiators are connected sideways, with supply from top to bottom, is 97%. With the reverse movement of the coolant - from bottom to top - this figure is 78%
Installation of a single-circuit heating system
The construction of a climate network with one pipeline is carried out in the following sequence:
- The boiler is being installed . For obvious reasons, it must be mounted at the lowest point of the system. The greater the height difference between the radiator and the heater, the better the heat exchange in the system.
The boiler must be located below the level of the radiators
If you do not have the opportunity to install the unit in the basement, you need to equip it with a pit cast from concrete and lined with ceramic tiles.
Note! If you decide to make a system with forced circulation, you don’t have to resort to such tricks. However, by placing the heater in the manner described above, you will make the heating system more independent of public utilities.
- Radiators are being installed . Here you need to strictly observe the horizontal and vertical, otherwise mineral deposits will accumulate in the batteries, which sooner or later will clog all the channels. Because of this, you will have to either clean or change the devices.
It is also necessary to maintain the distance between the battery and the structural elements of the building. Violation of the technology for hanging the battery will result in poor air circulation around it. This will negatively affect the performance of the device.
When installing batteries, keep an eye on the level.
- Pipeline installation . Here you need to decide on the pipe material. The most common climate networks are made of polymer parts, however, if part of the system is a solid fuel boiler, it is better to prefer steel ones. The mentioned unit heats the coolant to a temperature exceeding 95 degrees Celsius, which is very harmful for plastic pipes.
Pipes in a single-pipe system must be laid at a slope
- Installation of additional elements. Electric pumps, control and regulating equipment, an expansion tank, air valves, and so on are installed.
- The last stage of work is crimping . To carry it out, it is better to invite a qualified worker with a special pneumatic device.
The final stage of work is heating pressure testing
Thermal calculation
Indoor comfort depends not only on the layout, but also on the amount of thermal energy that the batteries release to the air in the rooms. Therefore, in order not to freeze in winter, you need to make the correct thermal calculations. By the way, this is also indicated by the instructions enshrined in the current SNiP.
Thanks to the correct calculation, you can choose:
- boiler of the required power - a weak one will not be able to heat the house, a powerful one will burn expensive energy resources in vain;
- radiators of the required area - this will help to significantly reduce the cost of their purchase.
Calculations can be made independently (using a special computer program) or contact a specialized engineering company. The second option is more expensive, but this way you will be sure that the data provided to you is correct.
Before installing heating, you need to perform a thermal engineering calculation of the structure
In addition, the engineers of this organization will also prepare a diagram of the heating circuits, drawn on the provided plan of your house (apartment). This will greatly facilitate installation and help you buy the right amount of materials.
Vapor barrier
In cases of insulation “from the inside,” a vapor barrier is required to protect the insulation and wall structure from steam penetration. Often, when building a private house, the question arises about “should the walls of the house breathe?” The process of moisture transfer occurs together with heat transfer from the internal warm surface to the external cold one. It is so slow that the calculation usually takes into account the annual cycle, during which the structure should not accumulate moisture. If the insulation is not designed correctly, moisture accumulation will occur gradually and may only appear several years after completion of the work.
Almost all materials have the ability to transmit water vapor, but it is different for everyone. The main wall materials are weakly vapor permeable: brickwork (ceramic brick) - 0.11 mg/(m*hour*Pa), wood (across the fibers) - 0.06 mg/(m*hour*Pa). In order not to disrupt the vapor permeability of the system, in this case, even more “breathable” thermal insulation materials should be used for finishing - mineral wool with an index of 0.6 mg/(m*hour*Pa). The use of pressed and extruded polystyrene foam (0.05 and 0.03 mg/(m*hour*Pa), respectively), as well as various polyurethanes (0.05 mg/(m*hour*Pa)) can lead to moisture accumulation in the structure and the formation of mold pockets in the interior. The walls of panel houses and most foundations are made of reinforced concrete (0.03 mg/(m*hour*Pa)). This material can be insulated with non-breathable thermal insulation.
When a reinforced concrete panel is sheathed from the inside with stone wool, it is imperative to perform a vapor barrier, since the barrier to the structure in this case will be the wall material itself. Moisture will accumulate in the spaces between it and the insulation, reducing its effectiveness and strength.
The vapor barrier, like the thermal insulation layer, must form a closed loop; the longitudinal and transverse overlaps of the films must be taped with special butyl rubber tapes. Ordinary office (or even “construction”) tape is not suitable for these purposes due to its low durability. It is the violation of the tightness of the vapor barrier (or its absence) that is the most fatal mistake when insulating premises from the inside.
Violation of the tightness of the vapor barrier
Using stationery tape
We analyze the single-circuit heating scheme in a private house
When designing a detached property for living, one of the points is its heating. The same question arises when purchasing a ready-made structure. A single-circuit or multi-circuit heating system is installed in a private house. Others choose multi-circuit. It all depends on the size of the house, the type of system and the needs of the owner. The first option is most often used, since it is easy to install and requires fewer components. A boiler is used for heating, and water is used as a coolant.
Types of wiring
There are two ways to install a single-circuit system indoors:
- horizontal;
- vertical.
Thus, horizontal wiring involves the use of a minimum number of pipes. The components are connected in series. This may cause air pockets. In addition, there is no possibility to regulate the heat flow.
Vertical wiring involves laying a central line through the attic, from which pipes extend to each radiator. This method allows water to be delivered to the batteries at the same temperature. The main feature is a common riser for radiators, regardless of the number of floors of the building.
Features of operation
Boiler room in the house
In a single-circuit system of a private house, they try to use pipes of different diameters. This avoids disturbances in coolant circulation. If for some reason pipes of the same diameter are used, please note that the hydrodynamic pressure in the batteries will be higher than on the return line. This will definitely affect the deterioration of heating performance as a whole.
What can be done in this case? There is only one way out - install two taps, one of which is on the bypass, and the second is on the inlet pipe from the water supply.
The temperature of radiators can be controlled and regulated by installing a control valve on each device. It is better for this type of shut-off valve to be a three-way valve. It usually replaces two simple taps at once.
Autonomous heating schemes
There are a large number of schemes by which you can create autonomous heating for your home, but among the main ones there are three that are used most often:
- Traditional. With this scheme, the coolant (usually liquid) moves around the house using a pipeline. Such systems often use water, but other types of liquids are also often found, such as antifreeze, which prevent the system from freezing in cold weather.
- Air. The air system is designed almost the same, with one exception: in this case, the heat carrier is not liquid, but heated air.
- Electric. The use of electric heating devices does not require the presence of a pipeline, since heating occurs on the air-to-air principle. Electric heating devices include convectors, infrared radiators, etc.
Technical characteristics of single-pipe heating
A single-pipe house heating circuit is a main line to which radiators are connected in series. The coolant passes through all heating components. The heat exchange cycle ends when the coolant reaches the last radiator.
Schematic diagram of single-pipe heating
This nuance is the biggest disadvantage of such a heating system, but there is an alternative solution. To prevent this nuance from having negative consequences, you need to install as many batteries as possible in the room or install special taps on them. This method will allow the entire system to be balanced, that is, the correct adjustment of the single-pipe heating system will be carried out.
How to choose a distribution manifold?
The combs have a similar design - they have standard fitting thread parameters and internal diameter. The connection can be made using several types of pipelines and fittings. The difference may be the permissible number of fittings - it varies between 2-12 pieces. The combs can be easily combined into groups to provide the required number of bends.
Heating distribution manifold designed for servicing underfloor heating
Distribution manifolds intended for servicing underfloor heating must have mechanisms for regulating the intensity and temperature of the working flow on each branch. These devices can be manual or automated. In the case of radiators, such elements are not necessary, since control can be carried out directly on each battery.
The choice may be influenced by the base material:
- Stainless steel manifolds are sold in the high price segment, but the price is justified by the quality - the products have the longest service life among analogues. The combs can withstand increased pressure, they are equipped with air extractors, end cap nuts for servicing the ball valve, and control valves;
- budget polymer products are characterized by insufficient strength; it is not advisable to use them in heating systems, since they do not have the necessary thermal expansion characteristics;
- The most popular brass series are inexpensive and at the same time functional.
If you have certain skills, you can assemble the distribution manifold yourself, but if you use metal, you must minimize the likelihood of rust entering the system.
What is a single-circuit heating system - diagram and installation features
The basis of a modern heating system
The heating system in private houses differs significantly from the schemes of city apartments. And the point here is not only that the coolant is supplied from different devices or equipment. The boiler piping and piping layout itself can be varied. And in each case, individual needs must be taken into account. Currently, two schemes are used for the heating system - single-circuit and double-circuit. Let's look at the first one and determine why a single-circuit heating system is considered a simple and easy-to-assemble circuit.
Let’s immediately make a reservation that it works according to the principle that determines its name. The coolant in it moves from the heating boiler through pipes to radiators, which are installed in a sequential order. After passing through all the devices, the coolant returns to the boiler. Everything is simple and uncomplicated. But it is economical in terms of the number of pipes used.
However, there is one drawback in this scheme - the last radiators in the chain receive the least thermal energy, since the coolant reaches them already cooled. True, there is a way out of this situation - to add additional sections to the last radiators, thereby increasing their heat transfer. There are several other ways to balance the heat in all rooms. For example, install shut-off valves on the batteries, with the help of which it will be possible to regulate the flow of coolant into the first heating devices. By reducing the supply to them, you can increase the thermal energy of hot water in the last radiators.
Bottom connection of radiator with pipeline
Bottom connection is not the most efficient heating scheme. However, it happens quite often, especially when the main pipeline is hidden under the floor.
The inlet and outlet pipes are connected to the lower pipes located on different sides of the radiator.
The heat transfer rate with bottom connection of radiators is 88%