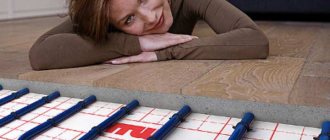
Heating systems used in everyday life have different technological capabilities and differ in efficiency. According to many indicators, “warm floor” heating systems take first place in popularity today. In many ways, this attitude towards this heating method is caused by the increased pace of small housing construction. Country houses, cottages and country houses are increasingly becoming objects of permanent residence. Against this background, residents and owners of such housing strive to achieve the most comfortable conditions in their apartments. Laying a water-heated floor is completely capable of satisfying such aspirations.
Heating built into the floor is convenient in all respects. In addition to the high efficiency of the method of heating rooms, such a system opens up wide possibilities for the design of the interior space of residential buildings. However, in order to achieve an acceptable temperature regime inside a residential building and make the heating equipment operate optimally, it is necessary to follow the installation technology and correctly configure the control mode.
Laying a water heated floor is a sequential process in which each stage has its own meaning and sequence. The decisive stage of the entire work will be a correctly made concrete screed for a warm water floor. What is special about installing heated floors at home? Which element of the floor design should you focus your attention on?
Review of characteristics of different types of substrates
| Name | Properties and characteristics | Price per m2 |
| Self-adhesive foil polyethylene | Thickness 8 mm. Used on particularly difficult surfaces. Excellent reflectivity and hydro-, sound insulation. | 99 rub. |
| Single-sided polyethylene laminated | Thickness 8 mm. Good thermal insulation and waterproof. | 58 rub. |
| Foamed polyethylene Tepofol NPE | Thickness 2 mm. Average heat and noise insulation. | 8 rub. |
| Foiled polystyrene | The thickness varies. With markings. Excellent heat-insulating and heat-reflecting properties. | 150 rub. |
| Tuplex backing | Thickness 3 mm. Silences the sound of footsteps. Maximum waterproofing and reflective thermal insulation durability. | 70 rub. |
| Heat-reflecting underlay for heated floors with lavsan coating | Thickness 3 mm. Heat, sound, hydro, vapor barrier. Chemically stable. | 75 rub. |
| Cork backing | Good sound and heat insulation. Environmentally friendly. | From 60 rub. |
You may notice that the price of underfloor heating depends on:
- the material from which the substrate is made;
- substrate thickness;
- quantity and quality of its characteristics and properties.
Which substrate is better to choose?
When choosing a substrate for a warm floor, first of all, you need to pay attention to the thickness and quality of the substrate. Of course, it is better to choose a substrate with the maximum number of positive properties and greater thickness, since the effectiveness of certain functions depends on it
A good substrate will cost from 70 rubles per square meter, but it will perform all the necessary functions and will delight you with its efficiency and durability. A high-quality substrate for a water-heated floor should have the following properties:
- have high efficiency of waterproofing and thermal insulation;
- high reflectivity must be present;
- be environmentally friendly;
- the material from which it is made must be resistant to temperature changes;
- have soundproofing ability;
- be resistant to deformation;
- do not cause installation difficulties.
The most suitable and high-quality substrate is considered to be polystyrene foam, because it meets all the necessary characteristics. Experts recommend it first of all.
Pros of using mats
The mats are a modern heat-insulating product, manufactured using the latest European technologies, and meet the latest quality and safety requirements. They combine all the positive aspects of existing insulation materials. At the same time, there are no disadvantages inherent in other heat insulators.
Positive aspects of mats:
- high performance indicators:
- increased thermal and sound insulation;
- the possibility of laying the floor “pie” in any way - with or without a screed;
- not subject to deformation during prolonged use;
- ease of installation - equipped with a locking mechanism;
- have markings (most models) - simplifies the process of laying the contour;
- do not rot and do not form a beneficial environment for the proliferation of microorganisms;
- do not absorb water;
- do not harm humans - do not emit toxic substances;
- able to withstand high temperatures - from +180 to -180 degrees;
- service life up to 50 years.
For your information! Polystyrene without treatment is flammable, so when producing insulation from it, fire retardants are added, this makes the product non-flammable.
Such products are marked “C”.
Installation diagram on a concrete base
Scheme of a water heated floor on a concrete base
Installation of water heated floors with concrete screed
Installing water heating on a concrete base contains several “layers of the cake”.
Thermal insulation layer
It is laid on a cleaned base; if it has large irregularities, then a screed must be made first. It is advisable to use foam concrete, it reduces unproductive heat losses. The thickness of the thermal insulation must be more than three centimeters, the density of the thermal insulation must be at least 35 kg/m3.
Thermal insulation layer
It is recommended to use polystyrene foam or pressed mineral wool of increased physical strength in the design. There are special mats for water floor heating systems; they have installed clamps that make the process of laying pipes much easier. If the room is large, the thickness of the insulation increases.
Pipe laying
Fastening underfloor heating pipes
On average, per square meter of room you will need approximately five linear meters in increments of 20 cm. These figures may vary taking into account the design power of the heating system.
Pipe laying
After connecting all sections, it is imperative to carry out hydrotests for the tightness of the connection. To do this, plug one end of the pipe and connect a water pump to the other. The water pressure during testing should be twice the operating pressure. Such tests will allow timely detection and elimination of leaks.
Damper tape for heated floors
Damper tape and insulating film
A damper tape is provided along the contour of the room, which compensates for thermal expansion of the upper cement screed. The diagram provides a layer of waterproofing between the pipe contour and the screed. For these purposes, you can use cheap polyethylene film with a thickness of at least 30 microns.
A metal or plastic mesh for reinforcement is laid on top of the waterproofing.
Insulation film and mesh
The thickness of the screed is 3–10 cm above the surface of the pipes. The screed is done in the usual way; you can use wet or semi-dry material. After cooling, the final floor covering is installed.
Screed over water heated floor
The diagram shows all the layers of the heated floor, indicating the materials of manufacture and linear parameters.
Why is a thermal insulation substrate required?
If the heated floor is installed according to all the rules, then its efficiency allows the system to be used as the main heating, although not for all rooms and not in all climatic zones. A poor-quality substrate for a warm water floor reduces the heating efficiency so much that it can only be used as an additional one.
Diagram - layers of heated floors
The diagram shows the substrate under the pipes
The presence of a high-quality substrate can reduce unproductive heat losses by 20% or more. This element is especially important on the first floors - thermal energy goes into the ground. On the second and higher floors, the lost heat at least warms the lower rooms, but this is little consolation.
The substrate is necessary for heat conservation
Energy is more evenly distributed across the floor area. There are no areas too cold or too hot. The negative impact of high temperatures on finishing flooring and furniture is minimized.
Without a backing, heat is distributed unevenly
Financial losses are significantly reduced not only for floor heating in winter, but also for its installation and maintenance. A substrate with bosses allows you to try several options for laying pipes, while temporarily fixing their position may not be necessary. Installers have the opportunity to choose the most convenient places to connect the system and install sensors for monitoring operating modes in optimal places. Due to this, control of the water heating system becomes more reliable and accurate.
The support with bosses makes the pipe laying process easier
The thermal insulation substrate, in addition to its main tasks, serves as an effective sound insulator. This is a very important factor for old-built apartment buildings; they have very low heat saving rates, losses can be 40–50%. Another additional function of some types of substrates is vapor and waterproofing.
The substrate is a good insulator
Laying pipes and heating system
Heated floor pipelines are:
- copper;
- metal-plastic.
The first option is more difficult to implement, but also more reliable and efficient. But metal-plastic is often chosen due to its low cost.
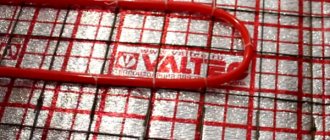
On insulation with a reflective film, the pipes are fixed with fastening wire, staples or special tape. These fastenings should be located at a distance of 0.5–1 meter from each other.
Most often, pipes are attached to a reinforcing mesh. But if, instead of reinforcement, fiber is chosen for the screed, or if a flooring made of wood boards is provided instead of the latter, then staples will have to be used to fix them in the insulation. However, screwing or driving in fasteners up to and through the waterproofing when installing a water underfloor heating system is unacceptable.
Options for laying water floor pipes
The waterproofing underlay must remain undamaged and continuous during all manipulations. If it is damaged and a heated floor is made on a leaky layer of water insulation, then if there are leaks in the system, the rooms on the floor below will have to be repaired immediately. Plus, you shouldn’t forget about constructing a screed made from liquid concrete mortar. Without waterproofing from below, it itself or moisture from it may well seep through the ceiling.
After laying the pipes and connecting them to the collector, it is necessary to carry out hydraulic tests by supplying water to the system for a day at a pressure of 5–6 bar. The pipeline must not be closed until the leak check has been completed.
Step-by-step instruction
Selecting and connecting the collector and boiler
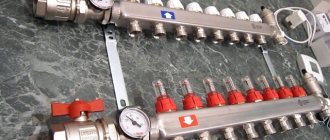
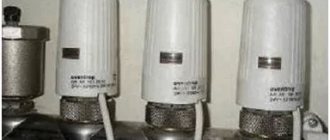
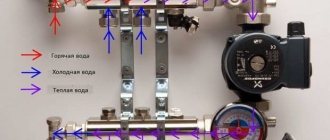
When it is clear how many circuits will be connected to the manifold, you can begin to select its length and decide on the number of valves, but also take into account that in order to be able to regulate the warm coating mode, you will need a pressure sensor, air vents, and drains.
The manifold with its lower pipe should be located at the same level as the supply pipeline, slightly above the floor level.
There are specially developed plumbing standards for the assembly of this unit. It is best to hide the collector in a niche in the wall, approximately in the middle in relation to all the contours.
The boiler is selected based on its power sufficient to heat water, plus a certain power reserve. The total required power is determined as follows: 20% should be added to the sum of the circuit powers for the reserve.
For greater efficiency of the system, it is advisable to install a circulation pump; in most boiler models, the pump is already included in the kit, capable of providing hot water to a one- or two-story house with an area of 120-140 m2. For large areas, additional pumps are needed.
Laying a heated floor pipe
This is the most interesting part of our instructions. There are several ways to install a water heated floor. We'll talk about them below.
Laying method: spiral or snail
The most popular and reasonable way to lay out a heated floor. Allows you to achieve uniform heat distribution in each circuit due to the fact that the pipes alternate according to the principle of one warmer, the other colder. If you look at the design diagrams of a water floor, they most often show a snail.
They unfold quite simply. First, you begin to lay out the pipe around the perimeter of the room (or conditional contour), turning it closer and closer to the center. In this case, you need to leave space in order to later return the pipe from the center to the base of the perimeter and then connect it to the return of the collector.
Therefore, if your laying step is 15 cm, then you start laying out the contour in 30 cm steps to the center, and then return the pipe just between the previously laid out pipes and the step is already 15 cm. It sounds complicated, but the picture reflects the essence more clearly.
We recommend sticking to this installation method in most cases.
Snake laying method
This installation method heats the floor less evenly, but is ideal for use in small spaces. It is often used in a situation where you have rolled out a contour with a snail and you need to capture part of a small space with the same contour. Then you already resort to installation with a snake.
There is also a “double snake” method of laying heated floors. This option is close to the “spiral” method in terms of heat distribution. It can also be used in practice
Step of laying the heated floor pipe
The distance between the underfloor heating pipes can be generally any, provided that it is correctly calculated in the project. In some places we have steps of 25-30 cm, and with such a step the room warms up perfectly.
But if you don’t have a heating project (which most often happens), then the underfloor heating pipe needs to be laid in increments of 15 cm in the main areas of the house, and in the edge areas (near the external walls) it needs to be reinforced in increments of 10 cm. In the vast majority of scenarios, this step enough for the eyes
Heated floor contour length
The length of the heated floor pipe can again be any, if this length is calculated in the project. Otherwise, stick to the contour size of 80-90 meters. If the length is exceeded, then it's okay. But it’s still better not to exceed. Also try to calculate the contours of the heated floor so that they are similar in length. Then you won't have to balance them.
Heated floor pipe diameter
You will be surprised, but you can also use any pipe diameter, but 16 mm is already enough for you. With all this, a small pipe is quite easy to work with. We see no point in resorting to other diameters.
How to lay
Let's start with the fact that the flooring of special film waterproofing is a mandatory installation stage, regardless of the type of mat. Along the bottom of all walls of the room it is glued with damper tape.
The next layer of mats is laid using a locking system, and if the thickness and weight are small, using the adhesive method.
Attention
With this installation, you cannot use metal fasteners, as this may damage the integrity of the thermal insulation layer and waterproofing.
The assembly joints of the foil plates are taped with tape. If necessary, mark the surface for water pipes and proceed directly to the installation of heating circuits.
Installation Rules
Installation of the underlay under a warm water floor is carried out on a flat surface
In this case, the material from which the substrate is made is important. All work on the installation of the substrate can be represented in the form of a certain algorithm of actions:
- The surface of the subfloor is prepared. It eliminates differences and all irregularities. It is recommended to use a self-leveling mortar mixture for this;
- the floor level is checked, a diagram for laying water pipes is drawn up;
- the substrate is laid. At the same time, its reflective layer remains on the surface. The substrate is laid out in an even layer over the entire surface on which it is planned to install the thermal water floor system. Docking areas must be additionally insulated with mounting materials - tape or adhesive tape;
- if the lining is assembled from several elements, then they are laid tightly, the joining seams are taped with tape with a metallized base. This will improve the steam and waterproofing properties of the floor.
The substrate under the water heated floor is laid in an even layer over the entire surface
. Having completed all of the above measures, you are allowed to begin installing the heating system itself. Experienced specialists recommend laying pipes exclusively on reflective coatings.
If we consider the general requirements, then the substrate for a warm water floor must fully comply with the thermal capabilities of the system and represent an additional factor in their improvement.
After studying all the characteristics of water floor underlays, you can make the right choice to keep your home warm.
OSB or chipboard boards
They have been used for a relatively long time and allow the installation of heating pipes of increased diameter. They have high levels of mechanical strength and are of the average level in terms of heat-saving characteristics. A prerequisite is that the slabs must be moisture resistant. The P5 chipboard substrate can withstand cement screed.
Warm water floor in a prefabricated dry floor screed
OSB board
Practical recommendations for choosing a substrate for various floor coverings
Professional builders recommend selecting a specific type of underlay, taking into account many existing factors, one of them is the type of finishing flooring. Let's look at a few of the most common options.
- The final coating is ceramic tiles. The tiles should be laid on a cement-sand screed; this creates significant additional loads on the substrate. It is recommended to choose materials with high load-bearing capacity: extruded polystyrene foam or OSB boards. In polystyrene foam, the pipes of the heating system can be hidden in special grooves - the overall height of the heating cake is reduced. Ceramic tiles conduct heat well, are not afraid of heating to high temperatures, and by all indicators are considered the best option for water-heated floors.
- The final coating is laminate. It is light in weight and can be used under any type of substrate, including the softest ones. The main requirement is maximum heat saving rates. The fact is that laminate itself does not conduct heat well; if heat saving is ineffective, then energy losses increase significantly, and water floor heating becomes unprofitable.
- The finishing coating is linoleum. Very soft material, laid on special plasterboard boards with additives to increase strength. There are options for mounting on sheet plywood or OSB, but these materials do not transmit heat well from the system, which reduces its efficiency. Gypsum is heavy, the substrate must have increased physical strength. Cork, foam or polystyrene foam are recommended.
Options for using natural boards or parquet as a finishing coating for heated floors should not be considered. It is not recommended to use such schemes for arranging water heating; there is no return, and many problems arise. During prolonged use at elevated temperatures, natural wood will certainly dry out and cracks will appear on it. In critical situations, they will need to be completely replaced with dismantling of the heating system. In addition, natural wood is considered an excellent heat insulator; accordingly, the heating system will work on its own, with minimal impact on the microclimate.
The substrates may have standard grooves for laying heating system pipes or protrusions (bosses). The second option is considered universal; it does not limit the type of system outline; during installation, you can choose any position, taking into account the geometric features of the room. Individual slabs are assembled into a durable structure using a tongue/groove system and may have additional fastening locks. To facilitate installation, some manufacturers provide approximate layout diagrams of heating pipes on the outside of the substrates.
Which substrate is better to choose?
Review of characteristics of different types of substrates
Basic parameters when choosing
Today, manufacturers offer a wide range of underlays for warm water floors. But the right choice can be made by knowing the main requirements for substrates.
- An indicator of elasticity and compressive strength. The heating water system is distinguished by its solid weight. The substrate under it should not sag, its thickness should not be reduced. When the load is removed, the material from which the substrate is made should return to its original form.
- Resistance to negative factors. The stability of the characteristics of the substrate depends on the quality of the material.
- Low thermal conductivity. It is considered one of the main conditions. The desired requirement in this case is a minimum thickness of the substrate in order to minimize the thickness of the entire heating system.
- Resistance to prolonged contact with moisture. When using a water heated floor, emergency situations arise in the form of a leak of the thermal fluid. And although during installation measures are taken to increase the reliability of the system, an additional obstacle for water will not be superfluous. Another important feature is the percentage of maximum moisture absorption. The substrate material should not get wet, but if this happens, its structure should ensure prompt drying without dismantling the floor covering. Such underlays for warm water floors are good for laminate or parquet, which are not exposed to moisture. In the event of an accident, the underlay for a warm water floor, laid under the laminate, will absorb all the water that has leaked from the heating system without damaging the finished floor covering.
- Prices. Today's choice of substrates provides a significant range in the cost of this material. An experienced specialist can choose the option that optimally combines quality and price.
- Versatility. You can assemble the substrate according to the principle of a designer, which makes it possible to change the parameters of the length of the pipeline system and its configuration during the installation process.
The choice can be made taking into account the material for finishing the floor:
- The underlay for a heated floor, finished with laminate boards, must be mounted on a flat surface. To eliminate the shortcomings of cement binder, experts advise using substrates made of soft materials. These can be substrates made of foamed raw materials or coverings made of balsa wood. Preference is given to the roll version, because it leaves a minimal amount of waste. The cork backing is not subject to deformation, does not shrink,
- If linoleum is chosen as the finishing material, it is recommended to use a hard substrate. Chipboard slabs are excellent in this case, giving the floor hardness,
- finishing with ceramic tiles has one drawback - a cold surface. The main task of a water heated floor is maximum heating. In this case, it is recommended to use polystyrene foam with a foil surface as a substrate, which minimizes heat loss.
If linoleum is chosen for finishing, it is recommended to use chipboards
Nuances of work
All of the above features of screed installation are basic. However, there are additional subtleties that should also be remembered before starting finishing work and operation.
First of all, you need to check the condition of the pipes immediately before pouring. Very often, immediately after putting the floor into operation, pipes begin to leak, become covered with corrosion or rust. Reliable prevention of heat loss is ensured by laying a heat-reflecting layer.
First of all, you need to check the condition of the pipes immediately before pouring
You should carefully select the materials used when installing heated floors. The main material of this type is cement. Most brands of this product begin to cake after a certain period of time and lose their quality characteristics. Professionals recommend purchasing cement on the eve of its use so that it does not remain inactive for too long and does not lose its properties.
Further care of the finished screed does not cause any difficulties. The main thing is to ensure normal humidity for a week after pouring. This is necessary because the cement becomes strongest 25 days after the mortar is prepared.
To maintain various chemical processes that have a beneficial effect on the condition of the coating, you need to use ordinary water. The material should completely harden, but not dry completely. Due to the natural drying of the screed, the material will not have time to harden at all, its performance properties will not meet the requirements. Thus, the screed can dry only after it has reached the required strength. Otherwise, the frozen mortar may crack.
Connection diagram for a warm water floor
Varieties
The substrate for the pipes of a warm water floor can be made of different materials that can provide the necessary properties. Here are examples of the most common options:
- Expanded polystyrene boards are made by extrusion, which gives the material good strength and density. The cells are of a closed type, which has a positive effect on resistance to moisture - the slabs are not afraid of prolonged contact with a humid environment. The initial indicators do not change even when heated to one hundred and thirty degrees Celsius. Expanded polystyrene in its structure contains no more than two percent polystyrene, the rest is air. This feature improves the heat-saving properties of the material. When using this material as a substrate for water underfloor heating, it is necessary to provide expansion joints to prevent the formation of cold bridges at the connecting areas. Expanded polystyrene during installation can be easily cut with a sharp knife, which minimizes the amount of waste. The joining areas are sealed with construction foam. To improve heat conservation, the surface of the substrate is covered with foil. Most often, such a substrate is used in new houses to take into account the height of the premises in the design solution;
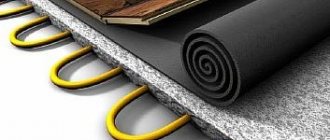
- a substrate made of cork material is the most successful solution for its use in this capacity. For production, environmentally friendly cork tree bark is used. It is pre-crushed and special binding components are added. The mass is pressed and dried, the products are sold in rolls or sheets. This substrate has high heat-shielding properties and can withstand heavy loads. To improve performance characteristics, the front side of the substrate under the water-heated floor is covered with foil material;
- Polypropylene slabs are the optimal solution for thermal insulation of a water heating system. The material is not afraid of elevated temperatures and moisture, and is reasonably priced. When heated, its surface does not emit harmful substances and is not exposed to chemical compounds. The slabs may have grooves prepared for laying pipes;
- OSB or chipboard - both options have been used for a long time; large-diameter pipes can be laid on them. The substrates are distinguished by their strength and are classified as middle class in terms of their ability to retain heat. When using them, the mandatory requirement for resistance to moisture must be met;
- metallized film on a natural lavsan base - a modern option used for arranging any heated floor system. It does not tear and can be used on uneven surfaces, speeding up and simplifying installation work. Even when exposed to high temperatures, the substrate is able to maintain its original characteristics. There are also negative aspects - it is distinguished by the ability to absorb moisture, which implies the installation of a waterproof layer.
Cork backing
Expanded polystyrene boards
Polystyrene heated floor
The lightest (by weight) installation system for water heated floors today
The plates are made using the extrusion method; this technology makes it possible to obtain materials of increased density and physical strength. It has closed cells, which has a positive effect on water resistance; the boards do not absorb moisture and are not afraid of prolonged direct contact with water. The initial parameters do not change when heated to t°=+130°C.
Expanded polystyrene boards for water heated floors
Mats for heated floors made of expanded polystyrene foam
For heated floors, sheets up to 3 cm thick are used. Expanded polystyrene is easily cut with a mounting knife, and the amount of waste during installation is insignificant.
Application of polystyrene foam boards for water heated floors
The joints in the seams are sealed with polyurethane foam or sealed with tape. To improve heat conservation, the surface can be covered with aluminum foil. They are used mainly in new buildings; the height of the heated floor must be taken into account during the development of design documentation for the building. In terms of price they are in the middle category.
Screed - finishing coating for a warm water floor
Expanded polystyrene board
Adviсe
One of the most modern trends in solving the issue of thermal insulation at home has been the installation of a “warm floor” system. Nowadays, manufacturers have brought to the market three main options for underfloor heating - water, infrared and cable. The water method is used for large areas. This technique involves circulating hot water through pipes built into the floor. Such a system has a number of limitations:
- it cannot be used in multi-storey buildings, as it creates additional pressure on the floors;
- in the event of a breakthrough, there is still a risk of “flooding” the neighbors below, which will lead to large expenses for troubleshooting;
- high cost of materials, as well as installation work.
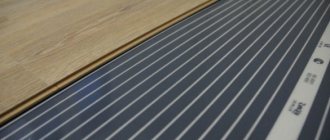
The infrared floor is a polymer film, which is divided into identical squares, each of which contains special plates responsible for high-quality heating.
It is better to install such a system under laminate or linoleum. If you use it under tiles, it bonds quite quickly with the adhesive solution.
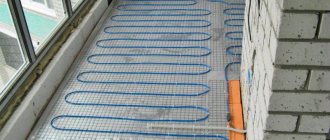
Cable is an electric floor that can function year-round. In order to reduce energy costs, special thermostats are built into the design. The structure itself is assembled from two- or three-core cables or electrical mats.
This method is optimal for tiles, as it helps them heat up quickly and retain heat.
The “floating floor” technology is very popular; Isover coating is used for it.
Substrate options for water heated floors
Let's think about whether it is possible to make a water floor without a substrate? It's certainly possible. When installing a water floor in a screed, the circuit pipes will be located at 1/3 of the thickness of the screed from the base (45 mm from the top of the screed). The concrete screed will gain heat like a kind of “heater” and release it in all directions. The absence of a substrate will not affect the operation of the system. Its absence will affect the efficiency of the system. In addition, the absence of a substrate will complicate the installation of the pipe circuit.
Some types of water-heated floor substrate serve as a base for attaching floor contour pipes. Thus, they perform the dual task of a thermal barrier and a mounting base.
So, what kind of substrate exists for a water-heated floor?
Firstly, the most economical option is polystyrene foam (PPS-16F) or its more technologically advanced alternative - solid extruded polystyrene foam insulation, such as Penoflex.
They are strong enough to withstand evenly distributed loads on the floor and retain heat well. However, such substrates are not special, although installing pipes with anchor brackets to them is very convenient.
Secondly, special foil underlays for heated floors. Their advantages in the foil (heat-reflecting) layer are negated by their small thickness. Although it is precisely the thickness of 2-3 mm that allows you to install warm concrete floors with height restrictions.
Most professionals do not consider isoline, folgoizol and foamed polyethylene (these are the same thing) to be effective substrates for water-heated floors. They are more interesting for electric heated floors.
Thirdly, these are special thermal mats for water floors. They come with tabs for attaching pipes or smooth, possibly with a foil front side. The latter combine polystyrene boards and foil backing.
What materials are used to make mats?
Today, mats are made from various materials, but the most modern models are made from extruded polystyrene foam, as it has:
- low vapor permeability - water vapor passes through it, and the material does not accumulate liquid;
- low thermal conductivity - which helps retain heat;
- high density - withstands enormous loads, made from raw materials with a density of 40 kg/m3.
In addition, the substrate is not afraid of rodents.
For your information! The level of density of the material plays an important role in the construction of a water floor, since the structure is heavy, per 1 square meter. m up to 200 kg.
The insulation, the lower part of the “pie,” experiences the main load, so its strength is important when constructing a water floor.
Choosing a substrate for a heated floor
The underlay is a thin-layer synthetic or semi-synthetic product used in “floating” coating systems (laminate, parquet boards, etc.). The underlying layer protects the finishing cladding from fine sand and residual moisture, eliminates minor defects in the base, and provides partial sound and heat insulation.
Based on the latter, it is reasonable to assume that a continuous layer of lining material with a low thermal conductivity coefficient will prevent the transfer of thermal energy from the base heating system to the cladding. Therefore, the substrate under the laminate for heated floors should be:
- Dense, with minimal air content.
- Thin.
- With the highest possible thermal conductivity coefficient.
According to the European standard EN 4725 and technical recommendations for laying floor coverings on floor heating/cooling systems from the Unilin concern:
- 1) The maximum permissible value of thermal resistance (R) of the laminate + substrate combination must correspond to the value of 0.15 m²*K/W
- 2) For normal floor cooling, the indicator must correspond to 0.09 m2*K/W and below.
The indicated values can be determined from technical brochures or specifications that well-known manufacturers post on official websites. As a rule, there is a separate information support section where you can download or view the required materials.
Let's explain why this is needed. The thicker the laminate and the higher its density, the greater its thermal resistance coefficient. You will most likely try to compensate for the lack of heat by raising the temperature. The consequence is overheating of the underside of the laminate floor, causing cracks to appear. So it turns out that one irrational decision will lead to damage to the coating and increased heating costs.
Manufacturers of bedding products suggest using the following types for heating systems:
- Products with perforations, that is, materials with frequent punctures of small diameter. Thickness – from 1 to 2 mm. The laminate underlay for water-heated floors is available in the form of sheets or accordion-folded layers of extruded polystyrene foam and polyurethane mats. By the way, products with perforations do not provide complete vapor barrier, so if you wish, you can find products laminated with polyethylene. In this case, the edges of the film can protrude beyond the lining by 5-10 cm to form an overlap.
- EPS sheets with cutting, that is, small “windows” that facilitate the transfer of heat from the screed upward. Thickness – up to 3 mm.
- Underlays with an increased degree of thermal transfer are products of composite roll underlays Tuplex, Domoflex, polyethylene high-density mats (PEHD) and their analogues with red/pink/orange markings.
- Recommended branded products from well-known laminate manufacturers. For example, Pergo Silent walk, QuickStep Unisound, Balterio Boost Plus, etc.
As an alternative, some craftsmen recommend using construction cardboard 2-3 mm thick under the laminate. The idea is really not bad, high-quality material suits all parameters. But if floor defects are detected, the manufacturer may refuse to satisfy the claim regarding product quality.
Laminate cannot be laid on screeds with electric cable “warm floors”! This rule is established by the manufacturers. Infrared film underfloor heating is allowed, but according to the instructions, the heat-reflecting substrate is mounted under the IR film, and not on it.
Installation of film heated floors under laminate
You should also figure out how to make an infrared heated floor under a laminate yourself. All work will be correctly divided into stages:
Preparing the rough foundation
It is important to remember the three main requirements - dryness, evenness, cleanliness. For uneven wooden bases, plywood is suitable, for concrete – leveling compounds. Laying insulation
There is a nuance here so that the insulation covers the entire area, even in cases where the IR film is laid pointwise.
The underlay should cover the entire floor
- Laying IR film. Rolls of film are rolled out so that they are located along long walls. This will allow you to get by with a minimum number of contact connections. If you need to trim the roll, this is done only in specially designated areas.
- Installing a temperature sensor. A cutout is made in the substrate for the power wire and the sensor itself. It is fixed using bitumen tape.
- Installation of terminals. In places where the system will be connected to the circuit, clamps are installed. The upper part is inserted into the contact slot of the film, and the lower part is inserted under it.
- Connecting the cable. Their ends are inserted into the contact terminal, everything is insulated with bitumen tape.
- Connecting the thermostat. A channel and a hole are made in the wall under the thermostat and the wires going to it.
Connection diagram
System test
After connecting all the parts, the heating is turned on; it is important to check that all areas of the IR film are heated evenly. Covering installation. The infrared heating device does not require serious insulation; a thin polyethylene foam film will suffice as a substrate.
After that, all that remains is to lay the laminate.
Ideal combinations
There are many options for combining substrates with insulation when installing water floor heating systems. The choice of their thickness depends on the permissible reduction in the height of the room, its location (thicker products are used on the first floors) and the available funds.
Let's look at the most popular combinations.
Expanded polystyrene + metallized film
Expanded polystyrene is considered the main one, and the metallized substrate is an additional layer of thermal insulation that prevents heat loss through the ceilings.
When installing such floors, an ordinary polyethylene film is initially laid on the base (as waterproofing), then a damper tape is attached along the contour and polystyrene foam is laid out. The thickness of the insulation is assumed to be greater than the planned screed (the strength allows you to secure the reinforcing mesh and pipe fasteners). A backing is placed on it (with the foil layer facing up), and the connections are sealed with tape. Then the reinforcing mesh is laid down. The red lines on the substrate serve as a guide for marking for pipe fasteners. The pipe is laid, connected to the system and checked for leaks. If everything is in order, proceed to pouring the screed, which covers the pipes by at least 4.5 cm.
Note! For water heated floors with cement-sand screeds, the use of an aluminum foil layer is prohibited; in this combination, a reaction begins that destroys the substrate (this does not happen in a gypsum screed)
Mats with bosses + extruded polystyrene foam
The combination is the most convenient for installation, because the purpose of the mats is to install floors with a water coolant. Let's take a closer look at the installation mechanism:
- Before laying the insulation, waterproof the base with a bitumen primer or polyethylene film, which is rolled out onto the wall.
- Expanded polystyrene is laid out on a waterproofed base or glued.
- Thermal insulation is carried out over the entire floor area; construction tape is applied to the joints.
- A damper tape is secured along the perimeter with self-tapping screws, together with plastic film.
- Before laying the mats, the work surface is thoroughly cleaned.
- The carpet is made from mats over a layer of polystyrene foam; it is not necessary to glue them; they snap into place with light pressure and form a continuous layer without gaps. If necessary, the mats are cut with a stationery knife according to the factory markings on them.
- Pipes are laid between the bosses starting from the wall to the center (step 40 cm). When the middle of the room is reached, the pipe is rolled out in the opposite direction between those already laid, resulting in a step of 20 cm.
- Next, the system is connected to the boiler and tested for leaks.
- A screed is installed that does not require reinforcement.
- The protruding film and damper tape are cut off after the solution has hardened.
Important! Warm floors with water heating are incompatible with finishing parquet and wood flooring due to the possibility of drying out. Summing up, it should be noted that it is better to put both a substrate and insulation on the safe side than to waste money and get ineffective, energy-intensive, not very warm floors
To summarize, it should be noted that it is better to be on the safe side by installing both a substrate and insulation than to waste money and get ineffective, energy-intensive, not very warm floors.
The nuances of laying floor tiles
The process of installing this flooring is not that complicated, but it requires attention and strict adherence to technology. Here, too, you need to start with a project, choose a design and layout of individual elements.
This can be the usual horizontal method, or a diagonal version, or even entire paintings made of tiles. The more complex the design, the more elements will have to be trimmed.
It is not always possible to lay only whole tiles. You need to plan the layout in such a way that the trimmed elements are not in plain sight: in the far corner, under furniture, etc.
To determine how many tiles are needed for a particular room, you can use one of the online calculators. This is more convenient, although you can perform calculations manually using a drawn up plan.
For the floor, you should choose floor tiles with a rough surface. An important point is the abrasion class of the material. The more people and the more often they visit the premises, the higher this indicator should be. When purchasing, you should consider not only the design, but also the batch number. All tile packages must be from the same batch.
Elements with the same design from different batches may differ in shade. The difference is minor, but after installation it will become obvious. Even after installation has begun, you should keep the packaging with the lot number in case you need to purchase more items.
In addition to the tiles, you need to purchase tile adhesive, as well as a notched trowel for applying it, plastic cross-shaped stops, primer and grouting compound. Tools you may also need are a regular spatula, a rubber grouting spatula, a rag, a tape measure and a building level, a tile cutter, etc.
If the underfloor heating is installed correctly, the base under the tiles will be smooth and clean. It must be treated with a primer in accordance with the instructions and wait until it dries. After this, proceed directly to laying the tiles. They start either from the corner or from the center, i.e. from the most visible areas.
First you need to make markings on the base. To do this, draw a straight line in the center of the room parallel to the longest wall, and then, again in the center, draw a line perpendicular to the first. In the doorway, a wooden block-limiter is nailed to the floor.
Place a small amount of tile adhesive on the back of an individual tile and spread it over the surface with a notched trowel. Sometimes it is more convenient to apply glue not to the tiles, but to the base, about one square meter, so that the glue does not dry out.
The floor tiles are laid on a layer of glue, and the distance between the individual elements is fixed using cross-shaped dividers
The tile is placed in place and lightly pressed against the base. The remaining elements are laid in the same way. Special cross-shaped stops are placed between the tiles. They help maintain the same distance between individual elements throughout the entire area.
As soon as the first row is laid out, you should carefully check how level the tiles are using a building level. This check is carried out constantly to ensure that the entire floor is perfectly level. If there is a drain in the room, then the tiles are laid with a slight slope towards the drain.
The quality of laying floor tiles should be constantly checked using a building level in order to adjust the position of the elements if necessary
This point is usually taken into account when laying the base for the tiles. After all the tiles have been laid, you need to wait at least 12 hours so that the tile adhesive has time to dry. Now you can remove the dividers and start grouting the joints. The composition can be either matching the tile or a contrasting color, it all depends on the design.
The grout is applied in small portions to the seam area and rubbed with a special rubber spatula; movements should be cross-shaped, directed in different directions. The remaining grout is immediately removed from the surface using a cloth, for example, microfiber.
When the grout has hardened a little, you need to check how filled the seam is. If the grouting material is not enough, you should repeat the grouting in this area.
You will learn how to install heated floors under linoleum from the following article, the contents of which we recommend that you familiarize yourself with.
Preparing the base for heated floors
Floor preparation is carried out for two purposes: to level the surface and to thermally insulate it from the underside (from the ground).
Leveling the bottom surface, thermal and waterproofing
Heated floor waterproofing scheme.
In apartments, floor slabs have a sufficiently horizontal surface. Leveling is necessary in the private sector when there is soil underneath the future floor. Primary leveling is performed by pouring dry sand into the recesses. Next, the primary screed is poured. The material for the bottom screed is cement. The thickness of the lower primary screed is 5-6 cm. In this case, the primary screed is considered to be of high quality if the existing irregularities do not exceed 3 cm
It is especially important to provide a flat surface for laying pipes; the free flow of heated water will depend on this
You can provide additional thermal insulation of the floor radiator from the ground using a cement+clay+sawdust screed (tyrsa).
Isolation of the heating layer from the ground or basement (in a house) or floor slab (in an apartment) is necessary for any design of heated floors. The most common materials for such insulation are polystyrene foam and penoplex. In this case, the density of the slabs used must be 3.5 kg/cm3 or higher. The density of the insulation should ensure its sufficient rigidity; on top there will be a layer of cement screed, water pipes and a heavy floor covering (for example, tiles).
Before laying foam boards, waterproofing is required (for example, polyethylene 250 microns). The structure of the foam contains open cells, it is vapor permeable and hydrophobic, that is, it absorbs moisture inside itself. To prevent the penetration of ground moisture, the insulation is placed on a layer of polyethylene (or other water-resistant material).
Penoplex insulation is characterized by improved properties, its cells are closed, moisture does not permeate the material, so laying waterproofing is not important. The thickness of the insulation should be higher than 5 cm (for the private sector) and 2-3 cm (for floor slabs in an apartment)
Reinforcing the screed and laying the damper tape
Reinforcement diagram for heated floor screed.
Reinforcement of a heated floor screed is important if the structure is an overhanging layer (the floor is the ceiling of a garage or cellar). Reinforcement is necessary when laying a structure made of pipes; it itself is heavier than electrical wires and creates additional uneven pressure on the bottom screed, which can cause it to crack
In cases where reliable reinforcement is necessary, metal reinforcement or mesh with a wire diameter of 4-6 mm, with a pitch of up to 150 mm, is used. A mesh with a smaller diameter (2-3 mm) is used to strengthen a heated floor with an electric cable. The metal mesh material will have an additional smoothing effect in distributing heat over the surface of the screed.
The damper tape is produced in a thickness of 5-8 mm and a width of 12-18 cm; when laying it, it must be taken into account that the edge of the tape must rise above the upper floor level by at least 2 cm.
This concludes the preparation of the base for laying the heated floor. Next, the heater is unfolded (according to a pre-drawn diagram), concrete or self-leveling floor is poured with a secondary screed, and an external decorative coating is installed.
The outer floor material must have high thermal conductivity; it must transfer heat well into the heated space. Tile is considered the ideal covering for heated floors; stone, laminate, linoleum, carpet are suitable and can be used.
conclusions
- Installation of warm water floors must begin with an assessment of the situation and measurements. It is necessary to decide whether the heated floor will be the main or additional type of heating of the room.
- The choice of the best underfloor heating must be approached responsibly and based on the characteristics of the room, taking into account not only the area of the room and the expected temperature, but also the humidity and height of the ceilings.
- It is much safer to use those materials that are specifically designed for warm water floors. This approach will not only save time, but will increase service life and save up to 20% on energy spent on heating the room.
