Plastic utility networks have already ceased to be a novelty, having firmly occupied the plumbing niche. The properties of the material have proven their reliability and have become constantly in demand in home repairs and industrial transportation of liquids and gases. Installation of polypropylene pipes is no more difficult than their steel or cast iron counterparts; even a novice plumber can handle it.
- Features and nuances of the practical use of propylene pipes
- Accessories for connecting radiators
- System planning
- Water heating schemes made of polypropylene for a private house
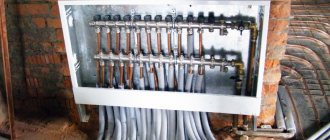
- Parallel or collector wiring
- Series tee connection
- Markings on the wall
- Internal and external gasket
- Installation of serial wiring
- Drafting
- Preparing tools
- Selection of polypropylene fittings
- Selecting a connection diagram
- Step-by-step instructions for welding PP pipes
- Pipe cutting
- Pipe processing and chamfering
- Preparing the soldering iron
- Heating and joining parts
- Errors when welding PP pipes
Features and nuances of the practical use of propylene pipes
The industry produces pipes for water supply, gas pipelines, sewerage, heating and ventilation systems. The standard length for outdoor work is 5 linear meters. There are models for interior work - ranging in size from 0.3 to 2 meters.
The diameter of the pipes ranges from 40 to 150 or more millimeters.
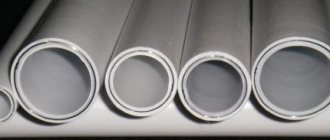
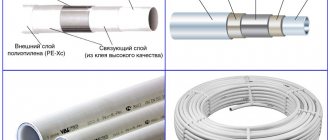
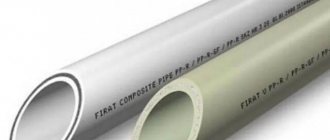
The most common are multilayer polypropylene pipes: two outer layers are polymer, the inner layer is fiberglass, and the middle layers are aluminum layers.
- Maximum withstand temperature – 145°C;
- Polymer density – 0.9 grams/cm3;
- Withstands tensile load – 25 Newton/sq.m. mm;
- Yield strength – up to 50%;
- Heat capacity – 2000 J kgC.
Pros and cons of operation:
- 9 times lighter than metal – easy to transport, load and install;
- Service life from 50 years and above;
- High level of noise absorption;
- The metal part is completely hidden by polypropylene, therefore it is resistant to corrosion.
- Weak resistance to ultraviolet radiation - external highways should be covered in trenches or wooden boxes;
- Linear thermal expansion requires additional expansion joints when laying plastic pipes.
| Code | Material | Properties | Special purpose |
| P.P.H. | Homopolymer | Does not tolerate high temperatures | For internal sewerage installations |
| PPB | Block copolymer | Heat resistant | For heated floors and plumbing |
| PPR | Random copolymer | universal | For heating and hot water supply |
- PN 10 – for installation of engineering cold water supply systems.
- PN 16 – used for transport gas lines or liquids up to 60°C.
- PN 20 – for hot water supply and heating systems up to 95°C.
- PN 25 - used in industry for transporting steam and hot mixtures, as well as in public utilities, when installing underfloor heating and heating.
READ ALSO: How to Solder Copper Pipes with Soft Solder
Soldering methods
In practice today, a couple of basic methods are used to ensure durable and reliable joining of welded elements:
- coupling;
- straight.
The first option is welding polypropylene pipelines using a shaped product (coupling) or a pipe having a sufficient external size. This method is suitable for plastic pipelines of small diameter. It consists of melting the outer side of the elements and the inner part of the coupling, which ensures a guaranteed tight joint.
Direct welding involves melting the end part of plastic pipes with the same diameter, as well as their subsequent joining with the end surfaces. A special feature of the method is the need to perform welding with extreme precision in processing all abutting areas and connecting them to each other.
In addition to the “hot” technologies already listed above, you can use a fairly simple and affordable method of “cold” soldering of polypropylene. In this case, a replacement for the active soldering component is a special solvent that promotes rapid softening of the polypropylene structure.
System planning
When developing a design for a heating system for a cottage or house, the area of living quarters and the degree of wall insulation are taken into account. The standard heat rate per square meter is 41 kcal. The technical characteristics of the battery indicate the thermal power of one section. Based on these data, the number of radiator sections is calculated.
Additional calculations include:
- Length of polypropylene pipe routing;
- Number of turns and adapters;
- Availability of thermostats and bypasses;
- Installation of vertical and horizontal structures;
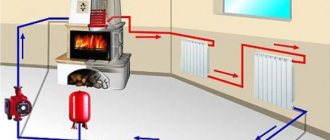
- Connection diagram to the boiler room (bottom, side, two-pipe or single-pipe version.
Water heating schemes made of polypropylene for a private house
Pipe installation is carried out in two standard schemes:
Parallel or collector wiring
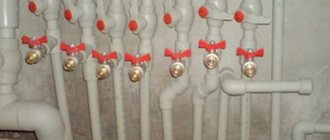
The advantage of the scheme is ease of maintenance. Technically, this is the connection of all plumbing and household appliances in parallel to one pipe into which bends are inserted. Each branch is equipped with its own shut-off valve, so when one of the points is turned off, the rest continue to receive water in full.
With such a two-pipe connection of several units at the same time, the pressure does not decrease, remaining uniform, since a separate branch is supplied to each point. The disadvantage is the increased consumption of materials compared to a simpler tee.
Series tee connection
It is used in small areas in private construction. Assembly occurs parallel to the hot and cold directions. Plumbing points and household appliances are successively adjacent to the main sunbeds. The advantage of the single-pipe scheme is the speed of installation, low cost due to lower consumption of linear meters.
The system can be easily hidden in boxes or cabinets. The disadvantage is that the pressure decreases when several units are turned on simultaneously. This problem is solved by increasing the diameter of the main line.
Advantages
Their increasing use is explained by the following advantages:
- installation of pipes made of polypropylene is carried out much faster than from other materials;
- there is no formation of corrosion and no danger of reducing the cross-section of pipes during operation;
- high resistance to several freezing cycles in the presence of operating pressure;
- long (at least 50 years) service life in cold water supply conditions;
- complete environmental safety.
Markings on the wall
Installation of PP pipes for cold and hot water supply to the wall is done using clips or clamps.
The correct step size depends on the application of the system and the maximum media temperature.
Comparative table of fastening pitch in centimeters relative to the diameter and temperature of the liquid
| Pipe diameter | Step at 20°C | At 50°C | At 70°C |
| 16 mm | 75 cm | 65 cm | 55 cm |
| 20 | 80 | 80 | 60 |
| 25 | 85 | 90 | 70 |
| 32 | 100 | 95 | 75 |
| 40 | 110 | 100 | 85 |
| 50 | 125 | 110 | 90 |
| 63 | 140 | 125 | 105 |
| 75 | 155 | 135 | 115 |
| 90 | 165 | 150 | 125 |
| 110 | 185 | 165 | 140 |
When marking on the wall, select the appropriate values from the table, obtaining a standard, durable mount.
READ ALSO: How to Hide a Gas Pipe in a PVC Kitchen
Internal and external gasket
Internal laying rules:
- The risers are mounted from pipes with a diameter of 100-110 mm;
- Bends – 40-50 mm;
- Make a slope towards the central collector of at least 3°;
- If mounted under a panel, be sure to wrap it with anti-noise material;
- The distance between the clamps is 50 cm;
- For risers – 1.3 meters.
- Assembly is carried out in closed collectors on a sand bed or box.
- The thread level is laid below the freezing point of the soil.
- The load on the road surface is taken into account.
Installation of serial wiring
Sequential wiring consists of laying a main line to which household units are connected using tees. The disadvantage of the scheme is that it reduces the pressure when several consumers are turned on simultaneously. The wiring is installed open or hidden behind false panels.
Do-it-yourself installation of polypropylene pipes includes the following operations:
Drafting
Count the number of points of plumbing equipment (bathtub, toilet, bidet, washbasin) and household appliances (washing machine, dishwasher, boiler) connected to the water supply. Calculate the volume of constant consumption and determine the diameter of the main pipe. The width of the connection tees will be 2-4 mm smaller.
Preparing tools
You need to stock up on a soldering iron, pipe cutters, a chamfer remover, a tape measure and a marker for marking.
Selection of polypropylene fittings
The components must be made of the same polymer as the main pipeline.
Selecting a connection diagram
The wiring is carried out together with connections for sewerage and hot water.
Dismantling the old water supply
You need to start laying a polypropylene water pipeline with your own hands by dismantling old pipes, if any, of course.
You may be interested in information: soldering iron for polypropylene
Step 1. Write to the management company or HOA an application to block the riser. On the appointed day, the plumber must come and turn off the water supply. Don't forget to warn your neighbors about the planned work.
Step 2. Disconnect the apartment's water supply from the common riser. If the pipes were laid a long time ago and all the connections are “stuck” to each other, cut them off with a grinder saw.
Dismantling of water supply
Step 3. If you plan to replace the riser, then cut the old one so that sections of pipe approximately 0.5 m long come out of the floor and ceiling. Then clean them using a special cable. Next, cut the threads and mount a new polypropylene riser. Install shut-off valves on the outlet to the apartment.
Step 4. Disconnect all consumers from the cold water and hot water lines in the apartment - sinks, bathtub, toilet, washing machine, etc.
Step 5. Remove the clips or other fasteners used during the installation of the old water supply.
Dismantling the old water supply
Step 6. Cut with a grinder or simply remove the old pipes from the fastenings. Be careful when doing this as there may still be water in the pipes. In addition, try not to damage fragile plumbing during the dismantling process.
You may be interested in information - soldering temperature of polypropylene pipes table
Step-by-step instructions for welding PP pipes
Let's consider the procedure for connecting using a welding machine.
Pipe cutting
A special pipe cutter is used that makes the cut clearly, without burrs.
Pipe processing and chamfering
The edge of the cut is cleaned, and the inner layer of polymer is cut with a chamfer.
Preparing the soldering iron
Before use, the device is heated as much as possible, allowed to cool and the heating is repeated, after which they proceed directly to soldering.
Heating and joining parts
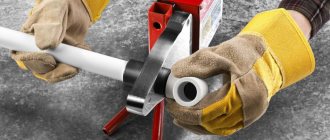
A nozzle corresponding to the size of the tube is inserted into the end of the cut and heated for no more than 8 seconds. Immediately insert the connecting element, pressing firmly. Repeat with the second cut.
Welders
From a design point of view, soldering equipment is a bit like a regular electric iron. The base is represented by a massive metal heater, the surface of which is removable special attachments.
Devices for butt welding of polypropylene pipes have more complex designs. In addition to the heating element, they also contain a system responsible for centering the elements being welded.
The classification of equipment for welding plastic pipes divides devices into the following main groups:
- non-professional hand-held devices, or “irons” for soldering PPR pipes. The optimal choice for domestic use (D no more than 50 mm). If necessary, nozzles are used that have a Teflon surface and make it easy to work with larger pipes;
- mechanical welding machines. This technique ensures reliable welding of large pipes with a diameter of 40 mm or more. The design includes additional elements in the form of an instrument block and a frame-based hydraulic unit. On the side parts there are special semi-ring grips with inserts.
The characteristics of additional accessories and their quantity depend on the manufacturer, and are also focused on specific model features of the welding machine.
Errors when welding PP pipes
When installing polypropylene pipes for water supply with their own hands, novice plumbers make a number of erroneous operations, which lead to poor-quality joining, and subsequently to depressurization of the system.
- The nozzle is tightened on the soldering iron with a wrench , which makes it unsuitable for subsequent use. The device comes with a hex key specially designed for tightening.
- Set the soldering iron to maximum heat . This procedure should be performed only at the first stage of heating. After complete cooling, it is recommended to set the temperature to no more than 220°C so that the nozzle does not stick to the tube.
- The pipe overheats , which leads to cut deformation. The hole in the tube contracts, leaving a very small passage for liquid. You need to heat the nozzle for about 5-8 seconds - this is quite enough for high-quality soldering of the assembly.
- They don’t have time to mount it correctly with the fitting . After removal from the soldering iron, joining must be done within the next 4-5 seconds, otherwise the temperature drops and gluing does not occur.
Having studied the suggested tips, a beginner will be able to perform simple work on installing polypropylene systems at home.
Installation of heating in a private house using polypropylene pipes:
]]>
How to secure the pipeline
It is necessary not only to solder it correctly, but also to separate the polypropylene water supply and secure it so that it does not sag or become deformed. Fixation is carried out using special fasteners. Clips (single, double, clamping) allow free movement of the pipeline along the axis. Clamps are designed for tight fixation.
Hot water leads to an increase in the length of PP products. If the fastening is rigid, a rupture at the soldering site is possible. The tension is relieved with various types of compensators: ring and similar in configuration to Z, G, P. Polypropylene pipelines cannot be mounted tightly in a corner - a small distance is necessary for the pipe to move freely when expanding.
