Choosing a location for installation
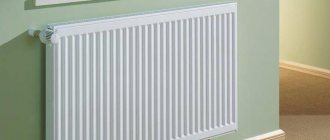
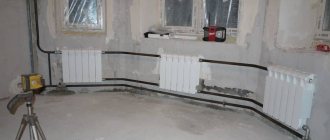
- For the best heat transfer and convenient cleaning of the room, you need to raise the radiator above the floor by 100-120 mm;
- From the level of the window sill you need to lower it by 100 mm. This is necessary for the free flow of heat from the radiator upwards;
- And finally, there should be at least 30-50 mm from the wall to the radiator. When approaching the wall closer, the air conversion will be disrupted and the wall itself will heat up, not the room.
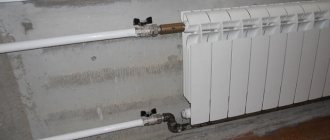
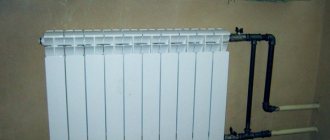
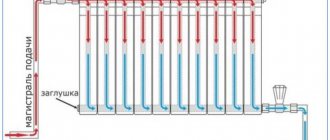
Let me remind you that installation of a steel radiator is possible according to three schemes: pipe connections from below, from above, from both sides. There are several more connection options.
How to hang a battery
The instructions themselves are extremely simple, in principle I have already talked about it - you drill a hole in the wall with a hammer drill and screw the bracket. But there are nuances associated with preparation.
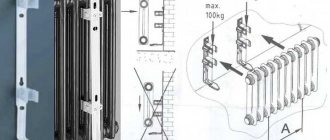
Modern canopies with intermediate fixation of the radiator.
So, if you are installing a radiator in a multi-storey building with central heating, then before installation you will need to invite mechanics from the local housing office. They will turn off the riser and drain the water from it.
Strange as it may sound, it is better to change batteries during the heating season. In this case, you will immediately see flaws in your work and will be able to quickly eliminate them. And if you install the battery in the summer, then when the water is turned on and the house is put under pressure, any mistake during installation can turn into a rush and it is not a fact that someone will be at home at that time.
Any radiator is installed strictly according to level.
Now a few words about how to mark the mounts for radiators:
- The first plumb line is the central center line;
- Next, perpendicular to the axial one, you need to draw a horizontal line on which the upper brackets will be mounted;
- If you have only 1 bracket from below, then it is mounted on a vertical axial;
- If there are several bottom brackets, then the same horizontal line is drawn below as on top and the installation points of the canopies are marked on it.
Marking option for installing a radiator.
Determining the location of radiators
Before fixing the heating battery, you need to determine its exact location. In this case, the following requirements must be met:
- the distance from the top surface of the radiator to the window sill should be at least 5-10 cm;
- the distance from the bottom surface of the radiator to the floor should be at least 6-10 cm;
- the distance from the back surface of the radiator to the wall should be within 3-5 cm;
- It is recommended to provide a slope of the supply pipe towards the radiator. The slope is 0.5 cm per 1 meter of pipe.
Radiator marking and installation
Having decided on the location of the battery, you need to mark the brackets. To mark up, you must perform the following steps:
- It is necessary to draw a vertical line that marks the center of the radiator. The length of the line must be no less than the height of the heating device.
- The distance from the gap of the first and second sections to the gap of the last and penultimate section is measured.
- A horizontal line is drawn marking the axis of the upper battery collector. In this case, the requirements for minimum distances to the window sill and floor must be taken into account. The length of the line is not less than the distance measured in step 2.
- From the point of intersection of the vertical line of the center of the radiator and the axis of the upper collector, half the distance measured in step 2 is laid horizontally to the right and left. As a result, we get 2 points for installing the upper brackets.
- From the point of intersection of the vertical line of the center and the axis of the upper collector, a length corresponding to the interaxial distance of the radiator is laid down vertically.
- From the point obtained in step 5, half the distance measured in step 2 is set aside to the right and left. The resulting points will be the installation locations for the lower brackets.
This marking is used for aluminum radiators with no more than 12 sections, bimetallic and cast iron radiators with no more than 10 sections. With a larger number of sections, additional brackets are installed at central points on the axis of the upper and lower collector.
After completing the markings, all that remains is to attach the radiator. To do this, holes are drilled at the marked points to the appropriate depth into which dowels are inserted. Threaded brackets are screwed into the dowels, or brackets with a smooth rod are driven in. The radiator is hung on the installed brackets. If necessary, you can bend the hooks a little to adjust its position. After installing the battery, it is connected to the supply and return pipes.
What the regulations tell us
It is extremely rare that the instructions that come with the unit contain detailed installation recommendations. Manufacturers believe that professionals will install the battery; therefore, they only need the technical characteristics of the radiator.
We will try to understand the source documents. At the moment, all issues regarding radiators are regulated by 2 documents - GOST 31311-2005 “Heating devices” and SNiP 3.05.01-85 “Internal sanitary systems”. There is no point in retelling the documents; you can find them on the Internet, so we will only go over the points relating to the installation of radiators.
| Illustrations | Recommendations |
| Central axial. |
· First of all, remember - the vertical center line of the window opening must coincide with the center center line of the radiator;
· It is desirable that the width of the radiator occupies about 75% of the width of the window opening.
· The minimum gap between the floor and the battery is 60 mm;
· The minimum gap between the battery and the bottom edge of the window sill is 50 mm.
· There is no clearly fixed gap between the wall and the radiator. The minimum recommended in GOSTs is 25 mm, maximum 50 mm. It is possible to do more, but less is not advisable, since air circulation is disrupted;
· On the question of how many fasteners are needed for a heating radiator, SNiP 3.05.01-85 says that for mounting batteries up to 8 sections in size, 2 brackets along the upper axis and 1 along the lower axis are sufficient;
· Further, when adding each subsequent 5 sections, 1 bracket is added at the top and bottom;
· A stand is used under the floor radiator to mount the radiator. The number of such racks is selected similarly to the mounted version, that is, for a radiator of up to 8 sections there are 2 racks and then 1 rack is added for every 5 sections.
Advice: to increase heat transfer, before installing the battery, cover the wall with foil, or better yet, with foil insulation such as rolled polyethylene foam (penofol) or polystyrene foam. In this case, foil insulation with a thickness of 5–7 mm is sufficient.
Foil insulation on the wall under the radiator significantly increases heat transfer.
Features of mounting heating radiators during self-installation
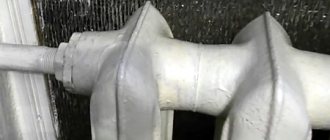
Heating devices made of cast iron impose special conditions on the strength of fastening and the quality of the base. It is important to consider that in addition to the mass of the product itself, there is also the internal volume of the sections that are filled with coolant. If for an aluminum unit it is no more than 0.5 liters, then for the cast iron MS-140 series the volume reaches 1.5 liters.
When calculating the number of mounting brackets, craftsmen are guided by the standards of paragraph 3.25 of the SNiP already mentioned above. According to its standards, the correct installation of heating radiators is as follows - one support per 1 m² of radiator heating area, but not less than three. The area of a section depends on its type. For example, for the M-140 it is 0.254 m², and for a set of 12 sections you will need 4 brackets.
Required tools and materials
Technology for unscrewing and assembling cast iron batteries: a – nipples capture the threads of sections (2-3 threads); b – tighten the nipples, join the sections; c – install the third section; d – two radiators are grouped.
Replacing or installing various cast iron radiators can occur in several stages and in completely different ways. To carry out this installation, you will need:
- gloves;
- protective glasses;
- gas welding;
- mounting keys;
- rubber gaskets;
- screwdrivers;
- radiator keys (short and long).
If you decide to install or replace it yourself, be very careful and follow the technical and safety rules. Welding work can be harmful.
Characteristic
Brackets for heating radiators are fastening elements of any design, shape, and size , made of steel, cast iron or other metals or alloys.
Products are divided into:
- hanging fasteners designed to secure the radiator to the wall;
- floor stands.
There are both adjustable and non-adjustable holders of both varieties.
Important! The key to proper installation of any heating battery is the selection of fasteners that match the characteristics of the model being installed. It is optimal to use those that come with the radiator.
Fasteners for steel heating devices
There are two different types in this group: tubular and panel radiators. They have different designs and, accordingly, different fastenings.
In panel radiators, brackets are welded on the rear wall, with the help of which they are hung on brackets. The shape of this type of fastener is different: it is designed specifically for staples.
In panel radiators, brackets are welded on the rear wall
When installing panel radiators, it is necessary to strictly monitor the vertical position of the brackets. High precision is required: four or six staples must fit exactly onto the hooks. It is also important that the wall is perfectly flat and smooth. In general, using conventional brackets, panel radiators are quite difficult to hang. It is easier to work with other types of holders.
Standard bracket for panel radiator
Since the mass of the heating device is small, it is quite enough to fix it on the upper brackets and install stops at the bottom that will give it direction in the horizontal plane. They are not attached to the wall, but are hooked onto a bracket and simply rest against the wall. For reliability, the part that faces the wall is expanded.
This is what a set of brackets for tubular steel batteries looks like: the upper collector is hung on the hooks, and plastic stops are placed below
There are also special mounting strips for easy installation. They are a strip of metal with plastic clips at the top and bottom. When using this fastener, there is no need for brackets on the rear panel. The slats are fixed to the wall, a radiator is inserted into them, which is held in place by plastic hooks.
Rail for quick installation of panel batteries
Fasteners for tubular radiators are similar to sectional ones: the same hooks, only of a different size, often equipped with plastic covers.
There is also a special fastener with SMB tube grips. This is a strip of steel with plastic clips and a shelf at the bottom that serves as a support for the radiator. This mounting plate can be used if the weight of the device filled with water does not exceed 100 kg. Installation is simple: place the battery on the shelf, bring the top edge closer to the latches. They grab the nearest tube and a click is heard. The radiator is installed, the supply pipes can be connected.
Bar for quick installation of a tubular radiator with shelf and clamps
There is a second option for quick installation: SVD fasteners. It consists of two parts. One is attached to the radiator, the second to the wall. Then they are connected to each other and secured with a steel loop.
Another type of holder for tubular models: two parts, one is attached to the wall, the second is attached to the pipe. They are held together with a wire fastener.
Floor mounting for tubular radiators can be of several types: tubular supports that are welded at the factory, or stands with hooks. Radiators are hung on such racks, and the racks themselves are attached to the floor.
Rules for installing heating radiators
Length requirements are not all recommendations. There are also rules for location under the window relative to the floor, window sill and wall:
- The heating device must be located strictly in the middle of the window opening. When editing, find the middle and mark it. Then to the right and left you set the distance to the location of the fasteners.
- The distance from the floor is 8-14 cm. If you make it smaller, it will be difficult to clean; if you make it more, zones of cold air will form below.
- The radiator should be 10-12 cm away from the window sill. With a closer location, convection worsens and thermal output decreases.
- The distance from the wall to the back wall should be 3-5 cm. This gap ensures normal convection and heat distribution. And one more thing: at a short distance, dust will settle on the wall.
Stages of work
If you decide to do the battery installation work yourself, you need to know what steps the process involves.
The instructions for carrying out such work divide it into:
- Preparation of materials and equipment.
- Location calculation.
- Installation of brackets.
- Production of the actual installation.
- Soldering or sealing the joint.
- System check.
Preparatory stage
These operations are not recommended to be performed in winter, especially in severe frosts - this is unsafe. Even if you decide to do all the work yourself, you will still have to call a plumber from the housing office to disconnect your apartment from the common riser. In preparation for installing the system, you will need to purchase or find the following tools and additional materials, such as:
- Keys.
- Tow.
- Valves.
- Sgony.
- Couplings.
- Adapters.
- Brackets.
- Bushings.
- Nipples.
- Corners.
If you still choose, for example, cast iron batteries, you will probably have to purchase Mayevsky taps and install them yourself. In bimetallic and aluminum sections they are already built-in. This device allows you to bleed excess air from the system and maintain its functionality, preventing airing.
Marking mounting locations
The easiest way requires the help of a friend. It provides for the following actions:
- Place a wooden block 8-12 cm thick .
- A radiator is placed on the block. In this case, its center should coincide with the center of the window opening.
- The top of the radiator is slightly tilted forward and the end of one bracket is inserted between the sections. The second process must be done by an assistant.
- Place the radiator vertically. The bracket (it must be supported by an assistant) should touch the wall.
- Use a pencil to mark the points where you need to make holes for the dowels. These marks must be on the correct horizontal line. The horizontal position must be checked with a level.
As for the number of upper brackets, there should be 2 fastenings for 10 sections . Next, one bracket is added for every 10 sections. The situation with the lower ones is slightly different: it is allowed to use 1 bracket for 2 upper ones .
This is because the upper ones will experience the main pressure. The lower ones are intended only to support verticality. If there is already a ready-made piping, then the mark is made after the radiator has been attached to it (the distance that the shut-off valve will take into account is also taken into account). At the same time, we must not forget that the upper pipe should have a slight slope in the direction of the battery . The lower one should be inclined in the direction from the bimetallic structure. This will allow air to move in and out of the sections easily. Incorrectly angled pipes will allow air to accumulate inside the radiator. This will reduce heat transfer.
Selecting brackets
The mounting bracket for the heating radiator is selected depending on the configuration and weight of the battery itself, plus the material from which the walls are made plays an important role, because not every wall can withstand the considerable weight of the battery.
Brackets for cast iron batteries
Cast iron is a heavy thing, and accordingly, fasteners for cast iron heating radiators must have a good margin of safety. Long hooks are best for mounting the battery on a brick or cinder block wall.
Under such a hook, a puncher makes a hole with a depth of about 100 - 150 mm, after which a plastic dowel is inserted into this hole and the hook itself is screwed. The price of such canopies is the most affordable.
Drilling a reinforced concrete wall, even with a good hammer drill, is quite difficult, and the load-bearing capacity of concrete is the highest, so here it is enough to go 50 - 70 mm deep and fasten a special hook installed on the site to the wall with an anchor bolt, as in the photo below.
Canopies for walls with high load-bearing capacity.
Fastening cast iron radiators to walls made of foam and aerated concrete is also possible, but special hooks are used for these purposes. The most commonly used is a pair of steel hooks on a single plate.
To install a cast iron battery in 6 - 8 sections on walls made of cellular concrete, there are 3 such paired brackets, plus the brackets themselves are fixed with at least 3 special anchors.
Advice: paired brackets come with a fixed and adjustable distance between the hooks, and if you haven’t yet decided exactly which model of cast-iron battery you will buy, then take adjustable canopies; they can be adjusted to your location.
Twin bracket with fixed distance between hooks.
By the way, for those who have not yet decided how many and what kind of batteries are needed in their particular case, I recommend viewing the article on the selection and calculation of heating radiators for specific conditions with photos and videos, the material is located “HERE” .
It is impossible to attach radiators to sandwich panels, so in frame houses, as well as in cases where the radiator does not border the wall at all, floor racks are used for installation.
The photo below shows the 3 most common types of such structures. Again, if the battery model is unknown, then it is better to take a design with a clamp in the form of a chain; it is universal and fits any radiators.
Floor mounts for heating radiator batteries.
Canopies for steel batteries
If in the cast iron version we relied on the load-bearing capacity of the walls, then the mount for steel heating radiators is selected depending on the type of radiator. Steel batteries come in panel and tubular types.
Panel radiators are flat and relatively lightweight. In the recent past, corner-shaped canopies were used for their installation. One part of the corner is screwed to the wall with anchors, and the battery is hung on the adjacent part; for these purposes, special hooks are welded on the radiator itself. Although such models are still sold, they are gradually giving way to modern canopies.
Modern panel-type batteries do not have any hooks at all. These structures are held on the wall using planks with two hooks on the edges. The panel is simply inserted and clamped between these hooks.
Modern canopy with clips for panel radiator.
In principle, the same brackets can be used for tubular steel batteries as for cast iron. But steel is much lighter and its own canopies are produced under it, and instead of 3 or more points of support, steel tubular batteries cling to 2 upper brackets, and in order to somehow fix the radiator from below (between the wall and the battery), supporting plastic clips are placed.
Fastenings for steel radiators with support clips.
Canopies for aluminum and bimetallic batteries
In terms of weight and configuration, aluminum and bimetallic batteries are almost the same, and accordingly, their canopies are the same. Only one type of bracket is available for such radiators; they are shown in the photo below. One part is screwed to the wall with anchors, and the battery is hung on the second.
Mounts for aluminum radiators are equally suitable for bimetallic batteries.
Such canopies can be distinguished by the recesses located on both sides of the bracket. This innovation allows you to screw the canopy on any side. And if the load-bearing capacity of the wall leaves much to be desired, then for the installation of aluminum and bimetallic radiators the same racks are used as for cast iron batteries.
For aluminum and bimetallic batteries, the same racks are used as for cast iron radiators.
Recommendations
When planning the purchase of brackets for radiators, it is recommended to focus on the following product characteristics:
- The composition of the alloy from which the product is made is of great importance. It must have high strength and be non-toxic, since the parts will be used indoors and heated by heating devices.
- In order for the purchased products to last as long as possible, it is worth buying brackets, the surface of which has been specially treated with agents that protect against corrosion processes and rust formation. However, painting the product will not be enough, since the product must be galvanized.
- A very important criterion for choosing brackets are the parameters of the element - length, thickness and maximum load indicators.
- The positive features of the product include the presence of a noise-reducing coating.
- The part should make it possible to adjust the distance between the device and the wall or floor.
To learn how to hang a radiator yourself using brackets, see below.
Date: September 25, 2022
Master Class. We connect the radiator from the floor using T-shaped tubes
Also, T-shaped connecting tubes can be used to connect the battery from the floor. They are necessary if the line goes under the heating device. Let's look at this process step by step.
T-tube
Step 1. A threaded clamp connection is put on the tube.
Threaded clamp connection is put on
Step 2. After this, the tube is flared.
T-Tube Flaring
Step 3. Next, you can proceed directly to installing the tubes.
Installation of tubesTubes are installed in different directions
Step 4. The connection is made using a sliding sleeve. The radiator is connected using T-tubes, and the line goes further to the next heating device.
The heating device is connected using T-tubes
Step 5. The exit of the pipes from the floor can be decorated using overlays in accordance with the finishing floor covering. Overlays can be made for different coatings.
Decorative overlayAn example of using decorative overlays
If there are no high aesthetic requirements for the interior of the room, then you can use a budget connection option using a connecting set. This set is used for cross-linked polyethylene pipes without an aluminum layer.
Connection set
Inside this set there are guides and rings for fixing the pipe. This set is necessary to prevent threaded connections from loosening and to compensate for thermal expansion.
GuidesRing for fixing the pipe
First, the ring is put on the pipe. Then the clamp is removed from the guide, the pipe is inserted into it and secured with a ring. The latch is inserted.
The ring is put on the pipe The pipe is fixed using the ring A clamp is inserted
The pipe is cut to the required length, after which a connection is put on it and installation is carried out to the heating device.
Trimming the pipePutting on a threaded clamping connectionInstallation to a heating radiator
Decorative overlays are installed, pre-cut to size.
Mark the place of cutInstallation of decorative overlays
Using this element, the two parts are connected to each other.
This element is necessary to connect two parts. Connecting two parts.
The connection kit is attached to the ceiling. That's it, the installation can be considered complete.
The kit is attached to the ceiling. Installation work is completed.
Connection to pipelines
The final step when installing heating radiators in an apartment with your own hands is connecting to the pipeline system. It can be carried out by the side or bottom, depending on how provided by the manufacturer of the heating device.
In turn, the lateral connection of the radiator to the pipes can be carried out in several options:
Of course, the connection diagram and all other nuances regarding how to install a heating radiator in an apartment must be carefully thought out in advance, before installation work begins. If everything was done correctly, then the result of such work is a comfortable temperature microclimate in the home, allowing you to survive the harsh and cold winter season without any problems.
https://youtube.com/watch?v=3BaaUUG4JZE
Wiring methods
First of all, it is necessary to distinguish two general schemes of heating systems: one-pipe and two-pipe.
In a single-pipe system, radiators are connected in series, and one pipe is used for hot and cooled coolant. This scheme is more demanding in selecting the diameter of the pipes, and the number of heating devices should not exceed 4 - 5 with a total pipeline length of up to 30 m. Since the water cools when passing through the radiators and giving off heat to them, the radiators located lower down the riser should have a larger power (i.e. surface area) to compensate for the lower coolant temperature.
Wiring diagrams for one-pipe and two-pipe systems
It may seem that a single-pipe design is cheaper due to fewer materials used, but this is not the case. In it:
- Overall efficiency decreases due to the gradual cooling of the coolant;
- A larger pipe diameter is required, which also increases initial costs;
- Larger radiators are required.
Connection methods
Having looked at general heating schemes, which you are unlikely to be able to influence in an already built house, let’s move on to how to connect each radiator. After all, when installing radiators, you will need to decide for yourself which method to choose.
To understand why the connection method is important, let's look at the figure:
1 – diagonal, 2 – bottom, 3 – diagonal with bottom feed, 4 – side, 5 – side with bottom feed, 6 – bottom one-sided
An incorrectly selected connection option can lead to heat loss of up to 22%. Of course, this does not mean that he is “bad”. Losses can be compensated for by greater radiator power. But they must be taken into account before purchasing radiators, so you need to decide on the connection method at the design stage.
What general conclusions can be drawn from the figure? The most important thing is that it is recommended to place the supply at the top, then, according to the laws of natural convection, the cooled coolant itself lowers and flows out from the bottom of the battery. If possible, use the recommended connection method - diagonal.
Methods 2 and 6 with bottom connections are often used in modern houses with horizontal riser wiring in the floor for design reasons. Today, there are even models of radiators with a bottom one-sided connection, in which the coolant circulates as if it were diagonal. Thus, with an aesthetic and discreet connection, these radiators do not lose in efficiency.
Size calculation
Making your own pipe heating device is not very difficult. But there is one important point here - to correctly calculate the dimensions of the device. After all, such an indicator as heat transfer will depend on them.
Required indicators
The calculation is not easy, because it requires some criteria for the premises itself. For example: glazing area, number of entrance doors, what windows are installed, whether the floor, walls and ceiling are thermally insulated.
It’s difficult to take all this into account, so there is a simpler option that takes into account only two indicators:
- area of the room.
- ceiling height.
How can this help when assembling a homemade heating device? To do this, you will have to compare it with a conventional cast iron radiator of the MS-140-500 brand. The heat output of one section is 160 W, volume is 1.45 liters. What does this give us?
You can determine exactly how many sections will be needed if you use a cast iron device. The total volume of coolant that will fit in one battery is determined from the number of sections. And knowing this number, you can approximately determine the volume of the pipe radiator.
The thing is that the thermal conductivity of steel is 54 W/m*K, and that of cast iron is 46 W/m*K. That is, a small downward error will not have any effect on the quality of heat transfer.
Calculation example
Conventionally, we will assume that an eight-section cast-iron heating device corresponds to the above-described ratio. Its volume is 8x1.45=11.6 liters.
Now we can calculate the length of a pipe with a diameter of 100 mm, which we will use to assemble a homemade battery. The standard cross-sectional area of the pipes is 708.5 mm². We divide the volume by the cross-section, we get the length (we convert liters to mm³): 116000:708.5= 1640 mm. Or 1.64 m.
A slight deviation in both directions will not greatly affect the heat transfer. Therefore, you can choose either 1.6 or 1.7 m.
