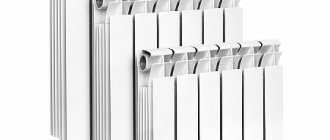
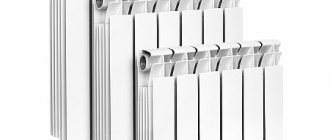
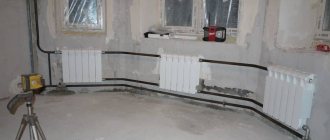
Connection diagrams for bimetallic heating radiators are virtually no different from standard installation methods for other types of heating batteries, for example, cast iron. Regardless of whether you plan to do the work yourself or turn to professionals for help, you should initially think about which scheme to choose and why.
The first thing you should know is that there are three connection diagrams for bimetallic heating radiators :
- Lateral.
- Diagonal.
- Lower.
If you want to connect bimetallic heating radiators in the optimal way, that is, so that labor costs are minimal and the efficiency of the devices is maximized, then when determining a suitable circuit, you need to focus on the following parameters:
- System type: one- or two-pipe.
- How the coolant is supplied: from below or from above.
- Number of sections in the radiator.
Heating system type
Single pipe systems can be routed vertically or horizontally. The latter option is most suitable for low-rise dwellings: usually we are talking about one- or two-story houses. Three-story buildings are rarely equipped with horizontal wiring. Vertical wiring is usually used in high-rise buildings. This scheme consists of a pipe coming out of the flow, going to the radiator, and then to the floor. This picture can be observed in all (or almost all) rooms. Sometimes there are cases where two radiators are powered from one riser at once. However, it is not at all necessary that they be in the same room.
The strengths of this scheme are the low installation costs and stability of operation (it is quite difficult to unbalance it). However, if significant changes in the parameters of batteries and pipes occur, this can significantly affect the hydraulic resistance. As a result, only the first two sections turn out to be warm, and the rest of the device remains cold.
Single-pipe wiring is characterized by a gradual decrease in the temperature of the coolant as it moves away from the boiler. The efficiency of heating the battery of the neighbor above (with top supply) is inversely proportional to the heating of the radiator on the floor below. To avoid such situations, a law on common ownership of the heating system was adopted. Now, in order to replace a pipe or heating device, you need to obtain the appropriate permits. High-rise buildings are not so often equipped with two-pipe wiring. This is explained by the large consumption of pipes for its organization. In addition, the large dimensions complicate the balancing of the circuit.
A two-pipe system in a multi-story building has the following diagram:
- Two pipes are brought into the room.
- The hotter part serves to supply coolant to the battery.
- The second removes the coolant that has cooled down after the radiator further.
Thanks to this scheme, the temperature of the coolant supplied to all heating devices is identical. It is important to remember that if there is a change in hydraulic resistance in just one radiator, the entire system can be completely unbalanced. A very small resistance will provoke the passage of almost the entire volume of coolant through this section. Therefore, in the presence of such wiring, installation of control valves is mandatory. Most often these are manual control valves or thermostats.
Carrying out installation
Installation of a radiator in an apartment or house is carried out in the following sequence:
- Make the markings with your own hands and install the fasteners. The second procedure is carried out according to a simple scheme: holes are drilled, dowels are inserted, brackets are attached and they are secured with screws. If the mount is floor-mounted, then it is secured to the floor with screws. Sometimes it is fixed on the bottom of the wall.
- Installation of components. They install a device that removes air. It can be automatic or manual. It is placed with your own hands on the upper manifold opposite the hole to which the inlet pipe can be connected. A plug is placed on one of the collectors. These elements are installed according to the battery connection diagram. If the diameters of the collectors and pipes are different, adapters are mounted on the free holes.
- If the heating system of the apartment is single-pipe, then it is necessary to install a bypass - an additional pipe that connects the inlet and outlet pipes. Ball valves must be installed at the ends of the bypass.
- Installation of control and shut-off valves. The control valve is a valve with a thermal head. At this stage, only the valve is screwed in. It is placed on the hole to which the inlet pipe will be connected. The thermal head is set aside. If such a valve is used, a shut-off valve is placed on the outlet hole. A replacement for this pair of fittings are ball valves. Shut-off valves are mounted as follows: fittings with American fittings are screwed into the radiator holes, and the base is fixed to the pipes. If the pipes are metal, tow is wound on the threads.
- Hang the radiator on the brackets. There is no need to remove the protective film from the bimetallic device before or during this process. She will protect the beauty of the product as long as all work continues. It is necessary to tear the film in those places that will come into contact with the fastener.
- Connect the inlet and outlet pipes. They are connected depending on the selected connection scheme. The process involves attaching the base of a tap or valve to a pipe with an American connection and tightening the American connection with your own hands. The connection may be different, because not every shut-off valve has an American connection. It may be that first a shut-off valve is connected to the radiator, and then it is connected to the pipes. In this case, they can be connected by crimping, welding or under pressure.
- The radiator and the entire heating system circuit are pressure tested. In this case, at first the taps are almost completely closed. Then they gradually open. A sudden opening can cause water hammer.
Direction of coolant circulation
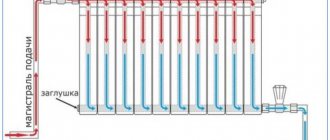
The lower saddle connection of the batteries using a lower vertical collector allows you to not depend on the direction of coolant supply. This cannot be said about the lateral and diagonal leash, as well as when radiators with a bottom connection point are used: here the supply must be clearly adjusted. Otherwise, the heating of the device may stop completely, or it will heat up very weakly. A lateral or diagonal connection involves the use of a top feed (the return pipe in this case comes from below).
When installing a bimetallic radiator with a bottom connection, it is important to clarify in advance which of the inputs will be connected to the supply. Usually this information is indicated in the passport. It is important not to confuse the directions, because... The supply in such heating devices is equipped with a tube extending upward from the inlet assembly. With its help, the coolant is brought to the upper collector. After this, it spreads over the radiator.
The coolant collection point is the lower collector, from where it is supplied to the return pipeline. The connection point is located on the left or right side of the radiator (it is recommended to choose the point closest to the riser). This makes it possible to save on pipes for bimetallic heating radiators and achieve a more aesthetic appearance.
Number of sections of bimetallic radiators
How many sections there will be on a bimetallic radiator has a direct impact on the choice of connection method. A battery of up to 8 sections can be connected with a side, bottom saddle or diagonal connection. If there are more than 8 sections, it is better to use a diagonal connection.
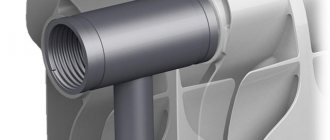
When using side switching, a flow extender will be required. This refers to a tube inserted into the supply manifold. It helps out in situations where the side connection provides heating only for the first sections. Thanks to the tube inserted inside, the coolant flows further than the inlet, heating the surface of the device more evenly.
Flow extension length options:
- 2/3 batteries.
- To the center of the last section.
Different cases show the effectiveness of both the first and second options. The main thing is that a noticeable optimization of radiator heating is achieved. Sometimes it happens that installation to the middle of the last section provokes a decrease in the heating level of the first sections. In this case, it is recommended to shorten the tube. But such situations rarely occur, which is influenced by the pressure in the riser and the cross-section of the liner.
As practical experience suggests, it is better to install a long tube, because You can always shorten it (but you won’t be able to lengthen it). Another way to distribute the coolant more evenly is to equip the flow extension tube with a series of holes. Thanks to this, the coolant flows into nearby vertical collectors. However, in general a single tube is sufficient.
What kind of fittings are needed
To connect a sectional bimetallic radiator, you will need a standard connection kit.
We are talking about the following elements:
- Plugs.
- Manual air vent valve (Maevsky faucet) and the key to it.
- Pair of adapters (with right-hand and left-hand threads).
Adapters are supplied to the right and left sides of the radiator. You can connect fittings or pipes to them. Their diameter (½ or ¾ inch) directly affects the diameter of the fittings and liner.
Pipes
When replacing radiators in a high-rise building, it is necessary to use the same pipes and with the same diameter. This is not just a whim. The fact is that multi-storey buildings use systems with certain parameters. The main ones are hydraulic resistance and operating pressure. A test (pressure test) pressure used during system startup is specially organized for them. As a rule, it is an order of magnitude higher than the working one.
The use of polypropylene and metal-plastic pipes to connect bimetallic radiators, despite all their advantages, is not recommended in such conditions. Their external attractiveness does not in any way contribute to increasing the service life in conditions of centralized systems, which is fraught with the appearance of leaks with all the ensuing consequences.
The same applies to the diameter of the pipes. When changing the diameter of the liner, the hydraulic resistance of the entire circuit changes greatly. And no one can guarantee that this will have beneficial consequences. Therefore, when using half-inch pipes in a system, there is no need to experiment with other diameters. The same goes for fittings and battery adapters.
Purpose and selection of bypass
When installing a bimetallic radiator in a single-pipe system, it is imperative to use a bypass. This is the name given to the jumper between the supply and return pipes. It allows excess coolant to bypass the battery. This scheme allows you to avoid blocking the drain and subsequent troubles with the management campaign. Most often, the bypass is made offset: its optimal location is between the radiator and the riser. If you insert a tap into the jumper, this will make it possible to adjust the temperature of the radiator. However, in this case there is a possibility of blocking the riser.
A more effective solution is to use an unregulated bypass, equipping the radiator directly with control valves. This is mainly done in cases where the room is very hot. If there is no such problem, then it is better not to reduce the efficiency of radiators, which inevitably happens when installing regulators.
The automatic fittings are designed for a pressure of 10 atm. Therefore, when the testing pressure drops below 15 atmospheres, operation does not encounter any difficulties. Exceeding this limit will most likely lead to device failure. If it is absolutely impossible to do without a thermostat, and the test pressure is very high, it is better to dismantle the device before starting the circuit and replace it with a drain. Upon completion of the pressure testing, the device is mounted back, which makes it possible to clean the valve at the same time.
Manufacturers
Among the many brands, the following brands have proven themselves well:
Lideya (Russia). This manufacturer has received many positive reviews, as all of its products are of high quality finish. The radiator panels are coated with a unique two-layer varnish, and the devices can operate in one-pipe or two-pipe heating systems.
- Biasi S.p. A. (Italy). The radiators of this company are created using the latest technologies, so their heat transfer is high and the rooms are heated instantly. The devices can also operate at low temperatures; their operating pressure limit is 9 bar.
- Korado (Czech Republic). Batteries have either one, two or three panels. The main features of the products are their wide range of colors, small volume of coolant, and convenient brackets. The pressure limit reaches 8.7 bar, and the water heats up to +110 C.
Selection of shut-off valves
As some manufacturers recommend, do-it-yourself installation of bimetallic heating radiators should be accompanied by the installation of shut-off valves at the inlet and outlet. We are talking about ball valves. To ensure normal coolant permeability, it is better to use full bore products.
Thanks to the shut-off valves, the radiator can be dismantled at any time for repairs and maintenance without stopping the entire system. To do this, just turn off the taps and wait for the coolant to cool. After which the device can be removed. In such cases, it helps to have a bypass through which the coolant will bypass the battery being serviced. Otherwise, you will have to turn off the entire riser, which can only be done with the permission of the management company.
Connection diagram
Any connection method can be used in a one- and two-pipe heating system. In the first type, the batteries are installed so that they form a single chain through which water flows from top to bottom. It is not profitable to install such a heating system in a private house, since the first radiators will heat up very well, but the rest will heat up poorly. This occurs due to the flow of cooled coolant to the last devices.
A two-pipe system is more profitable, since hot water comes from one riser, and cooled water flows into the other. This type of heating network piping is carried out in all private houses, because it allows you to maintain a constant specified thermal regime and makes it possible to control this regime.
Air vents
The standard installation kit includes a manual air vent (Maevsky valve). The place where it is installed is the free upper manifold. The presence of an air bleeder is mandatory when connecting a bimetallic radiator. The fact is that the contact of the coolant with the materials of the collector provokes chemical reactions, as a result of which gases are formed.
Thanks to this small device, it is possible to remove air and gases accumulated inside the radiator. If this is neglected, excess pressure will appear in the system, causing circulation problems and uneven heating of the batteries. To release gases, you need to open and close the valve with a key.
If you don’t want to remove gases manually, there is an option to install an automatic air vent. It is mounted in the same place as the Mayevsky crane. The device has a cylindrical shape and a height of 6-8 cm: when installing, it is necessary to maintain strict verticality. To hide the automatic air vent from view, a decorative screen is usually used for the radiator.
Calculation example
Let's do the counting
- For example, a room has dimensions of 3x4x2.6 m. Multiplying these numbers, we get 31.2 m3.
- Conventionally, we will assume that each section of the bimetallic radiator has a power of 200 W.
- For ease of calculation, let's divide the power by 100: 200/100=2.
- Now we divide the area of the room by the resulting figure: 31.2/2 = 15.6.
- The resulting figure is the result, which reflects the number of sections required for installation in the room.
- Since it is unrealistic to purchase 15.6 sections, we round the figure up. The result was 16 sections.
The above calculation of the number of sections for a room assumes that the walls are warm and the windows are not ventilated. Otherwise, the number of radiator sections will have to be increased.
Installation nuances
There are two types of bimetallic radiators: partially or fully bimetallic. In the first case, aluminum is used for the manufacture of vertical collectors, which requires special care during installation.
There are the following requirements for how to properly connect a bimetallic battery:
- When connecting fittings and manifolds, be careful not to use excessive force. As a rule, the accompanying documentation contains detailed installation instructions. A torque wrench is very convenient in this regard, allowing you to control the applied force.
- When using linen winding, it is important not to overdo it with its quantity. Otherwise, some of the effort will be spent on it, which will ultimately lead to the appearance of microcracks. After the coolant gets into them, the process of peeling off the paint will begin. As a result, sooner or later a leak will appear. It is best to apply sealant and a little flax. It is better to avoid using paint in systems where antifreeze acts as a coolant. This will lead to rapid corrosion of the seal and the appearance of a leak.
- The battery must be mounted in a strictly horizontal position. An exception is when an air vent is used, when, for greater efficiency in releasing gases, a slight forward angle deviation along the circulation path is allowed. It is prohibited to make a slope in the opposite direction, because this disrupts circulation.
- When hanging the radiator, you must use three brackets: two on top and one on the bottom. The upper elements take on the entire load. Due to the lower fasteners, the desired direction is set.
- To ensure effective air exchange, the following parameters should be adhered to: distance to the floor - from 60 mm, to the window sill - from 100 mm.
In some cases, the manufacturer may recommend other distances, depending on the design features (the differences are usually a few centimeters). However, the gap between the rear surface of the battery and the wall remains unchanged - 30-50 mm.
Requirements for the location of the radiator in a private house
Radiators should be installed in areas of greatest heat loss
in the house (window openings and entrance doors).
As a rule, heating devices are installed under each window of the home and in the hallway on the wall
, next to the front door of the house, as a thermal curtain and dryer for wet things.
For maximum heat transfer from the heating device, there are the following optimal distances from the radiator:
- To the floor 8-12 cm;
- to the window sill 9-11 cm;
- to the wall 5-6 cm;
- protrusion of the radiator beyond the window sill is 3-5 cm
(so that the heat from the radiator warms the window unit).
Requirements for wall and floor construction:
- The wall
on which the heating device will be mounted
must be plastered. - When attaching to a plasterboard wall,
first installed in it
. - Floor mounts
for the radiator
are installed on the finished floor.
Installation Tool:
- Drill or hammer drill,
- Drill 10 mm,
- Hammer,
- Screwdriver
for screwing self-tapping screws when using corner brackets, - Construction level
with spirit level or laser level, - Pencil,
- Roulette,
Plastic radiator spanner- Key for American.
