The creation of residential building projects, from the general design to the calculation of the placement of heating radiators, is regulated by state building codes and regulations. It is SNiP that is the main document on the basis of the provisions of which the building design is developed. But this is for new buildings, but what about houses built back in the 40-50s of the last century? Or with the projects of multi-storey panel high-rises that were so popular in the 70-80s? Especially when apartment owners replace old wooden windows with plastic ones with new window sills. In this case, you need to carefully study the regulatory documents and, in accordance with them, plan work on how to install a heating radiator under the window.
Types of heating systems
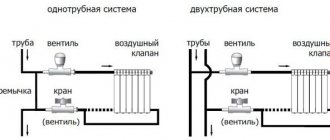
There are three options for radiator connection systems - serial, single-pipe, two-pipe and collector (parallel). They differ in the wiring diagram. Depending on what system is installed, it is necessary to select the type of batteries. It is important to remember that incorrect connection of heating radiators leads to a decrease in the actual thermal power of the batteries.
Serial connection
This is the simplest option for connecting radiators. From the heating device the pipe passes to the first radiator, from it to the second, etc. This connection option has become obsolete, since the water cools quickly and the heating level drops sharply with distance. There is no option to turn off an individual battery - you have to shut off the entire system.
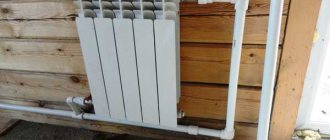
A clear example of serial connection of radiators.
Single pipe system
A single-pipe system uses one main pipe through which heated water or other coolant flows from a heating device (heat pump, boiler, boiler, etc.). Each battery is connected in such a way that the liquid passing through it returns to the main line.
The radiator can be turned off using a valve or shut-off valve without shutting off the main pipe. The water temperature in each subsequent radiator drops, but not as significantly as with a series connection.
Two-pipe system
The supply of heated water and the discharge of cooled water in the system occurs through different mains. Each radiator is connected to both pipes. In such a system, the temperature of the liquid at the inlet of each radiator is almost the same; it decreases slightly due to heat loss in the pipes.
Collector (parallel) system
In this system, all batteries are connected in parallel. One line comes out of the heating device, which is connected to the collector (popularly called a comb). In the collector, water is distributed through several pipes, each of which leads to a separate radiator. The shut-off valves are located on the manifold.
Collector or parallel heating system
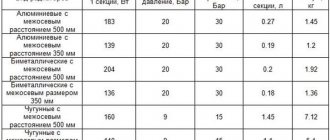
The collector system can work in conjunction with any other. For example, several radiators connected to each other in parallel using a single-pipe or two-pipe system can be connected to the main line with warm water leaving the collector. The number of heating radiator sections depends on the selected system and type of connection. You can calculate them using an online calculator.
Useful recommendations from professional installers
When installing heating radiators, you should not skimp on components. The longevity of the entire heating system often depends on the quality of the taps, fittings, and seals.
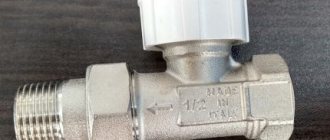
It is imperative to install shut-off valves in the radiator supply area. This is a necessary condition for the ability to carry out regular technical inspection and cleaning if necessary. If in the future you want to replace radiators with newer models, this will not be difficult to do - just shut off the flow of coolant.
Correct installation of heating radiators in a niche
It happens that in apartment buildings there is a niche for old cast iron radiators. This method of installing heating batteries is ineffective, but sometimes there are no other options. Therefore, let's consider it too.
- The distance between the side and rear walls of the niche to the radiator should be at least 5 cm.
- Air access from below should not be difficult, as well as its exit from above. The distance from the bottom and top of the radiator to the walls should be more than 10 cm.
Decorative grille Installing decorative grilles reduces the efficiency of the radiator.
The loss of thermal power can reach 20%. should promote convection. An overlay made of diagonal strips is best suited. It is better not to cover the gap in the lower part of the radiator with a grille to ensure optimal air convection. If the niche is made in a parapet located along the wall, it is better to cover its upper part with a decorative lattice rather than a solid overlay.
The battery in the niche under the window should be located so that there is a distance to the window sill. It should be twice as large as the window sill protrudes from the wall. For example, if the window sill extends 15 cm beyond the wall, the distance from it to the niche should be 10 cm.
The radiator in the niche under the window should be positioned so as to ensure good air convection. There should be at least 10 cm between its top and the edge of the niche.
This decorative grille will provide good air access to the radiator and completely hide it.
Connection diagrams according to SNiP
Before starting installation, regardless of where the installation is being carried out: in the kitchen, in living rooms, connecting batteries on the site between floors, or insulating the hallway - you should select the necessary connection diagram. Several options are presented for consideration.
Rules and regulations
Side connection
In most cases, a lateral connection is made, which helps achieve maximum heat transfer from heating batteries. This requires minimal expenditure on heating the room. The installation principle of the presented option is that the inlet pipe is connected to the upper branch pipe of the section, and the outlet pipe, respectively, to the lower branch pipe. When connected in this way, the pipes will be on one side of the heating radiator.
Diagonal connection
The indicated connection method is intended for attaching batteries that are long. In this case, the inlet pipe is connected to the upper pipe, and the outlet pipe is connected to the lower pipe, which is located on the opposite side of the radiator. As a result, maximum heating of the radiator is achieved along its entire length.
Distance from floor
Bottom connection
This connection method is used for heating systems located under the floor. The only drawback of the presented option is a decrease in efficiency by approximately 5–15% when compared with the side connection of radiators.
To summarize, it should be said that each manufacturer includes instructions with its products, thanks to which step-by-step installation of the purchased heating device and brackets is carried out.
In the bedroom
All standards are recorded in SNiP. It is necessary to adhere to the indicated rules and recommendations, maintaining the required distance between the radiator and the wall. When installing batteries, even without the involvement of specialists, no problems should arise, but it is still better to entrust such work to professionals.
How to properly install a battery under a window
The greatest heat loss occurs through windows. Therefore, correct installation of the battery under the window is especially important.
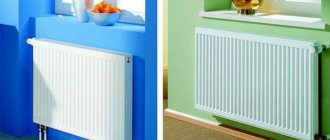
- The radiator must be located exactly in the middle of the window - this way it will cut off cold air. The main task of the radiator located under the window is to create a thermal curtain. It will not allow cooled air from the window to enter the room. and will not allow it to spread throughout the apartment.
- The installation height of the radiator from the floor should be 5-10 cm. If the gap is larger, a layer of cold air will form. If less, it will be difficult to clean under the battery.
- The distance from the wall should be at least 5 cm so as not to impede air convection. Otherwise, the battery will heat the wall of the building and not the room.
Important
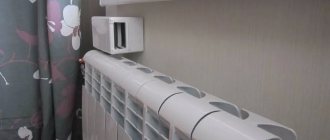
If the radiator is equipped with air cutoffs (see photo), the distance from it to the window sill should be more than 5 cm. If the window sill is wide and protrudes beyond the radiator, for every 1 cm of this difference you need to add 2 cm to the gap between it and the battery.
Such a radiator will remove warm air so that the window sill does not interfere with its circulation
For radiators without an air cutter, the minimum distance to the window sill is 10 cm plus 3 cm for every 1 cm of protrusion. Installing heating radiators under the window close to the window sill will interfere with air convection. And this will lead to a decrease in heat transfer.
If the distance between the window and the floor is too small and it is not possible to comply with the standards described above, it is better to install a low radiator with a large number of sections. This way you can avoid excessive heat loss and heat the room more efficiently.
You can read more about the issue of arranging a niche in the article “How to properly recess batteries into the wall without heat loss”
Location and dimensions
The ideal option is when the radiator has the same width as the window opening.
Then the heated air rising from the battery will completely block the access of cold air. But in this case there is one caveat.
If the number of radiator sections is too large, the room will be too hot.
To avoid this, you can install a battery with low sections.
There are options on the market with a height of 300 mm - they are ideal for solving the problem.
You can install a standard radiator with a section height of 500-600 mm, but in this case it must be placed exactly in the middle under the window opening.
An expert answers your questions
What is the best way to install batteries in a niche or on a wall?
If you want to hide the radiator, it is better to install it in a niche. But keep in mind that it must be made according to the rules; it is best to install a heat-reflecting screen in it.
When you make a niche in an exterior wall, you will reduce its thickness. If a house or apartment is poorly insulated from the outside, this will lead to heat loss. In addition, a thin wall will not support a heavy battery.
Do you need a niche for heating radiators? Do you need a niche for the battery?
There is no need for a niche as such. With its help you can hide the radiator and put a decorative grille on top.
Where to put the batteries if the house has large windows?
If you mean windows that start from the floor, then you need to place it directly in front of the window (see photo). If the windows are of normal height, but wide, panoramic, you need to install radiators under them. There will simply be more of them. Calculate so that there is one radiator for every 2 linear meters of window.
How to properly position heating radiators in a private house?
The installation rules are the same for both a private house and an apartment. The only difference is the large number of external walls. Try to make the wiring so that all the batteries stand along them.
Most heat loss occurs in the corners where two exterior walls meet. You should definitely install a radiator there. It may be small, 3-4 sections, but it is necessary.
Why do they put batteries in the corner?
This is done only in those corners where two outer walls meet. It turns out that in a small area there is a large area of walls through which heat escapes. And these losses need to be compensated somehow.
How to properly install batteries under plastic windows?
It makes no difference whether you place them under plastic or wooden windows. You just need to correctly calculate the number of sections. The smaller the window area and the greater the number of chambers, the less heat escapes through it.
Do heating radiators need to be placed flush with the edge of the window sill?
If your window sill does not extend beyond the edge of the wall, this can be done. But imagine how ugly such an arrangement will look? In addition, the lower the radiator is located, the more evenly the room warms up.
If you want to ask your question, do so in the comments.
Autonomous heating devices
As the heating season begins, the room temperature begins to drop. Turning on a heating boiler in a private home is not always profitable from an economic point of view. Waiting until centralized heating starts working is also not an option for many.
To maintain comfortable microclimatic parameters in your living space, you can purchase an additional heating device in advance. The modern market offers a large selection of similar units, among which you can choose an analogue that will suit you in terms of cost and power. Design and other parameters.
In our online store you can choose:
- air conditioning with heating function;
- infrared heater;
- fan heater;
- convector;
- electric fireplace;
- oil heater;
As you can see, when installing radiators, various parameters must be taken into account. In order for the heating system to work smoothly, you need to choose the right type of batteries and connect them correctly. If you are planning to change the heating system in your home, contact us. We will tell you which one to choose and how best to place the radiator.
Problems of insufficient fastening of batteries to the wall
Correct and reliable fastening of heating devices to the wall is a guarantee of peace and well-being of apartment residents. Insufficient fixation of batteries, especially in combination with the following factors, can lead to deformation of the product or depressurization of seams, which will cause leaks
That is why it is very important to install them correctly and reliably.
So, the factors that aggravate the improper fastening of batteries:
- mechanical damage to devices during their operational life;
- distortions of heating radiators when filling them with water.
Methods for installing mirrors on drywall: easier than batteries
When it comes to hanging mirrors on plasterboard walls, there are three installation methods.
These methods vary depending on the size and weight of the mirror:
For small and lightweight mirrors, you can use double-sided tape. This is the simplest method that requires minimal time and money. This way you can attach a product weighing up to 5 kg. We apply tape around the perimeter of the product and attach it to the wall, pressing it well. The main thing is that it hangs evenly. But usually there is no need to hang mirrors of such a small size on the walls for their functional purpose. This method is often used to create some kind of decorative solution;
- for liquid nails. Using this mount, you can hang a medium-sized product on the wall. In this case, the weight of the product should be up to 20 kg;
- on dowels or anchors or special brackets. With the help of such fasteners you can even fix an old and rather weighty mirror on a plasterboard wall. The method is used when the weight of the object is more than 20 kg.
The second and third methods are most often used, since mirrors of such sizes fully correspond to their purpose.
How to hang small objects on drywall
In a situation where your product weighs up to 20 kg, you can use liquid nails. To attach a product to a plasterboard wall in this way, we carry out the following manipulations:
choose the location of the future placement of the product on the wall; remove dirt and dust from the selected area of the working surface; apply liquid nails to the back surface of the mirror; the solution should be applied in such a way as to ensure maximum adhesion surface; special attention should be paid to the edges. Liquid nails should be applied here not to the edge itself, but at a slight distance
This must be done so that when pressing the product against the plasterboard surface it does not go beyond its boundaries. In such a situation, you can leave unsightly stains near the mirror, thereby ruining the exterior finish; We press the product against the wall, adjusting its position on the surface. You can use a level for this; if during the process of pressing a small amount of solution comes out of the mirror, carefully wipe it off with a clean napkin; hold the object in this position until the solution dries completely. In order not to stand and hold the product until it dries completely, you can prop it up or use any other structure to support it.
How to hang heavy objects on drywall walls
Mirrors that are large in weight and size are attached using special fasteners - a butterfly dowel.
The peculiarity of this fastening element is that when it is screwed into the wall cavity, the dowel opens like a butterfly (hence the name of the fastening element). As a result, the dowel is firmly fixed in the hole and will not be pulled out, unlike ordinary nails. Such fasteners will not rotate in the hole made, which will ensure greater rigidity of adhesion of the product to the wall surface.
Scheme for installing heavy mirrors on drywall
We install the product according to the following scheme:
- We find a metal profile under the material. The easiest way to find it is to use a magnet;
- make a mark in the right place;
- if the mirror has large dimensions and at the same time average weight, then it is necessary to determine several places for screwing in butterfly dowels. This way you can evenly distribute the load over the surface of the wall. The best solution would be to install fasteners in adjacent profiles;
- After this, you can screw hooks into the dowels or install brackets.
In a situation where the product has quite impressive dimensions, anchor bolts should be used instead of butterfly dowels.
Anchor bolts for mounting on drywall
This fastening is more durable than a butterfly dowel. In terms of its structure, an anchor bolt is practically no different from a butterfly dowel. When screwed into the hole, it helps ensure that the mount is firmly fixed in it. Installing such fasteners in a metal profile under sheets of drywall will create such a strong fastening that can withstand the weight of even a full-length mirror. And when installing anchor bolts in two adjacent profiles, it will not allow your mirror to fall.
In addition, in a situation where heavy products are installed, in order to avoid tearing out a piece of the wall, you can install a second sheet of material. Instead of drywall, you can use a plywood sheet as a second sheet.
