Many are afraid to use penoplex, believing that it is unsafe, but this is a controversial statement. The material is only dangerous in case of fire, as it emits harmful substances, but this can also be avoided. Let's learn about the features of this insulation, its advantages and disadvantages, its features and how to use it correctly and where. We will determine whether penoplex indoors is harmful to health, whether it can be used in residential buildings, and whether there are any restrictions.
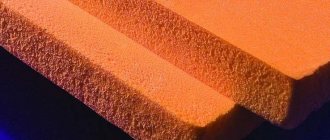
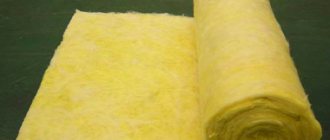
Appearance Source sps2016.ru
What is it and where is penoplex used?
Penoplex (“Penoplex”) is a large company that produces construction and finishing materials. The company also produces extruded (melted in a high-pressure oven) expanded polystyrene (EPS, XRS) or penoplex. This is a thermal insulation material that has excellent thermal characteristics. A sheet of material just 2 cm thick retains as much heat as a 20 cm thick wooden wall, 27 cm thick foam concrete or 37 cm thick brick wall.
Compared to foamed polystyrene (foam), penoplex has a higher density, so it better withstands mechanical loads. The material has low moisture permeability and almost does not conduct steam.
Penoplex is used when resistance to stress and low vapor permeability are important. It is used:
- For insulation of floors, facades, internal walls, non-residential basements;
- On flat roofs;
- For insulation of wells and septic tanks;
- On paths and playgrounds.
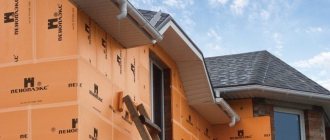
Using penoplex Source prom.st
The company produces several brands of material that differ in properties. For example, for insulation of foundations and underground garages, frost-resistant “Penoplex Comfort” or “Foundation” is used (it can withstand heavy loads), for insulation of balconies and external walls - “Wall” with low thermal conductivity, for roofs - non-flammable “Roof”.
At the same time, it is important to establish a ventilation system, which, like penoplex, does not allow steam to pass through. In the home, this can lead to increased humidity and the need for artificial regulation. However, this is not always necessary: for example, when insulating the floor, ventilation is not needed.
See also: Catalog of companies that specialize in finishing materials and related work
How to install penoplex with your own hands
To install insulation on the external walls of a house or apartment, you need to perform the following steps:
- We prepare for work, prepare the walls, clean them of dirt, dust, old finishes and paint. It is advisable to level them with a plaster mixture if there are obvious irregularities and then treat them with an antifungal substance;
- Using a special adhesive, glue the slabs to dry walls. The glue should be applied to the slab itself;
- The slabs must be secured with dowels, which must be 4 pieces per square meter. Fastening is carried out after gluing. Along the perimeter of windows, door openings or in corner areas, the number of dowels should be increased to 8 pieces per square meter;
- Apply a layer of plaster on top of the insulating boards. In order for the plaster to adhere well to the insulation, it is advisable to create a roughness effect on the surface of the slabs using special devices. The first layer of plaster should “drown” the reinforcing polymer mesh, and then apply the second. Only after it has dried can the walls be painted;
- You can also use wood, siding, or hanging frame systems instead of plaster.
If for some reason it is not possible to insulate the walls from the outside, they can be insulated from the inside .
The principle of operation is the same, but on top of the penoplex you need to install a foil film of polyethylene, which will act as a vapor barrier layer. Next you need to attach the gypsum board sheets, and then start gluing the wallpaper. To hang drywall, a lathing is used, which must be attached to the wall with dowels through the insulating layer. You need to insulate balconies and loggias using the same principle, only the joints between the slabs need to be glued with tape. Also, after laying the foil vapor barrier layer, you also need to equip the joints with tape to maintain the temperature.
If you use plasterboard sheets for final finishing, then you need to choose moisture-resistant ones. Also, in addition to the walls on the balcony and loggia, the floors also need to be additionally insulated.
But to insulate the roof either at the construction stage of the building, or during its reconstruction, for example, if a cold attic is converted into a living space.
For this type of insulation you will need:
- roofing material;
- sheathing;
- moisture-resistant membrane;
- penoplex;
- material for internal lining;
- rafters
Penoplex should be laid on top of the rafters according to the checkerboard principle. A membrane made of vapor-permeable material is placed on top of it. Next, the slabs are secured with longitudinal slats, the thickness of which is at least 40 mm in 300 mm increments, to ensure ventilation between the slabs and the roof.
Now we attach the transverse slats with a pitch that will be optimal for installing the roof covering, or by means of a continuous flooring if the roofing materials have a roll structure.
Compared to polystyrene foam, penoplex is more expensive, but it is of much higher quality, etc., in addition, it can be used together with any plastering systems.
Advantages and disadvantages
It is worth finding out whether penoplex is harmful to health. Like any material, it has a number of pros and cons. To understand whether it is harmful to health, it is worth learning a little more about insulation.
The advantages of the material include:
- Long service life: penoplex can be used for up to 50 years;
- Tolerates low (up to -50 degrees) and high (up to +75 degrees) temperatures;
- Does not absorb water, does not require additional waterproofing;
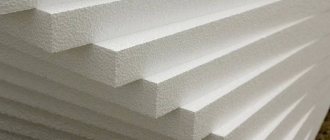
Penoplex close up Source sladkiyson.net
- Does not react with most chemicals. The material is destroyed only upon contact with a solvent;
- Withstands mechanical loads without breaking. On average, penoplex can withstand pressure of up to 4 kg per square centimeter, some brands (for example, “Foundation”) - up to 27 kg. Polystyrene foam can withstand no more than 0.5 kg per square centimeter.
In addition, the material is easy to use. It does not require additional processing or special skills; it can be cut with a knife and glued with glue or special foam.
Penoplex has some disadvantages:
- It is easily destroyed when exposed to direct sunlight. When working with it, it is better to choose a cloudy day and do everything quickly;
- It is easy for mice to breed in it;
- Its cost is higher than that of other insulation materials;
- Penoplex is flammable. It belongs to categories G3 and G4, which include the most flammable materials.
In advertising they often say that the material does not burn and is safer than wood. This is not so: you can determine whether penoplex is harmful by its flammability. The material is highly flammable and emits vapors that are hazardous to health. You can reduce the harm by treating the sheets with fire retardant compounds. This will help reduce flammability to class G1. In the event of a fire, the penoplex will melt and will not be able to support the fire.
Penoplex: technical characteristics
The key technical characteristics of this insulation are as follows:
- low level of thermal conductivity, its coefficient is 0.03 W/m;
- high level of compressive or bending strength;
- low level of water absorption - no more than 0.2 percent by volume per day;
- the vapor permeability coefficient is about 0.007-0.008 mg/m.h. Pa;
- the service life of the material can be more than 50 years;
- fire resistance;
- the material is non-toxic and does not rot;
- can be applied from minus 50 degrees to plus 75 degrees, respectively.
Requirements for insulation
Insulation is an important material in construction that can affect the health and safety of occupants. You shouldn't choose based on price alone.
When choosing insulation, it is important to pay attention to the following points:
- The material should not contain fine fibers or dust;
- It should not contain harmful phenol-formaldehyde resins;
- During operation, it does not emit harmful substances even at high temperatures;
- It practically does not get wet, since fungi and mold easily grow in wet material.
According to these criteria, penoplex is absolutely safe. It has the necessary certificates of conformity, has passed all tests and is found safe when used correctly.
Balcony insulation Source remontnik.ru
Comparison with other insulation materials
Other materials are also used as insulation. They all have certain features and disadvantages that are worth remembering.
Below we compare Penoplex and:
- Expanded polystyrene . It is produced using a non-press method, due to which the strength and density are reduced. Almost all technical characteristics of polystyrene foam are lower in comparison with Penoplex. The exception is vapor permeability: it is much higher, and therefore it is better to use insulation in rooms with high humidity.
- Styrofoam . Its characteristics are similar to expanded polystyrene.
Foam insulation Source tildacdn.com
- Styrex . Stirex and Penoplex have almost identical characteristics.
- Mineral wool . Made from mineral raw materials by heat treatment. It has different densities (up to 300 kg/cubic meter) and high vapor permeability, can absorb up to 1% moisture. At the same time, mineral wool can withstand temperatures up to +450 degrees. It is best used in rooms with high humidity and in fire hazardous places (workshops, garages, industrial facilities).
- Extrol . It has the same characteristics as Penoplex, but is produced not only in the form of slabs, but also in the form of cylinders or semicircular segments. It is convenient to use for thermal insulation of pipes.
When choosing a material, it is important to pay attention not only to the properties of the insulation, but also to the form of release and the ease of working with them.
Myths about insulation
Reviews of penoplex are varied, and there are many questions about whether polystyrene foam is harmful as insulation indoors. Some believe that extruded polystyrene foam is harmful and should not be used in the home, others note that the material is completely safe.
The most popular myths include the following:
- Penoplex emits harmful fumes. This is not true: when processing sheets, the material becomes greatly compacted and generally stops releasing vapor into the air. In addition, the sheets are covered on the outside with a finish that will not let harmful substances through, even if they are present.
- The insulation does not allow steam to pass through, which is harmful for residents and the material itself. The walls should not allow moisture or steam to pass through, as the room will become damp. To prevent the insulation itself from getting wet, it is enough to provide good ventilation.
- The presence of penoplex increases the risk of fire. This is a controversial statement. The insulation itself will not catch fire, but during a fire it easily flares up and releases hazardous substances. The sheets must be additionally treated with fire retardant compounds so that they do not burn, but melt.
Features of expanded polystyrene
- Relatively small weight - this parameter reduces costs when installing insulation. In addition, working with lightweight material is much easier, especially when it comes to high-altitude work.
- Simple processing, this means the absence of special protective equipment. Like, for example, glasses when cutting metal. Also, materials made from styrene are odorless, do not cause irritation, and do not create dust pollution.
- Biologically resistant polystyrene foam is not digestible by animals, and due to its very dense structure, fungus does not grow in it. Many are indignant that mice eat penoplex - this is not true, but just another marketing ploy of competitors. Expanded polystyrene has a chemical composition and is therefore not of interest to rodents.
- Treatment with chemical materials is acceptable - cement, glue, saline solution, putty, primer, and so on.
- Cutting and installation of even extruded polystyrene foam occurs without the use of special tools. An ordinary construction knife will do.
- Will withstand high loads when exposed to the entire area of the material.
- Demonstrate high energy saving performance.
- Suitable for insulation, both from the inside of the house and from the outside.
Now that we have a general idea of the material, we need to figure out where and how it is used. Reviews of penoplex agree on one thing - people are satisfied with the ease of installation of the material and its durability. After all, expanded polystyrene can last up to 50 years.
Areas of application
Considering all the above properties of the material, it becomes clear what its advantages are. Therefore, polystyrene foam, like expanded polystyrene, is mainly used as insulation. In this case, polystyrene foam is often used indoors, and polystyrene foam is used outdoors.
More precisely, the materials can be used in the following cases:
- To protect the foundation from the outside, it is more correct to use extruded polystyrene foam;
- To make thermal insulation in the basement, you can use both polystyrene foam and polystyrene;
- Floors - you need the densest material, that is, penoplex;
- Ceiling and ceiling slabs - both materials are suitable for their insulation;
- It is better to insulate walls on the outside using polystyrene foam, and on the inside with polystyrene foam.
- Both materials are also suitable for thermal insulation of loggias, but in this case polystyrene foam is preferable so that the room remains dry in any weather.
High-quality penoplex
How to insulate walls using polystyrene foam:
- Any repair work should begin with surface preparation, this case is no exception. It doesn’t matter from which wall the insulation will be carried out, it must first be prepared. This means removing wallpaper, paint, tiles, plastic and other finishing materials. Check how well the putty holds up if we are talking about internal insulation, or level the wall outside the house.
- When the outer layer is reliable, you can begin installing polystyrene foam. The insulation is fixed very simply - special glue (either a dry mixture diluted with water or foam glue) is applied to the panel around the perimeter, and then the block is glued to the wall. To keep it more secure, secure it with dowels on top. At the rate of one sheet - 5 dowels.
- Next, the insulation is covered with a thick layer of glue for fiberglass mesh (reinforcing mesh). A mesh is placed on the uncured layer and rolled with a roller until it disappears. Another layer of glue is applied on top. After the surface has dried, finishing work can be carried out - plastering, painting.
Carrying out insulation in this way is quite easy and simple; you don’t even have to hire workers. Many people have done their own wall insulation.
Review of polystyrene foam
“Many people say that polystyrene foam is a fire hazard. Nonsense! I burned it myself because I doubted whether to insulate it or not. As a result, I insulated the facade of the house, it turned out well, warm. There are no difficulties, and the polystyrene foam is securely covered with plaster on top.”
Vladimir, Kaluga
Video description
You can learn about the fire hazard of penoplex from the video:
- There are a lot of negative reviews from those who are already using the material. There are few negative reviews; they are in no way directly related to harmful effects. There are much more positive reviews: buyers note that they were not disappointed in the penoplex and did not notice any shortcomings.
Thus, it is not difficult to decide whether polystyrene foam as indoor insulation is harmful to health.
It is important to remember that only products from well-known manufacturers are safe. It has passed the appropriate tests and can be used in residential buildings. It is also important to remember that the technical characteristics of penoplex are maintained only with proper installation and operation. Although there are very few situations in which these conditions can be violated.
Reviews about polystyrene foam insulation
“I insulated the ceiling myself with penoplex. This is how it happens - a warm flow of air rises, but due to the fact that there is a layer of insulation there, it does not cool down. Therefore, heat is saved significantly. And you don’t need to hire anyone to do the repair work, you did it yourself. Personally, I'm happy with everything. The house is warm and very pleasant to be in.”
Victor, Smolensk
“A year ago, I first insulated the floor and then the ceiling in the house. I didn’t touch the outer walls yet - I decided to see how it would hold up. There is an effect - in winter the thermometer rose to 25, instead of the usual 20, with the same gas consumption. That's why I'm happy. The floor, of course, has become a little higher, by some 5-6 cm, but now it’s not cold to walk on it without slippers. So my feedback is only positive.”
Dmitry, Belgorod
“You know what’s amazing is the amount of advertising, and negative advertising at that.
Apparently, manufacturers of more expensive materials are afraid of competition. So they are trying to prove that their material is better. I doubted for a long time whether to insulate the ceiling in the entire house with penoplex. At first I thought of making it out of plasterboard; I even covered the ceiling in one room. But plasterboard, firstly, is more expensive, and secondly, all these metal frames, again, the ceiling lowers. That’s why I bought penoplex and insulated it with it. Cool, that's fair! Fast and easy. I sealed the seams, putty on top, painted - everything is ready. It’s warm and good in the house. There is no smell of fungus on the walls. That’s why I’m very pleased.” Gennady Omsk
Briefly about the main thing
Penoplex is a new material for insulation. Its main differences are strength, durability, resistance to various temperatures and exposure to water.
The main disadvantages of insulation are its high price, the likelihood of mice appearing inside it, and high flammability. Penoplex belongs to the flammability groups G3 and G4.
Despite the large number of myths, penoplex is safe and does not harm humans in any way during operation. Only products from well-known manufacturers that have passed the necessary tests and received certificates are distinguished by high quality.
In case of fire, sheets can release harmful substances. To prevent this from happening, it is necessary to treat them with special solutions.
Warming of surfaces
Both polystyrene foam and polystyrene foam are equally suitable for insulating floors and ceilings. The process of insulating the ceiling occurs as follows:
- Cleaning the ceiling down to the concrete surface;
- Treating the surface with a primer, and if it is strongly absorbed, then it needs to be treated several times. This stage is necessary to protect the ceiling from bacteria and fungi.
- The blocks are glued with a special glue, which is applied either directly to the ceiling or to the material. There is no fundamental difference here. After applying the adhesive, the polystyrene foam panel is applied to the ceiling and held until the adhesive begins to set. Then they are additionally secured with dowels. The principle is the same as for walls - five pieces per surface.
- When the entire ceiling is covered with polystyrene foam, a reinforcing layer is applied and a reinforcing mesh is added. This is necessary to improve waterproof qualities and elasticity. Because of the mesh, polystyrene foam cannot be broken. But the main thing is that the flammability of the material decreases.
- When the surface hardens, finishing work is carried out, joints are puttied, wallpaper is glued, and the ceiling is painted.
Floor insulation
Extruded polystyrene foam is suitable for all types of floor insulation, that is, on the ground, under a wooden floor, for concrete screed. It is better not to use polystyrene foam for these purposes at all. You can, of course, lay it down and secure it, but as a material it is quite fragile, especially under constant loads. Therefore, it is preferable to use extruded polystyrene foam.
Laying extruded polystyrene foam on the ground.
Initially, a 10 cm thick embankment is made of gravel or slag, the voids are then filled with expanded clay. If there is no basement, then for insulation you should choose the thickest material. Then logs are fixed on top - these are wooden beams several meters long that serve as support for the floor. They are installed so that the distance between them is 40-50 cm. All remaining free space is sealed with penoplex. Important! The top of the material should be covered with a waterproofing mixture, paying special attention to the joints.
For wooden floor
The technology is the same, only a cement screed is made on top of the logs, insulated with extruded polystyrene foam. Wooden floors, laminate, linoleum and so on are laid on it.
Concrete floor
If you have a ready-made concrete floor that needs to be insulated, then do the following:
Checking how smooth the surface is. If the differences are no more than 2-4 mm, then the foam boards can be laid without additional supports, such as the same logs. If there are more unevennesses, then there are two options - to level the floor, or to nail down joists and lay polystyrene foam between them.
The floor insulation also needs to be strengthened with a reinforcing mesh and a layer of waterproofing. Then, usually, the floor is finished.
Insulation of aerated concrete house with Penoplex
Step 1. Let's look at how a house made of aerated concrete is insulated using Penoplex. So, the first thing you need to do is build the foundation of the building.
First the foundation is built
Step 2. Next, cut-off waterproofing must be laid along the perimeter of the foundation and along the perimeter of all load-bearing walls.
Laying cut-off waterproofing
Step 3. After this, using standard technology, you need to build walls from aerated concrete blocks to the level of the upper border of the window and door openings.
Construction of house walls
Step 4. The next stage is the installation of window and door openings, and here the use of Penoplex begins. The material is laid on top of the window opening, and then, above it, perpendicular to it, you need to install two pieces of Penoplex, tighten them together with ties.
The material is laid on top of the window opening
Two pieces are installed on top
The segments are contracted
Step 5. Between two sections of Penoplex it is necessary to lay reinforcing bars and continue further construction of walls. The rods will connect two gas blocks lying along the edges of the window opening.
Laying reinforcing bars
The rods will connect two gas blocks together
Step 6. The cavity between two sections of Penoplex needs to be filled with concrete.
The cavity is filled with concrete
Step 7. In this way you need to arrange all the door and window openings.
All door and window openings are equipped
Step 8. After this, formwork is created for arranging the ceiling of the second floor. If there is a staircase in the house, it is important to leave an opening for it according to the design.
The formwork is being created
Step 9. Now you should cover the formwork with sheet material, creating a full overlap.
Don't forget to leave an opening for the stairs
Step 10. Next, Penoplex should be laid around the perimeter of the building at the floor level. If necessary, the slabs are cut according to the building design.
Laying material around the perimeter of the building
Step 11. After this, the reinforcing mesh is laid and the floor surface is filled with concrete. That is, you need to make a concrete screed. Work can be continued after 7 days.
Pouring concrete
Step 12. The next step repeats step 2 in this instruction - you need to lay the waterproofing.
Waterproofing is being re-installed
Step 13. Next, you need to build the second floor of the house, not forgetting to finish the window and door openings with Penoplex as in the previous steps.
Second floor erected
Step 14. After installing the roof, you can use heat guns to dry the inside of the house.
Drying the house from the inside
Step 15. Now that the building has been erected, you can begin to insulate the facade of the house using insulation boards.
You can start insulating the facade
Step 16. First, Penoplex slabs need to be placed on glue. It must be applied to each slab along the perimeter, 1-3 cm from the edge, as well as to the middle of the slab from one edge to the other along the length.
Applying glue to the slab
Step 17. The slabs need to be glued along the entire facade.
Gluing slabs to the facade
Result of work
Step 18. Now you need to prepare holes for the dowels by drilling both the Penoplex and the concrete underneath to the required depth, focusing on the length of the dowel.
Drilling holes
Depth depends on dowel length
Step 19. Using anchors for aerated concrete, Penoplex is additionally attached. You can knock out the dowel with a hammer.
Anchor for aerated concrete
There should be a small gap
Step 20. Fixing one Penoplex slab with dowels is done in two places in the middle and along the perimeter of the slab (corners, middle of the long side).
Additional fixation of Penoplex
Step 21. Now Penoplex can be processed mechanically, making it rough, and covered with reinforcing plaster and adhesive material. All that remains is to complete the finishing touches, and the insulation of the house is complete.
Mechanical processing of material
Application of a base reinforcing plaster-adhesive layer
Prices for Ceresit glue
Ceresit glue
Production technology and material features
To make polystyrene foam, they use the method of foaming polystyrene, which does not use high pressure at all. During industrial production, pentane and polystyrene increase in their own volume by 50 times, and the resulting foam consists of 2% polymer and 98% - almost entirely - air.
Fact!
Polystyrene foam retains heat well precisely because of the manufacturing method.
Penoplex is a derivative of polystyrene foam. Its production differs in technology. So, in the production process of this material, the starting raw material - polystyrene - is influenced by temperature and a certain pressure. What do we end up with? As a result of these production steps, a dense, strong material with a homogeneous composition is obtained.
Recommendations for laying thermal insulation
In most cases, external insulation is practiced in private houses, which, when carried out correctly and with accurate calculations, provides effective thermal protection of the entire structure. External thermal insulation allows you to move the dew point towards the insulation, and thereby protect the walls from the formation of condensation.
In addition, penoplex has low vapor permeability, which is why it is not recommended for use inside the house. Negative consequences can be mitigated by installing a high-quality ventilation system.
Thermal insulation of walls outside and inside the house
The insulation is attached to the walls of the log house using adhesive or frame methods. It should be taken into account that due to its high density, penoplex does not absorb the adhesive solution well enough.
Over time, the fastening weakens, as a result of which the slabs and finishing sheathing can settle, which will lead to the formation of cold bridges and loss of appearance. The same thing can happen with the frame finishing option.
Therefore, many people have a question: how to attach penoplex to a vertical surface? Experts say that you cannot limit yourself to just gluing or laying insulation into the cells of the frame. In both cases, it is also necessary to secure the heat insulator with special mushroom fasteners with wide lids.
In frame houses, penoplex is placed inside the frame, where it is glued and additionally secured with dowels.
Insulating a log house from the outside can be done in both ways. For thermal insulation of a house made of 150x150 timber and internal structures, it is better to choose a frame option. There should be a small space between the insulation and the walls of the house, in this case the air will circulate freely and prevent the wood from moistening.
Scheme of insulation of external walls of a house
Due to the roundness of the logs, log walls have gaps where air can penetrate; the surface of a log house is flat, which makes natural ventilation impossible.
For the sheathing, timber with a cross section of 25x50 or 50x50 mm is used. The installation of the frame must be done in such a way that it forms squares, into which the insulation boards will then be laid.
To give greater rigidity to the insulated structure and prevent cold from entering the house, it is better to lay penoplex in two layers. Sheets are installed offset or in perpendicular directions. In the second case, a counter-lattice is made to lay the top layer; the slats are positioned perpendicular to the guides of the main frame.
The façade insulation scheme for siding is as follows:
- vapor barrier film;
- wooden sheathing;
- thermal insulation;
- hydro-windproof film;
- finishing material.
When insulating inside the house, the same scheme is used, but the waterproofing will be located between the wall and the insulation, and the vapor barrier should be under the decorative cladding.
Foundation insulation
- To improve the adhesion of the base to the adhesive composition, it is necessary to carefully prepare the insulated surface: clean it of debris, dust, and contaminants. The best way to do this is with a grinder.
- A thick layer of bitumen waterproofing mastic is applied to the prepared base.
- The roofing material is glued, first the lower part of the foundation is glued, then the upper. The strips of material should overlap each other on a horizontal surface by 10 cm, at the corners of the house by 15 cm. For reliability, it is recommended to cover the foundation with another continuous layer of roofing felt.
- Penoplex boards are glued onto the waterproofing. To do this, you should use either water-based bitumen mastic or an adhesive composition specifically designed for working with polystyrene foam. The glue is applied to the slabs in 5-6 places pointwise; when gluing, it should cover at least 40% of the surface area.
- Installation of insulation begins from the bottom, the sheets are pressed tightly against the surface and the adjacent panel, and it is necessary to combine the tongue-and-groove joints. Plates located above ground level are additionally fixed with mushroom dowels.
How to insulate a wooden floor
Thermal insulation of a wooden floor with penoplex is usually carried out along the joists. Warming is carried out in the following order:
- Installation of rough ceiling.
- Laying a waterproofing layer.
- Installation of foam boards.
- Fixing the insulation with self-tapping screws.
- Filling gaps between slabs with foam.
- Laying vapor barrier film.
- Laying the finished floor on beams.
- Installation of finishing coating.
The technology for insulating the floor in a wooden house from below along joists, as well as the rules for installing insulation under a concrete base, are described in more detail in the article “How to properly insulate the floor from below - rules and nuances.”
Penoplex is different in that it can be laid directly on open, dry and well-compacted soil. This insulation option is usually used under a concrete screed.
In this case, the following installation scheme is used:
- A 30 cm layer of compacted crushed stone is laid below.
- Next comes a layer of sand, compacted to a thickness of 10 cm.
- Then lay penoplex 100 mm thick (thinner sheets can be laid in two layers perpendicular to each other). The plates are glued together with special metallized tape.
- Next, a waterproof film is laid.
- A fiberglass mesh is laid on top.
- A 5 cm thick screed is poured on top.
Stages of work
The horizontal surface under the floor must be thoroughly cleaned and leveled. If you decide to insulate the floors in an already inhabited house, then before carrying out the work it is necessary to dismantle the floor covering. If it is still in good condition, then remove it carefully so that after work you can put it back in place. Well, if you plan to replace the coating, then you don’t have to stand on ceremony and remove it quickly. Check the condition of the subfloor. If it is deformed or there are defects, carry out work to strengthen it.
Prepared wooden logs must be positioned and secured in such a way that there is a space of no more than 70 cm between them.
The boards on which the penoplex will be laid must be hemmed to the joists or secured to bars specially designed for this.
Before laying the insulation, it is necessary to treat the logs and all wooden elements with antiseptic solutions. This precautionary measure will protect the tree from rotting and damage by bugs. After antiseptic treatment, it would also be useful to treat with a moisture-repellent agent.
First you need to lay out a layer of thick waterproofing film on the boards or plywood , so carry out the work of installing the waterproofing. Keep in mind that this material is overlapped (about 15 cm) to ensure complete tightness and high-quality protection from moisture.
It is possible that it will be useful for you to study the material about insulation for the walls of a house outside under siding.
Floor insulation scheme.
The next step is the direct installation of insulation on wooden boards. When laying out the penoplex, carefully ensure that no gaps or cracks form during the work. Careful placement of the material will provide reliable protection from the cold.
For additional protection from moisture, you can stretch polyethylene film over the surface of the insulation. This technique is of particular importance if the house is located in a swampy area and the climate is rainy.
The floor covering is laid on top: laminate, parquet, solid wood, etc.
By the way, similar work can be done in an ordinary apartment. Such insulation is of particular relevance if you live in an apartment building on the ground floor.
Penoplex can also be used as an insulator under a “warm floor” system. In this case, it will provide additional protection of the room from blowing and heat loss. In order to lay the material in this case, a concrete screed with floor pipes built into it is used.
You will probably want to find out more information about whether it is possible to insulate the ceiling and floor with sawdust.
General installation information
Penoplex is quite easy to work with, but there are a number of aspects that need to be taken into account during installation in order to do everything correctly. So, as for the method of fastening, the slabs need to be fixed using the method that is most suitable for a specific element of the structure. For example, if the base or foundation is insulated, that is, that part of the building that is located below the upper boundary of the soil, then the material can be glued and then pressed down with soil. If Penoplex is used to insulate floors, then it is best to simply put it under the screed - there is no need for any fixation. But on the walls, the material must first be glued, and then additionally fixed with special disc-shaped dowels with a wide head. Sometimes Penoplex is also attached to the sheathing.
Penoplex board insulation
For adhesive fixation, a special composition Penoplex FastFix is used. It is applied to the surface of the slabs evenly in stripes around the perimeter, retreating from the edge of the slab about 1-3 cm, as well as in the middle of the slab. It is recommended to make the slab slightly rough by making notches or treating it before applying the glue. This will improve grip. The glue consumption is as follows: one bottle is enough for about 100 meters of linear seams, that is, it can glue about 10 m2 of insulation.
Attention! When fixing Penoplex to the wall, glue alone is not enough - you will also have to use dowels.
As for dowels, it is better to take synthetic ones with low thermal conductivity to avoid the appearance of cold bridges. The holes for them need to be drilled so that they are approximately 1-1.5 cm longer than the length of the dowel being driven in. As for fixing the material on concrete, in this case the minimum length of the spacer part of the fastener should be at least 4.5 cm, and for brick even longer - 6-9 cm. For foam concrete, it is better to select longer dowels, at least 10-12 cm.
Fastening Penoplex with umbrella dowels
Prices for dowels for fastening insulation
Dowel umbrella
On a note! If Penoplex is fixed over a waterproofing material, then it is important to replace the dowels with special weld-on fasteners.
As for the thickness of the insulation, we remember that it can be different. This parameter must be determined taking into account the climatic characteristics of the region and the purpose of the building structure, as well as the materials from which it is constructed. The easiest way to find out the optimal thickness in each specific case is to use a special calculator on the Penoplex website. It will also help identify the required number of slabs.
Installation of Penoplex sheets