To understand how to insulate the roof of a house, you need to know how it is structured, the features of its design and operation. For flat roofs alone, the domestic company TechnoNikol offers almost forty schemes of technical solutions. There are fewer such solutions for a pitched roof, but there are different options here too. And if you consider that this company is not the only one that produces roofing materials, and each other has its own established schemes, then a non-professional may get confused. But regardless of the technical nuances and characteristics of the materials, the principles of roof insulation are general.
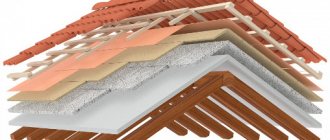
Typical insulation scheme for a pitched roof Source postroikado.ru
Insulation process
The main reason why experts recommend insulating the roof and installing high-quality waterproofing is to create effective air ventilation and retain heat in the house. Also, with the help of simple steps, the owner of the house will be able to increase the area of the room due to the attic that resulted. You can work on it further and add beauty and comfort to such a small room.
If the roof is located above a non-residential room and it includes a roof, sheathing and rafters, then you can do without additional insulation. The attic space is usually consistently ventilated, and the humidity and temperature levels correspond to those found outside. Here it will be enough to take care of the insulation of the attic itself.
What is needed to insulate an attic?
It’s another matter if under-roof thermal insulation is installed in the attic: in this case, the temperatures and air humidity levels will be very different from those that are currently outside. The fact is that moisture rises to the upper layers along with warm air, and there it comes into contact with cold currents and the surface of the roof. As a result, condensation forms. In some cases, moisture may end up in the roof parts themselves:
- If the vapor-permeable layer was immediately laid carelessly;
- A small number of vapor barrier strips have been installed;
- The strips do not adhere tightly to pipes and walls;
- There are minor and large tears in the material, etc.
That is why the first thing you should do if you want to insulate your home is installing a reliable vapor barrier system, which is located on the inside. Also, additional waterproofing is installed outside, which protects the insulation: such a layer is created from rafters or special flooring.
This type of protection is rated as more reliable compared to other technologies. However, even this is often not enough. Be sure to take care of the water drainage system that accidentally gets into the insulation. This system is ensured by air ventilation that passes between two cavities. One of them is placed between the waterproofing and the roof itself, and the other part is between the under-roofing part and the waterproofing. So that air can circulate between all these elements, and also exit each cavity, it is necessary to create vents in the overhang and upper component. In order for the air to move freely and calmly, it is necessary to additionally lay counter-lattice slats parallel to the rafters. The size of the air cavity will depend entirely on the thickness of these slats. Air will flow into this hole through the corresponding holes, which are located in the side parts of the roof.
How to get rid of excess moisture
Once you install insulation, indoor humidity levels may increase. This effect does not have the best effect on the microclimate. Experts identify several main reasons why this can happen:
- Cracks or gaps appear in the insulated parts of the roof. Even the smallest defects lead to disruption of the integrity of the layer. That is why, before starting insulation work, check all parts of the material and, if necessary, eliminate deficiencies.
- The vapor barrier is missing or damaged. In such a situation, humidity will not be able to leave the room - it will gradually accumulate in the insulation. For this reason, craftsmen recommend using a vapor barrier film, in which all joint parts must be additionally glued with a special tape.
- Violation of the indoor air ventilation system. This can happen if renovations have recently been carried out and during the renovation the ventilation holes were moved or blocked. This also happens if the shaft is blocked or metal-plastic windows are installed. Each case leads to the same result - air circulation is reduced because the entire structure is too tight. If you are faced with such a situation, you will need to periodically ventilate the room or install an additional hood for ventilation.
Preparation for installation of insulation
In order for the roof insulation to be as high-quality and simple as possible, it is necessary to prepare before work. The first step is to check the rafter system for various damages, such as rot, mold or excess dampness.
If there is damage to the rafters, then you need to get rid of them using a suitable algorithm:
- If small defects are found, it will be enough to treat the rafters with sandpaper, soak them with an antiseptic and cover them with a layer of paint that provides protection from further damage;
- If the elements of the rafter system are seriously damaged, it would be much more advisable to replace them.
Another point that should be taken care of is checking the installed electrical lines. If there are problems, you need to act in the same way as when processing rafters: damaged elements are brought back into working order or replaced.
Insulation of pitched roofs
If the roof of your house is based on a rafter system, then there are several ways to quickly and effectively insulate:
- By installing insulation between the rafters;
- By installing it directly on the rafters;
- Place it under the rafters;
- Use a combined method.
Typically, the owners of such houses prefer the simplest method of insulation of all those presented - this is laying thermal insulation between the rafters.
What exactly is the problem?
There are three ways to place insulation as part of a roof structure:
- Fix it in the space between the rafters;
- Supplement the installation between the rafters with an additional layer of insulation underneath;
- Lay insulation on top of the rafters.
Any of these methods, provided it is carried out correctly and the thickness of the insulation is correctly calculated, reliably retains heat in the interior of the house and prevents the formation of ice and icicles on the roof. But there are nuances that, under different circumstances, make different methods of insulation preferable. Let's take a closer look at them.
Method of installing thermal insulation between rafters
If you choose this method of insulation, then it must be continuous: no gaps or gaps are allowed. The same rule applies to places adjacent to pipes, windows and walls that are in contact with the plane of the roofs. The fact is that wherever the thermal insulation material is interrupted, a cold bridge appears. If any area is not insulated enough, temperature changes will lead to the formation of condensation. This accumulation of moisture destroys the structure of the roof and building. The attic and attic are places that bring constant heat loss, since the walls and surfaces are in direct contact with the street. To prevent heat from escaping from the house through the slopes and gables, it is recommended to install thermal insulation along the entire contour of the roof.
Leaving the crank mesh that is in contact with the roof without insulation can lead to a lot of problems. Also, when installing thermal insulation, the Mauerlats are not sheathed. Mauerlat is a beam that stands at the base of the roof rafters. It is used to evenly distribute the load on the walls from the weight of the roof. Due to this device, the roof can withstand the weight of snow that accumulates on it, and also increases its service life. If specialists install a warm coating on the roof slopes, then it usually only reaches the border of the Mauerlat. As a result, a cold gap is formed, which helps heat escape from the room. To prevent you from encountering this problem, you need to stretch the attic insulation material onto the Mauerlat to the location of the insulation from the outside.
Thermal insulation of flat roofs
When insulating a flat roof, you should decide on the purpose of the surface - whether it will be used or not . If so, then you will need to make an additional concrete screed on top of the thermal insulation (for example, if you walk on such a roof, you will need to adjust the antenna, for example). If the roof platform is not used, then a screed is not needed. You can read more about the insulation of a pitched roof by following the link.
Note!
The main requirement for flat roof insulation is the strength and reliability of the material . After all, in winter a significant mass of snow will accumulate on a flat roof, which can deform the weak, fragile material.
Thermal insulation on a flat roof comes in two types - single-layer and double-layer . As the name suggests, double-layer insulation uses two layers of insulation, while single-layer insulation uses one.
How to choose the right thermal insulation material?
Most often, when installing thermal insulation, craftsmen use mineral fiber mats and polyurethane foam tiles, which have thermal conductivity values of 0.35 - 0.40 W/m × K.
When you decide which insulation to install, be sure to check that it does not sag under its own weight. If this happens, then a place will again form where all the heat will come out. Such situations are faced by home owners who use fiberglass materials with a low level of density as insulation.
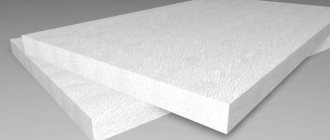
With expanded polystyrene, not everything is as simple as with other materials - it is partly suitable for installing thermal insulation on pitched roofs. However, if you decide to choose this material, then do not forget to take additional fire safety measures: you must treat the structure with fire-retardant impregnation, as well as install fire-retardant layers. The most effective material is hydrophobized slabs, which are based on basalt rocks, and additionally they are laminated with foil or fiberglass. They are mainly used for insulating lightweight roofing structures. When purchasing, be sure to check that the materials come with hygiene certificates.
How to lay insulation ↑
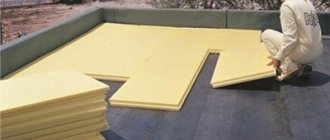
- Placing rigid roof insulation on a flat roof begins from the low area of the roof, more precisely from its corner. If for some reason the slope of the structure was not observed during construction work, then you need to start from the installation sites of the gutter or water intake funnels.
- Thermal insulation boards are placed on the profiled sheets in such a way that the corrugations and their long sides are mutually perpendicular. In this case, fastening can be done through different ridges.
- Plates in multilayer thermal insulation are arranged according to the principle of brickwork, that is, the seams are staggered. In addition, the seam lines and crosshairs in the upper tier cannot coincide with those in the lower row.
Below is one of the options for cutting and laying insulation.
Mounting options
To fix the insulation layer on a flat roof, the following methods are used:
- Fastening is done using so-called telescopic fasteners. They consist of a flange with a smooth outer surface and a tubular rod. The various standard sizes of disc dowels available on the market allow you to fasten roofing pies of various thicknesses.
- Anchors are driven into concrete floors and secured to the screed with screws with plastic sleeves.
- To calculate the required number of fasteners for an insulated flat roof, the default condition is taken as a basis: two units of fasteners for each slab.
- For concrete roofs, the coating and insulation are fixed simultaneously. If the base is made using profiled sheets, separately.
- In certain areas (roof penetrations, lines connecting to vertical planes, etc.), the installation step of fasteners is reduced.
- All layers of the roofing cake, including thermal insulation, are glued to hot mastic, most often bitumen-polymer. The insulation must be glued evenly. In this case, the total area of contact between the heat-insulating material and the base must exceed one third of it.
- If the roofing pie is completed with bitumen or bitumen-polymer material, then the installation of the roofing system cannot be carried out during the rainy period, since excess moisture will accumulate in the insulation without the ability to escape outside. But when using a roofing membrane as a finishing coating, you can glue it throughout the year, since the membrane allows excess moisture accumulated in the insulation to pass through.
ballastnie-krishi-1 ballastnie-krishi-2
Ballast.
The insulation is laid on a flat roof and covered with a waterproofing carpet. A mixture of gravel and pebbles is poured over the waterproofing layer or paving slabs are laid on plastic supports. The components of the roofing pie lie freely. The pie is fixed exclusively around the perimeter, as well as around the roof penetrations.
Green roofs are also classified as ballast roofs. Although it should be noted that the roof with landscaping is inverse, so the order of the layers of the roofing cake differs from the traditional one. The insulation is laid on top of the waterproofing, which simultaneously functions as a vapor barrier. The thermal insulation layer is covered with a geodrainage polymer membrane, on which a soil-vegetative layer is arranged.
Installation of thermal insulation from the inside
Installing insulation slabs from the inside of a building with a flat roof is physically not very convenient, but practical. After all, installation can be carried out in almost any weather. And there is no need to rush to complete the work in a day, because the insulation does not get wet.
The algorithm for installing thermal insulation is as follows:
- Along the line where the ceiling meets the wall, a plank of wooden block is screwed in, the thickness of which on one or both sides is equal to the thickness of the insulation.
- The same bar is attached on the opposite side.
- We screw a block, both or one of the sides of which is equal to the thickness of the insulation board, along the line where the ceiling and wall join.
- We install a similar bar made from a bar on the opposite wall.
- Rigid polystyrene foam boards are perfect for internal insulation.
- The ceiling is conventionally divided into strips.
- The polystyrene foam board is glued to the ceiling and plank using bitumen mastic and pressed tightly. The marked strip is completely filled with polystyrene foam. If necessary, the outer slabs are trimmed.
- On the side of the completed strip of polystyrene foam boards, pressing tightly, another strip is screwed.
- Next, the insulation strip is formed and glued again.
- Alternating these two operations: screwing the bars and gluing the thermal insulation, fill the ceiling plane.
- Fixing them with a stapler, a plastic film is attached to the planks and the ceiling is finished with some convenient covering material, for example, plasterboard.
How to install thermal insulation yourself
In order to insulate the roof, you must first install waterproofing material. To do this, the film is rolled out horizontally to the ridge from the eaves with an overlap. The overlap will need to be marked using a special strip - its dimensions depend entirely on the slope of the roof. If, for example, the slope is less than 21%, then the overlap must exceed 20 cm, and if the slope value is in the range from 22 to 30%, then it is reduced to 15 cm, etc. Attach the waterproofing using a construction stapler. Sometimes galvanized nails can be used for these purposes. The overlap must additionally be covered with a special tape.
Vapor protection film
It is also necessary to put a vapor barrier film on the prepared frame, which will prevent water vapor from penetrating into the insulation. It is most convenient to attach it to the frame profiles with double-sided tape, after which you can mount the plasterboard ceiling.
In addition, it is worth remembering that the attic insulation must also be well protected from blowing out.
To do this, place vapor-permeable foil on it:
- Very breathable - it can be applied directly to the insulation;
- With less vapor permeability - with a void of 3 cm above the insulation.
Before using such foil (like any building material), you should study the instructions to know how to insulate the roof with your own hands.
How to install waterproofing on a pitched roof?
When insulating a pitched roof, it is necessary to roll out the film in such a way that the overlap lies on the wooden elements in the structure (it is better if these are spacer bars, rafters or counter battens). If you have previously impregnated the sheathing with an antiseptic agent, then before installation, be sure to check that the impregnation has time to dry.
The waterproofing at the overhang and eaves must extend beyond the wall line by 2 cm or more; at the ends of the roof it must also extend beyond the end boards. Next, the film is laid out along the rafters, and the adhesive tape should secure it tightly. If you install perforated film, make sure that it faces outward - if you do not follow this rule, then moisture will pass through it in large quantities, and steam will not be able to circulate between the layers. To determine the outer side, rely on the inscriptions that are usually printed on the material.
Lay the film so that there is a gap of 20 mm between the rafters. Such a gap is needed to prevent too much tension in the material, which can lead to its rupture (this happens if it begins to gradually shrink from the cold). It is also recommended to leave the distance between the rafters less than 1.2 m.
Next, you need to start laying the insulation itself. Where a joint is formed between the insulation and the slope, you need to try to install thermal insulation so that it fits tightly to the slope. Experts recommend additionally using reinforcing mesh and protecting the coating from rain and moisture. If you are dealing with a pitched roof, then they are installed under the eaves, which protects against precipitation. For a flat roof, it is better to use tin aprons and polyurethane tape as protection.
Video description
How to properly make a hydro- and vapor barrier for the insulation of a cold attic floor, see the following video:
If you do the opposite, then the water vapor of warm air will penetrate into the pores of the wood, but will not be able to erode - there is a vapor-tight barrier on top. This will lead to wetness of the wooden elements of the supporting structure, and no treatment with antiseptics will save the wood from waterlogging and rotting.
The scheme for insulating the wooden floor of a cold attic looks like this:
- On the side of the room there is a vapor barrier, on top of which there is lathing for decorative finishing of the ceiling. Vapor barrier can be of several types: simple film, with an anti-condensation surface, with a reflective (reflective) surface. In addition to protecting the thermal insulation from getting wet, it protects the room from insulation particles getting inside.
- Thermal insulation between beams is stone wool mats or expanded clay.
- A layer of waterproofing superdiffusion membrane.
- Distance bar.
- Attic flooring.
Typical scheme for insulating a wooden floor in a cold attic Source forumhouse.ru
Installing a vapor barrier in the roof
When you have finished with the previous steps, you need to start installing the anti-condensation film. It is laid out in the rafters and spread to the ridge of the roof. They are also seated with an overlap (the absorbent surface should be at the bottom), and then attached with a stapler (you can also use galvanized nails). Be sure to stretch the film during installation - sagging is not allowed. To increase the reliability of thermal insulation, strengthen the gluing area using a pressure strip. This step cannot be skipped if the roof slope is less than 30 degrees. Make sure that the bottom part of the film is not connected to the insulation - otherwise there will be no room for air circulation. To ensure natural ventilation in the system, it is recommended to leave a gap between the film and the insulation in the region of 40-60 mm.
If you use foil material, then place it with the shiny part inside the room. It is recommended to use foil tape for joints.
Be sure to look at the places where the film is attached to the chimneys and interior walls. Here the main role is played by the parameters of the surface with which it will need to be connected - all joints must be as tight as possible. If it is necessary to work with rough material, then the vapor barrier film is attached using acrylic or synthetic glue. Scotch tape is not suitable for connecting to such a surface; it is also not recommended to use polyurethane sealing tapes. In this case, it will not be possible to achieve a tight connection. If metal bases were used to install the roof, then the vapor barrier can be connected to them using double-sided tape and glue.
If you install vapor-permeable films in living rooms, the humidity level will increase significantly. As a result, the microclimate will be disrupted - in this case, you will have to constantly ventilate the room.
As soon as the installation of the film is completed, counter-lattice bars are installed along the rafters. Their cross-section should be 40 × 25 mm, and in increments of 100 - 150 mm they are fastened with galvanized nails.
If during the installation process a diffusion membrane is used, whose vapor permeability indicator remains at a high level, then it is laid on thermal insulation without additional gaps. Be sure to ensure that the overlap is around 20 mm. In this system, only the upper ventilation gap remains: it is located between the sheathing and the membrane (its size does not exceed 40 mm). When installing the membrane, be sure to follow the instructions from the manufacturer. The painted side is laid against the insulation. The principle of its fastening is similar to the method used when installing the film: a construction stapler or nails will do. Double-sided adhesive tape is suitable for gluing membrane joints to prevent excess moisture from penetrating there.
When installing, be sure to take into account the following rule: the width of the air gap that is installed between the waterproofing and insulation over the entire area should not be less than 2 cm.
Also, pay attention to the location of the waterproofing material: it should not sag too much: otherwise, air circulation will be impaired. It is for this reason that some craftsmen prefer to lay it completely on wooden flooring. You also need to make sure that air calmly escapes from the cavities that remain on the outside of the waterproofing layer: to do this, it will be enough to install special tiles that promote ventilation, or leave gaps when installing the ridge.
Installation - arrangement options ↑
Insulation of an unheated attic ↑
The simplest type of roof insulation device is thermal insulation of an unheated attic, since insulation of roof slopes is irrational. The most reasonable thing in this case is to insulate the attic floor. Structurally, it is performed as follows:
- by attaching a vapor barrier to the joists with an overlap from below, they create an obstacle to moving steam;
- insulation is placed between the joists;
- so that you can move on the thermal insulation, it is either covered with a continuous flooring, or “paths” are laid from boards.
Thermal insulation must be constantly dried, so ventilation holes are provided in the gables, and waterproofing is installed under the roofing material to protect against possible leaks.
Insulation of a warm pitched roof ↑
Thermal insulation of a used attic or residential attic is somewhat more complicated. The insulation design, which also includes thermal insulation of slopes, is as follows:
Vapor barrier
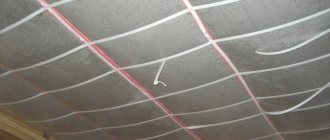
Necessary to minimize the penetration of vapors from residential premises into the thermal insulation. The vapor barrier film consists of several layers of polyethylene in several layers and a reinforcing grid made of polyethylene or polypropylene. Fastening is carried out either using a stapler or strips.
It is important to always glue the joints with construction butyl tape.
When installing a vapor barrier, special attention is required to the junction units. They are also glued with butyl tape
Roof insulation
The space between the rafters is filled with insulation of the calculated thickness.
The calculations take into account the thermal conductivity coefficient and operating conditions of the pitched roof. Quite often, mineral wool acts as insulation (density - 30-50 kg/cube
m) and staple fiberglass. For additional fastening of fibrous materials, stretchers made of fishing line or rope are also used. If the height of the rafters is not enough to lay insulation of the required thickness, it is increased by adding timber to the rafters.
We advise you to study - Which concrete mixer is better to buy - comparison of characteristics and specific models
Waterproofing insulation
The main function of this layer is protective: firstly, against leaks of the roof covering, and secondly, against condensation that forms on some of its types. For waterproofing use:
- a hydrobarrier made similarly to a vapor barrier made of PE layers with a reinforcing lattice, with the difference that to remove steam, it has additional micro-perforations and cone-shaped punctures. During installation, a gap of several centimeters is maintained between the thermal insulation and the hydrobarrier.
- a superdiffusion membrane, the vapor permeability of which is very high compared to a film hydrobarrier. It is laid without any gaps directly on the heat-insulating layer.
Ventilated gap
An air gap must be provided above the waterproofing layer for ventilation, through which steam that escapes from the insulation through the waterproofing is removed. The vents are located on the roof eaves and ridge.
Substructure for roof covering
As a rule, laying the roofing requires the installation of sheathing - solid or lattice with a certain pitch.
Roof covering
Roofing material is selected according to the requirements of operating conditions.
2020 stylekrov.ru
- Safety
- Types of roofs Mansard
- Flat
- Pitched
- Glass
- Keramoplast
- Types of jobs
- Mauerlat
- Flexible
- Hydro- and vapor barrier
- Ventilation
Installing insulation in the interior of the house
If the thermal insulation layer is placed in the lower part of the rafters, then the under-roof waterproofing is mounted in the upper part along the rafters. There is no need for solid wooden sheathing here, because in any case you will have to deal with a large gap (it is often located along the entire size of the rafters). However, when using a similar technique, the total volume of the attic is also reduced.
Correct calculation of insulation thickness
The formula for calculating the layer thickness in meters will look like this:
Layer thickness = Thermal resistance of the layer * Thermal conductivity coefficient of the material (roof thermal insulation snip).
These data are provided by the manufacturer and may vary. Specialists at a hardware store will help you find detailed information on each insulation material.
Many experts advise that after receiving the final result, add another half of the calculated value to it. It is worth noting that when using bulk or crushable materials, they should be loosened from time to time so that the current layer thickness is not disturbed and remains stable.
Stages of roof insulation
- At the preparatory stage, before insulating the roof, it is necessary to install waterproofing. The methods of its installation have already been discussed above: it is better to lay it along the rafters. Staplers or galvanized nails are used as fasteners. If the temperature in the attic is low enough or there is no heating in the room, then there is no need to install a vapor barrier.
- Next you need to install thermal insulation. This material is already installed below the rafters. You can also use a construction stapler as fastening. A vapor barrier film is placed on top of this layer.
- Install the internal lining. Here you can use drywall, clapboard or plywood. It can be attached to the structure using galvanized nails or self-tapping screws. Be sure to ensure that the heads of the nails and screws fit completely into the facing material. Before you begin the final finishing of the room, you must fill the remaining recesses with putty. After this, you can glue the wallpaper to these materials.
Why insulate the roof
The presence of an attic space is an important factor for the temperature regime of housing, since even an unheated attic, being a buffer between the street and the ceiling of the upper floor, serves as thermal insulation.
On a cold roof, due to heat exchange between the attic and the outside environment, the snow melts - heat loss is evident
To reduce heat loss through the ceilings of the upper rooms, the floors of the attic rooms are insulated, but heat exchange still occurs through them, and in winter the attic is still a little warmer than outside.
If the roof is not insulated, then in winter condensation forms on its inner surface, which causes rotting of wooden rafters and sheathing, flows down and accumulates on the floor.
Roof without insulation
Top roof insulation
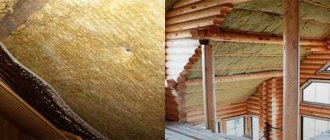
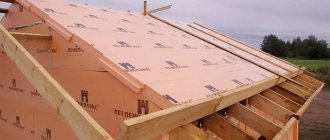
If you install thermal insulation material above the rafters, then most of the elements will be protected from the influence of temperature, changes, humidity and precipitation. To do this, it is necessary to install the insulation material on a solid wood paneling. This technique allows you to use open rafters if you want to further decorate the attic interior.
However, a problem may arise here: not everyone knows where to buy high-quality waterproofing material. In specialized stores you can now even find models with water protection already installed. In this case, only one layer is needed to ventilate air flows - it is located between the roof and the thermal insulation. The counter-lattice creates an air cavity: in this case, the slats must be laid parallel. In order for such thermal insulation to be of high quality, it will be necessary to install a vapor barrier layer inside the roof.
The main advantage of this roof insulation algorithm is the low risk that during the installation process cold bridges will appear through which all the heat will escape. Also, a constant air temperature and humidity level of all elements are established in the room. This situation suggests that all elements will not be deformed during operation. This technique is considered the most effective when compared with other methods of installing sound insulation. It can also be used as much as possible inside the attic floor.
There are also a number of disadvantages that appear when using this technique. If you have a complex roof, then such work will take a lot of time and effort. High demands are placed on roofing films, and in unfavorable weather such work cannot be carried out at all.
Types of mineral wool and their features
Mineral wool can be called a kind of veteran in the field of thermal insulation. It appeared on Russian markets more than half a century ago. Since then, manufacturing technology has undergone changes, resulting in improved technical characteristics. There are three types: slag wool, glass wool and stone wool. Let's talk about each of them in more detail - this will allow you to decide which one to choose.
We advise you to study - What are the types of wood cutters for a hand router?
It is made from special fibers, the thickness of which is only 5-15 microns, and the length can reach 5 cm. These elements give the material high elasticity and strength. Therefore, it is often used for finishing complex pitched structures. However, you should be extremely careful when working - if small glass fibers get under the skin, it will cause serious irritation. Don't forget about PPE - gloves, hats and especially goggles.
Let's highlight the main technical characteristics:
- Thermal conductivity - from 0.03 to 0.05 W/m*C (depending on density).
- The maximum heating temperature is 450 degrees Celsius (less often 500).
- The minimum operating temperature is minus 60 degrees. This suggests that glass wool can be safely used to decorate a private house in almost any region of the globe (with the exception of the far north, where the temperature often drops below this mark).
- Moisture absorption when immersed in water for a day - 1.7%
It is made from special blast furnace slag, with a thickness ranging from 4-10 microns and a length of up to 16 mm. The main property of slag is residual acidity, due to which the insulation has an aggressive effect on metals in conditions of high humidity. Therefore, it is highly not recommended to use it if there is contact with iron structures.
In addition, this substance strongly absorbs moisture. Therefore, it is not recommended to use it for the exterior decoration of a private house. If there is still a need to use it, you will have to create additional waterproofing. The slag fibers are very fragile, so it is difficult to work with.
In terms of technical characteristics, it is also inferior to its more advanced “brothers”:
- Thermal conductivity - from 0.045 to 0.048 W/m*C
- Maximum heating temperature - 300 degrees
- The minimum operating temperature is minus 50 degrees.
- Moisture absorption when immersed in water for a day - 1.9%
Stone or basalt wool
Now in most cases, when they say mineral wool, they mean the basalt analogue, since it has the best technical indicators:
- Thermal conductivity - from 0.03 to 0.0412 W/m*S.
- The maximum heating temperature is 1000 C.
- The minimum operating temperature is minus 190 C.
- Moisture absorption when immersed in water for a day is 0.9%.
This suggests that it can be used not only in private, but also in industrial construction. Adding here the highest density (it may differ from one manufacturer to another), moisture and frost resistance, we can say that this is an excellent insulation for roofing, capable of withstanding any climatic vagaries and extreme conditions.
It can be used with equal success both for a simple flat roof and for multi-level pitched structures. There are no additional components in the composition, which will allow it to withstand sudden temperature changes. For private use, it is sold in rolls or sheets with a thickness of 5 to 20 cm. It is also sold in loose form.
There are disadvantages common to all varieties of cotton wool. The most important of them is the inconvenience of work (the need to protect the skin). Inhalation of the smallest fibers is unacceptable. Despite its solid density, it is relatively fragile, and a cut piece may simply tear during installation. Another disadvantage is the presence of phenol in the composition. When heated, it begins to release, and its fumes are dangerous to health. To protect yourself from these harmful effects, you can cover the surface with PVC film; this is especially easy to do on a flat roof.
Thermal insulation inside and out
Another method of laying insulation is a combined scheme, which involves two-layer insulation. In this case, the thermal insulation is divided into two parts: one of them is laid between, and the other under the rafters.
In this case, it is recommended to use glass wool or its mineral analogue with a standard density as a material. The top layer of insulation must be as strong as possible to prevent compression. Here it is better to use basalt slabs or wood fiber options. When you start installing the top slabs, you also need to cover the rafters to prevent cold bridges from forming.
First you need to install waterproofing, which is also attached using special nails or a stapler. You can then install insulation between and under the rafters. The inner layer is installed between the transverse elements of the beams so that the rafters are completely hidden. In this case, the dimensions of the thickness of the thermal insulation and timber must be equal.
Vapor barrier material is placed between the insulation. However, in this case there are small additions: to prevent condensation from appearing, the internal thermal insulation layer must exceed 20% of the main thermal resistance. Another option that is practiced by craftsmen is to install a vapor barrier on top of the internal insulation. However, there are some risks: the film may be damaged during interior decoration, installation of lighting fixtures, or installation of electrical wiring.
Attic floors
When choosing insulation for the attic floor, you need to take into account its thermal protection, strength and stable qualities in relation to adverse environmental conditions
It is also important to take into account the type of flooring and the material from which it is made. Concrete and wood have their own characteristics
The process of installing insulation depends on the material; if it is mineral wool, then it is better to use thick layers (about 20 cm), but if you want to create increased thermal insulation, you can increase the thickness to 30 cm. The wool is laid only after the vapor barrier has been placed. It is best to lay it under a ceiling made of boards or timber so that they do not absorb moisture and rot. If it was not possible to lay a solid piece of vapor barrier, it needs to be glued with tape.
After this, work begins with the insulation, which is placed in a wooden frame so as to fill all the free spaces. Once the mineral wool has been placed, waterproofing is laid on top, which prevents the wool from absorbing excess wool.
It is especially important to do this if the next step is pouring concrete when the 2nd floor of the building is planned. Instead of concrete, you can make flooring from OSB boards
This is how you can insulate the attic and, if desired, make it a living space.
Features of flat roof insulation
The main difference between the method of insulating a flat roof and a pitched roof is the ability to install insulation from the outside and from the inside. However, this method also involves large expenses for the installation of thermal insulation material. To reduce the cost of repairs and installation of insulation, it is recommended to first work on the outer part of the roof, and after a year you can install thermal insulation in the inner part.
Sometimes a home owner may find that external insulation is not enough for him. Then there is no need to spend money on the inside. Expanded polystyrene or mineral wool is suitable as a material for finishing rooms without attics. If you plan to equip a terrace on the roof, then you need denser insulation material. The most optimal insulation solution is to install extruded polystyrene foam. Be sure to ensure that the thickness of the thermal insulation layer is more than 150 mm. In this case, the material is laid in a double layer to prevent cold bridges from appearing.
Main types of insulation
URSA is one of the modern insulating materials that fully meets the requirements.
Its basis is spatula fiber, processed using the proprietary technology of the URSASpannfilz company.
The insulation has such a high level of geometric resistance that it does not require renewal or repair over its entire service life.
URSA is available in the form of mats measuring 1200 x 4200 mm, the thickness of which is 150 mm. The material is rolled into tight rolls and sealed in film.
Before use, the rolls are opened and allowed to straighten. It only takes a few minutes to reach normal size and restore thickness.
Afterwards the mat needs to be cut. If the pitch between the rafters is 60 cm (standard size), the mat should be cut lengthwise into two parts.
In the case of a different distance between the rafters, the mat is cut transversely into separate slabs, the length of which should be approximately 30 mm greater than the size of the rafter pitch.
After this, the slabs are placed between the rafters (they must be slightly compressed). Due to the high degree of elasticity of the material, the mats hold in place independently, and there is no need for additional fastening
Installation of this insulation is so simple that even one person can do it. URSA is also suitable for broken gable roofs.
- Glass wool is a material that has been used for a very long time and has not yet lost its popularity.
However, it should be noted that this insulation has a number of serious disadvantages, as a result of which many builders do not recommend using it for thermal insulation of gable roofs:
- glass wool perfectly absorbs moisture and loses its quality characteristics in a short time;
- it can easily be deformed and lose its geometric shape, as a result of which, when using it, it is necessary to significantly complicate the roofing pie to prevent slipping;
- the material does not meet environmental safety requirements.
- Mineral wool is a very popular material for insulation. It is obtained as a result of special processing of basalt rocks.
They are exposed to extremely high temperatures, after which the resulting mass is pressed and shaped into tight slabs. As a result of the described actions, a chaotic interweaving of fibers occurs into a very dense micronetwork. Thanks to this structure, the boards do not deform, do not absorb water and moisture, are resistant to temperature fluctuations and the effects of adverse environmental factors,
How to properly install snow guards on the roof.
You can get acquainted with the technology for repairing soft roofs in the article.
Useful information about ladders for roofs made of metal tiles https://rooffs.ru/accessories/lestnici/sdelat-samomy-ili-kypit.html
In addition, mineral wool does not emit toxic substances and does not burn.
- Spatula insulation - this material is non-hygroscopic and easy to install. There are several types that differ from each other in the degree of density. Therefore, it can be used for internal insulation and external thermal insulation.
To maximize heat retention, a material with a high fiber density is used. It is perfect for gable roofs. Due to its weight, the insulation fits tightly to the slopes, which helps prevent slipping. The material based on spatula fibers meets environmental requirements.
