Any engineering communications, including heating systems, gradually wear out and fail. Malfunctions can be of different types, but when the heating battery leaks, it leads to unpleasant consequences. The sooner a leak in a cast iron, steel or bimetallic radiator is repaired, the less likely it is to flood your apartment and flood your neighbors.
- Why do heating radiators leak?
- The heating radiator is leaking: what to do
- How to fix a weld leak
- Repairing leaks between battery sections
- How to repair a leak in a heating battery: repair methods
Why is the heating battery leaking?
Before figuring out how to fix a radiator leak between sections or in another place, you need to understand the causes of the problems that arise:
- Cast iron radiators are heavy and are mounted on durable hooks. With minimal error, radiators sag under their own weight, and a misalignment of several millimeters causes the formation of air pockets. Corrosion begins in these places - the cast iron becomes thinner and over time a fistula forms. A minor leak appears, which it is advisable to quickly fix.
- In houses with a centralized heating system, water hammer often occurs, which sometimes causes radiators to leak at the joints (especially for bimetallic radiators).
- Cast iron radiators are rough inside, so all kinds of debris and foreign inclusions linger on the surface: pieces of metal, rusty sediment, etc. Gradually, the channels begin to clog, and deterioration in coolant circulation leads to the risk of a breakthrough or leak. This is another reason why batteries, both cast iron and steel, leak.
- Gaskets and nipple threads are the weak points of heating radiators, so leaks can form in these places.
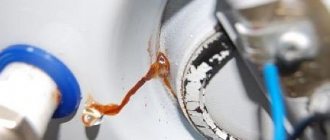
Practice shows that leaks in aluminum, steel and other radiators do not appear suddenly. First, characteristic signs appear: the air temperature in the room decreases, plaque forms on the radiator, and corrosion spots form on the surface.
Do not remain idle when you notice these signs, but decide what to do - the battery is already leaking. If you ignore the situation, an accident may occur. You may also soon find a puddle of water under the radiator, and the humidity level in the room will increase noticeably. You can repair the leak in the heating radiator yourself or contact a professional. An experienced plumber from our company will quickly fix leaks in any radiator: aluminum, steel, bimetallic, cast iron.
Many people are concerned about the question: if the battery is leaking, who should they call? If you live in an apartment with central heating, contact the management company or us. In other cases, you can do without a management organization - it will not help you.
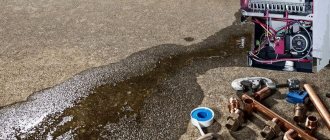
Hidden wiring pipes are leaking
When laying hidden pipes, reliable ones are used. But even in this case, leaks may occur. Breaking walls or floors is, to put it mildly, a “not very good” option. There are two ways to eliminate this heating leak:
- The method is old-fashioned, but it works. By the way, it will also help in cases of open wiring - if there is a leak somewhere, but it’s difficult to get to. Fixing a leak in the heating system in this case is simple: pour a couple of packs of mustard powder into the expansion tank and start the system with this coolant. After a couple of hours, the leaks heal: they become clogged with suspension. This way you can plug up small leaks in the boiler. Then the mustard coolant is drained, the system is washed and it is restarted with clean water. The method works, but is risky: something else may get clogged at the same time, and filters and dirt traps will have to be cleaned.
- The work of factory sealants for heating systems is based on the same principle, but only with the use of polymers. They are poured into the system for a certain period of time. As polymers circulate through the system, they settle on the walls; in places where there are leaks, they are not carried away by the coolant flow. Gradually a traffic jam forms there. When the leaks are blocked, the composition is drained, clean water is poured into the system and the heating continues to operate.
Heating system sealants seal all leaks
Of course, it is cheaper to use mustard, and significantly cheaper: a 1 liter canister of such sealant (added at the rate of 1*100) costs from 6 thousand rubles. But the result may be different: mustard is organic, and the sealant contains a suspension of polymers. Moreover, there are ready-made sealants for antifreeze, for water, and for leaks of varying intensity.
And, by the way, this is almost the only way to eliminate an antifreeze leak: it is very fluid, and often also poisonous (ethylene glycol) and you need to work with it extremely carefully. You cannot live in a room where ethylene glycol flows: its vapors are also toxic.
https://www.youtube.com/embed/kax7LBUmZ2c. There are enough ways to eliminate a leak in the heating system
But everything except replacing a damaged part only provides some respite - to survive until the end of the heating season. Then you need to change the pipes or radiators, and re-seal the connections. Read about how to change radiators here
There are enough ways to eliminate a leak in the heating system. But everything except replacing a damaged part only provides some respite - to survive until the end of the heating season. Then you need to change the pipes or radiators, and re-seal the connections. Read about how to change radiators here.
How to fix a leak in a heating radiator
What to do when the radiator begins to leak at the joints, between adjacent sections, or when the faucet leaks? Many people, when they discover a leak, are confused and do not understand what to do. First of all, you need to turn off the coolant supply and place something under the place where the water is dripping or flowing. In a private house there will be no problem with this, but apartment residents may have to go to the basement to turn off the supply valves on the entire riser (if the apartment does not have valves on the radiators).
We must warn you right away: if you don’t have a set of tools and spare parts, don’t even think about how to fix a leak in an apartment or house on your own. Otherwise, you can only make things worse. It’s better to call a specialist by calling our company. If you decide to do it yourself, try to follow the instructions for each specific situation.
Checking the side walls of aluminum radiator sections
Now comes the hardest part...
The problem is that 95% of leaks occur only when water or coolant is under pressure in the radiator. It won't work to remove a section, fill it with water and see where it comes out from.
Unfortunately, at this stage you will have to work hard. To find out exactly where the aluminum radiator is leaking, you will have to dismantle the sections.
If your radiator is installed and connected correctly, then there are taps on the lower and upper pipes, and they are connected to each other via a bypass. You need to do the following:
- Close the valves on the supply and return pipes;
- Open the bypass;
- Drain the radiator.
To drain the water from the battery, first unscrew the top plug, then the bottom one. When the water has completely drained, you can begin dismantling the sections.
If there is no bypass or taps, you will have to turn off the entire heating system. This is not difficult to do in a private home. In an apartment building, for this, contact the employees of the housing office, housing and communal services or a regular plumber. In some houses (especially new ones) you can turn off the heating only in your apartment.
Options for leaks and searching for section damage
In this situation, two options are possible (see figure).
Options for radiator side wall leaks.
If an aluminum heating radiator leaks from the side of the section that is located further from the supply pipe, you must do the following:
Using a nipple wrench, unscrew the nuts located between the leaking section and the intact one located further from the pipe (see figure);
Places for unscrewing the nipple nuts of the section located further from the water supply.
If a leak appears from the side of the section located closer to the supply pipe, proceed as follows:
- Using a nipple wrench, unscrew the nipple nuts located between the leaking section and the intact one located closer to the pipe (see figure);
- Unscrew the damaged section;
- Turn it so that the wall on which there is a leak is located further from the pipe;
- Install the damaged section using a nipple nut and wrench.
Places for unscrewing the nipple nuts of the section located closer to the water supply.
After these manipulations, you need to completely seal the radiator:
- Screw the bottom plug;
- Install the Mayevsky tap in the upper hole of the radiator and unscrew it two turns;
- Open the water supply and close the bypass slightly.
After this, the radiator will begin to fill with water, and the air will exit through the Mayevsky tap. When water comes out instead, turn off the tap. There is now fluid in the radiator that is under pressure.
At the site of a crack or break in the radiator wall, water will begin to leak out. It's done - you've found a leak.
Important! If the joints between the nipple nut and the radiator were treated with sealant, you will also need to use it. This also applies to the places into which the plugs and Mayevsky tap are screwed.
Types and signs of breakdowns
Before starting repairs, it is worth taking a closer look at what types of breakdowns of heating radiators can occur, as well as studying their signs. There are some problems that only specialists can handle. For example, if noise is heard from the radiators, then the reason most likely lies in the airiness of the entire heating system. In such cases, you cannot do without a master. After all, which radiator is faulty can only be determined with a special device.
Incorrect selection and connection of the radiator
If the ratio of the heating system does not coincide with the technical characteristics of the radiators, then they will not fit each other, and connecting them will be quite problematic. So, if you take ordinary pipes and select copper adapters for them, and the battery housing turns out to be aluminum, then their contact can provoke corrosion of the metals. Therefore, it is worth choosing batteries very carefully and installing them correctly.
Leaks
If they appear, then this is the first sign that the radiator has burst and there are malfunctions in the operation of the entire heating system. This could be due to incorrect connection of the battery to the pipeline, blockages, destruction of threaded nipples, and many other reasons.
Heavy weight
If you pick up cast iron radiators, you should immediately notice that they have quite a lot of weight. This becomes the biggest problem when installing them. After all, even a small error in installation work can lead to system malfunction. The presence of weak brackets will lead to misalignment of the battery, and subsequently cracks may even form on the wall.
High pressure and water hammer
Even with excellent technical characteristics, cast iron is still not an ideal material. It is susceptible to too much stress created by the circulation of water in the system. If a water hammer occurs, then in the places where the sections are connected, you can see the resulting leak.
Dirt
Along with the coolants, various impurities and small particles of rust or even dirt are carried through the pipeline. This often leads to blockages in the channels. If the radiator is not flushed in time, it may begin to leak. Also, dirty batteries often result in them not warming up properly.
Consequences of cold return
Circuit for heating return
Sometimes, with an incorrectly designed design, the return flow in the heating system is cold. As practice shows, the fact that the room does not receive enough heat with a cold return is half the trouble. The fact is that at different supply and return temperatures, condensation may form on the walls of the boiler, which, when interacting with carbon dioxide released during fuel combustion, forms acid. It can also damage the boiler much ahead of time.
To avoid this, it is necessary to carefully consider the design of the heating system, special attention must be paid to such a nuance as the return temperature. Or include additional devices in the system, for example, a circulation pump or boiler, which will compensate for the loss of warm water
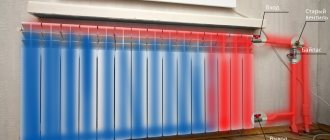
Radiator connection options
Now we can more than confidently say that when designing a heating system, the supply and return must be perfectly thought out and configured. If the design is incorrect, more than 50% of the heat can be lost.
There are three options for inserting a radiator into the heating system:
- Diagonal.
- Lateral.
- Bottom.
The diagonal system gives the highest efficiency coefficient, and is therefore more practical and efficient.
The diagram shows a diagonal inset
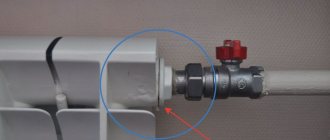
How to regulate the temperature in the heating system?
In order to regulate the temperature of the radiator and reduce the difference between the supply and return temperatures, you can use a heating system temperature controller.
When installing this device, do not forget about the jumper, which must be located in front of the heating device.
Key methods to combat leaks
If it is not possible to immediately call an emergency team, you can use the following techniques:
- self-tapping bolt;
- plaster-cement bandage;
- sealant;
- rubber gasket and clamp;
- fabric with water- and heat-resistant adhesive impregnation;
- welding
The easiest way to eliminate a leak in a cast iron battery is to fasten a self-tapping screw in an identified hole.
The easiest way to eliminate a leak in a cast iron battery is to fasten a self-tapping screw in an identified hole. Next, you need to take care of installing a new radiator as quickly as possible.
Hermetic seal
You can purchase polymer or powder based sealant at a hardware store. In air, this composition polymerizes, with its help you can gain time to organize a full repair. Two-component variations harden after mixing all components.
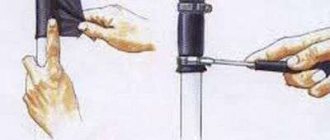
Cold weld is a two-part sealant sold in compact tubes, usually containing epoxy resin and metal powder. Before using cold welding, the area must be thoroughly cleaned and degreased. It is necessary to remove paint and rust, preferably with allowances to increase the accessible contact area. Sharpening is easiest done using a stone, which is usually used for sharpening knives. The instructions on the tube describe in detail the method of use recommended by the manufacturer; please note that some varieties cannot be used in wet conditions - water can become an obstacle to full polymerization.
Manufacturers offer liquid welding and thick welding, with a consistency reminiscent of plasticine. Before use, you need to knead both components in your hands so that the polymer acquires a uniform color without inclusions, then it is applied in a thick layer to the defective area. It is advisable not to introduce water into the system until the composition is completely polymerized. When properly applied, after a few hours a durable coating is formed that prevents the release of moisture.
Clamp and gasket
This technique is applicable to repair damage at the junction of the heating device and the main pipe. You can use a piece of a bicycle inner tube as a rubber band; it is secured with a clamp or wire.
Moisture resistant glue
Another emergency temporary measure, convenient if it drips from the joint between sections. The fabric is impregnated with glue that is resistant to heat and moisture, and the problem area is wrapped with it. By the time it dries, the water will no longer appear on the surface. A two-component epoxy composition is perfect for solving this problem.
Moisture-resistant glue is another emergency temporary measure, convenient if it drips from the joint between sections
Bandage with cement and plaster
You need to prepare alabaster, cement, a small container of water at room temperature, a medical bandage and salt. The cement is diluted in a container so that the consistency resembles low-fat sour cream; you need to immerse a bandage cut into strips into the mixture and, after it is soaked, wrap the workpieces around the damaged area. Alabaster (gypsum) will be needed if it is necessary to carry out repair work without shutting off the water - this mixture sets faster.
Leaks that occur at the threaded connection are eliminated with salt. The fabric or bandage is soaked and rolled in salt, and wrapped around the joint. The above-mentioned cement bandage is applied on top.
Welding
This technique is only suitable for steel appliances; here you will need a welding machine. Arc welding is dangerous, it is better to use gas welding - this way you don’t have to worry about damaging the area around the leak.
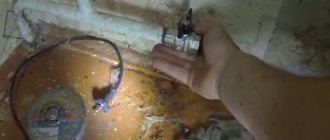
Magnet and self-tapping screw
Metal particles travel along the communications with the coolant, especially in systems made of steel pipes. If a small crack appears or a connection leaks, these particles can be used as a sealant. Without draining the water, a small magnet is applied to the pipeline, attracting the metal to the defect point. Practice shows that after 1-2 days the leak is delayed.
Recommendation. The method works well on aluminum and bimetallic radiators; you just need to attach a magnet. This method is not suitable for large damage and plastic pipes.
When the connection is dug, a piece of magnet from an old speaker is applied to it.
The option with a screw is simple to implement: select a self-tapping screw of the required diameter and screw it into the hole. The method helps in such cases:
- for point defects measuring 1.5-5 mm;
- on pipes made of copper, polypropylene (PPR) and cross-linked polyethylene;
- on bimetallic and aluminum radiators.
Note. Damaged metal-plastic pipelines are prone to delamination, so a self-tapping screw plug will not help.
To be sure, the screw being screwed in can be coated with automotive silicone sealant or epoxy resin. If the hole in the pipe is quite large, instead of a self-tapping screw, drive a wooden peg into it, sharpened to a cone. Cut the top of the plug flush with the surface and apply a regular clamp.
Salt “bandage”
The essence of the technique is to create conditions for artificial corrosion of metal. Therefore, we recommend using this method on old steel pipe systems that are planned to be replaced in the near future. The size of the hole or crack is 1-2 mm.
How to seal a leak:
- Wet a medical bandage and make 1-2 turns around the pipeline at the leak point.
- Sprinkle the bandage with table salt and continue wrapping. A total of 20-40 layers will be required.
- Wait 2-3 hours and start heating. At first, coolant leakage is possible, but after a day the leak will completely heal.
Clarification. There is no need to clean the steel pipe before winding. If necessary, work is carried out under pressure, if the temperature allows.
Salt is not suitable for sealing polyethylene and polypropylene pipes. Home craftsmen advise on the Internet to impregnate the bandage with the following compounds:
- liquid glass;
- automotive high temperature sealant;
- epoxy resin based adhesive.
Sealing
Next you need to act according to the circumstances. If the “hole” is located in the upper part of the battery, and when the heating system is stopped, water stops flowing from the damaged area, then repairs can begin. If a leak has formed in the lower part of the radiator, then before the “treatment” of the equipment it is necessary to drain the coolant either from the entire system or from a specific element (usually this is possible with a bypass that allows liquid to bypass the equipment being repaired).
Naturally, before gluing, you need to wipe and thoroughly dry the area you will be working with. In addition, you need to clean the surface of peeling paint and similar debris. Otherwise, the result will not be of satisfactory quality.
Epoxy resin can be used in its original form, that is, directly after purchase in a store. But you can slightly improve the composition, giving it greater final strength. To do this, an additive is added in the form of bronze or aluminum powder. It is very easy to obtain the powder by using a rasp to process any part of the corresponding metal - naturally, having previously placed a sheet of paper under the work area, on which the powder will collect. Add the resulting material to the epoxy and mix properly.
If for some reason you cannot use epoxy glue, then instead you can use zinc white, diluted to a thick paste. In any case, the work is carried out in the same way.
- Cut the fabric into strips. The width of each of them should be twice the diameter of the area being repaired. Calculate the length so that you can wrap the element 6 or 8 times.
- Coat the area to be repaired with epoxy resin or zinc white. Naturally, this must be done not only at the leak itself, but also at a certain distance on both sides of it.
- Wrap a fabric strip tightly over the area treated with adhesive. Then coat it and repeat the procedure with the next strip.
- After all the fabric strips have been wound (the topmost one, of course, no longer needs to be coated with adhesive), secure the whole thing at both ends with clamps or strong wire.
you can find
Types of leaks and their elimination
There are several classifications of heating pipe failures. Each of them is affected by different reasons and provides individual ways to eliminate the problem. Let's look at the main types of breakdowns associated with heating batteries:
Radiator section leaking due to a crack
Is your heating battery leaking? Such a leak occurs due to the constant load on the heating pipes: maintenance work, heating supply, hydraulic measures. All this creates a threat of destruction of the integrity of the pipe and subsequently leads to the appearance of cracks.
This problem can be easily eliminated using a welding machine, if you have one at hand. You can learn how to solder copper pipes or how to solder polypropylene pipes from our articles.
You need to wipe the battery very well so that the radiator is dry. Then use cold welding, clamping the accident site and holding this point until it is completely glued. After half an hour, the problem will be eliminated, and the heating pipes will become operational again.
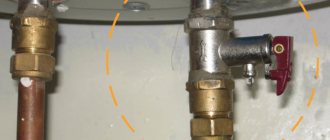
Loss of tightness at the junction of the riser and radiator pipes
The reason is the incorrect factory assembly of the battery itself. For example, significant differences in the size of pipes when they are connected. Incorrect threads can also cause pipe failure and leakage. Also the cause is the deformations that occurred as a result of using the radiator.
Under no circumstances should you place any objects on the battery, sit down, or exert any other physical force. This also leads to a similar kind of breakdown.
To eliminate the accident, a clamp is needed. It is sold in hardware stores, so in case of an emergency it is better to buy it in advance and put it at home. If such a product is not available at home, you can use a bandage made of small wire and rubber. This auxiliary tool can be used as a tourniquet, which should be used to tighten the section of the battery where the leak has occurred.
The appearance of “tears” in places where heating pipes are connected
It's all due to corrosion. The appearance of rust on the pipes that connect to the radiator leads to the destruction of the equipment and the appearance of a small amount of water at the leak site. As soon as a small amount of liquid is detected leaking from the hole in the battery, appropriate measures must be taken immediately.
To eliminate the accident, you can use the same clamp. You don’t have to buy it, you can make it yourself. You will need steel plates, several pieces of rubber and bolts to connect it all together. A rag or cloth that contains epoxy glue works well. Next, you need to carefully tighten the leak and wait half an hour until it is completely glued. You can use a few pinches of table salt, sprinkled on a damp piece of cloth and wrapped around the problem area. After a couple of days, the leak will be eliminated.
The integrity of the common pipes that connect the radiator and the riser has been damaged
Impurities, air, and harmful substances that enter the battery along with water can, over time, lead to the destruction of sections of heating pipes. This can happen at any time of the year, since preventive work with water pumping is carried out constantly. This again leads to corrosion and damage to the integrity of the pipes. Replacing equipment often does not lead to a successful result because the same faulty pipe may be installed.
If the situation has not yet gotten out of control and the leak is small enough, it can be fixed with cement and gypsum diluted in water.
It is necessary to soak small bandage strips in a solution of cement and plaster, wrap the emergency area and wait until everything hardens. The bandage should be thick and tight. If there is a leak in the thread, cover the area with a wet cloth soaked in table salt. This will help stop the problem for a short period of time.
Air jams
The cause of cold batteries is usually air, which does not allow water to flow freely.
An air lock forms for several reasons.
:
Oxygen bubbles accumulate in one of the radiators or at the highest point of the heating system. Because of this, the bottom half of the radiators will be hot and the second half cold. Gurgling sounds also occur when the equipment operates. In multi-storey buildings in the highest apartments, boilers completely stop working.
In older apartment buildings, many of the pipes have long since expired. Therefore, they can cause accidents and reduce heat levels
. Microelements contained in the coolant are deposited inside the pipelines. They impede normal water circulation. The correct solution would be to replace the products, but this is not always possible.
Layers of scale form on the inner surface of the boiler, which reduces the pressure in the system. This problem is caused by the use of hard water, saturated with minerals and salts. Special reagents must be added to the equipment to soften the quality of the coolant.
When pipes are corroded or improperly connected, leaks occur. If it is in a visible area, it is easy to seal the hole with sealants. It is more difficult to deal with a problem hidden in the wall or floor. In this case, you will have to cut off the entire branch, fix the problem and install a new section. In addition to sealants, you can use special parts to clamp the pipeline, corresponding to its diameter. If it is not possible to purchase such devices, then it is enough to make a clamp. The leak area is covered with a piece of soft rubber and secured tightly with wire.
If a leak is detected at the radiator or at its junction with the pipe, wrap the hole with a strip of fabric, after soaking it in moisture-resistant construction glue. Sometimes cold welding is used. To avoid such problems, before the start of the heating season, inspect the entire system for damage. It is imperative to start the boiler and check the quality and reliability of its operation.
Fistula in the rib of the battery
This type of leak can be considered one of the most unpleasant, since it requires significant effort to eliminate. But temporarily, you can use a simple method to eliminate such a leak. If the hole where the leak came from is small, then you will need to enlarge it a little. For these purposes, the water is completely shut off and the pressure in the batteries is reduced. After this, using a small drill, the hole is slightly drilled out. This is done in order to insert a peg into the hole from which water is leaking. It can be cut from a small wooden block. It will swell with water and plug the leak well.
What to do in case of a breakthrough: step-by-step instructions
If your battery is leaking, you won’t be able to fix the leak on your own, but you can minimize the consequences and prevent serious damage. The sequence of your actions should be like this:
- Remove children and pets from the room; if hot water is spurting out, you need to throw something thick, such as a blanket, over the radiator to prevent thermal burns.
- Turn off the power to the apartment or at least turn off electrical appliances that are located near the battery.
- Turn off the water. If there are no shut-off valves in the apartment, then you can shut off the coolant supply at the main pipeline at the entrance to the basement, but this method is used in exceptional cases, because the entire house will be left without heat.
- Call an emergency plumbing team.
- Take possible measures to eliminate (reduce) the leak.
How and what can you fix with your own hands?
If the leak is small, you can try to fix it yourself. For this you will need:
- Find the exact location of the leak. Use dry toilet paper (napkins or newspaper) for this. By looking at the wet spots, you will understand where the water is flowing from the pipe.
- If a leak has formed in a cast iron battery, it is eliminated with a self-tapping bolt, which is screwed into the resulting hole.
- If you have the necessary materials, you can make a plaster-cement bandage. Strips of a regular bandage are moistened in cement or gypsum mortar and applied to the leak site.
- If a leak has formed at the threaded connection between the pipe and the radiator, you can use a salt dressing. Strips of bandage soaked in water are rolled in salt and applied to the leak site. Salt dissolves in water and cokes the point of damage. A cement bandage is applied on top.
It is important to understand that all these measures are temporary; if even a small leak in the system occurs, over time this can lead to an emergency and serious damage. Therefore, it is better to replace such a device
Where to go in other cases?
If a serious leak occurs, you need to call the management (maintenance) company. It is her responsibilities that include eliminating leaks and organizing repair work.
Drawing up an application
After eliminating the malfunction, a report is drawn up, which records the amount of damage. If heating radiators need to be replaced, residents must file an application addressed to the management company (who should repair and replace heating radiators in apartments?). The application is drawn up in any form, but it must contain the following information:
- name of the management company and details of its director;
- the applicant’s personal data and specific address;
- text demanding replacement of radiators and indicating the cause of their damage;
- signature and date of submission.
We do not recommend completing the documents yourself. Save time - contact our lawyers by phone:
The application must be registered as a written appeal, in which case it must be considered within 3 deadlines and a written response must be given, in accordance with paragraph 34 of Government Decree No. 416.
Ball valve repair
New-fashioned ball valves are somewhat more complex than traditional valve models. So, what should you do if the ball valve is leaking? Most often, the problem is that dirt has gotten inside the housing and interferes with the operation of the mixer.
When repairing a ball valve, you must carefully remove the valve. To do this, first remove the decorative plug, under which there is a fixing screw. In short, the faucet needs to be disassembled, cleaned and reassembled
They do it like this:
In short, the faucet needs to be disassembled, cleaned and reassembled. They do it like this:
Use a screwdriver to unscrew the screw that secures the lever. Carefully remove the lever from the tap. Use a screwdriver to unscrew the threaded screw. Remove the mixer dome and plastic seal. Inspect the seal gasket and remove accumulated deposits. If the seal is worn out, you need to purchase and install a new part. Remove and inspect the ball. If it is damaged, it will also have to be replaced with a new one. Using a thin screwdriver, carefully pry off the seals that secure the ball.
If they are even slightly worn, they will also need to be replaced. After replacement, lubricate the seals with the composition recommended by the manufacturer. Carefully reassemble the mixer in reverse order.
All procedures when cleaning a ball mixer must be carried out carefully, since its parts are easily damaged. If all steps are completed correctly, leaks will stop.
In the same way, problems with temperature control in mixers of this type are eliminated.
Sometimes you just need to change the faucet cartridge. This procedure is described in detail in the video:
Advice from professionals
A few tips will help you carry out an effective repair:
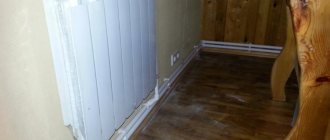
- After repair, the radiator will have to be painted. If it is hidden behind a decorative screen, it is advisable to choose dark paint. A cast iron battery will transfer heat better.
- The hanging brackets are positioned so that the gap between the radiator and the window sill is 10 cm, and the gap between the floor is 12-15 cm.
- To reflect heat, the wall behind the cast iron radiator is sealed with foil material.
Heating efficiency depends on the number of sections on each radiator. This requires competent calculations, which experienced specialists will help you perform.
Cement-plaster dressing to eliminate leakage of the heating radiator
Before fixing a leak in the heating battery, you need to prepare the required materials and tools:
- cement;
- alabaster (plaster);
- container with water;
- salt;
- medical bandage
To eliminate the leak, a bandage is applied to the damaged area.
The procedure after turning off the water is as follows:
- dilute cement in a container with water to the consistency of thick sour cream;
- cut the bandage into strips 25-30 centimeters long;
- thoroughly soak the bandage with the cement mixture;
- wrap strips around the damaged area.
The process is repeated until a durable bandage is obtained.
If it was not possible to turn off the water, then instead of cement you need to use alabaster, which dries much faster. Then a cement bandage is applied to the plaster cast.
If the heating battery leaks at the threaded connection, you can use salt:
- wet strips of cloth or bandage in water;
- roll the material thoroughly in salt;
- wrap the leak area.
The gap will close as a result of the salt dissolving in the water. A cement bandage is applied on top.
Application of universal welding
Thanks to this device, you can eliminate absolutely all traces of leakage. Welding allows you to eliminate leaks in any type of battery in just a few minutes. The master can purchase a high-quality installation in a specialized store.
This option is in great demand, since the result of the manipulations performed is not afraid of the negative effects of moisture and high temperatures. Welding is one of the most reliable ways to eliminate leaks in a heating system. If a person has not previously encountered such a device, then it is better to entrust all manipulations to a specialist.
A variety of products for filling holes in cast iron products
Scheduled Maintenance
All of the above methods are mostly used in winter, when something urgently needs to be done. During the warm period of the year, you can carry out scheduled maintenance of risers and batteries so that leaks do not occur in winter. The battery is completely removed from its place and unrolled into sections. All threaded connections are cleaned of old sealant. If necessary, nipples are replaced with new ones. Intersectional gaskets are also completely replaceable. The detected fistulas are welded or sealed, and the battery is installed in its place. In the video below you can see other ways to eliminate leaks.
Prevention and care of radiators in summer
After the completion of the heating season, the pipeline must be tested (pressured) with increased hydraulic pressure. This is done in order to identify weak points and repair areas where ruptures or coolant leaks have occurred. The house main is subject to periodic internal flushing by utility services. Water is supplied to the system along with compressed air under pressure. A temporary break is made on the return line (unwinding of one of the connections) to drain dirty water through a hose or hose.
Dust and dirt accumulate on the outer surface of the batteries and on their ribs, which must be washed off in the summer with a cloth moistened with soapy water. Once warm, the cleaned surfaces can be coated with fresh paint. This will make them dry faster. Make the paint layer thin, otherwise it will crack later.
To avoid damage, do not use the equipment as supports or tie clotheslines to the risers. Read about warm floors on a wooden floor on our website.