Many residential buildings are equipped with a water heating system. In practice, both after construction and during subsequent operation of municipal housing, heating systems are always pressure tested.
This is usually done by professional structures - housing and communal services and similar organizations. Is it possible to do pressure testing of a heating system with your own hands, for example, for the owner of a private house?
We will help you understand this issue. The article describes in detail a set of works that make it possible to identify the “weak points” of the heating network. Practical recommendations for testing and crimping the system in different ways are also given.
How to pressurize a heating system in a private house and apartment
From the author: Hello, dear readers. An engineered water heating system is the standard for equipping private and apartment buildings, as it is efficient and reliable. In practice and during active operation, the system, like any other, requires preventive maintenance and regular monitoring.
Typically, in apartment buildings, pressure testing is carried out by housing and communal services or invited specialists, but what should owners of private houses do? How to pressure test a heating system yourself, estimate the amount of work, identify breakdowns, if any, and avoid mistakes? There are a lot of questions, let's try to figure it out theoretically.
Pressure testing of the heating system - nuances and tricks from the installer
Pressure testing of a heating system is a pressure test. Hydraulic testing is called pressure testing if it is carried out with water. If air, then this is a pneumatic test.
Why do you need to do crimping?
When a pipeline system is assembled, it needs to be tested. This applies to all engineering systems. It is necessary to test heating, water supply and even sewage systems.
This way you can check the integrity of the system, installation errors and possible defective materials.
Many people put a bolt on it and don’t want to bother testing it. And then the customers intervene.
Warm floors in an insulated Swedish stove
These installers were recommended to Dmitry by a friend of his. They did the heating for him. It seemed like normal guys did everything quickly and carefully. Dima was building a house, and he needed to install heated floor pipes.
On the Internet, he saw a technology: an insulated Swedish stove, and he wanted one for himself. USHP is this type of foundation. Insulation is laid in the prepared area, heating, water supply and sewerage pipes are laid out. Then the concrete is poured.
The result is a concrete slab with a built-in heated floor.
I made an agreement with the installers, they came and laid out the heated floor pipe. They threw down water supply pipes. The slab was filled with concrete. Within a year, a frame house was built.
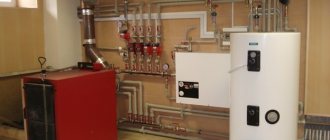
Boiler room installation
It's time for winter; finishing needs to be done. It was not possible to come to an agreement with the same installers for the installation of the boiler room. They didn't take on this kind of work. All they could do was install a warm floor and install a water supply system.
He found other installers, made an agreement, and they built a boiler room for him. Let's turn on the heating. And then it turns out that there is a leak in the warm floors. The pressure in the system drops to zero within half an hour.
Finding leaks in the heating system
The problem is that you can’t even figure out where the leak is. The floors are dry everywhere. The installers suggested pressing the heated floors at 10 bar. In theory, such pressure should cause moisture to rise to the top of the slab.
Did not help. They crawled through the entire slab and didn’t even find a hint of a leak. Then the installers suggested trying to find the leak using a thermal imager.
The idea is that when you run hot coolant into the underfloor heating pipes, the leak should be visible in the thermal imager. We rented a thermal imager. We trained for two days and found nothing.
The installers also kept buzzing in their ears: why didn’t you immediately pressurize the heated floors?
If Dmitry knew then that pressure testing of the heating system was needed, then, of course, he would have forced those installers to do it. And now there is nothing to show them, a year has passed.
Dima's hit is not weak.
Firstly, you need to either look for a leak or make part of a new heating system. The installers have already figured out which circuit is broken.
Secondly, they will have to pay for the search; they spent six days searching for the leak.
Thirdly, you’ve already lost your time and nerves, don’t worry, mom.
Dmitry decided to run pipes under the radiator into that room, but what else to do? And then the electrician says: there’s something murmuring there. Again we brought up the pressure to the warm floors and began to listen.
After some time we heard a murmur. We armed ourselves with tubes, and let’s listen to the floor through them. Eventually the leak was found and fixed. The pipe was broken and there was a leak in that area. At what stage this happened is unclear.
Mechanisms for carrying out
Crimping operators, i.e. Special pumps for carrying out relevant tests differ in design. Based on this feature, they are classified into three types:
- Porshnev.
- Vane-rotor.
- Membrane.
If testing of a pipeline (or other object) of a relatively small volume is required (for example, in private housing construction), then it can be performed using an inexpensive and easy-to-maintain manual pressure tester. This mechanism allows you to pump up to three liters of working fluid into the system in a minute.
To check the systems of a multi-story building, you will need a more powerful mechanism driven by an internal combustion engine or electric. The domestic UGO-30 is equipped with a 16-liter tank and allows you to develop a pressure of up to 30 atm. Manual two-stage pumps UGO-50 and UGO-450 are used when performing more complex tasks.
In domestic conditions, compact devices are used that can be manually controlled.
German-assembled electrically driven crimpers produced by Rothenberger (model ROTEST GW 150/4, for example, designed for testing drinking water and gas supply systems with air) and Ridgid (for example, model 1460-E 19021 are used in systems filled with as a working fluid water, oil or ethylene glycol).
Conditions for performing crimping
Test work is carried out correctly if all necessary requirements have been met. For example, outside work cannot be carried out on the tested object, and the testing must be supervised by the shift supervisor.
Pressure testing is carried out only according to a program approved by the company’s chief engineer.
It defines: the procedure for employees and the technological sequence of verification .
They also outline safety measures for ongoing and current work performed at adjacent facilities. There should be no strangers during pressure testing of the heating system; there should be no turning on or off of testing devices; only employees taking part in the test remain on site.
When work is carried out in adjacent areas, it is imperative to provide reliable fencing and turn off the testing equipment.
Inspection of heating appliances and pipes is permitted only at operating pressure values. When the heating system is pressure tested, reports are filled out to confirm the tightness.
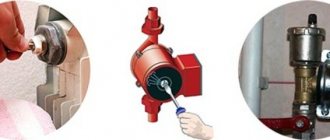
Types of pumps for testing
Test activities are carried out using manual or electric pumps to build up pressure.
Manual models are equipped with pressure control devices, a tap for shutting off incoming water and a shut-off valve for draining water from a rectangular cuvette. A plunger pump is used to pump water under pressure. The main disadvantage of manual equipment is the low download speed and labor-intensive process.
The best choice would be electrical equipment. Its advantage is the high speed of filling the circuits and automatic shutdown when the required pressure is reached.
Pressure testing of a heating system in an apartment building
How the tests are carried out:
- Conduct an inspection of the fittings, install paronite seals between the flanges and secure the stuck bolts.
- Install pressure gauges and thermometers to indicate oil levels.
- Check thermal insulation.
- Proceed with testing based on technical data and correct regulations.
- Fill the circuit with water.
- Monitor the decrease in pressure for 30 minutes.
Who carries out the pressure testing
Responsibility for monitoring the performance of the heating system and carrying out preventive measures lies with the organization that operates it. Utility services deal with these issues in residential buildings, and in other enterprises and institutions - the corresponding technical services.
Certified specialists with the necessary qualifications are allowed to carry out pressure testing work.
This work in private houses with autonomous heating is carried out by employees of service organizations or independently, as is installation.
Regardless of who will carry out the pressure testing activities, one should adhere to the requirements and rules of the regulatory documents governing this type of work.
Necessary tool
To create the required conditions during pressure testing, you need equipment that allows you to achieve the required pressure level. A pump is most often used. It, together with the check valve, is connected using a high-pressure hose to the system through a pipe. The main characteristics when choosing a device are the level of performance and the pressure it can create. If the device is powered by electricity, then pay attention to the operating voltage (220 V or 380 V).
Required Tools
When carrying out work with a small volume of the circuit, it is advisable to use a manual crimping machine equipped with a hydraulic cylinder. Greater efficiency and ease of use can be achieved by using an electrically driven piston device. The electric type of crimping machine will create the required pressure in a short time without applying any muscular effort. These devices, in addition to the pressure gauge, have monitoring and control equipment.
In private houses where there is low pressure in the system, fill it with water and then record the pressure readings on the pressure gauge.
Crimping: how to do it yourself
Often, when building a private house, the heating system is installed before the water is connected. Therefore, a large water container and a submersible pump are used to pump water into the pipes. During the manipulation, you need to constantly monitor the pressure using a pressure gauge and control the water level in the container, gradually adding it if necessary.
Checking the heating system before starting
When the pressure readings rise to 2-2.5 atm, the pump is turned off, and the remaining air is gradually released from the system using Mayevsky taps. Further, after the mark on the pressure gauge drops below 1 atm, filling with water continues. This is done until the water completely displaces the air and the pressure reaches a level of 1.2-1.5 atm.
If no leaks are detected, you can connect the boiler and start the system.
For such an important event as crimping, it is better to hire a team that has the appropriate license. These people are fully responsible for the actions performed. In this case, the customer receives all the necessary documents about the work performed.
Attention! The report on the pressure testing carried out must include the time during which the system was under test pressure and indicate its level.
Pressure testing of a heating system is a matter that requires a serious approach. This operation should be carried out with your own hands only in extreme cases.
About wiring diagrams
The simplest heating wiring diagram is considered to be a single-pipe one.
Its features:
- There is 1 circuit (closed in a ring);
- All radiators are connected in series;
- The coolant circulates in a closed circuit.
This is one of the simplest designs. But there are significant drawbacks here too. Thus, a single-pipe system is not suitable for large multi-story buildings. Since the further away the radiator is, the weaker it heats up. This means that the rooms will warm up unevenly.
And increasing the number of sections on a separate battery will not solve the problem. It’s just that the coolant tends to cool down along the way. And the last radiator in the line will be colder than the previous ones.
Therefore, it is worth installing a single-pipe system only in houses with a small area. You can compensate for this moment using a forced circulation pump. The changes are obvious:
- Pumping equipment is connected to the boiler;
- The coolant begins to circulate through the system with acceleration;
- The temperature will not change and all radiators will heat up correctly.
And at the same time, there are several disadvantages:
- Purchasing a pump is an expense;
- The equipment requires power supply;
- If there is a power outage, the heating will stop working.
Methods for crimping a heating system
There are several different ways to pressurize a heating system, each of which has its own characteristics.
p, blockquote 7,0,0,0,0 —>
Pressure testing with water. This method involves connecting a hose from the water supply to a tap located on the collector or boiler. After the system is filled with water, the pressure level should reach 1.5 Atm.
p, blockquote 8,0,0,0,0 —>
Pressure testing using air. This method is based on connecting a pressure tester - a special compressor that performs the function of pumping air masses. The pressure at the place that is being checked must exceed the worker indicators (1.5 -2 Atm.). In such a situation, an adapter is placed in the area where the Mayevsky tap is mounted, which is used to connect the compressor.
p, blockquote 9,0,0,0,0 —>
In order to save on the purchase of an expensive pressure tester by performing pressure testing of the heating system yourself, you can use a car pump with a pressure gauge.
p, blockquote 10,0,0,0,0 —>
Air pressure testing is performed in a situation where there is no way to connect to the water supply, and also in winter, when there is a high probability that water may remain in the pipes and freeze. During the air test, the integrity of the system is determined based on the readings on the pressure gauge. If the discharge pressure remains at the same level and there are no surges, then there are no leaks. In order to see the fistulas, the intended area must be covered with a soap solution.
p, blockquote 11,0,0,0,0 —>
p, blockquote 12,0,0,0,0 —>
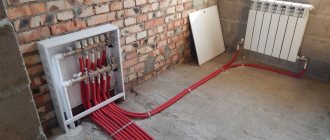
Shut-off valves
Shut-off valves must perform their main function - block the flow of coolant. If there are valves on the heating unit that do not “hold”, they need to be replaced. Different sections of the system are pressurized under different pressures, and if there is a non-working valve in the circuit, it will definitely manifest itself.
Marking of fittings
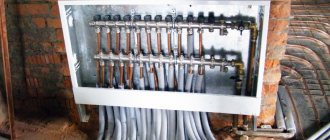
Ideally, everything should look like this: at the heating point there should be a diagram showing numbered and marked inlet and outlet pipelines, shut-off and control valves, drainage and drainage devices. The diagram must correspond to the current state of the system, that is, if changes have been made to the system, they must be displayed on the diagram.
All of the above devices must have tags with symbols corresponding to the symbols in the diagram (1,2 - shut-off valves on the supply and discharge pipelines, t1 and t2 - thermometers, P1 and P2 - pressure gauges, etc.).
In practice, at small heating points, inspectors do not always focus on this. The main thing is to make it clear what goes where, for example: “supply to the left wing”, “return from the right wing”, “supply to ventilation”, etc.
But if everything goes according to Feng Shui, this is an additional plus.
Inspection of wedge valves
Old-style wedge valves require additional attention during operation.
Wedge valve design: 1 - wedge, 2 - cover, 3 - flywheel, 4 - seat, 5 - body, 6 - o-ring, 7 - spindle, 8 - threaded bushing, 9 - bushing, 10 - stand, 11 - gland flange , 12 — stuffing box made of thermally expanded graphite.
In such valves, it is mandatory to pack the stuffing box every year. And during the year, if a leak occurs from the seal, it is necessary to tighten the flange. If this is not done, the valve will become unusable.
To replace the stuffing box, you need to unscrew the nuts on the union bolts, lift the flange, remove the old stuffing box and install a new one. The seal is wound in rings around the spindle and pressed against the flange.
There should be no signs of rust on the valve. The body should be painted black, the flywheel red, and the retractable spindle should be lubricated with grease.
Call specialists or do it yourself
If for some purpose you require a pressure test certificate for your heating or hot water supply system, you have only one option - order this service from a specialized organization. The cost of heating pressure testing can only be quoted to you individually. It depends on the volume of the system, its structure, the presence of shut-off valves and their condition. In general, the cost is calculated based on the tariff for 1 hour of work, and it ranges from 1000 rubles/hour to 2500 rubles/hour. You will have to call different organizations and inquire with them.
Companies involved in hydraulic system testing have more serious equipment.
If you have upgraded the heating or hot water supply of your own home, and you know for sure that your pipes and equipment are in good condition, there are no salts or deposits in them, you can carry out pressure testing yourself. No one will demand hydraulic test certificates from you. Even if you see that your pipes and radiators are clogged, you can wash everything yourself and then test it again. If you just don’t want to do this, you can call specialists. They will immediately clean the system and pressure test it, and will also issue you a certificate.
Certificate of hydrostatic testing of the system (pressure testing)
Description of the process - what is it?
Pressure testing should be understood as the process of testing the functionality of equipment or a pipeline by injecting water or air under high pressure.
In other words, the system is tested for strength and density using non-destructive testing. The idea of pressure testing is as follows: the absence of leaks at increased pressure of the working medium guarantees uninterrupted operation of the system in normal mode. It is very important to understand that pressure testing of a building involves the comprehensive implementation of the following actions:
- Testing of pipelines with simultaneous flushing of the system.
- Repair or replacement of some elements.
- Insulation update.
In the private sector, pressure testing is performed in heating, water supply and sewerage systems, as well as in the hot water supply circuit.
Hydraulic tests are carried out for the following purposes:
- Check the strength of the housing and walls of pipe sections, radiators and heat exchangers, as well as shut-off valves.
- Determine the degree of tightness of the connections of various components of the system.
- Check the functionality of various taps and sensors.
During operation, pipes are exposed to corrosion and mechanical damage, and the presence of manufacturing defects is possible. All this leads to weak areas, including boiler pipes and fittings, prefabricated fittings and joints. As a result of exposure to high temperatures and hydraulic shocks, leaks appear in weak areas, which can be identified by pressure testing the boiler and testing the batteries.
SNiP and safety requirements
For safety and operational reasons, it is recommended:
- Do not perform long-term pressure testing on pipes made of PVC.
- Perform testing on a line that is previously disconnected from other sections of the pipeline.
- Monitor leaks only with proven instruments and equipment.
- Do not involve organizations and persons in pressure testing that do not have certificates to perform such procedures.
For all types of pressure testing, possible deviations from the calculated pressure parameters in the network and the duration of visual inspection of leaks should be taken into account.
A short video about how to carry out pressure testing of heating and water supply