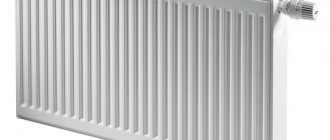
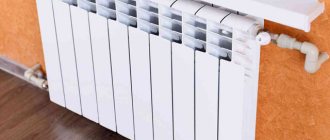
Radiator connection diagrams
How well the radiators will heat depends on how the coolant is supplied to them. There are more and less effective options.
Radiators with bottom connection
All heating radiators have two types of connection - side and bottom. There can be no discrepancies with the bottom connection. There are only two pipes - inlet and outlet. Accordingly, coolant is supplied to the radiator on one side and removed from the other.
Bottom connection of heating radiators for single-pipe and two-pipe heating systems
Specifically, where to connect the supply and where the return is connected is written in the installation instructions, which must be available.
Heating radiators with side connection
With a lateral connection, there are many more options: here the supply and return pipelines can be connected into two pipes, respectively, there are four options.
Option #1. Diagonal connection
This connection of heating radiators is considered the most effective, it is taken as a standard and this is how manufacturers test their heating devices and the data in the thermal power passport for such a connection. All other connection types transfer heat less efficiently.
Diagonal diagram for connecting heating radiators with a two-pipe and one-pipe system
This is because when the batteries are connected diagonally, the hot coolant is supplied to the upper inlet on one side, passes through the entire radiator and exits from the opposite, lower side.
Option #2. Unilateral
As the name implies, pipelines are connected on one side - supply from above, return from below. This option is convenient when the riser runs on the side of the heating device, which often happens in apartments, because this type of connection usually predominates. When the coolant is supplied from below, this scheme is used infrequently - it is not very convenient to position the pipes.
Lateral connection for two-pipe and one-pipe systems
With this connection of radiators, the heating efficiency is only slightly lower - by 2%. But this is only if there are few sections in the radiators - no more than 10. With a longer battery, its farthest edge will not heat up well or will remain cold at all. In panel radiators, to solve the problem, flow extenders are installed - tubes that bring the coolant a little further than the middle. The same devices can be installed in aluminum or bimetallic radiators, thereby improving heat transfer.
Option #3. Bottom or saddle connection
Of all the options, saddle connections for heating radiators are the least effective. Losses are approximately 12-14%. But this option is the most inconspicuous - pipes are usually laid on the floor or under it, and this method is the most optimal from an aesthetic point of view. And so that losses do not affect the temperature in the room, you can take a radiator a little more powerful than required.
Saddle connection of heating radiators
In systems with natural circulation, this type of connection should not be made, but if there is a pump, it works well. In some cases, it’s not even worse than the side one. It’s just that at a certain speed of movement of the coolant, vortex flows arise, the entire surface heats up, and heat transfer increases. These phenomena have not yet been fully studied, therefore it is not yet possible to predict the behavior of the coolant.
Types of lower pipe connections
- One-sided. With a one-way connection, two pipes of the heating device exit from one side. In this case, hot water passes through the upper radiator plug, and cold water is discharged through the lower one, which is located next to the upper plug.
- Versatile. In the case of a versatile connection, a pipe with hot water enters on one side, and cold water is discharged from the opposite side. This type of liner is ideal for individual heating systems. The big advantage here is that water flows to the heating devices in any direction: bottom-up, top-down, bottom-down. A versatile liner has a shorter length of supply and return lines. The choice depends on the level of heat transfer that is most appropriate to obtain for the room.
How to connect a heating radiator to a polypropylene pipe
Connecting a radiator to polypropylene pipes is a process consisting of several stages:
- Drawing up a drawing, marking.
- Fastening batteries to walls using brackets.
- Installation of pipes, connection of individual parts.
- Pipeline testing.
There are several ways to connect the battery to the pipes:
- Bottom connection. The tubes are connected on both sides of the radiator at the bottom. Suitable for horizontal installation of a single-circuit pipeline.
- Lateral connection. On one side of the battery there are two holes for the liquid supply and waste outlet.
- Diagonal connection. A classic option for connecting radiators to pipes. The coolant supply and outlet openings are located on both sides in the lower and upper parts.
Single pipe system
The one-pipe method is when all radiators are connected to one pipeline. When installing this method, it is necessary to correctly calculate the diameters of the pipes for effective heat transfer. This type has its positive and negative qualities.
When connecting, you can significantly save money on materials, but only with a falling vertical riser. Suitable for five-story buildings.
Types of radiators
Radiators for the manufacture of heating pipelines are popularly called batteries. New models are made from different metals, which are superior in technical characteristics and aesthetics to cast iron products. Types of radiators:
- Aluminum batteries are efficient batteries that are installed in new multi-story buildings. They quickly fail if the coolant contains alkalis and acids.
- Steel - there are sectional and tubular. The level of heat transfer does not depend on the shape of the battery.
- Bimetallic ones are the most effective in heating rooms. Made from a mixture of aluminum and steel.
Any of the presented types is relevant when assembling a heating circuit with polypropylene pipes.
What are bimetallic radiators?
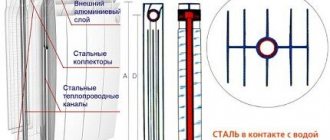
These are batteries for water heating that have a composite structure:
- internal steel (less often copper) pipes;
- external sectional housing made of aluminum alloys.
The circulation of the coolant fluid occurs through internal collectors, which transfer the temperature to the body, and that to the air. The advantage of such units over aluminum radiators is obvious: they are more resistant to aggressive environments. Steel and copper are less susceptible to rust, and high temperatures are less destructive to them.
Classification of heating systems
The main criterion for dividing heating systems is the number of circuits. Based on this criterion, all heating systems are divided into two groups:
The first option is the simplest and cheapest. This is essentially a ring from boiler to boiler, with heating radiators installed in between. If it comes to a one-story building, then this is a justified option in which you can use the natural circulation of the coolant. But in order for the temperature to be uniform in all rooms of the house, it is necessary to take some measures. For example, build up sections on the outermost radiators in the chain.
The best option for such a pipe circuit is to connect the battery using the Leningrad method. In fact, it turns out that an ordinary pipe runs through all the rooms near the floor, and radiator radiators crash into it. In this case, the so-called bottom cut is used. That is, the radiator is connected to the pipe through two lower pipes - the coolant enters one and exits from the other.
Attention! Heat loss with this type of battery connection is 12–13%. This is the highest level of heat loss
So before making such a decision, weigh the pros and cons. Initial savings can turn into large expenses during operation.
In general, this is a good connection scheme that justifies itself in small buildings. And in order to evenly distribute the coolant over all radiators, you can install a circulation pump in it. The investment is inexpensive, and the device works perfectly and requires little power consumption. But it ensures uniform heat distribution throughout all rooms.
By the way, a single-pipe piping scheme is very often used in city apartments. True, the bottom battery connection cannot be used here. The same should be said about the two-pipe system.
How much do bimetallic batteries cost?
Radiators combine all their excellent consumer qualities with an affordable price. On MirCli you can buy a model with 4 sections with a height of 500 mm for 4-5 thousand rubles. It will be a first-class unit, developed by a reliable brand and accompanied by an official guarantee.
As the size of the battery increases, on which heat transfer performance depends, the cost of the products also increases. A radiator for 7 sections, which can serve up to 11 square meters, will cost 7-8 thousand rubles. And to heat a room up to twenty square meters, you will have to spend 10-12 thousand.
What kind of harness can be
The main stage of installing a heating system in a house is tying the heating radiator with polypropylene. During this process, you need to install parts that allow you to regulate heat transfer.
Shut-off valves
There are several types of shut-off valves that are suitable for piping heating radiators:
- Chokes with thermal control capability. To adjust heat transfer, you need to set the parameters. After this, the mechanism will work automatically. Regardless of what temperature changes occur outside, the same temperature regime will be maintained in the room. Throttle is a valve designed for manual adjustment of heat transfer. The temperature begins to change two hours after changing the valve position.
- Valves are a part that is installed in front of the battery. Designed to shut off the coolant supply.
Fitting
To connect the battery to the pipeline, you need to use the following fittings:
- American couplings with which shut-off valves are connected. If there is a union nut, you can quickly dismantle the heat exchanger.
- Triple couplings - suitable for connecting pipes for supplying coolant simultaneously with control valves.
- Tees that have vias.
The choice of connecting part depends on the complexity of the water supply system.
Tools
To assemble a polypropylene heating system you will need a set of tools:
- special soldering iron for welding plastic;
- a tool for removing the reinforcing layer from tubes - a shaver;
- key with hooks for installing shut-off valves;
- scissors for cutting polypropylene.
Additionally, you will need measuring and marking tools.
Stages of connecting heating radiators
Installation of radiators with polypropylene pipes is carried out in several stages:
- Marking the laying of tubes and battery installation locations.
- Fastening heat exchangers to the wall. For small models, two brackets are enough, for large ones - one per section.
- Installation of shut-off valves.
- Pipe connection.
- Installation of jumpers, compensators.
The last stage is connecting the pipeline to the battery. To make the joints more airtight, you can use sealants that are resistant to prolonged exposure to high temperatures.
To heat rooms in an apartment or private house, it is necessary to install radiators in each room. For them to work, you need to correctly connect the heat exchangers to the heating pipeline.
Suitable house heating circuits for bottom connections
If water moves in the upward direction, then it moves in the opposite direction of gravity. Therefore, the coolant is not supplied from below to room heaters in gravity heating systems.
If pipes are connected to the device from below and from 2 sides according to a standard scheme, then even in this case a specially designed valve is used. It is placed on the supply and allows less coolant to pass through compared to a conventional liner. Because of this, the local resistance coefficient of the battery increases. It becomes approximately 2 times larger than the nominal value. Because of this, a circulation pump unit has to be built into the system.
The number of difficulties increases if the piping of the heating radiator from below is done only on one side. This occurs due to a significant increase in the hydraulic resistance of the heating device. It increases because the tap used is split into two channels. Moreover, each of them has a small nominal bore.
Pipe supply from below and on one side of the heating radiator Source build-experts.ru
For this connection option, it is still difficult to select high-quality fittings, the design of which includes a thermostatic head. Most of these products are made in China. It does not differ in accuracy of adjustment.
Another problem is adjusting the amount of water. Many available injection units are designed with a bypass rather than a rod that changes the flow rate. Because of this, the way of balancing completely changes. In addition, injection units that are equipped with a thermostatic head and a separate throttling device are often impossible to install due to their large size.
The best option when supplying pipes from below is a two-pipe polypropylene piping of the heating radiator. Ideally, the system will have a passing water movement. One of the best options is also radial isolation.
On a note! If you decide to connect the heating radiator to a single-pipe system from below, then this is not the best solution. When choosing this option, balancing becomes significantly more complicated.
What you need for efficient battery operation
An efficient heating system can save money on fuel costs. Therefore, when designing it, you should make informed decisions. After all, sometimes the advice of a neighbor in the country or a friend who recommends a system like his is not at all suitable.
It happens that there is no time to deal with these issues yourself. In this case, it is better to turn to professionals who have been working in this field for at least 5 years and have grateful reviews.
Correct connection is guaranteed to ensure comfortable living in the house for all family members. After all, when choosing a scheme, you need to take into account a number of features of your home
Having decided to independently connect heating radiators, you need to take into account that their efficiency is directly affected by the following indicators:
- size and thermal power of heating devices;
- their location in the room;
- connection method.
The choice of heating devices amazes the imagination of the inexperienced consumer. Among the offers are wall-mounted radiators made of various materials, floor and baseboard convectors. They all have different shapes, sizes, heat transfer levels, and connection types. These characteristics must be taken into account when installing heating devices into the system.
Among the models of heating devices on the market, it is better to choose based on the material and thermal power specified by the manufacturer
For each room, the number of radiators and their size will be different. It all depends on the area of the room, the level of insulation of the external walls of the building, the connection diagram, the thermal power indicated by the manufacturer in the product passport.
The location of the batteries is under the window, between windows located at a fairly long distance from each other, along a blank wall or in the corner of the room, in the hallway, pantry, bathroom, in the entrances of apartment buildings.
Depending on the location and method of installation of the heating device, there will be different heat losses. The worst option is a radiator completely covered with a screen
It is recommended to install a heat-reflecting screen between the wall and the heating device. You can make it yourself using one of the heat-reflecting materials - penofol, isospan or another foil analogue. Also, you should adhere to the following basic rules for installing a battery under a window:
- all radiators in one room are located on the same level;
- convector fins in a vertical position;
- the center of the heating equipment coincides with the center of the window or is 2 cm to the right (to the left);
- the length of the battery is at least 75% of the length of the window itself;
- the distance to the window sill is at least 5 cm, to the floor - no less than 6 cm. The optimal distance is 10-12 cm.
The level of heat transfer from devices and heat loss depends on the correct connection of radiators to the heating system in the house.
By following the basic standards for the placement of radiators, you can maximally prevent the penetration of cold into the room through the window
It happens that the owner of a home is guided by the advice of a friend, but the result is not at all as expected. Everything is done like his, but the batteries don’t want to heat up. This means that the selected connection diagram was not suitable specifically for this house, the area of the premises, the thermal power of the heating devices were not taken into account, or annoying mistakes were made during installation.
We connect the heating radiator to polypropylene pipes
In the private sector, in old housing stock and in new buildings, work is currently underway to re-equip heating systems. Old heating equipment, steel and cast iron heating radiators are replaced with new devices. Modern industry produces bimetallic, steel heating devices with improved parameters and characteristics. Accordingly, in parallel, the old steel pipelines through which the coolant circulates are being replaced with new consumables. Today, polypropylene pipes are taking the lead in creating a heating circuit.
Accordingly, in view of such a large-scale modernization of heating systems, reasonable questions arise. How is a polypropylene water circuit installed at home? What does it look like to connect a heating system radiator to polypropylene reinforced pipes. Let's look in detail and consider what it means to connect polypropylene consumables to heating sources in detail.
Main pros and cons
By installing such heating equipment in rooms, you can achieve harmony and symmetry in the lines
A pipeline hidden under the floor covering will not attract attention and will not spoil the design
At the same time, heating radiators with bottom connections have disadvantages. As noted above, for aesthetic reasons, the pipeline is installed in the floor or hidden from view under the baseboard. If even the most minor accident occurs, repairs are fraught with serious difficulties.
Experts also claim that heating radiators with bottom connections do not have a high level of heat transfer. If we talk about the latter, then in the first place are traditional radiators with a side connection method. They are most often chosen for installation in private households and old apartment buildings. Due to the fact that the supply pipe and outflow are located on one side, the radiator warms up as much as possible. The lower method of supplying coolant is ineffective when using multi-section batteries. These devices may not always warm up completely. This problem is solved with the help of special duct extensions. Most often, steel heating radiators with bottom connections are chosen by homeowners in the private sector where autonomous heating systems are installed.
Is it worth using a one-pipe heating system?
When laying pipes, a 2-pipe heating system is often used. Schematically, it can be represented in the form of 2 circuits, one is responsible for supplying hot water to the radiators, and the second is responsible for removing the cooled coolant and supplying it to the boiler. This approach allows you to organize the circulation of water of the same temperature in all batteries.
A significant disadvantage of this method of organizing heating is the financial cost of pipes (the price of installing such heating will be approximately 1.5-2 times more than single-pipe heating), and the labor intensity increases. In addition, the pipes will be more difficult to disguise.
The single-pipe scheme does not imply the presence of a separate riser for the removal of cooled coolant, that is, approximately half as many pipes will be required. Schematically, it can be represented as a closed loop, and the connection of radiators with a single-pipe heating system is made in series.
Comparison of one- and two-pipe heating systems
Such a system began to be widely used during the construction boom during the USSR, and then its significant shortcomings were discovered:
the main thing can be considered that the last batteries in the circuit receive a coolant with a temperature approximately 30-50% lower than those closest to the boiler, this leads to the fact that the rooms are heated extremely unevenly;
Note! This drawback can be easily solved by increasing the number of sections of the latest radiators. But when constructing a large number of objects, this will lead to an increase in calculations, which is not very convenient
- You will need a fairly powerful pump; it will not be possible to organize the movement of coolant by gravity;
- it is characterized by large heat losses;
- startup of the system takes longer than in the case of a two-pipe system;
- When doing work with your own hands, the risk of air locks occurring during operation is especially high. It’s just that quite often it is not possible to maintain the required slopes along the entire length of the pipes.
The listed list of disadvantages is typical for a conventional one-pipe heating system. Nowadays, most of the listed shortcomings are successfully eliminated by installing simple devices. For example, it is already possible to regulate the temperature in individual batteries, and installing balancing valves will make it possible to achieve almost identical operating conditions for all batteries in the circuit.
Considering the significant savings on materials, such a heating system design definitely deserves attention.
Video on heating battery connection diagrams
Video about the difference between natural and forced circulation of coolant in a heating system:
Video clearly demonstrating the differences between different heating system schemes:
Scheme for effectively connecting heating batteries with a two-pipe system:
The heating efficiency directly depends on the choice of battery connection diagram for your home. With the right option, heat loss is minimized. This allows you to get maximum effect with the least amount of fuel used. You can install the batteries yourself
It is important to take into account the features of your home so that cold radiators do not interfere with a comfortable life in a cozy home
Please tell me what to do if my radiator pipes directly “stick” to the wall of the house, is this not a minus? For example, when I was already doing putty at home myself, I noticed that it was not convenient, since I could not properly straighten the walls. And is it worth replacing old Soviet cast-iron radiators with new, but more beautiful steel or cast-iron appliances?
Free consultations with an engineer on the arrangement of technological networks Ask your question
Join on social media networks
Add a company
Popular from this category
- What is the best way to cover a heating radiator: options for masking radiators
- How to paint a heating radiator: technology for painting radiators
- Calculation of heating radiators: how to calculate the number and power of batteries
- How to choose an infrared carbon heater: an overview of various designs
Visitors are currently discussing
Ventilation in the cellar: technology for constructing a proper ventilation system Design and calculations
Rainwater collection system: how to arrange storage tanks for water use in the house Other
SMS socket: how a socket controlled by gsm works and is installed Sockets and switches
Ejector for a pumping station: operating principle and installation rules Pumping equipment
We connect heating radiators correctly
Regardless of the type of radiators chosen and the connection diagram suitable for them, it is important to calculate and install everything correctly. Each specific case will have its own optimal system.
For expensive houses with a large area, it is advisable to contact specialists who can offer the optimal design. This is not an issue to skimp on.
Each specific case will have its own optimal system. For expensive houses with a large area, it is advisable to contact specialists who can offer the optimal design. This is not an issue on which you need to skimp.
In order to properly install and connect heating devices in complex design schemes, it is better to use the services of professionals
For small residential houses, you can independently choose a suitable scheme and install heating devices. It is imperative to take into account the features of your home, the rules for installing batteries and the feasibility of using one or another scheme.
When installing radiators, do not forget that the type of material for the battery itself and the pipes must be the same. Plastic pipes connected to cast iron heating devices will cause many problems, ruining the heating system.
When installing heating radiators yourself, you should not forget to install ball valves for bleeding air and a regulator at the inlet
Installation of radiators with bottom connection unit
The connection of the panel heater units is carried out with the simplest tool in the form of a wrench; if adjustment is made, a hexagon or flat-head screwdriver is used. Since all pipes are equipped with sealed fluoroplastic or rubber seals, the use of threads, tow and other waterproofing materials is not required. When connecting from below to a common cross-linked polyethylene pipeline, proceed as follows:
- A Eurocone coupling with a union nut is placed on the end pipe outlets; its difference from standard compression fittings is that the polyethylene sheath is pressed to the inner fitting through the outer ring with a slot, and the connection to the “binoculars” branch pipe is made with one union nut. The cone at the end of the connector with a rubber gasket fits tightly and hermetically into the mating hole when the nut is tightened.
- Screw the N-shaped unit with a key to the radiator from below using an American nut using regular and conical gaskets included in the installation kit of the thermostatic fitting, install the radiator on the floor or hang it on the wall at the required height.
- Using a wrench, attach the union nuts of the Eurocone coupling from the pipe ends to the inlet pipes of the lower connection fittings.
When carrying out work, the main thing is not to pinch the connections with a wrench, which can cause irreversible rupture of the gaskets and loss of tightness; it is better to tighten all the nuts by hand with maximum force, and after supplying water in the leak areas, lightly tighten them with an adjustable wrench.
Rice. 10 Example of installing a radiator on lower fittings (Hummel)
Although the heat is distributed evenly, this detail reduces the aesthetics of the look and one of the main advantages of the lower eyeliner is lost. The use of built-in bypasses, thermostats, control and shut-off valves in the supply fittings allows the effective use of a lower inlet device in one-pipe and two-pipe heating systems.
Coolant circulation methods
As you know, water, and it is usually what is poured into the heating system, can circulate forcibly or naturally. The first option involves using a special water pump that pushes water through the system. Naturally, this element is included in the overall heating circuit. And in most cases it is installed either near the heating boiler, or is already a structural element of it.
A natural circulation system is very relevant in places where there are frequent power outages. The circuit does not include a pump, and the heating boiler itself is non-volatile. Water moves through the system due to the fact that the heated column of water displaces the cold coolant. How the connection of radiators will be implemented under such circumstances depends on many factors, including the need to take into account the characteristics of the heating main and its length.
Any of the four connection methods can be implemented if there is a circulation pump in the heating system
So, let's look at these options in more detail.
Method No. 1 - one-way connection
Connecting the battery in this way involves installing an inlet pipe (supply) and an outlet pipe (return) to the same section of the radiator:
This ensures uniform heating of all sections of each individual battery. A one-way heating system is a rational solution in one-story houses if it is planned to install radiators with a large number of sections (about 15). However, if the accordion has more sections, then significant heat loss will occur, which means it is worth considering another connection option.
Method No. 2 - bottom and saddle connection
Relevant in those systems where the heating pipeline is hidden under the floor. In this case, both the coolant supply pipe and the outlet pipe are mounted to the lower pipes of the opposing sections. The weak point of connecting batteries this way is low efficiency, since in percentage terms heat loss can reach 15%. Logically, the radiators in the upper part heat up unevenly.
Method number 3 - cross (diagonal) connection
This option is designed for connecting batteries with a large number of sections to the heating system. Thanks to the special design, the coolant is evenly distributed inside the radiator, which ensures maximum heat transfer.
Direction of coolant movement during cross connection (1-Maevsky tap; 2-plug; 3-heating radiator; 4-directional coolant movement)
The answer to the question of how to properly connect a heating battery in such a situation is extremely simple: supply - from above, return - from below, but from different sides. When radiators are connected diagonally, heat loss does not exceed 2%.
We tried to cover the topic of possible connection diagrams for heating radiators in as much detail as possible. We hope you will be able to evaluate all the pros and cons of each of the options described, and choose the most relevant one in your particular case.
Types of lower pipe connections
- One-sided. With a one-way connection, two pipes of the heating device exit from one side. In this case, hot water passes through the upper radiator plug, and cold water is discharged through the lower one, which is located next to the upper plug.
- Versatile. In the case of a versatile connection, a pipe with hot water enters on one side, and cold water is discharged from the opposite side. This type of liner is ideal for individual heating systems. The big advantage here is that water flows to the heating devices in any direction: bottom-up, top-down, bottom-down. A versatile liner has a shorter length of supply and return lines. The choice depends on the level of heat transfer that is most appropriate to obtain for the room.
Types of piping, or how to properly connect a heating battery
Providing heat to a house or apartment is task number one during the cold season. Therefore, every average person strives first to create an efficiently operating system that would be economically justified. And since most heating systems are of the radiator type, the question of how to properly connect heating batteries is one of the most pressing.
For many, this means nothing, especially for those who are faced with the problem of piping the heating system for the first time. But anyone who has already dealt with the creation of such schemes understands perfectly what we are talking about.
There are not so many classifications of types of piping and routing of a pipe system, especially when it comes to radiator piping. Therefore, it will not be very difficult to understand this issue. Most often, it is the pipe layout that influences the nature of the connection of battery radiators. Therefore, it is necessary to consider the classification of various heating systems and determine which of them is best suited for a particular connection.

