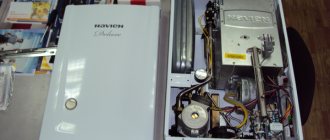
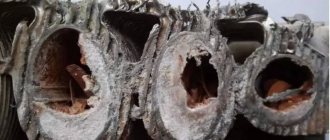
Are you familiar with the situation where you have to repair an expensive part, but the budget for this repair is growing? Surely you know what costs can and should be considered unnecessary. For example, you have a gas boiler and you don’t want to pay up to 30 percent of the cost of the entire device to repair one single part. If you don’t know how to weld the heat exchanger of a gas boiler, just read our article and you will learn.
Thanks to this article, you will learn the procedure for repairing the heat exchanger - a part due to which boilers often break down. We talked about soldering heat exchangers in different ways. Using our recommendations, you can independently repair the failed part.
In domestic conditions, heat exchangers are repaired by soldering. Welding is literally used in manufacturing, sometimes with the help of robotic devices. Leave a heat exchanger with extensive structural damage to the craftsmen, but in the case of small holes in the part, soldering can help. Find out more about this.
Preparation of material and welding of parts
The process of argon metal welding.
To install heating devices in the form of registers, it is necessary to prepare pipe and consumables:
- smooth steel pipes with a diameter from 76 to 159 mm;
- pipes with a diameter of 32 mm for jumpers;
- inlet and outlet pipes for welding, threaded or flanged type with a diameter of 35 mm;
- threaded fitting for connecting an air vent (Mayevsky valve);
- plugs for pipe diameters;
- floor supports made from corners or brackets for mounting to the wall.
For the manufacture of such heat exchangers, pipes with diameters of 76, 89, 108 and 159 mm are most often used. Products with profile, rectangular or square sections are also used.
Tools you will need:
- welding machine;
- gas key;
- grinder (grinder);
- hammer, electrodes;
- roulette, level;
- welder protective equipment.
Heating register device.
The joining surfaces of the parts are cleaned and degreased before welding to avoid defects in the seams. The ends of the pipes must be perpendicular to their axes. Large-diameter pipes are processed using milling machines or gas-acid cutting.
The pipes are cut into pieces of calculated sizes, the ends are cleaned with a grinder. On horizontal pipes, holes for jumpers are marked and cut out; the pipes must fit into the hole.
Jumpers inserted into the holes are welded to horizontally laid pipes in accordance with the dimensions. Plugs are welded to the ends of the register elements. The inlet and outlet pipes are welded into pre-cut holes at two ends (diagonally).
At one of the upper ends a threaded pipe is welded for installing a Mayevsky tap. All seams are cleaned with a sander to give an aesthetic appearance. Racks are welded to the structure (if the device is installed on the floor).
To check the register for leaks, the lower outlet for the coolant outlet is closed with a plug. The structure is filled with water and inspected for leaks. When they are detected, the water is drained and the problem areas are boiled again. The seams are cleaned again and the register is painted.
Tapping into a pipeline under pressure
If the water pressure in the pipeline is low (no more than 6 bar, as in the cold water supply line of communal houses), it is not so difficult to insert into the pipeline by welding. For these purposes, select a piece of pipe with a thread suitable for a shut-off valve: a ball valve or valve. Immediately prepare sealing materials (plumbing tape, flax fiber, paste), a hammer drill with a metal drill with a diameter corresponding to the drainage passage.
Further operations are carried out in the following sequence:
- Grind down the lower edges of the transitional steel coupling with a grinder thread to fit the semicircular profile of the pipeline, make a chamfer around the perimeter for the weld pool.
- Place the transition coupling on the pipe, fix it at several points with drops of molten metal and begin welding it around the perimeter in the usual way.
Rice. 9 Welding a coupling side outlet with a thread for a ball valve
What electrodes should be used to weld a 2 mm profile pipe, professional advice . On our website there is a separate article devoted to a review of methods and types of welding of thin-walled profile pipes, the choice of electrodes, welding modes, read it, it might be interesting.
- Then a metal drill is inserted into a hammer drill or screwdriver and a hole is made in the pipeline through a welded coupling, having previously prepared a ball valve and wound flax fiber around the thread.
- After drilling a hole in the pipeline, remove the drill with a power tool and quickly screw the ball valve onto the threaded outlet pipe.
- A more reliable and simpler option, if the pressure in the system is unknown, is to screw a ball valve onto the threaded pipe in advance, using seals made of flax fiber or plumbing thread, and drill the pipe through it. It is worth noting that the fittings must be full bore without internal narrowing of the passage channel.
- As soon as a strong water flow appears at the outlet after removing the drill, it is quickly blocked with the cantilever handle of the crane.
An important nuance. To prevent water coming out of the pipeline from getting into the power tool during drilling, a protective screen is placed on the drill - a piece of thick cardboard, plywood, or plastic.
Rice. 10 Operations for inserting into a pipeline through a ball valve
Welding pipes with water flowing through them is an operation that can be performed by highly qualified welders with extensive experience. Also, using welding, it is easy to insert into any metal pipeline that transports water under pressure.
Source
Basic operating principles
The design of a water heating system can without a doubt be called one of the most significant developments of the nineteenth century. What is the principle of its operation? When raised up through the pipes, hot water creates a continuous flow. and the vacated space is filled with cold water. The water is constantly moving and constantly heating up. This ensures that all rooms of the house maintain a comfortable temperature for a long time. After all, the water will circulate on its own through the pipes.
Types of heating systems:
- Gravity flow. Water moves through the pipeline on its own
- With forced movement. Water moves under the action of a pump
Systems using forced movement are much more effective compared to the first ones, since in gravity flow systems, passing through the radiator, the water slows down and cools, ceasing to heat the rooms. The flow of water is accelerated by a circulation pump, which is built in to ensure constant movement of water.
Such designs require an electrical connection. Perhaps this is their only drawback, but in all other respects they are the most efficient and economical compared to other types of heating systems.
Types of forced circulation of coolant in heating
The use of forced circulation heating schemes in two-story houses is used due to the length of the system lines (more than 30 m). This method is carried out using a circulation pump that pumps the liquid from the circuit. It is mounted at the inlet of the heating device, where the coolant temperature is lowest.
In a closed circuit, the degree of pressure that the pump develops does not depend on the number of floors and area of the building. The speed of the water flow becomes greater, so when passing through the pipeline lines the coolant does not cool down much. This contributes to a more uniform distribution of heat throughout the system and the use of the heat generator in a gentle mode.
The expansion tank can be located not only at the highest point of the system, but also near the boiler. To perfect the circuit, the designers introduced an accelerating collector into it. Now, if the power goes out and the pump stops, the system will continue to operate in convection mode.
- with one pipe;
- two;
- collector
You can install each one yourself or invite specialists.
One-pipe circuit option
Shut-off valves are also installed at the entrance to the battery, which serves to regulate the temperature in the room, as well as necessary when replacing equipment. A valve is installed on top of the radiator to bleed air.
Valve for batteries
To increase the uniformity of heat distribution, radiators are installed along the bypass line. If you do not use this scheme, then you will need to select batteries of different capacities, taking into account the loss of coolant, that is, the further from the boiler, the more sections.
The use of shut-off valves is not necessary, but without them the maneuverability of the entire heating system is reduced. If necessary, you will not be able to disconnect the second or first floor from the network to save fuel.
To avoid uneven distribution of the coolant, circuits with two pipes are used.
- dead end;
- passing;
- collector
Options for dead-end and passing circuits
The associated option makes it easy to control the heat level, but it is necessary to increase the length of the pipeline.
The most effective is the collector circuit, which allows a separate pipe to be connected to each radiator. Heat flows evenly. There is one disadvantage - the high cost of the equipment, as the amount of consumables increases.
Scheme of collector horizontal heating
There are also vertical options for supplying the coolant, which are found with lower and upper wiring. In the first case, the drain with the supply of coolant passes through the floors, in the second, the riser goes up from the boiler to the attic, where pipes are routed to the heating elements.
Vertical scheme
Two-story houses can have a very different area, ranging from several tens to hundreds of square meters. They also differ in the location of the rooms, the presence of extensions and heated verandas, and their position to the cardinal points. Based on these and many other factors, you should decide on natural or forced coolant circulation.
A simple diagram of coolant circulation in a private house with a heating system with natural circulation.
Heating schemes with natural coolant circulation are distinguished by their simplicity. Here, the coolant moves through the pipes on its own, without the help of a circulation pump - under the influence of heat it rises, enters the pipes, is distributed among the radiators, cools down and enters the return pipe to return to the boiler. That is, the coolant moves by gravity, obeying the laws of physics.
Scheme of a closed two-pipe heating system for a two-story house with forced circulation
- More uniform heating of the entire household;
- Significantly large length of horizontal sections (depending on the power of the pump used, it can reach several hundred meters);
- Possibility of more efficient connection of radiators (for example, in a diagonal pattern);
- Possibility of installing additional fittings and bends without the risk of pressure dropping below the minimum limit.
Thus, in modern two-story houses it is best to use heating systems with forced circulation. It is also possible to install a bypass, which will help you choose between forced or natural circulation in order to select the most optimal option. We make a choice towards coercive systems as more effective.
https://www.youtube.com/watch?v=olrD9qxCAhM
Forced circulation has a couple of disadvantages - the need to purchase a circulation pump and the increased noise level associated with its operation.
Requirements for the premises for gas boilers
Gas boilers can be installed in a closet, kitchen or basement, or a special outbuilding. There are certain requirements for the room in which gas boilers are installed in a private house. They are the same for any room and are as follows:
- The room must be well ventilated, with a mandatory exhaust hood.
- There should be vents in the windows and a small gap at the bottom of the door.
- Ceiling height – from 250 cm. Room volume – from 15 m2. Each unit of gas boiler power requires additional volume (0.2 m2) so that you can freely approach the boiler for maintenance.
- Walls. separating the room with the installed boiler from others must be made of fire-resistant materials that do not support combustion.
- The basement or basement room must have a separate exit to the street.
- The extension should only be placed against a blank wall of a residential building. The minimum distance to the nearest window is 4 m. The height from the ceiling to the window is 8 m.
Photo
Welding work in the manufacture of a boiler
Making a boiler at home
Converting a safe into a stove
Stove-fireplace with smoldering mode up to 8 hours
Slow burning stove from a gas cylinder
Homemade metal stove
Reliable and economical solid fuel boiler
Waste oil heating boiler
Made from a barrel
Testing a homemade long-burning boiler
Features of gas boiler piping
There are several ways to tie a gas boiler. The most popular option is lining the heating boiler with polypropylene. Working with pipes made of this material is low cost and simple. Plaque and solid particles do not collect on the walls of polypropylene products. When such pipes are used, piping a gas boiler with your own hands is not difficult; any property owner can handle such work.
Paronite serves as a gasket. It is prohibited to use tow, fum tape or components made of rubber. The fact is that rubber gaskets under the influence of high temperatures can narrow and, as a result, practically block the passage in the pipeline, and tow is easily flammable.
A pipeline tied with polypropylene pipes, such as the one in the photo, can withstand pressures of up to 25 bar; high temperatures reaching 95 degrees Celsius are also not dangerous for it.
How to install a wood boiler
Let's start installation
Please note that the volume of the device inside should be the same, but the heat exchanger jacket should be increased in volume to improve the efficiency of the wood-burning boiler. When you install it in a place prepared in advance for it, you will need to connect it to the water circuit, and then check the operation by sealing all the joints
The best energy output occurs in gas generator mode; to heat the room, the wood-burning boiler takes about half an hour to heat up.
Once installed, it can be painted to make it as fire resistant as possible, and painting will also make the boiler look more attractive.
If you did everything correctly, carried out the calculations and made the correct assembly, then wood-fired water boilers will become more efficient than gas boilers. A wood-burning boiler also allows for more even distribution of heat in the room.
Joint repair
There are situations when you need to re-weld the entire joint. First, the lower part of the joint is welded; it is welded through a window cut out in the upper part of the pipe. It can be made in any geometry: round, square, rectangular. This does not matter; it is important to provide access to the joint. The water is blocked by clogging the passage with rags; they are inserted on both sides to dry the work area as much as possible. The seam is made in small fragments, three centimeters each, in two passes. The second is done in the opposite direction. When the scale is knocked down, the rag is removed, water will flow into the pipe again. Proceed to the side parts. The final part of the work is welding the window, it is closed with the prepared patch, the seam is drawn in a circle. Walls thicker than 6 mm are boiled twice in different directions.
How to weld a heating boiler with your own hands
Scheme for manufacturing a long-burning boiler with a heat exchanger
Before you weld a heating boiler yourself, you need to decide on its design. It is preferable that it meets modern requirements for safety and operational efficiency. Therefore, as an example, we will consider a pyrolysis-type boiler made independently.
How to properly weld a heating boiler of this type? In addition to the welding machine, this will require the following materials and tools:
- Sheet steel, the grades of which are selected from the data in the table shown above. For the combustion chamber, the metal thickness should be 3-4 mm. The body can be made of steel of smaller thickness - 2-2.5 mm;
- Pipes for the manufacture of a heat exchanger. Their optimal diameter is 40 mm. This size will allow you to quickly heat the coolant. Number of registers - from 3 to 6;
- How to weld a heating boiler without a cutting tool? It is best to use a grinder with special metal discs for cutting sheets;
- Doors for the combustion chamber and ash pan. You also need to purchase cast iron grates. This must be done in advance, since the openings and fastening parts of the boiler will be made according to the dimensions of the components;
- Level, tape measure and pencil (marker) for marking;
- Protective equipment - gloves, welder's mask, transparent work glasses and clothing made of thick material with long sleeves.
For clarity, you can see how to weld heating in a private house. Videos or photographs will help in your work, as they clearly show all the stages and features of their implementation. However, this should be done only after drawing up a drawing and preparing all the tools and components. This applies to all stages of manufacturing components, since it is impossible to weld heating with your own hands, including boilers, registers, combs, without the correct diagram.
It is also important to prepare the work site before welding the heating in the garage. Most often, the manufacturing process takes place here.
First you need to ensure maximum free space by removing unnecessary items.
For safety reasons, flammable liquids such as gasoline, oil, etc. should also be removed from the garage. And only after that you can start working - welding the heating in the garage. Correct welding of a heating boiler involves the manufacture of two components - the boiler body itself and the heat exchanger.
Heat exchanger
Heat exchanger for heating boiler
This element is manufactured before the heating boiler is welded. Subsequently, it will be installed in a structure that will directly depend on its actual dimensions.
Structurally, it consists of 2 rectangular tanks connected to each other by pipelines. The optimal thickness of the material should be 3-3.5 mm. This is due to the high temperatures that will affect the surface. The specifics of its manufacture can be seen in the video - how to weld heating in a private house.
Markings of the structure are made on steel sheets according to the drawings. First, the back panel is cut out and a partition is welded to it to remove wood (coal) gases. You need to be very careful at this stage, since the weld may not always provide proper fastening. Then the side and bottom are welded to the partition and rear wall.
It should be noted that welding a heating boiler yourself is quite problematic. Therefore, it is recommended that two people do this work. This is especially true for the installation stage of a finished heat exchanger. Its pipes are placed in pre-prepared holes, and the pipes are spot welded to the inner walls of the boiler.
The question often arises is how to weld heating inside a garage without forced ventilation. To do this, work should only be carried out with the gate open to ensure a normal flow of fresh air.
The main problem with homemade structures is low efficiency. To increase efficiency, it is recommended to make double walls, between which a basalt fireproof heat insulator is installed. You can weld such a boiler with your own hands for water heating, but for this you need to provide for additional material consumption. First, double walls are made and filled with insulation. Then the further technology of welding the structure fully corresponds to that described above.
Manufacturing instructions
When starting the production process, you need to start by preparing all the essentials:
- Pipes with the following diameters - 30 cm, 5-6 cm, 10 cm (the wall thickness of each is at least 3 mm)
- Steel sheet with a thickness of more than 4 mm
- Bulgarian
- Welding machine
- Hand tools
It is recommended to place the boiler on a level, hard surface. If such an installation will be installed at home in a boiler room, you should think about arranging the foundation, a few words about which will be said later.
Let's start making the boiler:
- Take a pipe suitable for its characteristics and cut off a piece from 70 to 100 cm. A short length will not allow you to load a sufficient amount of firewood, a large length will make loading extremely inconvenient
- Now you need to build a distributor. In order for it to move freely, its diameter is made 15-25 mm smaller than the main pipe
In the center of the circle you need to drill a hole with a diameter of 15 mm - air will flow through it into the combustion chamber. To ensure that the disk does not fit tightly to the panels and there is space for air circulation, it is necessary to weld an impeller to its inner side - several plates up to 5 cm high
A pipe with a diameter of 5-6 cm is welded in the center of the regulator, while its height is made 10-15 cm larger than the boiler. As mentioned earlier, it is recommended to make a damper at the top, which will allow you to adjust the draft at any time, thereby controlling the smoldering process. A door is cut out at the bottom with a grinder, through which ash will be removed
Also, the bottom is securely welded at the bottom of the boiler. At the top it is necessary to run a horizontal chimney pipe with a diameter of 8-10 cm and a length of no more than 40 cm (this is what is passed inside the heat exchanger)
The finishing touch of the design is the boiler lid, in which a hole is cut for the air intake pipe. It should lock the camera as tightly as possible
A good alternative to firewood is heating briquettes - see our review
Gas boiler wiring diagrams
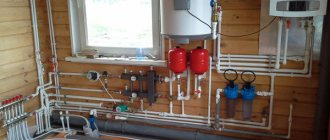
If the gas boiler is piped in the classical way, the coolant moves up the supply pipeline. Then the water is directed to risers, which have special devices that do not allow them to be opened.
When the piping of a double-circuit gas boiler is carried out by the house owner himself, you need to prepare the following tools and components for the work:
- circulation pump;
- thermal head or distribution valve;
- expansion tank;
- drain and ball valves;
- pass filter;
- balancing valve;
- check and air valves;
- corners and tee.
Pyrolysis heating boilers
In order to save on materials and energy spent on boiler operation, this type of unit should be used. The principle of operation of the boiler is a mixture of air and pyrolysis gas, which ignites and produces more heat. The cost of materials for the manufacture of a pyrolysis boiler is an order of magnitude higher than that of a wood-burning boiler, but after a couple of heating seasons the device pays for itself.
The design of a pyrolysis water unit will consist of several sectors: power supply regulators, an opening, smoke channels, a fan, a combustion chamber and pipes. When manufacturing it, it is necessary to adhere to the exact drawing due to the complexity of assembling the structure. High heating capacity and efficiency make it possible to reduce energy consumption and set the power to 25-30 kW, unlike other boilers (40-50 kW).
Rice. 3 Assembly diagram
To assemble it, we will need an electric drill, a temperature sensor, a 230 mm cutting wheel, a grinder, electrodes and a welding machine, as well as 2 mm thick steel strips and a fan.
- Cut the fuel hole slightly higher than the combustion tank.
- Install a restrictor that controls the air supply.
- Cut a special hole in the boiler for the limiter.
- Weld a stopper from a pipe 65-70 mm thick.
- Make a rectangular opening for loading and cover it securely with a steel plate.
- Cut a hole to remove ash.
- It is advisable to make the outlet pipe with a bend in order to increase the amount of heat generated.
- Install a valve outside the structure to regulate the amount of coolant.
- Carry out a tight test and install.
Rice. 4 Operating principle
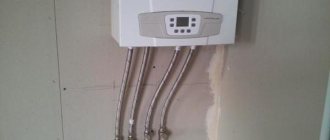
How to place a gas boiler on the wall
Having correctly selected and prepared the room for installation, you need to determine the position of the wall-hung gas boiler on the wall and prepare the surface for installation accordingly:
Photo 4: Correct placement of the gas boiler on the wall
- It is recommended to install it on a solid wall that can support the weight of the device. If the wall is made of flammable material (for example, a wooden house), then between the boiler and the wall there should be a gasket made of non-flammable material protruding along the perimeter of the device at a distance of 200 mm. Typically, a layer of asbestos cardboard is used, and a sheet of galvanized steel is attached on top of it.
- It is recommended to install the mounted boiler at a height of 90-120 cm from the floor and at a distance of at least 10 cm from adjacent walls. This space is necessary for convenient piping and servicing of the boiler.
- The socket for connecting to the electrical network should be located next to the wall-mounted boiler and in no case under it. This will avoid a short circuit in the event of a leak. A place should be provided nearby to install an uninterruptible power supply (UPS) for a gas boiler.
The requirements for the location of gas boilers on the wall and the distance to various building elements differ for many models. We have given the most typical values, but still, before installation, you need to clarify them in the passport for a specific device.
Assembly of the unit
Assembling the boiler begins with welding the chimney to a small-diameter pancake (41.2 cm). Then temporary stops are welded inside the body at a height of 30 cm from the edge of the firebox. For this, ordinary steel wire or the same reinforcement is used. Then a pancake with a chimney is placed on top of them.
After this, the most difficult and responsible part of the work begins - welding the pancake to the body, on both sides. The pancake serves as a boundary or wall between the firebox and the water tank, and everything depends on the quality of this seam.
Then a pancake with a diameter of 42.5 cm with a hole is placed on top of the chimney and all the seams are thoroughly welded - between the chimney and the pancake and between the pancake and the body.
The next stage of work is the installation of the ash pan. First, a grid of reinforcement is inserted inside the body on the other side, and then stops from the corner are welded, onto which the ash pan will lie when the pipe (body) is turned over. The ash pan is installed between the firebox and the ash pan.
After this, the remaining whole pancake is welded to the lower edge of the pipe (body) and the legs of the boiler are attached to it. Next, all that remains is to make the doors. Hinges are welded to the edge of the firebox and pieces from the cutouts and the door is hung.
The blower valve can be made in different ways. It can be just a regular door, in the form of a gate or a rotary valve with holes in the body.
There is another option - buy ready-made doors, latches or dampers. They are made of cast iron and equipped with thermal insulation, eliminating the likelihood of severe burns upon contact.
Blower doors and valve
How to weld a heating register with your own hands
How to properly weld a heating register and in what cases is it recommended to install them? First you need to correctly understand their purpose. In essence, these are heating devices that must ensure maximum heat transfer from the hot water of the heating system to the room.
Before welding the heating registers, it is necessary to prepare the basic material for manufacturing:
- Main pipes. They should be relatively large in diameter - up to 100 mm. For forced systems with high temperature conditions, it is recommended to use just these. It is better that the pipe cross-section is round, since profile structures will create high hydraulic resistance, which is undesirable;
- In order to properly weld the heating register, you will need pipes of a smaller diameter, which will serve as pipes for coolant circulation between the main horizontal ones. Their cross section should be in the range of 24-30 mm.
At the first stage of work, you need to cut all the pipes according to the previously prepared drawing. Then, before welding the heating registers, it is necessary to make plugs for the ends of large pipes. They are divided into two types - blind and with inlet pipes. With the help of the latter, the coolant will move along the register contour.
The order of the work is as follows.
- In order to properly weld the register of the heating system, you must first cut all the pipes according to the drawing. For this purpose, a “grinder” is used. At the end of the work, the end parts are cleaned;
- Production of plugs. For them you need to use metal of the same thickness as the pipes. The diameter of the plugs must be larger than the cross-section of the pipe by the thickness of the metal. This is necessary for welding the fastening edging. After their manufacture, installation is carried out using the welding method;
- Before welding the heating system registers using adapter pipes, it is necessary to make holes in the pipes. It is best to do this with a welding machine, since it is impossible to cut a round hole with a grinder.
The final stage of work is connecting large pipes into a single heating device - a register.
How to weld a pipe with water using electric welding
Situations arise when a defect in the pipeline has to be repaired when supplying water. More often, fistulas occur on welded pipes; they can be eliminated by electric welding the water pipe using surfacing electrodes. Although the welding will be weak, a serious accident, water leakage will be prevented.
Before welding, the main pressure is reduced to possible limits. Experience is required to perform the work. A beginner cannot cope with such welding. It is especially difficult to weld cast iron risers. Cast iron has high fluidity; when heated, structural changes occur in the metal, worsening performance characteristics.
Safety regulations
Always follow safety precautions when using wood burning stoves
Never leave stoves burning for a long time without control, do not forget to clean the ash chamber in a timely manner and add firewood to the firebox. Pay attention to the chimney channel valves. keep them in the open position until you start to light the stove. Use only in the cold season; it is not advisable to use it in summer. Significant overheating can lead to breakdown, and then the stove will have to be repaired
and seriously. High temperatures can cause destruction of the furnace walls. That is why you should avoid excessively high temperatures and using the unit in the warm season
Significant overheating can lead to breakdown, and then the stove will have to be repaired. and seriously. High temperatures can cause destruction of the furnace walls. That is why you should avoid excessively high temperatures and using the unit in the warm season.
We build it with our own hands
If your oven is brick. then you can also build a water boiler for it with your own hands, and the oven itself can also be made of bricks. As a water heater for it, you can take a simple cast iron radiator. A similar model can be found when dismantling old five-story “Khrushchev” buildings, if they are being demolished in your city.
Each radiator has a capacity of about one and a half liters. When twelve of these radiators are connected to each other, you will end up with a powerful 18-liter heater with an area of three square meters. However, such a scale is not suitable for all premises, but for heating a large Russian bath this will be one of the most acceptable options.
Before you install the structure itself, disassemble the radiators. they should then be thoroughly cleaned. To remove all contaminants on them, make a hot solution based on six percent hydrochloric acid and rinse the radiators with it, then rinse them with cold water. Now we change the intersection gaskets, since the temperature can be more than six hundred degrees. At this temperature, the cardboard will not be able to withstand the impact, which will cause the radiator to leak. Therefore, as a gasket, take an asbestos cord, having previously soaked it with drying oil.
Now we install the boiler in a brick oven. and it's not as difficult as it might seem at first glance. But there are some points that are worth special mention. Firstly, the water boiler pipe for the brick kiln should be equipped with a large diameter seamless pipe, this will distribute the water as efficiently as possible. Secondly, under no circumstances should pipes be soldered end-to-end to prevent the appearance of defects that could cause the boiler to subsequently leak.
You should also chamfer the edges of the pipes; before cooking, make sure that the rings are located about 5 cm apart from each other. Often, a boiler in a brick stove can leak heavily; if this suddenly happens, clean the leaking areas with a grinder and wash them.
Why is it necessary to weld a pipe with water?
It is necessary to boil pipes with water in the following situations:
- when, after putting the system into operation, lack of penetration of joints is detected;
- sometimes when installing welded pipes, the main line turns out to be defective;
- when it is impossible to leave a large area without water;
- there is no way to drain the water or it is not economically feasible;
- you urgently need to install a shut-off valve or metering unit;
- Due to the slope, water remains in the pipe after the system is drained.
These are not all situations in which welding of pipelines with water is necessary.
Choosing a welding machine and electrodes
Selection of electrodes and welding mode depending on the thickness of the metal
Currently, manufacturers offer several models of welding machines that can be used to make high-quality metal joints of various brands. But before you properly weld the heating, you need to choose the optimal model. Let's look at the most popular types of devices and their main characteristics.
Transformer
The operating principle is based on increasing the frequency of the incoming current. Step-up transformers are used for this. Despite the relatively large dimensions, this type of welding machine is best adapted to power surges. With its help, you can properly weld a heating boiler following the manufacturing technology.
Inverter
The generation of current according to the established parameters occurs due to the operation of electronic circuits. They are characterized by a stable arc, which ultimately produces a high-quality seam. This must be taken into account before you properly learn how to weld heating yourself. However, they are extremely sensitive to voltage drops in the network.
It is recommended to purchase a voltage stabilizer as additional equipment for inverter devices.
Is it possible to weld a boiler with your own hands for water heating using an inverter apparatus? Yes, but its characteristics must correspond to the parameters of the metal used. Carbon steels are most often used for the manufacture of heating elements.
Heating welding material table
You also need to know the dependence of the diameters of the electrodes on the thickness of the metal being welded
As for choosing a welding machine, experts recommend choosing inverter models that operate on alternating current. Their cost is slightly higher than that of transformer ones, but they are smaller in size and can be used to make a high-quality weld
This is important to consider, since self-welding of a heating boiler must be of high quality
The cost of a device with a power of 7 kW, a welding current of up to 200 A and a maximum electrode diameter of 3.6 mm will be about 16 thousand rubles.
Useful tips from experts
Main water supply system filled with water, a source of high humidity. There are professional secrets that allow you to carry out quality work. You need to reduce your exposure to water. This is achieved in several ways:
- A bolt of the appropriate diameter with a large head is driven into the fistula. The stream of water decreases and only drops form. If the fistula is round, it will clog completely. It will be enough to scald the cap and melt the metal around it. This method is suitable for any spatial location of the damage.
- A large nut is placed on the fistula, the leak is partially eliminated, the water does not fall on the electrode, but flows out through the internal hole of the hook. After this, the nut is scalded along the outer edge. After this, a bolt is screwed into it using fum or screwed in, a tight connection is formed, and the defect is eliminated. The appearance of the pipe becomes worse - this is a minus, but such repairs are quite effective and do not take much time.
- The volume of metal supplied to the weld pool increases. A few drops are not enough. The size of the drop depends on the thickness of the electrode. Sometimes they additionally take an electrode with a cleaned coating. The first electrode creates an arc, and when a melt pool is formed, a second one, which has no coating, is inserted into the holder. The volume of surfacing material increases, the hole is fused faster.
Taking into account the peculiarities of working with a filled pipe, you can repair the network yourself without flushing water from the system. It is necessary to select the correct electrodes according to the type of rod, type of coating, and regulate the operating current mode.
Source
How to weld a heating register yourself
A register is a heat exchanger with parallel mounted pipes with a diameter of over 32 mm, connected by jumpers from pipes of a smaller diameter. They can also be made in the form of a coil. The devices perform the same functions as radiators, but differ in the ability to manufacture them independently.
Heat exchanger installation diagram.
As a rule, registers provide heating in warehouses, utility rooms, garages, and some low-rise residential buildings, but can be equipped as part of the interior of ordinary rooms. Heat exchangers are used as elements of one- and two-pipe heating systems with increased fire and sanitary standards.
Electrodes for manual arc welding
4.1.1. For manual arc welding of joints of pipelines and boilers made of carbon, low-alloy and high-alloy steels, it is necessary to use electrodes that meet the requirements of GOST 9466, 9467 and 10052. The brand of electrodes should be selected depending on the grade of steel being welded. For welding products covered by this RD, domestic electrodes listed in Table 4.1 can be used; the chemical composition and mechanical properties of the deposited metal of these electrodes are given in Appendix 7.
Brands of electrodes from foreign companies that can be used are listed in Appendix 8; The type of electrodes according to the domestic classification is also given there to determine the scope of application of a specific brand of electrodes.
The possibility of using electrodes not listed in Table 4.1 and in Appendices 7 and 8 for facilities of the Ministry of Energy of Russia must be agreed with CJSC "Prochnost MK", for other facilities - with any specialized research organization in the field of welding, given in the appendices to rules of the Gosgortekhnadzor of Russia.
4.1.2. Electrodes for welding fastening parts made of high-alloy steels to superheater pipes and other boiler elements or to a pipeline made of low-alloy pearlitic steels, as well as for welding fastening parts, must be selected according to Table 4.2.
To weld fasteners made of steel of any grade to pipes made of austenitic steel, electrodes EA-395/9, ZIO-8, OZL-6, TsL-25, TsT-10, NIAT-5 should be used; for steel 12X11V2MF - electrodes EA-400 /10U and EA-400/10.
4.1.3. Before welding production joints and testing, the electrodes must be calcined according to the regime given in the relevant document (OST, TU) or label. In the absence of such data, the calcination mode is selected according to Table 4.3.
Imported electrodes are calcined according to the same regime as domestic ones with a similar type of coating.
4.1.4. Electrodes with a basic coating intended for welding pearlitic steels should be used within 5 days after calcination, TsT-45 electrodes - within 10 days, other electrodes - within 15 days, if they are stored in a warehouse in compliance with the requirements of clause 3.10. After the specified period, the electrodes must be calcined again before use. If electrodes are stored in a drying cabinet at a temperature of 80-115°C, their shelf life is not limited.
Table 4.1
Wiring diagrams for floor-standing boilers
As the wiring diagram for a floor-standing gas boiler suggests, when creating a heating system, the installation of a circular electric pump is required (read: “Connection diagram for a gas heating boiler with examples”).
Forced-type devices are easy to operate and are considered more comfortable to use.
The heating unit is controlled automatically. Among the advantages, it should be noted that a certain temperature can be set for individual rooms, thanks to the presence of sensors that control the heating process.
At the same time, the piping scheme of a wall-mounted gas boiler has negative aspects, including:
- high price for components;
- the difficulty of implementing the strapping, which can only be done by a professional;
- the need for constant balancing of parts;
- high cost of service.
If the house has a complex heating system, for example, there is a “warm floor” and radiators, then you may notice some inconsistency in the movement of the coolant. Therefore, to solve the problem, a hydraulic decoupling is included in the piping circuit, forming several circuits for the movement of coolants - a common circuit and a boiler circuit.
To waterproof each circuit, an additional heat exchanger is installed. This will be required to combine open and closed systems. Installations belonging to the separate type must be equipped with circular pumps, a safety system and taps (drain and feed). How to connect a gas boiler, see details in the video:
Advantages of using a register
The principle of connecting pipes by welding.
Registered heat exchangers have certain advantages over other heating devices:
- Homemade heating registers are large in size, therefore they provide more uniform heat transfer, unlike radiators, which are local heat sources.
- The devices are easy to clean and do not have hard-to-reach places where dust accumulates.
- With high-quality welding of parts, heat exchangers can withstand significant pressure and high temperature of the coolant.
- When the device is equipped with a heating element, it can serve as an autonomous heating source.
- A well-installed heating register can last at least 25 years without repair.
At the same time, heating registers have worse characteristics in comparison with radiators of the same size, in which the heat exchange surface is formed more compactly. The maximum operating pressure of the heat-carrying medium for which a register heat exchanger can be designed is 10 kgf/cm². The system works more efficiently with the installation of a circulation pump.
What difficulties may arise
During repair welding of water pipes using electric welding, the quality of the seam from contact with water will be low. This repair of defects is a temporary measure. It is not provided for by GOST. When water pressure increases and the system is pressurized, the seam formed during welding can crack. Not all welders undertake this type of work. Surfacing of metal in the damaged zone often leads to multiple fistulas around the welding zone, because during welding the oxidation process is activated by contact with water. Instead of one fistula, many are formed.
Welding a pipeline containing water is a technologically complex job for a number of reasons:
- Due to the steam generated from the water during welding, you have to periodically wipe the mask; the work area is difficult to see.
- Water constantly cools the welding working area and prevents the metal from penetrating to great depths. Setting occurs immediately and crystallization begins.
- When pipelines located under the ceiling leak, work clothes get wet from the water. This is fraught with breakdown of current. The hand twitches and the electrode gets stuck.
Types of heating boilers
Gas-fired boilers
Before you start making your own boiler, you need to decide on its type, which depends on the type of fuel heated by the coolant. If desired, you can build a boiler that runs on any fuel. You can find the necessary information on Internet resources. However, before making a choice, it is worth having an idea of the advantages and disadvantages of the most famous ones.
- Heating boilers running on gas. You should not try to make this type yourself, as there are a lot of requirements for them that you are unlikely to be able to satisfy. Well, an equally important reason is the high probability of an explosion during operation. Installation of a gas boiler is prohibited in the basement of the house.
- To make an electric boiler, you do not need professional skills or a variety of materials. One cannot fail to note a huge drawback - high prices for electrical energy. This is an ideal option for periodically heating a country house, but for constant use an electric boiler is very expensive.
- A boiler with liquid fuel is quite suitable for making it yourself, but the cost of fuel and the features of setting up the nozzles can cause considerable difficulties during the work.
- Among all the listed options, the most optimal is a boiler that runs on solid fuel, for which firewood can be successfully used.
Boiler for a water heating system
Everyone knows that firewood has a high combustion rate, and therefore does not have time to heat the room to the required temperature at the initial efficiency. In order to optimize this process, it is worth considering two ways to independently construct solid fuel boilers.
Advantages and disadvantages
Before you start making heating registers, you need to evaluate all the pros and cons of these heaters, so that your expectations are not disappointed later. So, first about the advantages:
- low cost and ease of manufacture;
- low hydraulic resistance: thanks to this, the heater can be used in the “tail” of any system;
- reliability and durability: a register, qualitatively welded from ordinary pipes, will quietly serve for at least 20 years;
- resistance to pressure drops and water hammer;
- The smooth surface facilitates easy removal of dust when cleaning premises.
Unfortunately, a home-made heating register also has a lot of disadvantages. The main one is low heat transfer with a significant mass of the device. That is, in order to provide a comfortable temperature in a medium-sized room, the register must be of decent size. Let's give a simple example taken from technical literature. If the temperature difference between the coolant and the room is 65 ºС (DT), a register welded from 4 DN32 pipes 1 m long will deliver only 453 W, and from 4 DN100 pipes – 855 W. It turns out that, based on heat transfer per 1 m of length, any panel or sectional radiator is at least twice as powerful.
Note. The presented data were determined experimentally at a high coolant flow rate of 300 kg/h.
Other negative aspects of smooth-tube registers are not so critical, although significant:
- holds a large volume of water: the disadvantage does not play a big role if there are 1-2 such heating devices for the entire system;
- During operation, it is very difficult to increase or decrease the power of registers made of smooth pipes. You can’t do without dismantling the welding machine;
- are susceptible to corrosion and require periodic maintenance with painting;
- They have an unpresentable appearance: the defect can be corrected; if necessary, the heater is hidden behind a decorative screen.
Having analyzed the advantages and disadvantages of smooth-tube devices, we can conclude that their scope of application in private housing construction is very limited. As already mentioned, registers can be used for heating various rooms with low requirements for comfort and interior design.
