The mid-90s of the last century was a turning point for the building materials market. Practical and inexpensive types of thermal insulation began to appear, for example, mineral wool, glass wool, and cellulose-based insulation. These materials attract the attention of buyers with their affordable price and relatively good characteristics.
However, there are also significant drawbacks. In particular, these are quite large materials, and the thickness of the insulation board “conceals” the interior space of the premises. In addition, such thermal insulation can dry out and become painted, which invariably leads to heat loss. Of course, mineral wool is still considered one of the popular thermal insulation materials today.
However, this is not due to high efficiency, but to an affordable price. If there is a need for really high-quality thermal insulation of premises, penoizol is used during construction. This is a liquid insulation material that is rapidly gaining popularity in our country.
What kind of thermal insulation material is this?
Let's start with definitions. The name "Penoizol" is a trademark of insulation created on the basis of urea resins. The material is in high demand, so it has become a household name, combining the following names:
- "Teploizol"
- "Mipora"
- "Unipor"
- "Mettemplast"
However, among professional builders, insulation is better known as liquid or poured foam.
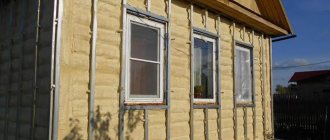
In appearance, thermal insulation resembles marshmallows, which, after hardening, turns into an elastic mass that is guaranteed to fill all voids.
The composition of the insulation includes the following components:
- Urea resin
- Orthophosphoric acid
- Foaming additives
The ingredients are mixed in certain proportions and pumped into special cylinders where the mixture is under pressure.
How to make penoizol yourself
Ready-made liquid foam is very expensive, but if you make it yourself, it will cost you much less.
But even if you prefer finished products, ask the seller about the availability of quality certificates and information about the composition of the product. If you follow all the stages of creating penoizol yourself, the insulation process with its help will be high-quality and effective.
In order to make penoizol with your own hands, you need to mix water foam with a hardener and urea resin. Then you need to let the finished substance harden.
After hardening, the material takes the form of foam. It should be applied to the surface in the form of a thick mixture. Thanks to this consistency, you can insulate even the most inaccessible places; take care of the method of applying pressure so that the foam can completely cover the surfaces.
After hardening, the material serves as insulation. Insulated in this way, the house does not need excessive heating, therefore, you can save on this.
First you should pour the material onto the insulated surface , adhering to all recommendations regarding the installation of the gap.
As a rule, to insulate a house with an area of about 70 square meters, you need to allocate about 6 hours for repair work. If you invite a team of specialists to do this, they will probably do it better and faster, but you will significantly reduce costs on your own.
To insulate the surface with liquid foam, you need to fill all empty areas of the walls with foam. To do this, you first need to drill holes and insert a hose into them. And the pressure will ensure the tightest possible fit of the foam to the wall and will ensure that all penoizol and cavities are closed.
Technical characteristics of urea-formaldehyde foam (UFP)
It is believed that, in terms of its stated performance properties, penoizol is superior to any insulation available on the domestic market. The main characteristics of thermal insulation look like this:
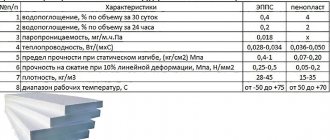
- Thermal efficiency . The thermal conductivity of insulation varies between 0.031-0.041 W/m on the Kelvin scale. 10 cm layer of liquid foam to provide reliable insulation to the interior.
- Soundproofing . Penoizol absorbs up to 65% of street noise, which is considered a very good indicator.
- Fire safety . The material is not flammable and does not support combustion. However, when exposed to high temperatures, the insulation will simply evaporate without releasing toxic substances into the air.
- Dependence on chemical and biological factors . The insulation is neutral to any aggressive environment. In addition, the insulation is of no interest to rodents and is resistant to pathogenic microflora: fungus, mold.
- Moisture resistance . The material absorbs moisture well, but subsequently evaporates it without losing its original properties. Given this feature, it is recommended to install ventilation gaps to prevent the appearance of mold on the walls.
- Durability . Indicators of linear compression of insulation are 0.07-0.5 kg/cm2 . Accordingly, the material holds its shape well and quickly restores its structure.
Manufacturers claim that thermal insulation can last 30-50 years without loss of quality. However, insulation appeared on the market relatively recently, so there is no evidence of such an impressive service life yet.
Comparative characteristics
The properties of polyurethane foam are most clearly visible in comparison with similar thermal insulation materials:
| PPU | Mineral wool | Foam concrete | |
| Standard material density, kg/m3 | 28-160 | 15-150 | 250-400 |
| Recommended thickness, mm | 50 | 90-100 | 760 |
| Thermal conductivity coefficient, W/m*K | 0,019-0,040 | 0,052-0,058 | 0,145-0,160 |
| Operating temperature limits in degrees Celsius | -200… +150 | -40…+120 | -30…+120 |
| Declared service life | 25 | 5 | 10 |
Advantages and disadvantages of hardened thermofoam
The popularity of penoizol did not arise out of nowhere. Among the undeniable advantages of insulation are the following features:
- High technical properties - even a 45 mm can prevent heat loss.
- Resistance to dynamic loads - the elastic structure allows it to be restored to its original state even after prolonged compression.
- Neutrality to any external influences - sudden temperature changes do not affect the quality of the insulation.
- Excellent adhesion - thanks to its liquid structure, thermal insulation adheres well to any surface and fills all voids.
- Multifunctionality - insulation is suitable for any structure, regardless of geometric shape.
- Vapor permeability - when using penoizol, condensation does not form on the walls, which is very useful for wooden structures.
In addition, liquid foam does not form cold bridges.
Of course, it wasn't without its drawbacks. The weak points of insulation are:
- Shrinkage - after pouring, the volume of material can be reduced by 0.1-5%.
- Moisture absorption - when it comes to insulating the foundation, this parameter can be regarded as a disadvantage.
- Dependence on temperature conditions - you can work with penoizol only at air temperatures above +5 degrees .
- Low tensile strength - despite the elastic structure, the insulation is easily torn and pierced, which violates the thermal insulation performance.
The disadvantages include high cost. It is curious, but the price of insulation does not exceed the cost of mineral wool and other thermal insulation materials. However, pouring liquid foam requires special equipment, which private developers do not have.
Therefore, you have to rent equipment or hire a team of construction workers, which adds to the overall cost of the work.
Features and Key Specifications
Liquid penoizol is made from a resin of a polymer composition.
This foam has several varieties. For example, if we talk about the classification of penoizol by purpose, then technical type foam will be more harmful and toxic. And the foam plastic that is used for insulating residential buildings and apartments differs from it in composition; it is harmless and well cleaned. As for manufacturing technology, the safest insulation is based on hardened foam plastic. Sometimes liquid foam can release harmful substances when it hardens.
The safest penoizol in liquid form is made on the basis of urea-formaldehyde resin.
Each foam insulation is produced by hardening the material . If the foam needs to be applied directly to the surface that you are insulating, then adhesion increases significantly compared to installing a foam board.
The most optimal version of liquid foam is made on the basis of urea-formaldehyde resins.
Each of the insulation materials that have a foamed purpose is formed by hardening the material from which it is made. If the foam is applied directly to the surface that needs to be insulated, then its adhesion to it increases several times than if a foam slab is installed on that same surface.
To prepare liquid foam you will need resin and hardener . A special machine mixes the ingredients and beats them until foamy. Then the foam is pumped through a hose to the insulation site. The finished product is sold in the form of a foam container.
Once penoizol hits the insulated surface, it instantly hardens and provides warmth in the house.
Independent reviews from construction forums
To understand the real effectiveness of insulation, you should not unconditionally trust the words of sellers and manufacturers. It will be much more effective to turn to the reviews of real people who have already used the subject of our conversation for insulation. Let us immediately note that opinions on the properties of liquid thermal insulation are divided.
Not bad, but there was a small nuance. Alexander (www.forumhouse.ru)
Penoizol is an excellent alternative to any type of modern insulation. The price is quite reasonable, the mice will not be stolen, the declared characteristics are at a high level. However, during practical use, a small drawback emerged: when insulating wooden walls, unfilled areas remained.
Recommended by friends. The house has a comfortable microclimate. Ildar (mastergrad.com)
We decided to insulate the walls with foam insulation about 5 years ago: the outer wall is made of block and brick. 6-7 centimeters left between the masonry . Glass wool and mineral wool did not give the expected result: the wall began to mold, the rooms were quite cool.
Friends recommended penoizol. As the crew worked, one could hear and see the insulation filling the space between the walls, emerging from the cracks. Now the house maintains a comfortable microclimate at any time of the year.
No complaints, but problems arose during the filling process. Mikhail (forumnov.com)
It is clear that seamless insulation has undeniable advantages. There are no complaints about the quality of insulation, however, for the operation of the equipment, a connection to a 380 V . I did not have such an opportunity, which caused some difficulties during the pouring process.
I really don't like the toxic smell. Konstantin (forum.vashdom.ru)
After pouring, penoizol noticeably decreased in volume, which already reduces the quality of thermal insulation. In addition, the material has an unpleasant and clearly toxic odor. They said that the composition includes formaldehyde, the use of which has long been abandoned in European countries. I recently insulated the house, so I can’t say anything about the properties of the material, however, doubts about the correctness of the choice are already tormenting me.
The price of the work is steep. Eduard (www.forumhouse.ru)
Personally, I am satisfied that penoizol will not be chewed by mice, the insulation accurately fills any gaps, and provides reliable heat and sound insulation. I didn't like the fragility of the material and its susceptibility to deformation. And the overall price of the work is a bit steep.
Technology of home insulation using penoizol
The surface should be filled with liquid foam directly at the construction site, so everything happens easily and quickly. Penoizol does not expand, but may experience slight shrinkage. In order to prevent cracks from appearing during the shrinkage process, you must strictly follow all the rules for insulating houses using this material.
As we said earlier, carefully choose purchased penoizol or material for its own preparation. Read the instructions carefully .
When dry, polystyrene foam is suitable for insulating any surface. After pouring it, a seamless layer appears, which has excellent characteristics in terms of sound and heat insulation. Despite minor cracks, this protective layer practically does not allow moisture to enter the house.
Rules for pouring liquid foam
In order for penoizol to fully live up to the hopes placed on it, it is necessary to strictly adhere to the pouring technology. If this is your first time dealing with liquid thermal insulation, it is better to immediately contact specialists who can do the job efficiently.
Wall insulation is carried out according to the following scheme:
- Holes are drilled in the wall structures, into which penoizol is pumped through filling hoses.
- Install a protective facade made of metal profiles, leaving a gap of 5-10 cm between the wall and the metal.
- Fill the free space with insulation.
- Wait 4 hours for the material to set, cut off excess insulation, and begin finishing.
Roof insulation:
- The surface intended for insulation is covered with a film, which should extend 10-15 cm .
- Fix the membrane with staples.
- The slats are stuffed on top of the film.
- The space between the slats is filled with insulation.
- Wait 15-20 minutes for the insulation to become viscous and level the surface.
- After 4 hours, you can begin further work.
Floor insulation:
- Wooden sheathing is being installed.
- All sections are filled with insulation.
- When the material hardens, a plastic film is placed on top.
- Finishing is carried out: boards are laid or concrete is poured.
In principle, working with penoizol is practically no different from installing other types of insulation.
Production and release forms
- Mobile stations. To make polystyrene foam, special devices are used, the cost of which is quite high - up to 2.5 thousand dollars. However, the unit is so simple that you can equip it yourself. The operating principle is simple. Using a hydraulic pump, raw materials and catalyst are supplied to a unit with compressed air, where they are converted into liquid foam. Then, through a hose, using a certain pressure, they are supplied to the place that is to be treated. All parts of such an installation can be freely purchased, and the assembly drawing can be viewed on the Internet.
- Liquid foam in cylinders . Often used in large-scale construction. The cylinders are reusable and rechargeable. The kit includes two cylinders, one of which contains a special mixture of paste-like consistency, the second contains a catalyst. When mixed, they form an insulating substance in the form of liquid foam. This type of balloon insulation is also used for large-scale work.
- Household foam. The easiest variety to produce. It is intended for household needs.
Mobile station
Liquid foam in a container
Balloon packaging of liquid foam is considered the most convenient. It has a longer service life, is resistant to fire and environmental influences, and is not damaged by rodents.
It is not difficult to buy such polystyrene foam, since the price is quite reasonable. The cost of one household cylinder with a dispenser is on average 500 rubles. It is enough to process 6-10 square meters. m of surface.
Consumption rates for insulating material per 1m2
When planning a construction budget, you need to accurately determine the amount of material. To determine the amount of liquid insulation that will be required to insulate the entire building, you need to know the consumption rates of penoizol per square meter.
According to manufacturers, the consumption of liquid foam per 1 m2 varies between 1-1.3 liters.
To calculate the required amount of material, you need to multiply the length and width of the wall by the consumption rates stated by the manufacturer. For example: 7*3.2*1.3=29.12 l. In this case, the final amount of thermal insulation must be taken with a small margin, taking into account unforeseen situations.
Penoizol over time
6 years after insulating the house with foam insulation, the owners noticed dampness, mold and mildew on the façade of the extension. It turns out that the tiler, when laying the tiles in the shower area, did not provide waterproofing. The water gradually penetrated the partition until one day it came out.
Sasha decided to dismantle the siding that covered the façade and replace the rotten areas. When the siding and OSB panels were dismantled, everyone was shocked that the penoizol had shrunk by 50-60% . In fact, the insulation did not insulate anything.
It was necessary not only to redo the bathroom from the inside, but also to completely dismantle the external part of the extension in order to replace penoizol with mineral wool.
If you do not use insulation, then you will have to overpay many times over for heating or cooling your home.
Let me remind you that the more insulated the house, the less energy is needed to maintain the optimal temperature in it.
They say that the shrinkage of penoizol is only 1-3%, but Sasha saw with his own eyes that the shrinkage was 50-60%. If, when insulating mineral wool or expanded polystyrene, you can somehow control their installation, then how can you control the injection of penoizol? You can’t see it with your eyes and you can’t check it in any way.
The resins from which liquid foam is prepared have a limited shelf life. Who will guarantee that this deadline has not expired? It turns out that there seems to be good material for insulating a house, but it will not be possible to control the quality.
Look what Sasha says about penoizol insulation:
Manufacturers of urea foam plastic in the Russian Federation
Many companies in Russia and Europe are engaged in the production of penoizol. However, to purchase quality material, you need to take a responsible approach to choosing a manufacturer. Therefore, we advise you to pay attention to the products of such companies:
- "New construction technologies" . The company was founded in 1990 and specializes in the production of thermal and waterproofing, fiberglass, fiber-reinforced concrete. Today, this is one of the main suppliers of penoizol on the Russian market. By the way, the rights to use this trademark belong to this company.
- "Varmal LTD". This is a British company engaged in the production of liquid insulation flotofaum - the name of penoizol.
- LLC "Uveis" Russian company located in the city of Orenburg. The manufacturer has been working on the market for a long time, so it carefully monitors the quality of its products.
In addition, buyers speak positively about the products of ProTeplo LLC, Penoizol-Omsk LLC, and Murmansk Universal Plant CJSC .
Parameters of sprayed insulation
It’s worth saying right away that, as with any other insulation, it is preferable to insulate the walls of buildings from the outside. If you insulate from the inside, the outer wall will freeze. How many defrosting/freezing cycles it will withstand depends on the material, but rarely will such a house last more than 10 years.
When insulating the outside with polyurethane foam, a final exterior finish is required - the surface has a very unattractive appearance. But there are no problems with freezing of the walls, the building will last a long time.
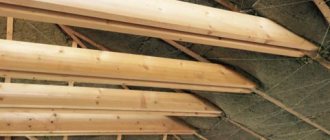
There are no problems with the roof at all. Roofing materials are designed to withstand repeated freezing, so roof insulation with polyurethane foam can be done from the inside, spraying it directly onto the “underside” of the roofing material or onto the sheathing.
Sprayed thermal insulation can be applied to any surface, and the roof can be insulated from the inside
Whether to insulate the house from the outside or from the inside, we figured it out. Now a little about the layer thickness. Insulation with polyurethane foam is usually made of large thickness. This is not due to the fact that small is not enough. Usually, just according to thermal characteristics, an insulation thickness of 2-3 cm is required, but they make it at least 5 cm. This is so that under any conditions the dew point ends up in the thickness of the thermal insulation, and not in the wall material. Since polyurethane foam is non-hygroscopic, it cannot get wet, condensation simply does not occur, and excess moisture is removed naturally due to the vapor permeability of the material.
Insulation with polyurethane foam - application methods
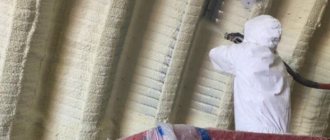
Depending on the readiness of your room, wall insulation with polyurethane foam can be carried out in several ways - spraying and pouring. In the first case, your construction has not yet been completed, in front of you are bare, rough-hewn walls, some kind of minimal frame is attached to them to divide the area into unique sections, and a thin layer of foam is sprayed on. As it expands, it forms a “fur coat”, which you then have to level and carry out external finishing. When insulating floors or a roof in this way, you already have a frame in the form of a rafter system and a log under your feet.
Filling is used in cases where it is necessary to insulate a cavity in a wall with a finished finish or during construction the frame of a house consists of several rows of bricks, for example. The difficulty with this process is that you do not see how evenly the foam has filled all the voids, because you are simply blindly pouring it into the cavity on top of the wall under construction or through holes in the wall that is already covered with a ceiling or roof. For this, a special hose is used, which is fixed on the spraying machine and the other end is inserted into a hole in the wall.
How to choose material
There is a wide range of foam insulation materials on the market. European foam insulation intended for walls guarantees high quality, but has a high price. Domestic manufacturers have well mastered the production of licensed compounds and materials of their own design, which provide decent quality thermal insulation and a guaranteed service life at a significantly lower price. Experts highlight such manufacturers as
Their advantage over nameless Chinese crafts is their precisely known composition and quality control at all stages of production.
When choosing foam intended for insulating external walls, you should check whether the specific material is recommended for outdoor use, whether it matches the density of the equipment available and the final calculated density of the foam.
And if saving on equipment is even more or less reasonable - it will only be useful once, then it’s definitely not worth saving on materials.
Nowadays, issues related to energy saving are more relevant than ever; the constant increase in tariffs forces us to look for alternative options for saving heat.
Areas of application for Touch'n Seal Foam Kits (USA) for insulation
Currently, the construction market offers a fairly wide selection of insulation materials. At the same time, insulation based on foam, which is contained in cylinders, has rapidly begun to gain popularity.
Work using polyurethane foam and mineral wool for wall insulation can be carried out both inside the premises and along the entire facade.
Execution of work
Each construction operation begins with the selection of materials and tools. In principle, any polyurethane foam can be used as insulation. “Any” means high-quality, professional. There is no point in fiddling with household spray cans on large areas of work.
But when choosing a material, it is important to take into account the characteristics of the building that is planned to be insulated. Eg. If you need to treat a wall, floor or ceiling at the exit of a chimney or chimney, then we buy heat-resistant polyurethane foam. This is a must.
Tools
Let us repeat once again: there is no point in insulating using cylinders. Nobody is doing this. Even spray foam guns will not work. You need a special device to spray the substance.
It's expensive. To insulate numerous houses, it is advisable for customers (for money) to purchase it. To perform one-time work, you can rent it.
A device for spraying polyurethane foam supplies the product to the sprayer under pressure. From there - to the surface. The flow rate is controlled by the user (the switch is located near the nozzle). Therefore, before use, it is recommended to test the machine and set a comfortable spray level.
Stages of work
It is recommended to insulate buildings with polyurethane foam while wearing protective suits, gloves and masks; in well-ventilated areas. The work area is still large. And the volatile substances released by foam are dangerous to the respiratory system.
1. Surface preparation.
We remove all dirt and dust. We moisten the clean surface. For good adhesion of polyurethane foam, high humidity is required. To moisturize, you can use a primer diluted with water in a 1:1 ratio.
It is also recommended to nail the slats to the surface with a certain pitch. This makes it easier to control the amount of foam applied. And the installation sealant itself will have a larger area for adhesion.
2. Applying foam.
Polyurethane foam is sprayed in portions, carefully filling all cavities and joints. The work is carried out in a bottom-up direction.
When the substance has completely hardened, the surface is considered insulated.
3. Finishing.
It is not recommended to leave hardened polyurethane foam open. It needs to be sewn up or puttied.
A draft-free house that retains warmth for a long time in winter and coolness in summer is a reliable material basis for family coziness and comfort. High-quality thermal insulation allows you to reduce heating and air conditioning costs. A relatively new method of insulation, used since the end of the last century, is spraying foam insulation. The method allows you to achieve ideal compaction of surfaces and joints of all building structures. The eco-friendly coating can be removed without much effort if necessary.
Insulation with polyurethane foam - step-by-step diagram
Step 1: Preparing for work
If you are filling a cavity between walls where there will be nothing but foam, then no special preparation is required.
Also, you don’t need to worry too much if you spray foam; you will then lay all communications directly in it. The only thing is that to spray the foam you need a frame that will divide your wall into sections, which you will fill in turn. Usually this role is performed by the sheathing. The rest of the preparation will consist of following safety precautions, get a respirator, goggles, preferably a mask to cover your face, a thick work suit and gloves. Foam is difficult to remove not only with solvents, but also with acids, so you risk wearing the “gift” on your skin for a very long time. If you are pouring polyurethane foam into a wall with finishing, but you need to drill technological holes in it according to the size of the hose, the first one is at the level of the middle of the wall, the second one is at the top. Seal all holes and cracks with masking tape so that, as the material expands, it does not flow out and pollute your wall; damage in the form of several holes will be enough. These gaps include sockets for sockets, window and door openings, etc. If there are any niches, then they should not only be glued, but also the fabric should be stuffed into them in a dense layer.
Step 2: Pouring and Spraying Foam
To spray, you just need to spray starting from the bottom. Apply a small layer and work your way up evenly. Having sprayed 30 centimeters high, stop, watch how the foam expands, how thick it is, and how far up it will creep. If necessary, spray a little more foam on top of the finished layer, achieving the desired thickness. This way you will develop the desired pace of work and spraying strategy.
